


Well, in what precious "free" time I have (now that I have been promoted, and have yet to backfill my old position, and have essentially been working 2 jobs since the start of the year),
I also volunteer as a leader in the Boy Scouts of America.
I have had a District training role for a year, and had an opportunity to staff a MAJOR Adult Leader Training Course (called Woodbadge).
One may wonder why this is relevant on a lightsaber building forum.
Well, as part of that training course, the staff puts on a banquet for the participants that is usually a fun kids theme.
For this course we chose Star Wars (right up MY alley!).
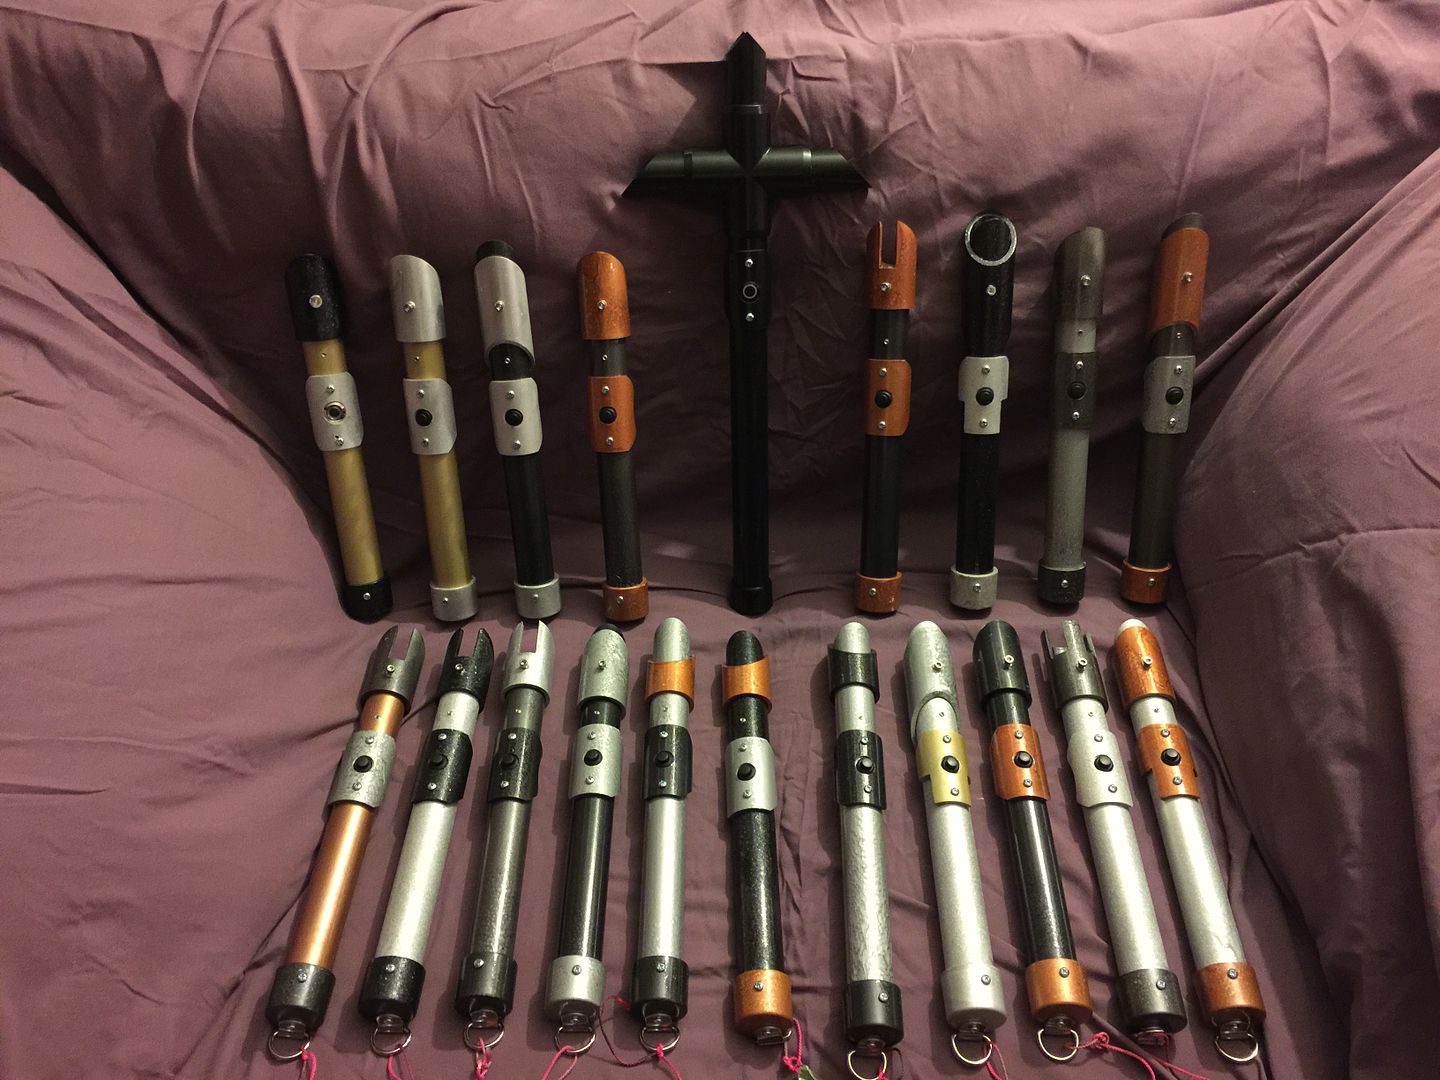
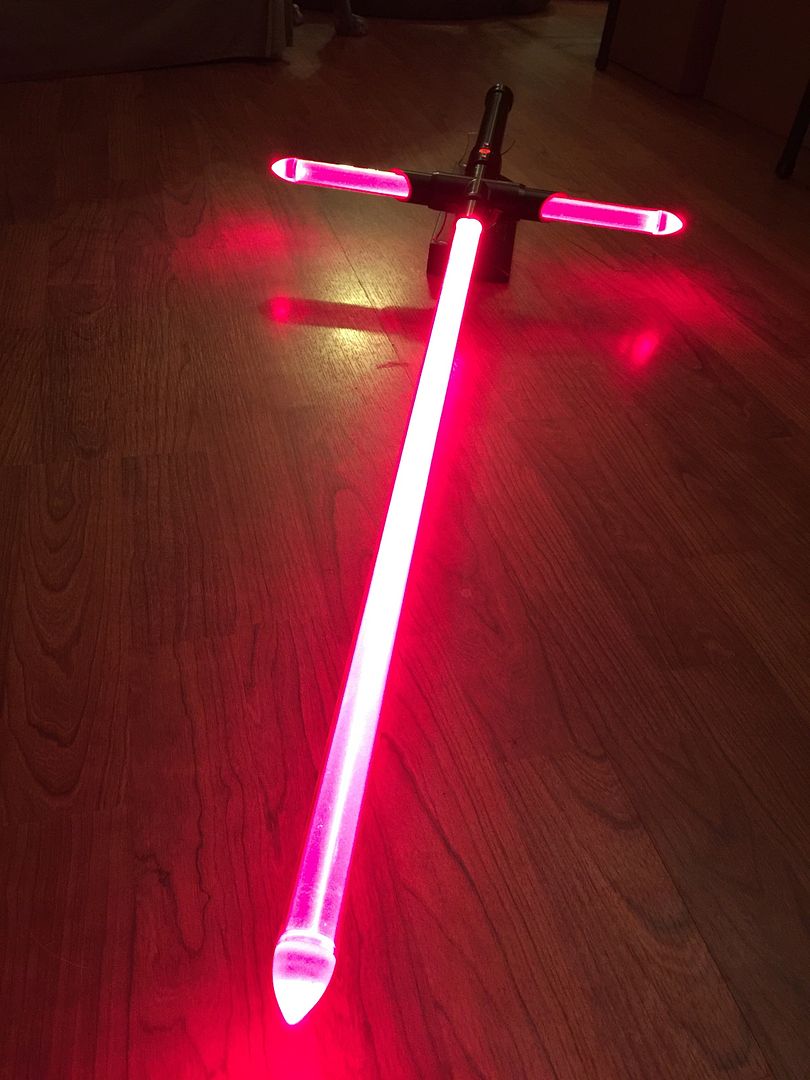
As an awesome add-on, I offered to build each staff member their own custom PVC Stunt Saber.
This was done on the EXTREME CHEAP, and I sourced A LOT of parts not from TCSS (though there is still no place better, and there were items only Tim has!).
I'll be posting about that project in a different thread.
But for this thread, I'm posting my personal PVC Stunt saber.
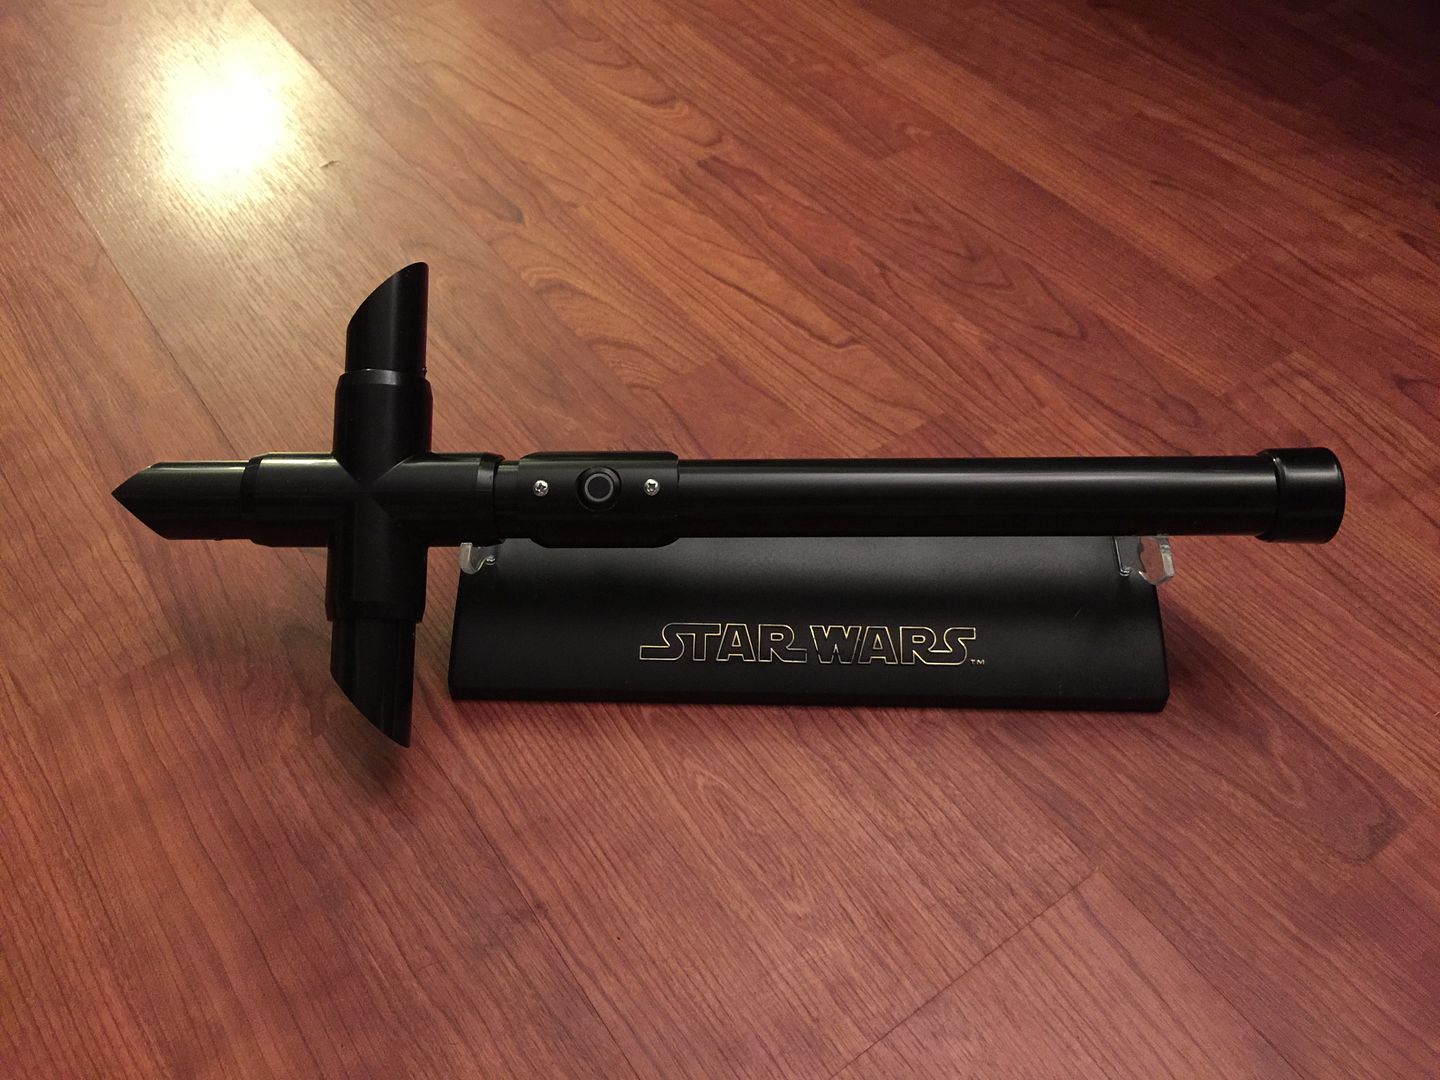
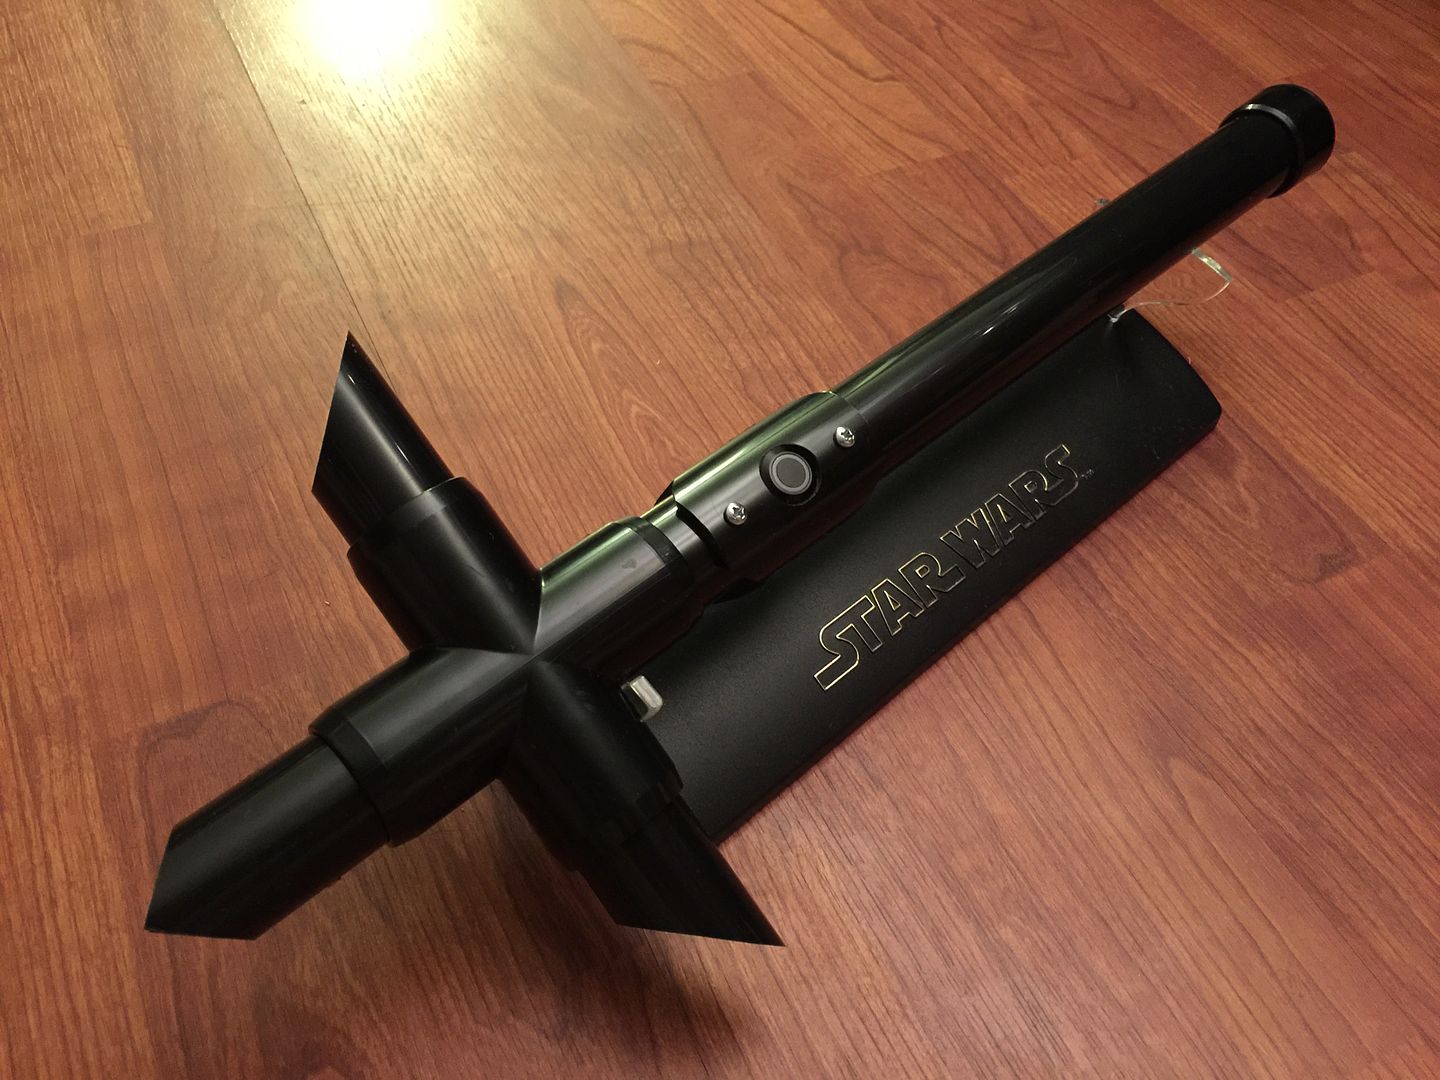
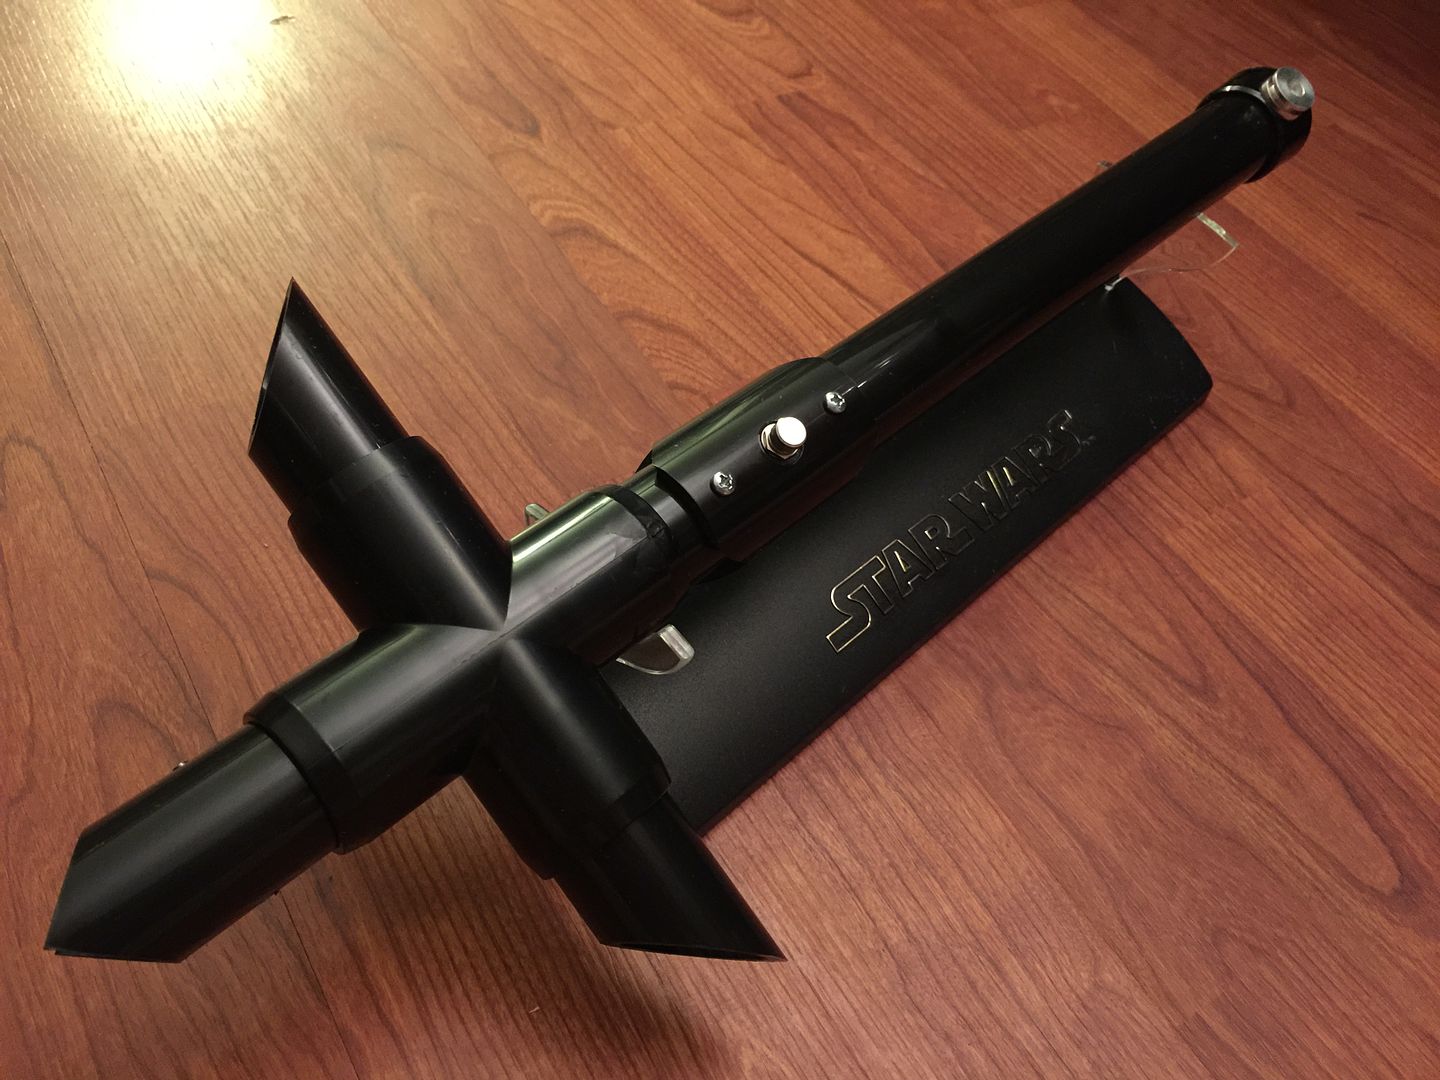
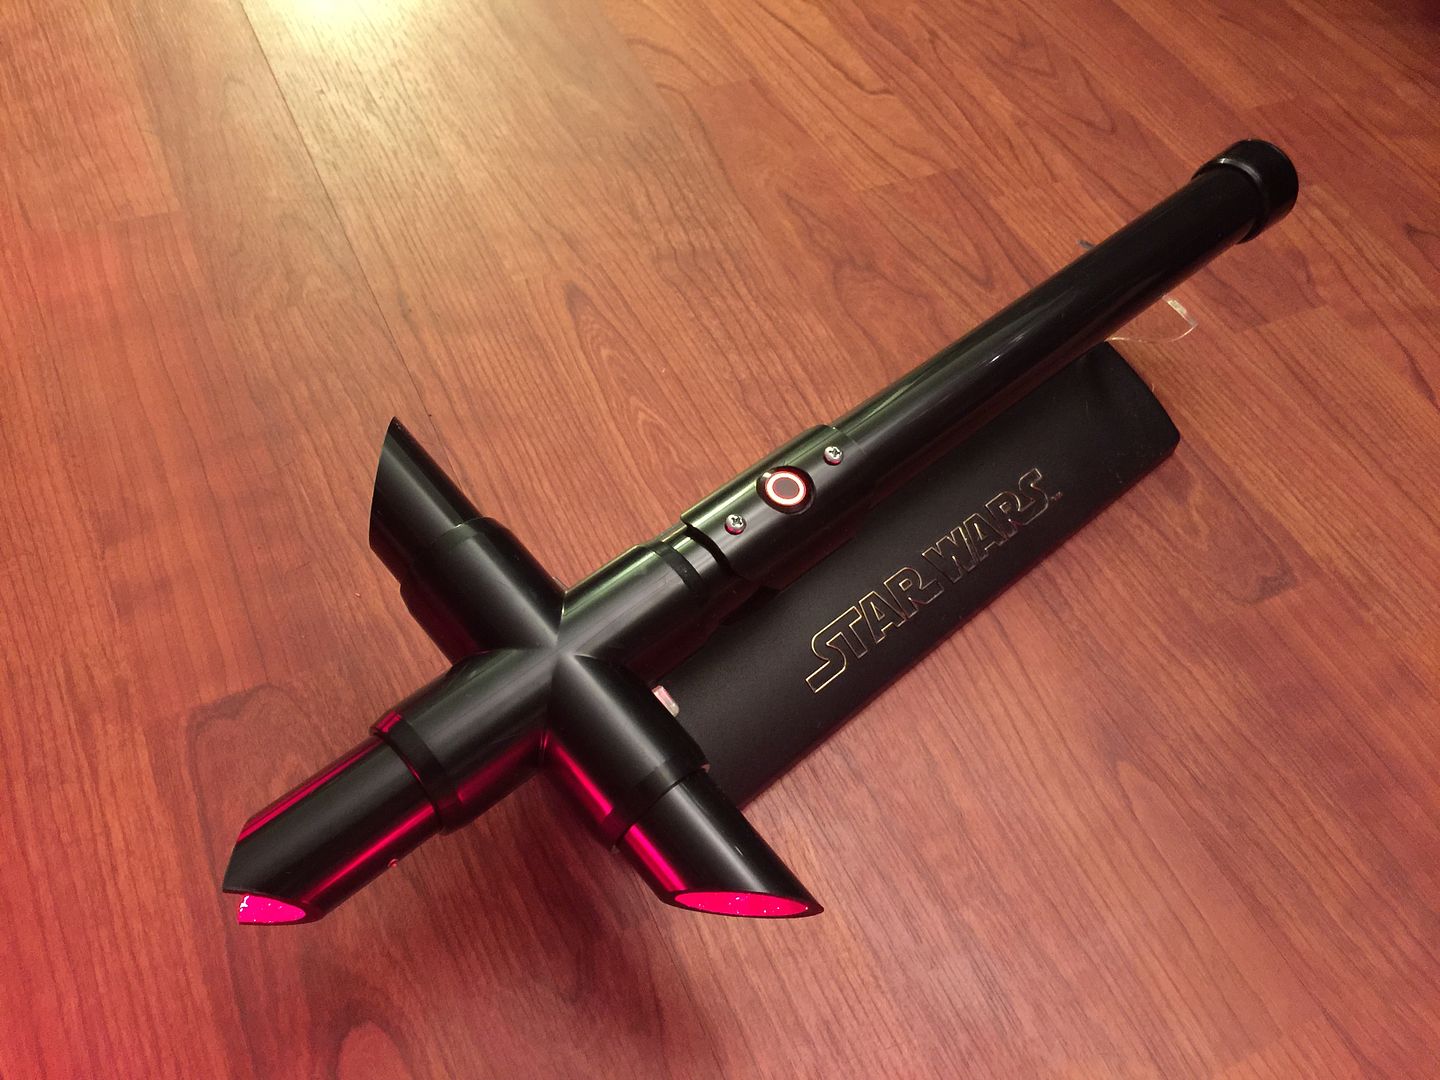
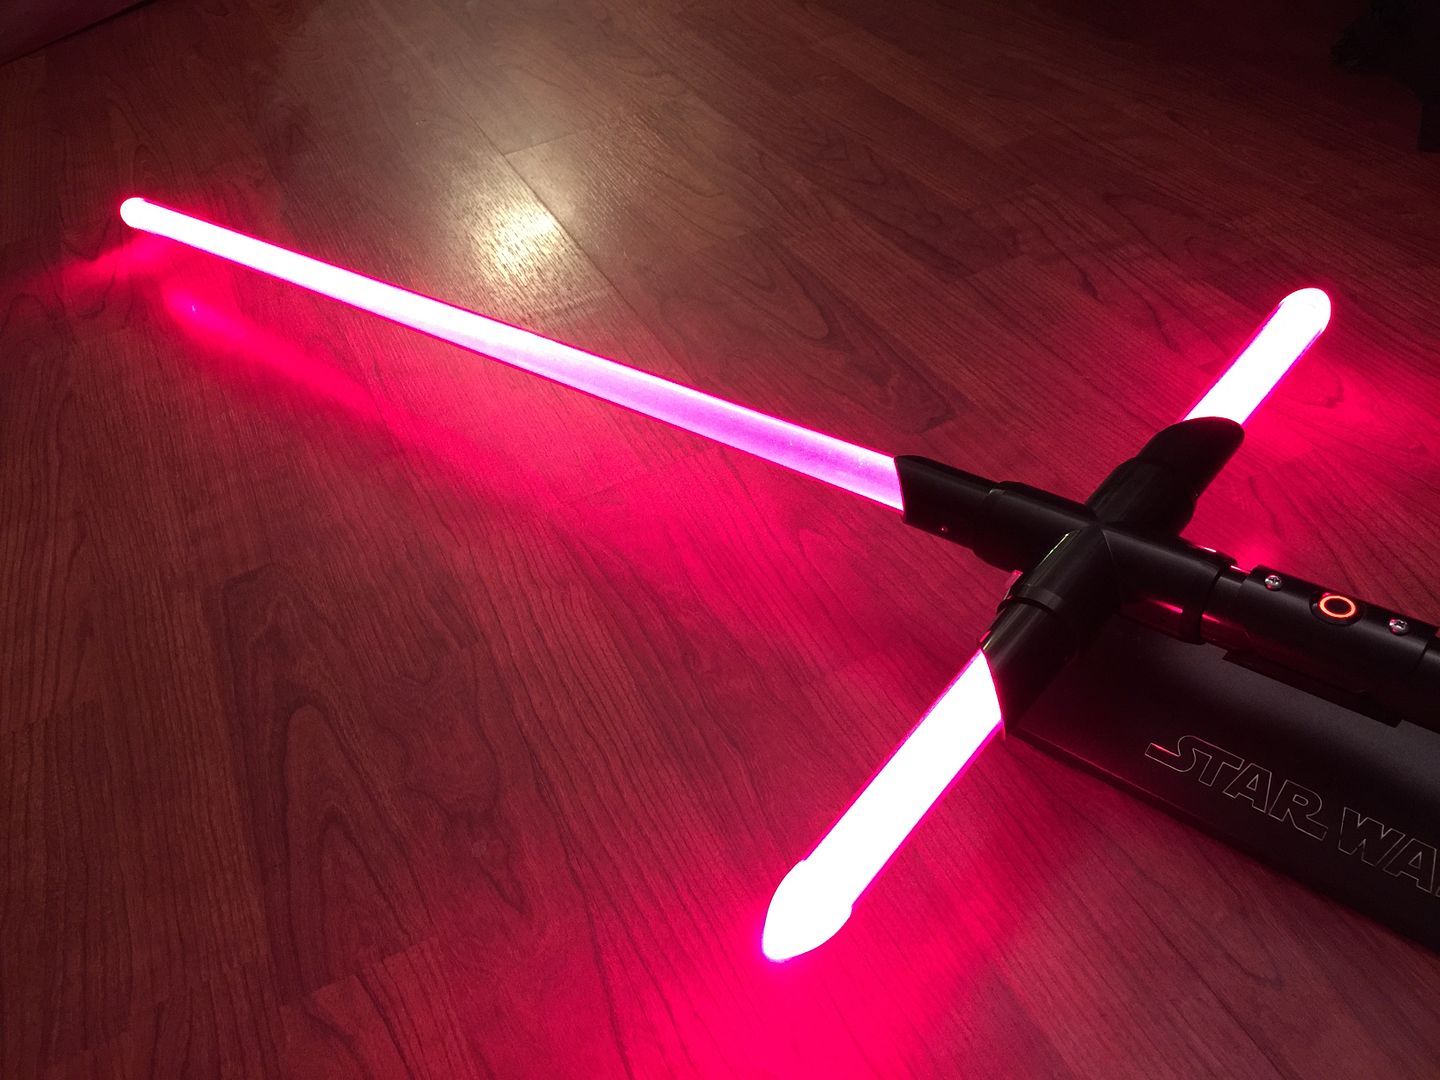
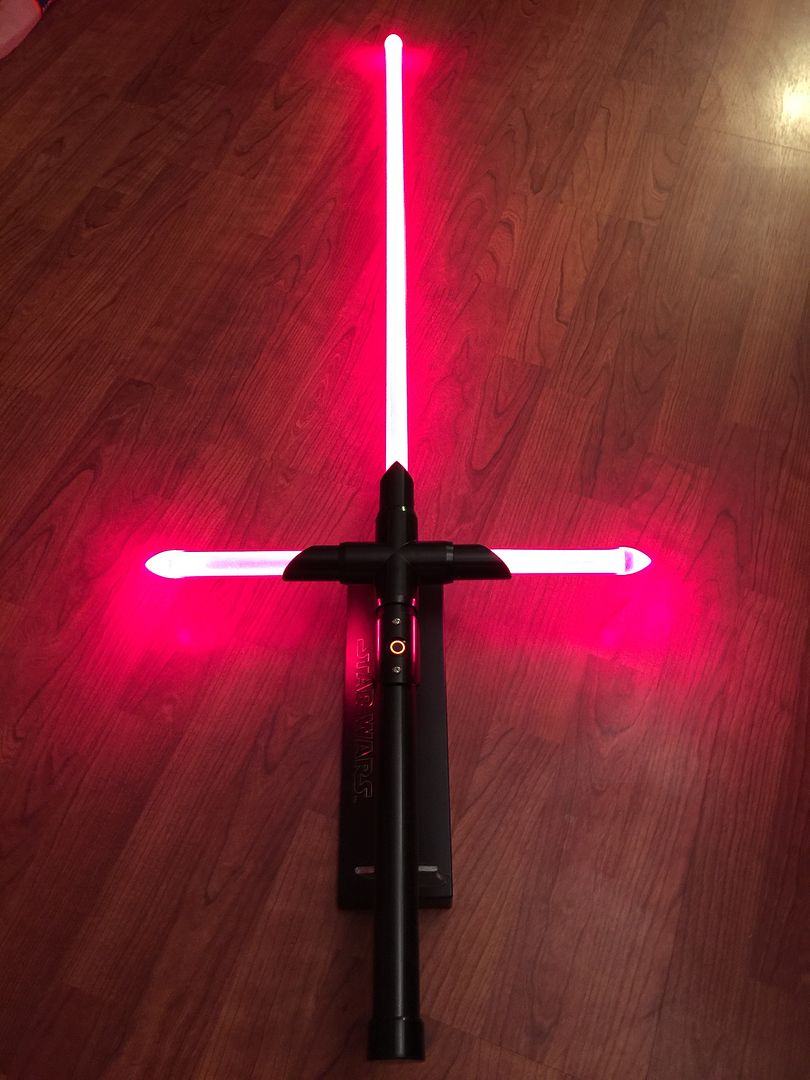
Of course, since I was doing all the work, I had to make my own special! (Go Big or Go Home!)
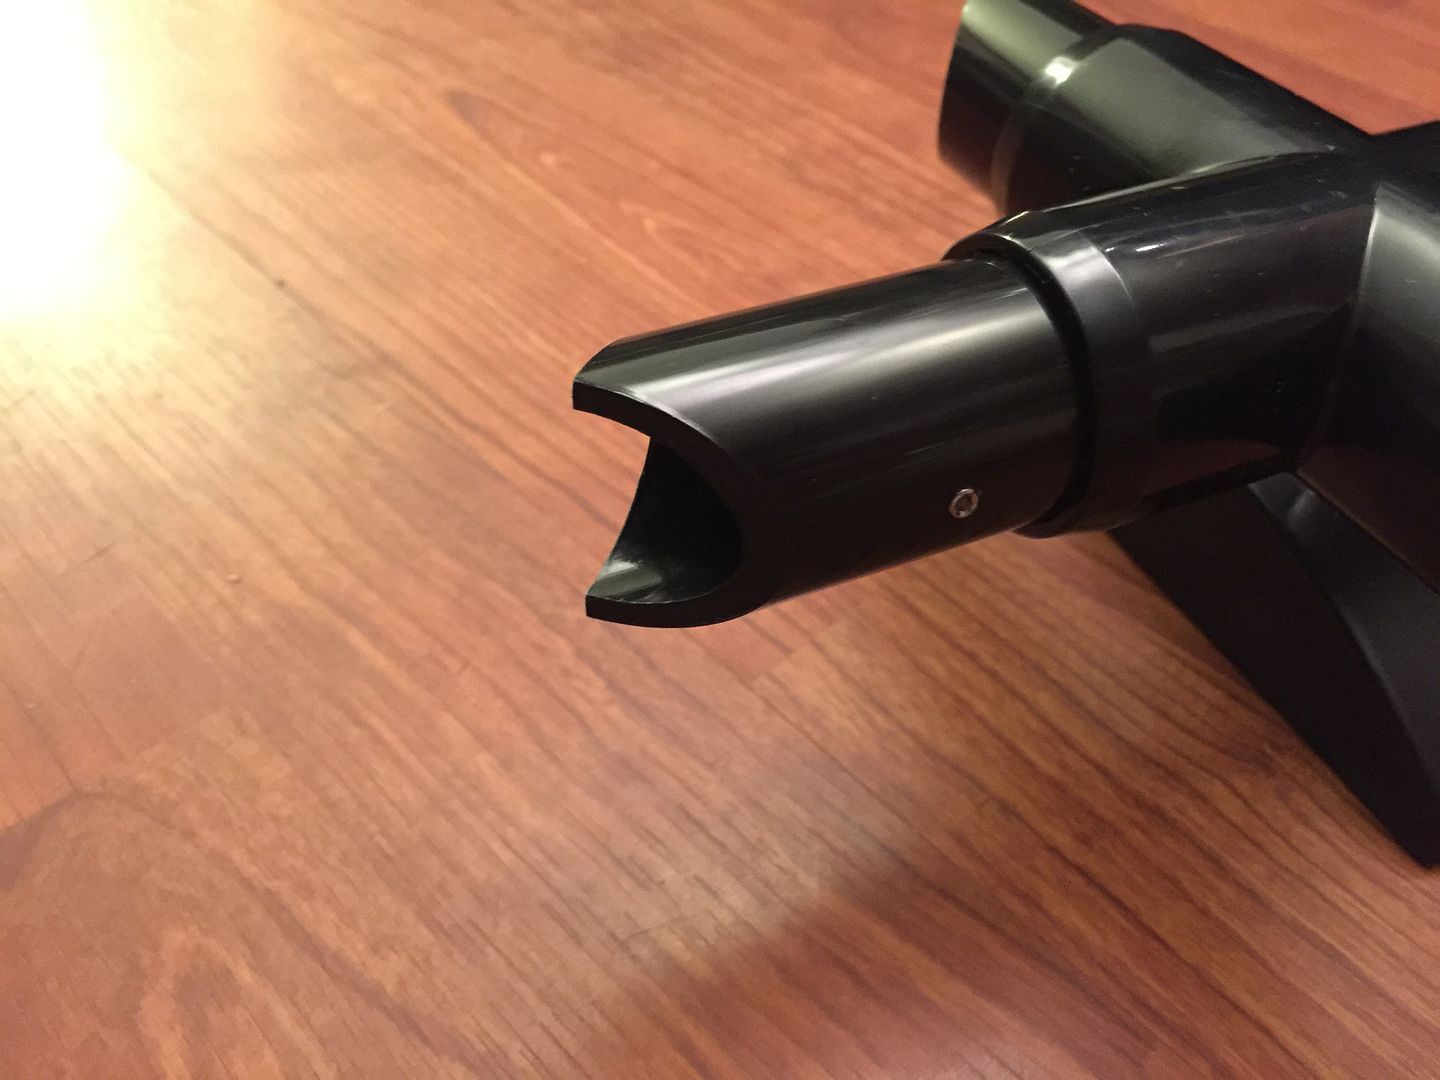
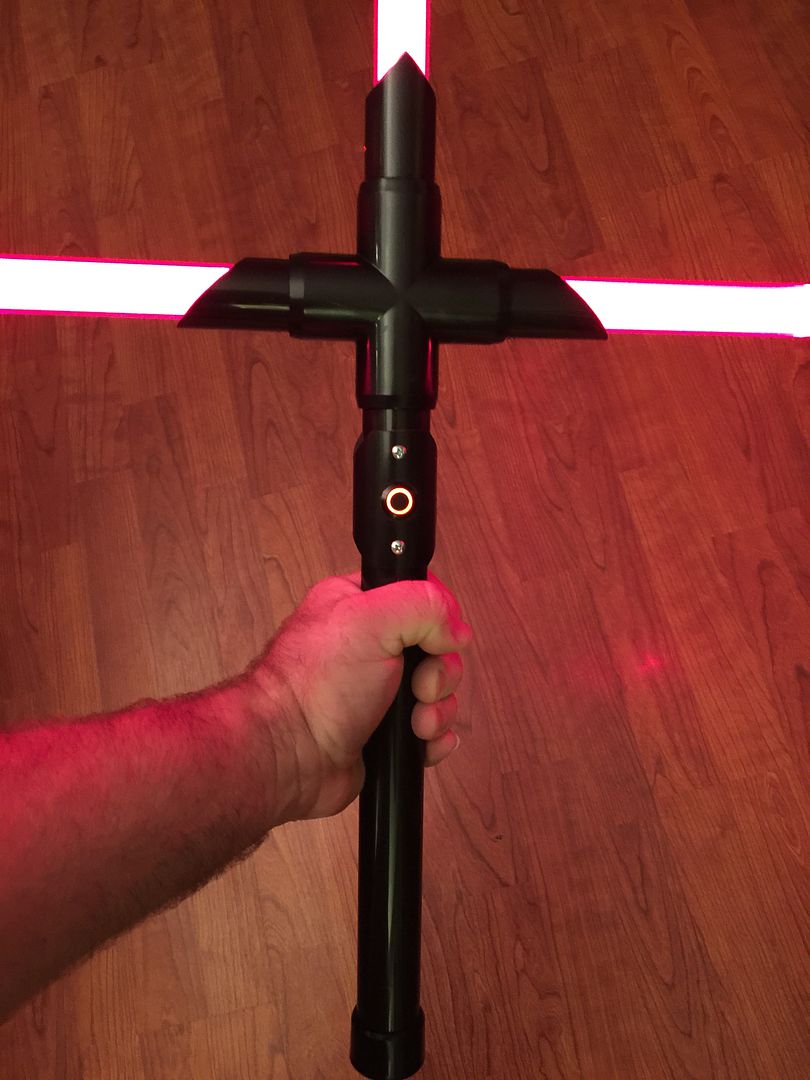
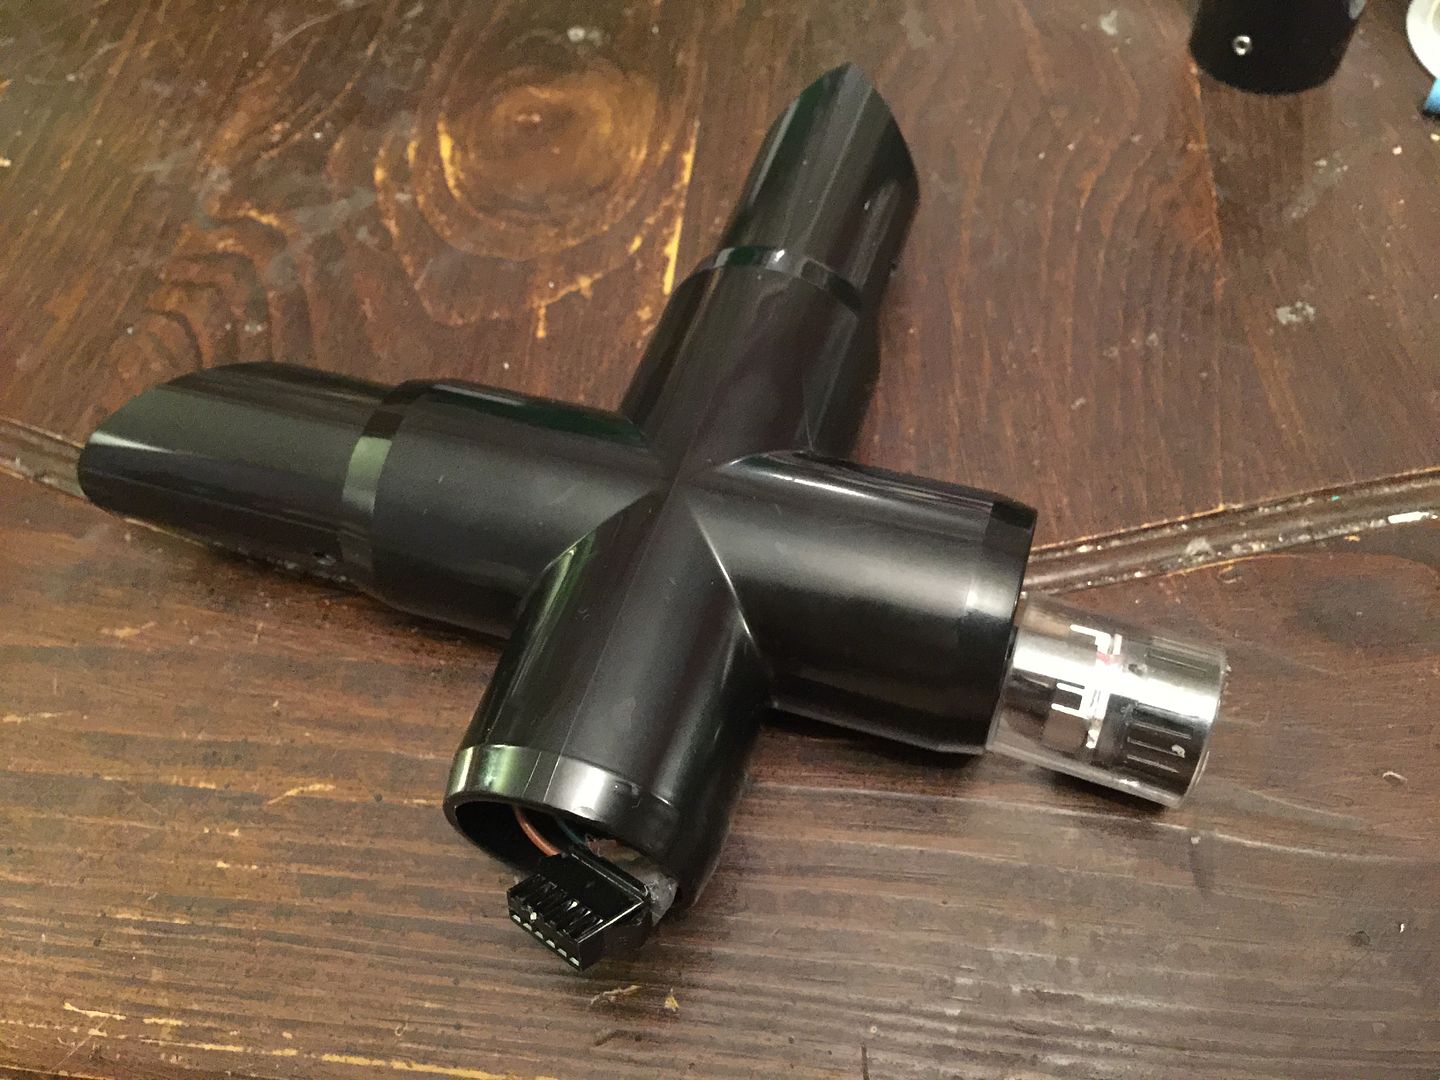
Generic Crossguard
Specs:
Solid Black PVC (Schedule 40 "Furniture" grade) 1" pipe and fittings, and 1.25" pipe for the switch plates.
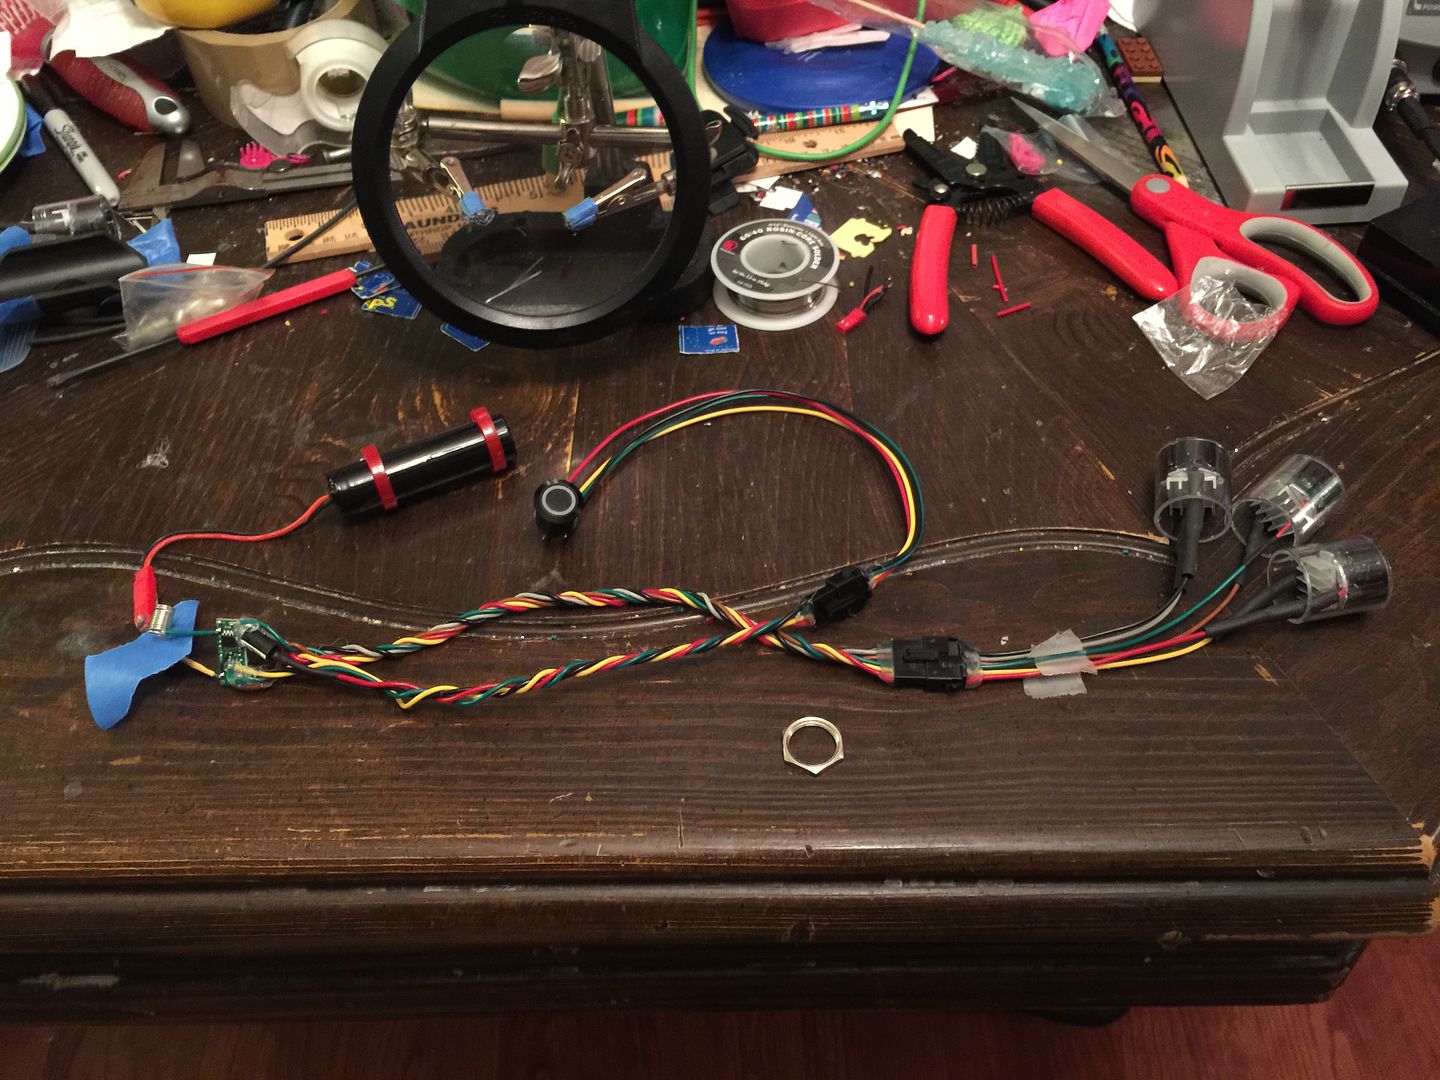
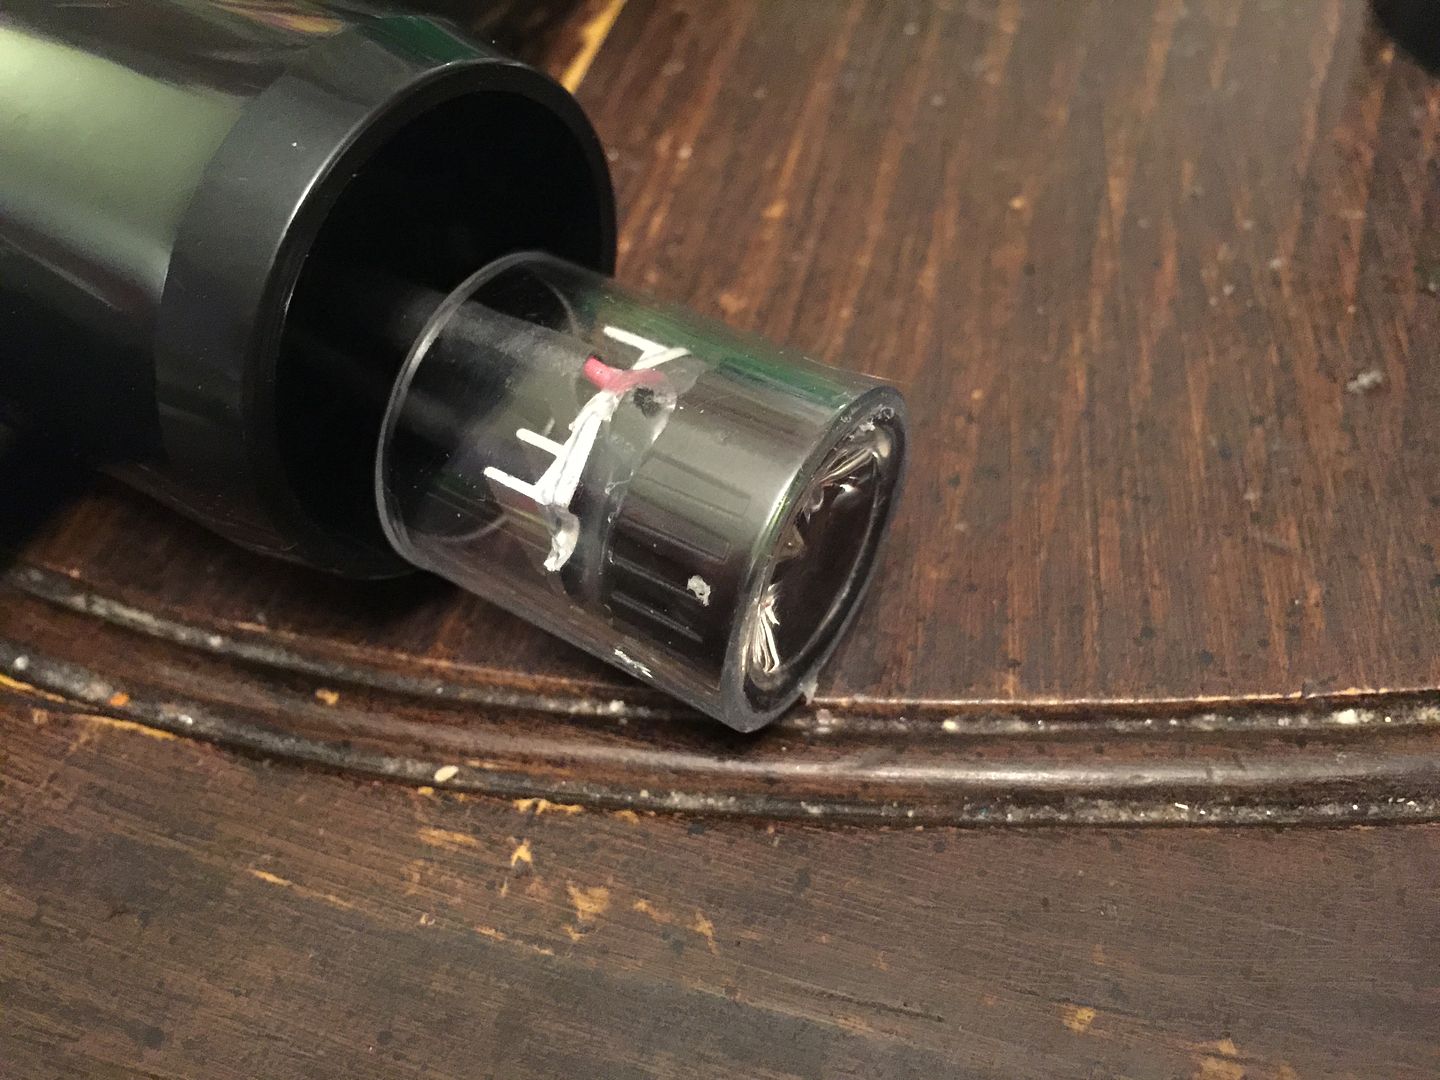
3 Cheapo "Amazon Special" '3W Deep Red High Power 660NM LED Emitter Light with 20mm Star Base' LEDs (part of the bulk buy for the 20+ saber project) .
3 Cheapo "Amazon Special" '5 Degree Lenses with Black Holders' (part of the bulk buy for the 20+ saber project).
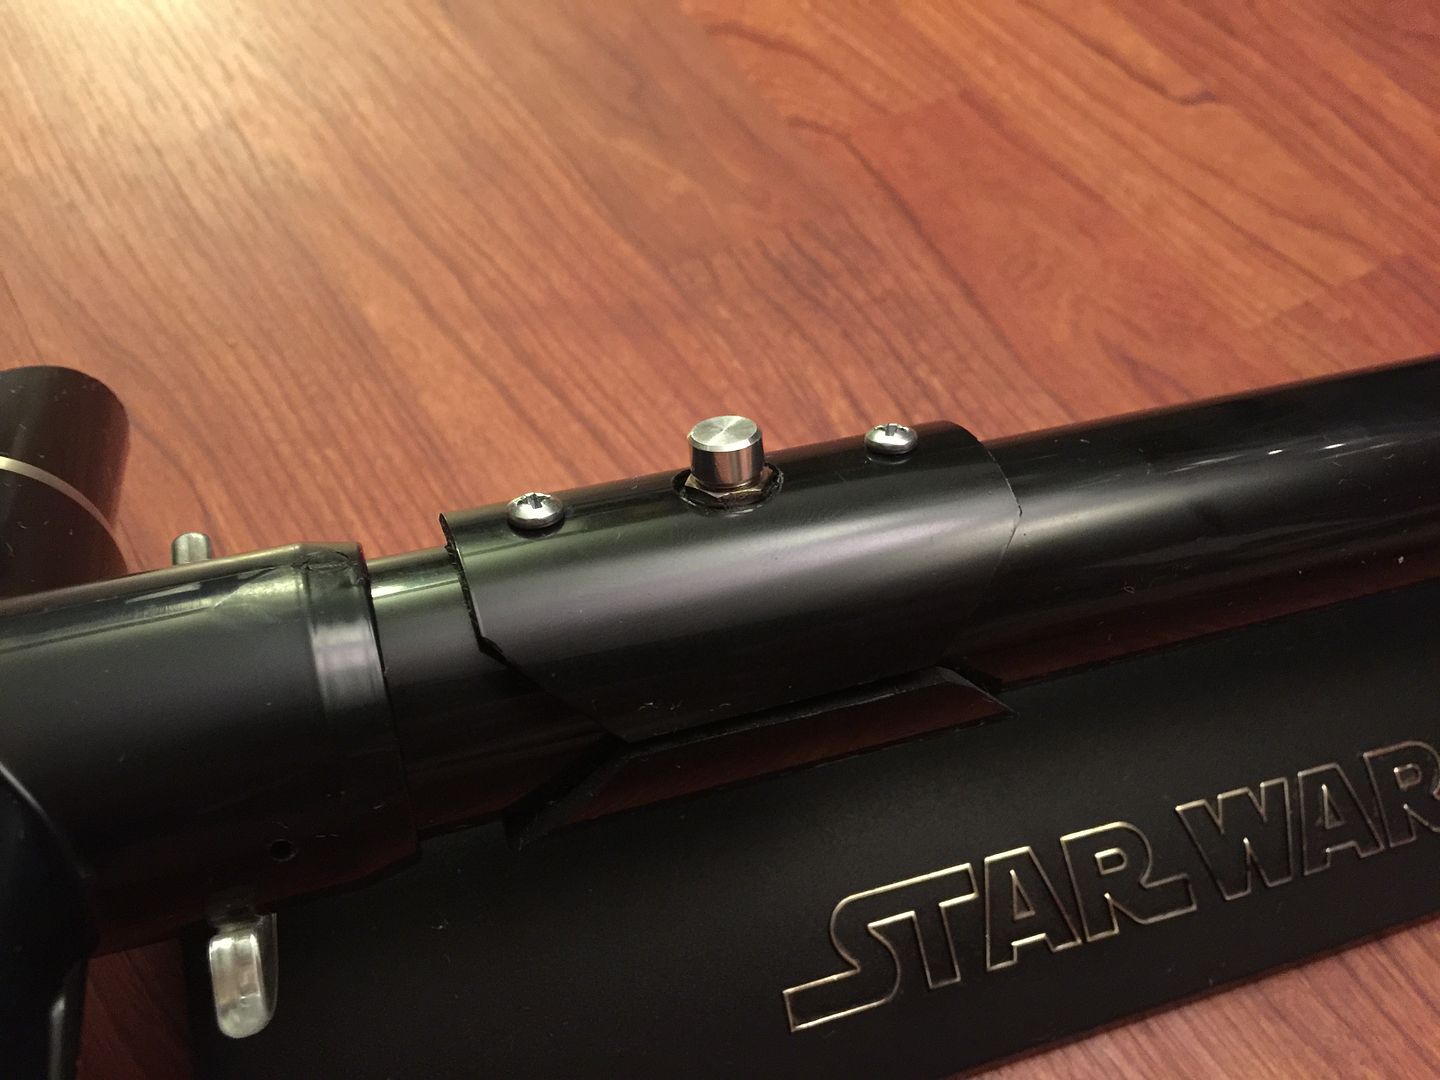
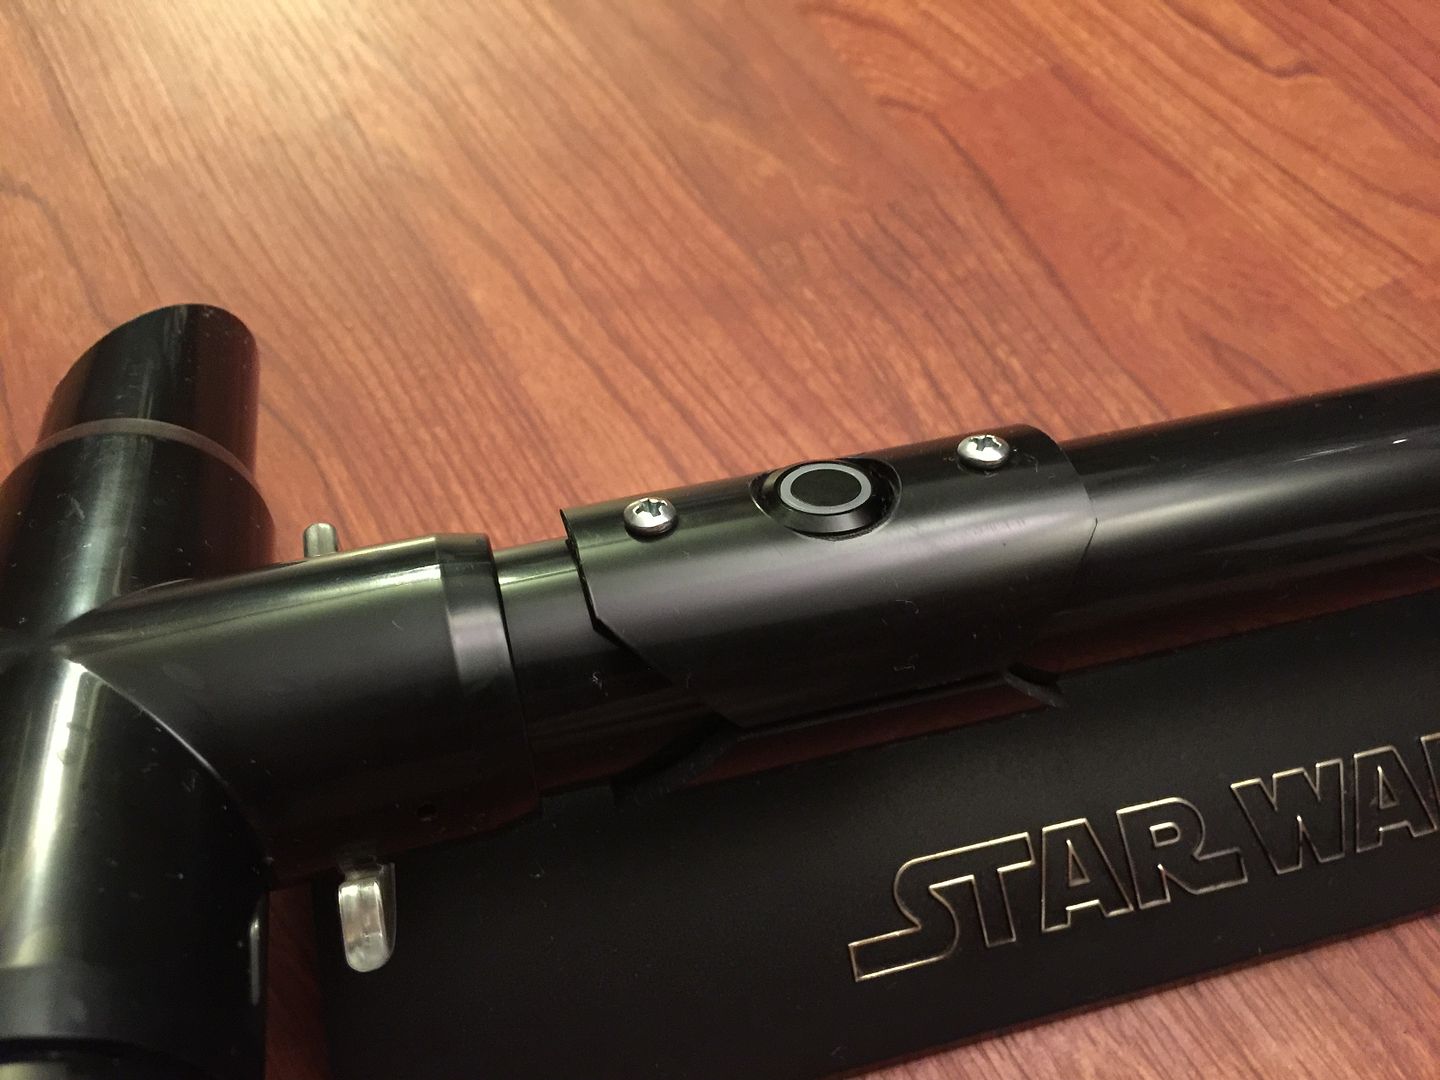
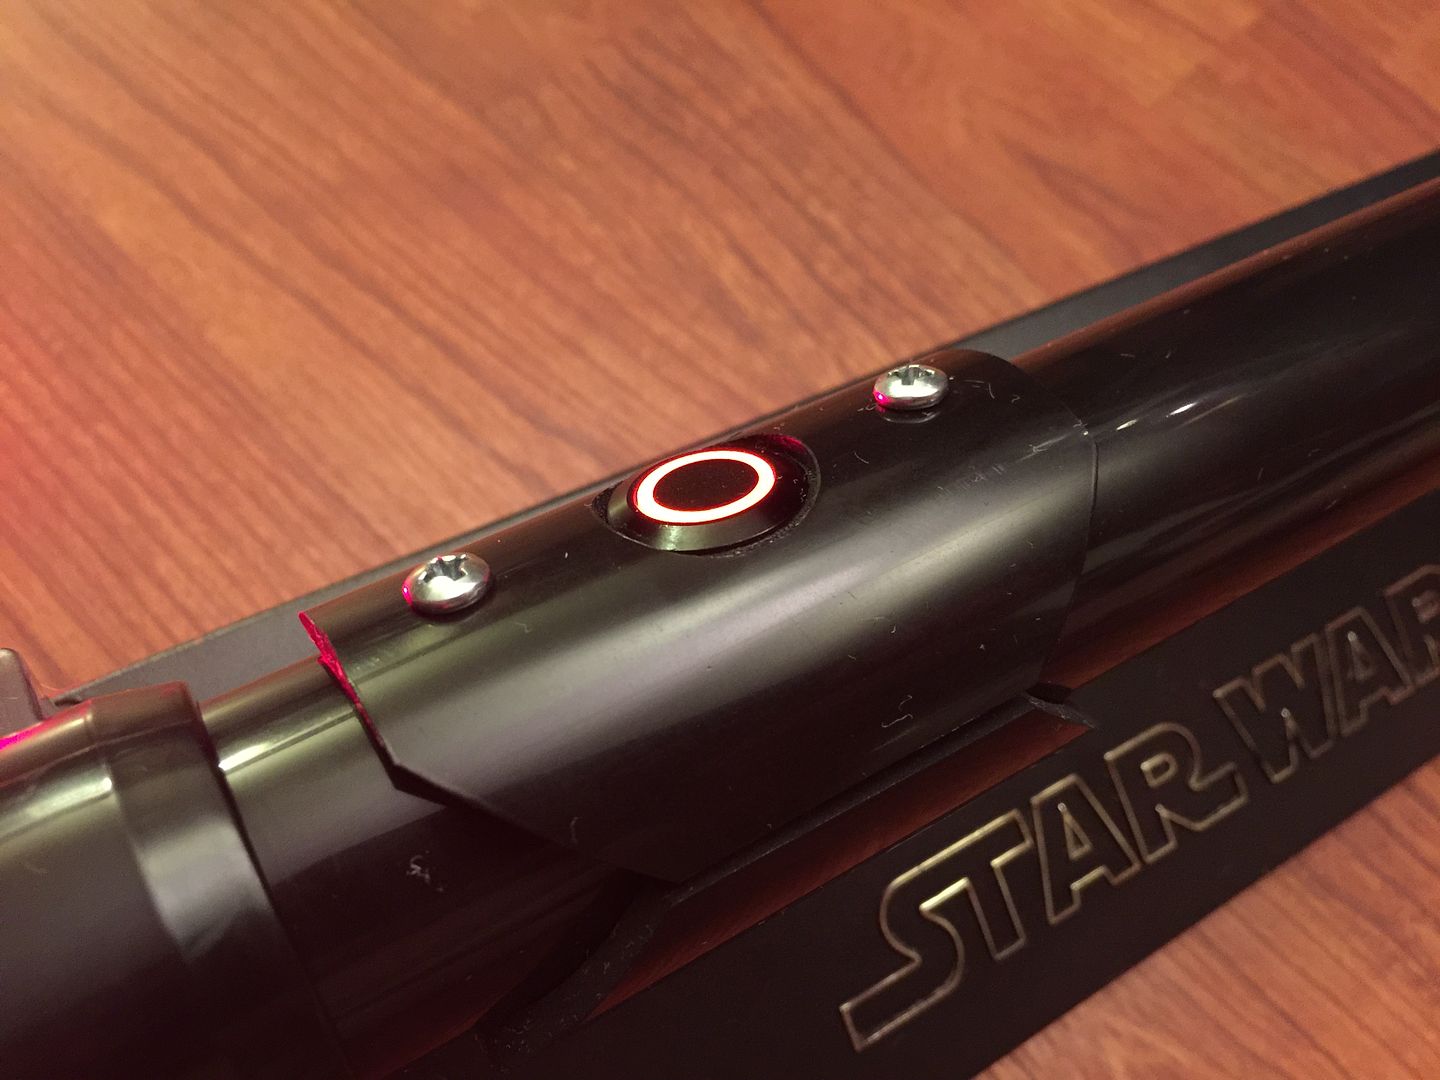
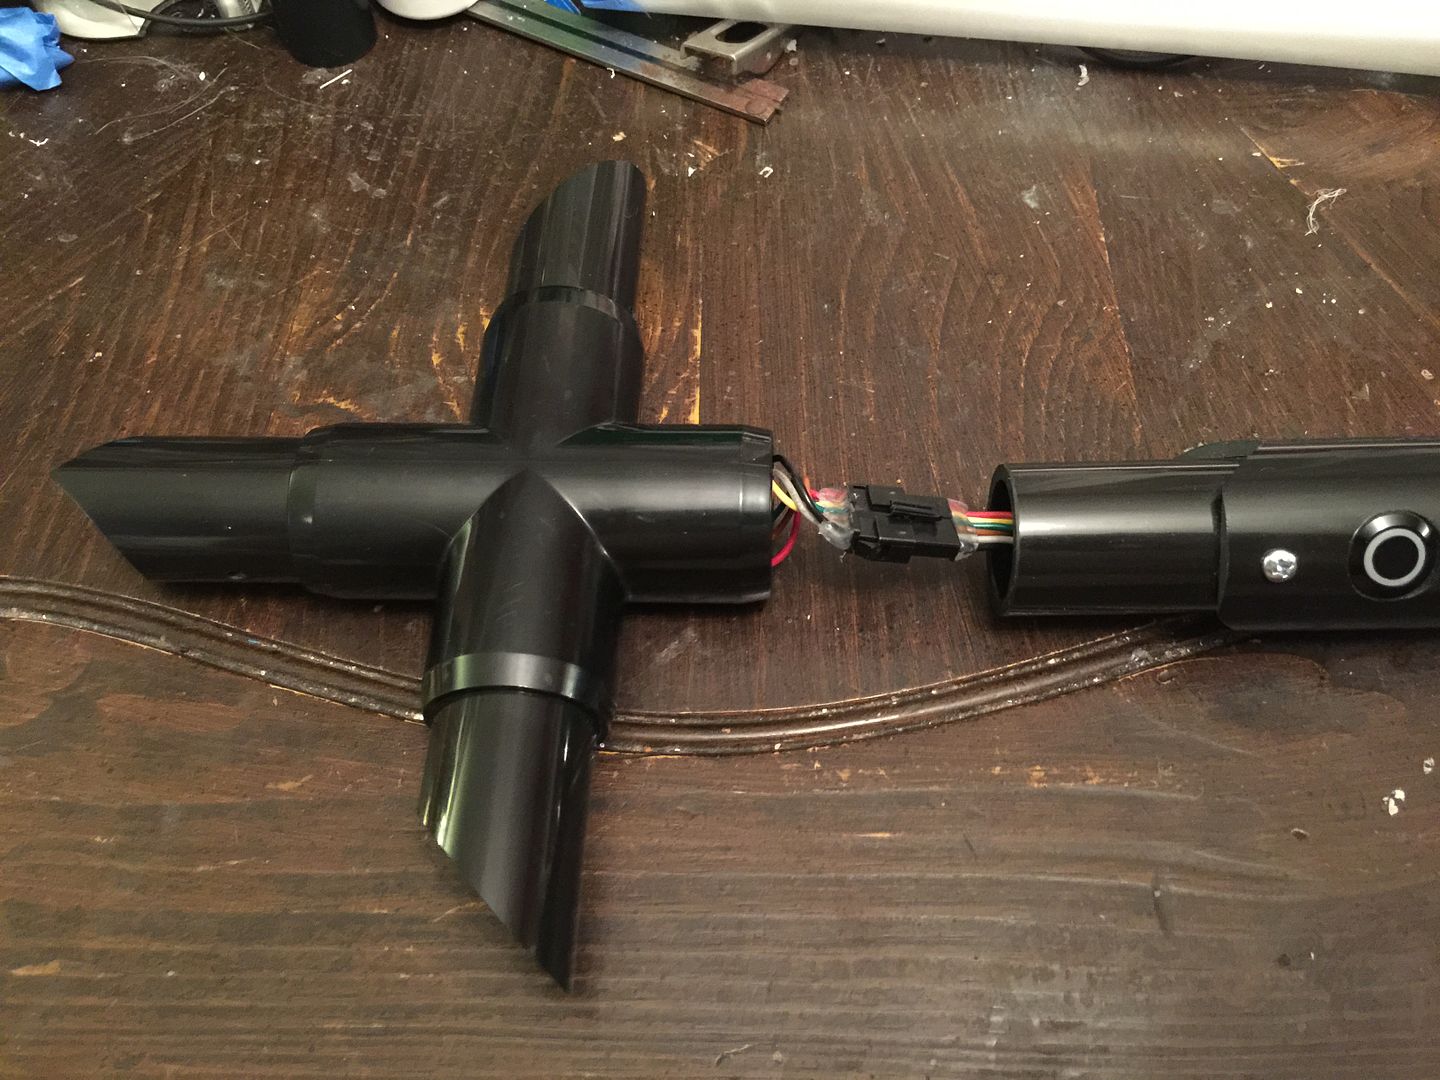
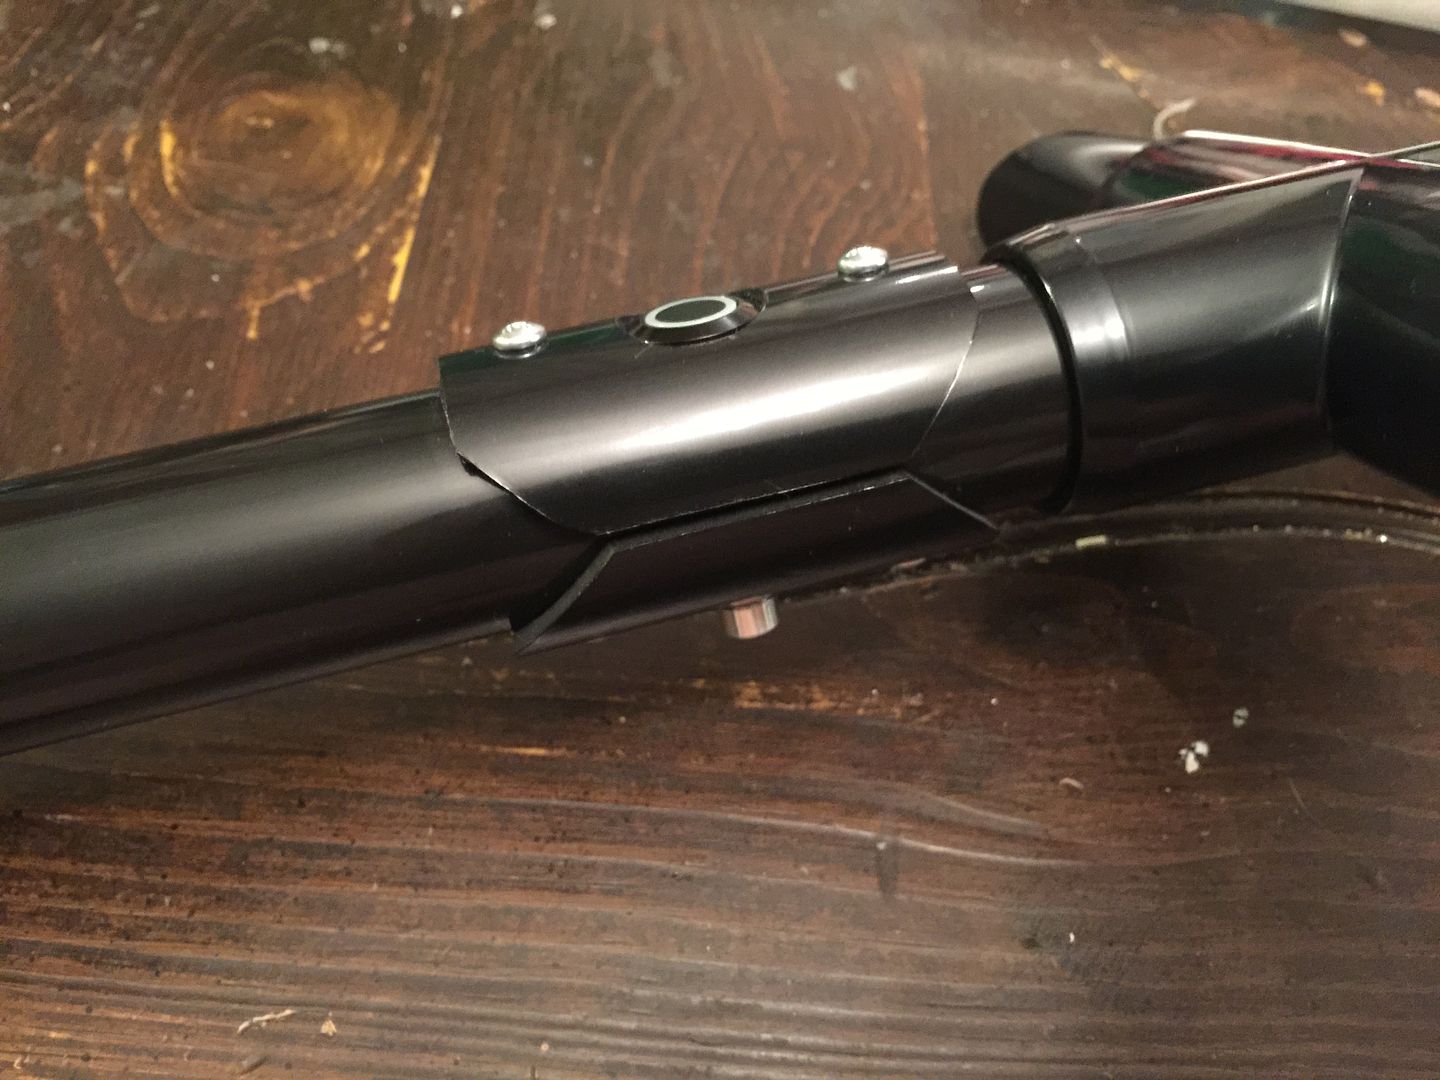
Black Short Momentary Red Ring AV Switch & Recharge Port from TCSS.
2.5-7.0v Momentary to Latching converter (Pololu board) from TCSS
MHS v2 Chassis Discs for 18650 batteries from TCSS.
A 18650 3.7V 3400mAh PCB Protected Rechargeable Battery from TCSS.
Covertec Button Thumbscrew from TCSS.
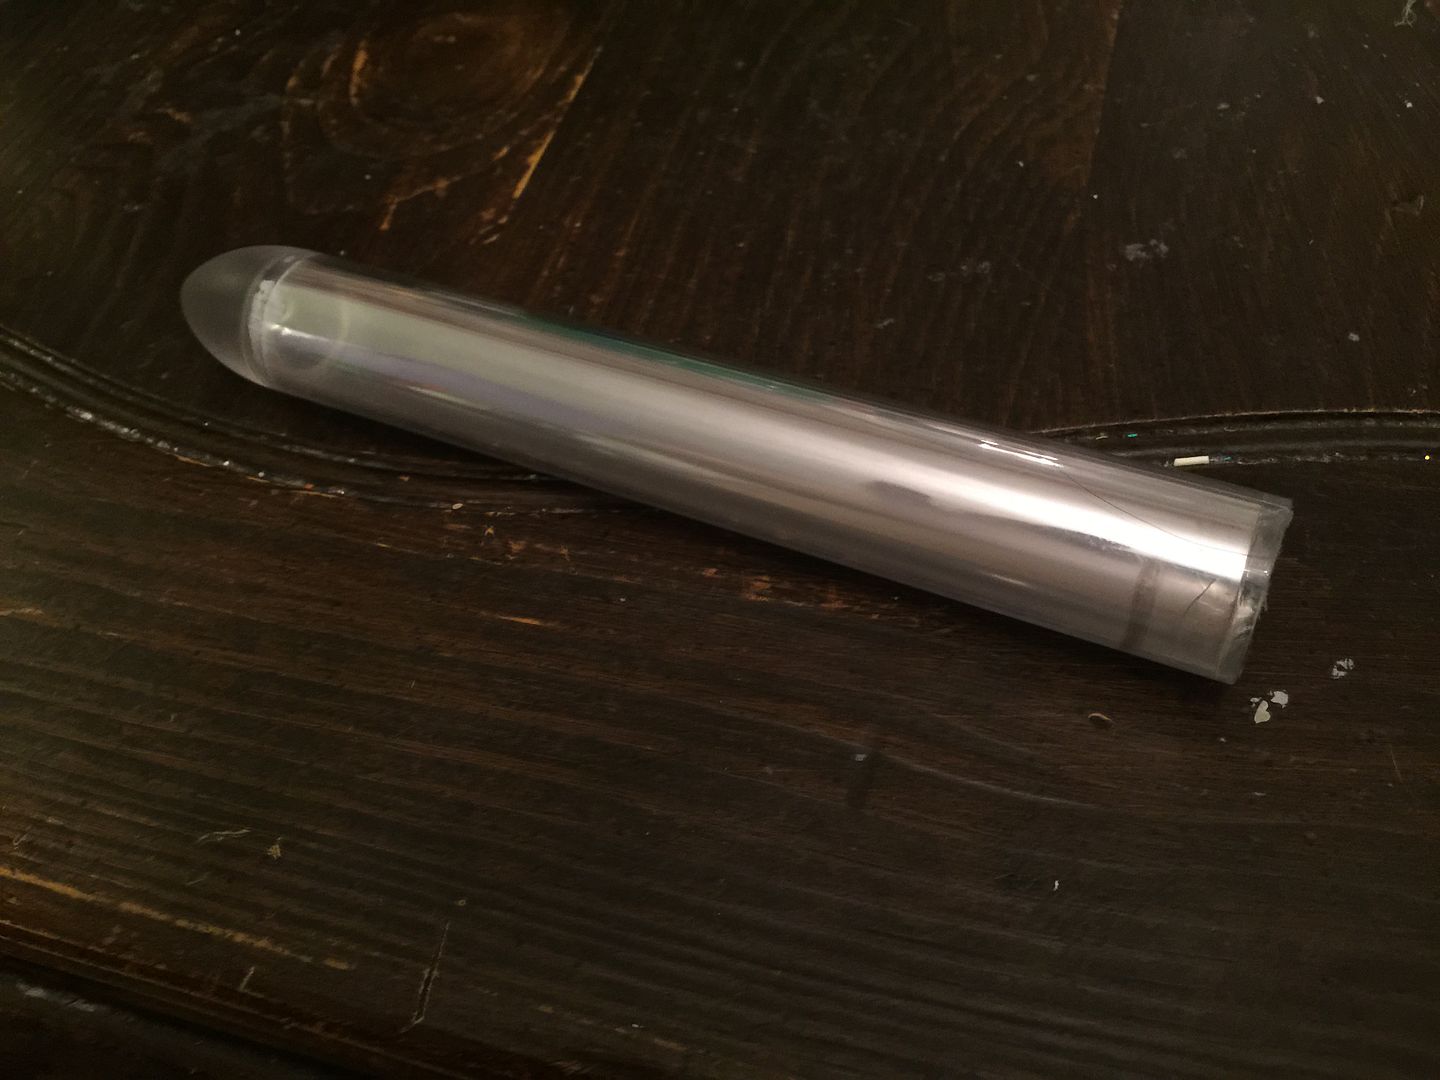
1" bullet tips for thin walled blades from TCSS.
Thin Walled polycarbonate for blades & LED Modules (part of the bulk buy for the 20+ saber project) from an industrial supplier.
A 4-wire quick connect for the Switch, a 6-wire quick connect for the 3 LEDs, and resistors & DynaOhm from TCSS.
The Saber is just over 18' wide, and just shy of 51" tip to pommel. (like I said, Go Big or Go Home!)
Without the blades, I can actually wear it on a covertech clip on my belt, though I will not be doing any acrobatics with it on.
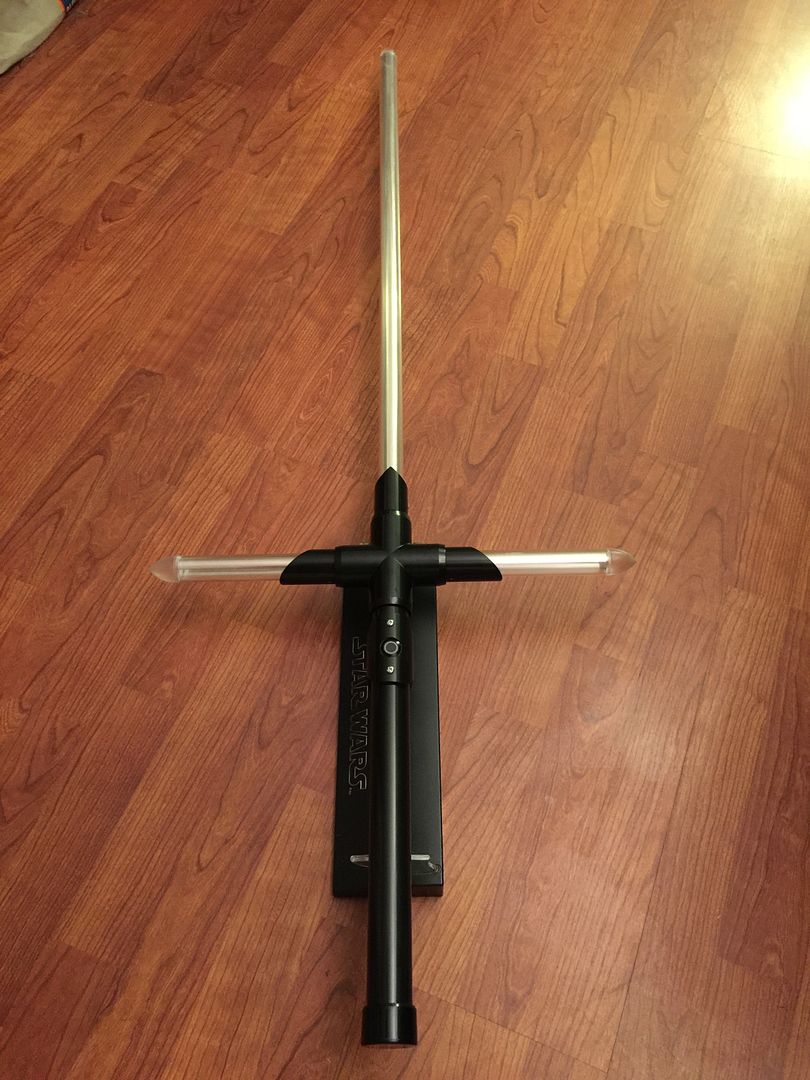
The Glams:
Select Build Pics:
The size of the 'cross guard' was dictated by minimum spacing of the LED Modules, and minimum blade inset (for the set screw).
The cross guard blades themselves are 6.5" long, plus tip. The main blade is 32" plus tip.
The Blades are homemade, using approximately 3' of clear wrap (as getting any LONGER length of wrap in was an exercise in frustration).
The LED Modules are hot-glued together, housed in 1.125" cut offs of 1" thin walled blade material.
For a heat sink, I used stick on RAM heat sink modules. In testing before assembly, they conducted heat well (away from the LED star).
8-32 set screws are used to hold the LED Modules and Blades in place. 3/8" #6 wood screws are used to mount the Switch and Recharge Port plates.
Thanks to the community for all the wonderful information freely shared, that helped me even think about attempting a 20+ Saber Build in less than 3 months!


 Reply With Quote


Bookmarks