


Recently I've been working various blaster. I got these two finished this weekend and took pics of them yesterday.
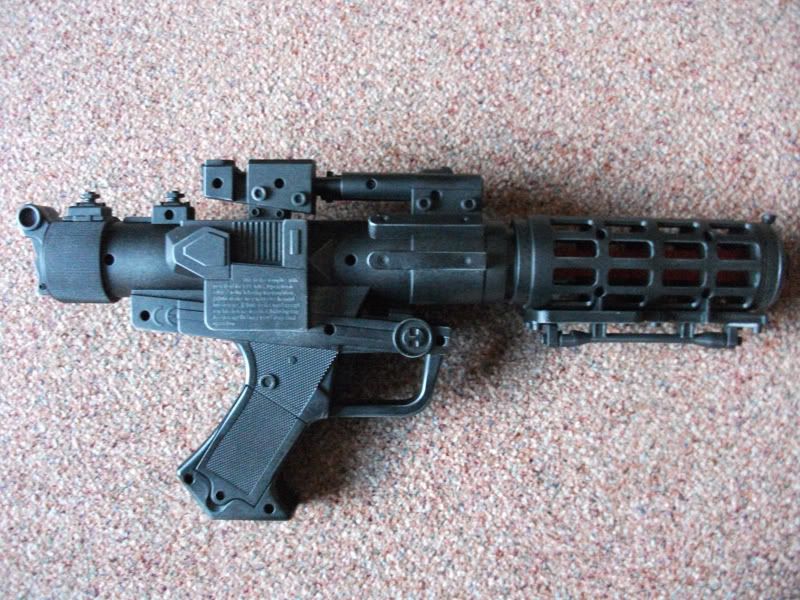
I'll start with the General Grievous blaster first as that was the first one finished. I replaced the original LED with a 1w led star I got from china. I glued the LED and optics in a piece of MR blade and then glued that to the bottom of the plastic light up part. I sanded the plastic part slightly to defuse the light better.
Then I painted it. I wanted it to have a used look so I painted it the same way as I did my Nerf gun. I started with a matt black base coat, then went over it with a really thin coat of silver. I made sure not to put it on to heavy so that some of the black would still be seen. I then went over the silver with a thin coat of black, again making sure that some of the silver still came through. I then went over it again with silver and then with some more black. Next I dry brushed silver on parts to mimic the paint wearing away. I then gave the whole thing a matt clear coat. So here it is:
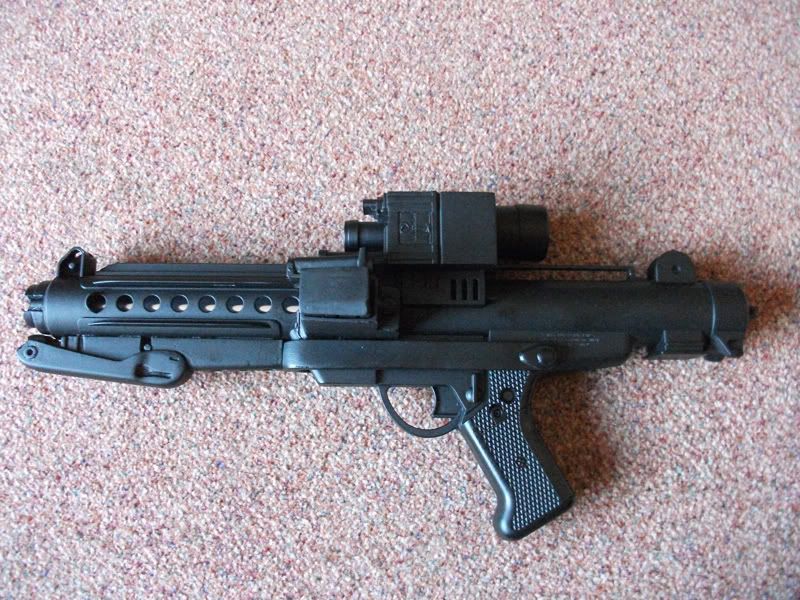
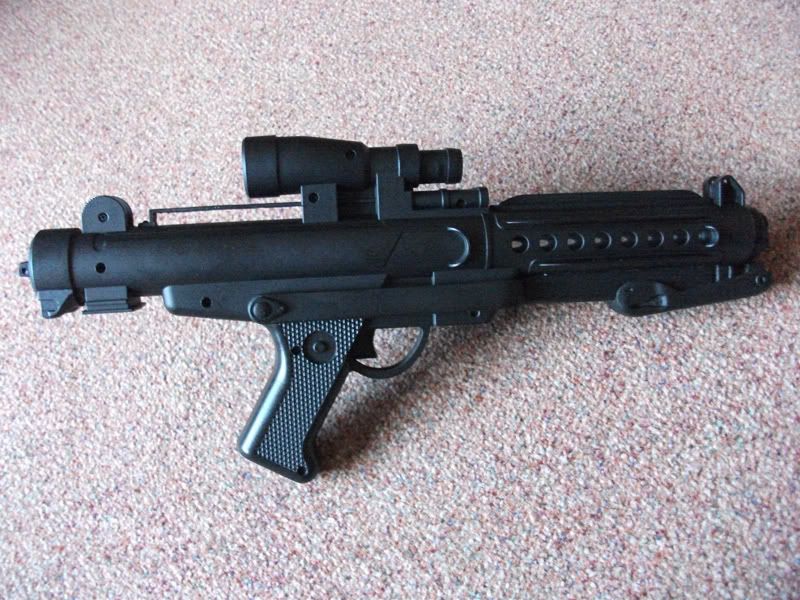
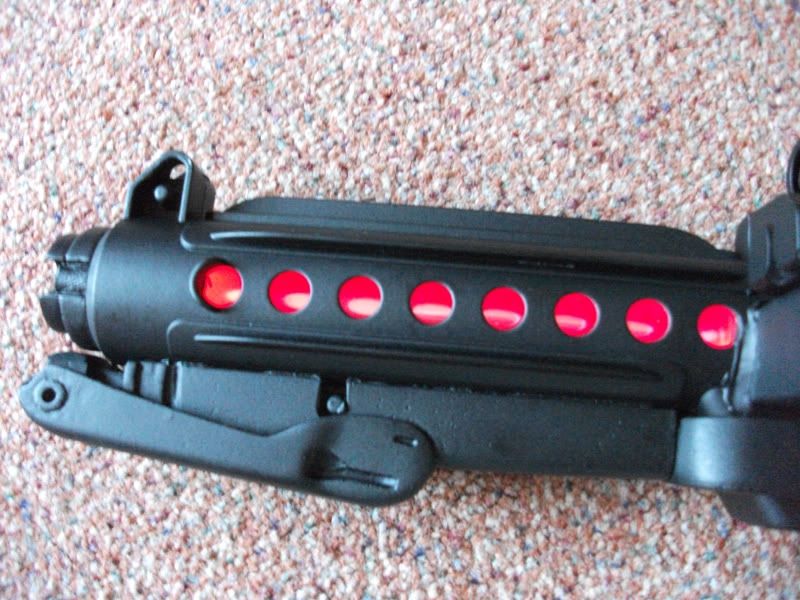
Now the Stormtrooper E-11 blaster. Again I replaced the original LED with a 1w led and relocated it from the front of the blaster to the rear of the barrel so it will light it up. I mounted the led and optics in the end of a 8" section of MR blade and then put in just over 3 feet of polypropylene to defuse the light for the rest of the tube. This was then glued in place inside the blaster.
I cut the plastic out from under the scope mount rail so it looked more like the original blasters. I also got one of doopydoos conversion kits of ebay and glued that on.
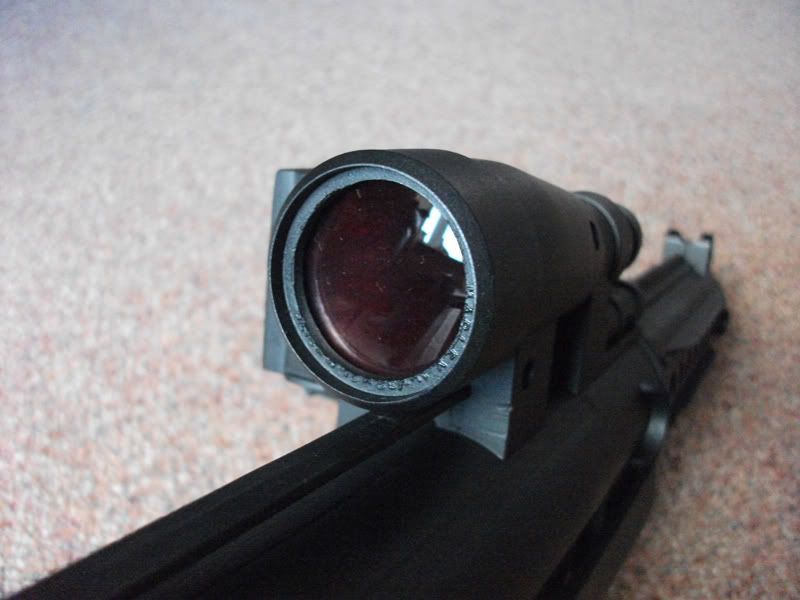
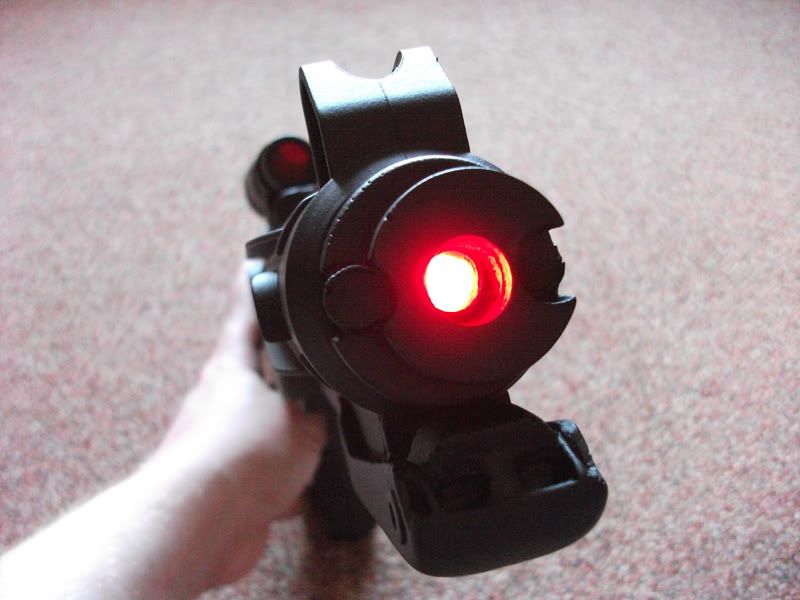
Next I made the scope more functional. When taking the balster apart for the first time I had to destroy the original caps on the scope as they were glued on but a quick trip to a DIY store helped witht that. I found a pvc end cap that fitted on the rear large end and found a small torch that had a small piece that would fit the small end of the scope. I put in two lenses, a large one at the rear, that was from a watch, and a small one, from a tiny magnifiying glass, at the front. In both ends I put in pieces of red Lee Filters and put a Reticle similar to the MR scope in the large end but see through. It makes everything go upside down but I can live with that.
I then painted it. This was a xxx to paint because of all the nooks and crannies but I managed it to paint it all matt black in several coats. I then gave it a matt clear coat. For now I'm leaving it as is but I may at some point I may dry brush some silver on to different parts to mimic the paint wearing away.
One thing I wasn't to happy about with the E-11 balster was that the LED wasn't very bright but after some tentitive experiments I found out that if you replace the normal 2 AA batteries with 2 TrustFire 14500 Lithium Battery it not only increases the brightness of the LED but it increases the loudness of the blaster. So here the pics:
Then finally both of them together:
Up next will be a DL-44 blaster, then another more accurate E-11.


 Reply With Quote


 TCSS the #1 Part supplier of


Bookmarks