Page 1 of 4 1 2 3 ... LastLast
Results 1 to 10 of 40

Thread: Bertuzzi’s "Mediator V3" (MHS - CF V5 – crystal chamber – Cree RGBW) - WIP

  1. #1

    Default Bertuzzi’s "Mediator V3" (MHS - CF V5 – crystal chamber – Cree RGBW) - WIP

    Hi Guys,

    I’ve been reading in this forum for over a year now and so I decided to (hopefully) enrich this forum with the one or other saber.

    I’m working with MHS-Part for a year now and so I could test what’s possible. So I built some sabers to gain experience.

    But for now I want to show you the process of building of the "Mediator V3", hoping for feedback and tips
    I already made many drafts for the Mediator. Version 1 I built two years ago, a friend of mine lathed me the parts I needed but the result was … botch. V2 has never been made, maybe I’m going to do this in the future.
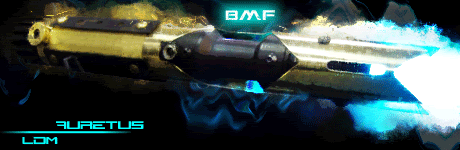
    So this is the draft of the "Mediator V3":


    The saber is based on MHS-Parts. It’s 11,61“ long and consists of a blade holder style 18, a 9“ double female extensions with grooves, slots and two holes for the switches and pommel style 7 with insert style 6 to hold a recharge port. The powdercoating (super wet black) is in custom style.
    For me it is important to build a saber I can duel with, because we also do stage combat, so the saber must be handy but nevertheless the design should be ambitious. I think I found a good solution.

    The parts:


    The specifications I want the saber to have:
    - Crystal Focus V5
    - Cree RGBW, green with white clashflash
    - rechargeable Li-Ion 18650
    - chrystal chamber with quartz
    - rumbling motor

    I’m still indicisive whether I use an activation box instead of just having two switches.

    My personal challenge will be cutting the overlay. I’ve never done that before so I’m very curious about the result.

    At first I looked for designs of chrystal chambers and I found something I really like. After getting inspiration I started building and after a few hours of work, I had my first crystal chamber.


    I used two MPS inserts style 6 and drilled threads for the thread rods.
    But I was not satisfied with the result – the rods didn’t look good, the crystal looked cheap and rattled in the chassis although I tried to clamp it between the LED-holders.
    So I looked in the DIY-store, ordered a quartz and did a litte bit of handicraft.


    To hold the crystal I used the copper wire of an inductor I still had from repairing a CF.

    I hope to be able to start soon with a chassis for the whole saber.

    Feedback and tips requested

  2. #2
    Council Member
    Jedi Master
    FenderBender's Avatar
    Join Date
    Jul 2008
    Location
    Earth System - Rhode Island
    Posts
    1,531

    Default

    I hope that you had the hilt lathed down before powdercoating. The gloss colors tend to be thicker than the flats and the shroud might gouge the PC in places.

    If you're new, please take the time we all consider just as precious as you and READ!

    GET LATHED!

    Official BMF and LORD OF THE STRINGS

  3. #3
    Force Aware Darth Enab's Avatar
    Join Date
    Jul 2010
    Location
    America the Beautiful
    Posts
    65

    Thumbs up

    Wow. That's gonna be awesome. It kinda reminds me Qui-Gon's saber. Anyways, keep us informed. Good luck!
    Two there should be. No more. No less. One to embody the power, the other to crave it. -Darth Bane
    If a Luxeon III gets hot enough to melt...[hot]glue, something's wrong with your wiring! -Jay Gon Jinn

  4. #4
    Council Member
    Sith Lord
    Lord Dottore Matto's Avatar
    Join Date
    May 2008
    Location
    On the Black Mat
    Posts
    3,289

    Default

    Good start. I echo fender (I sure hope those parts fit with your shroud)
    All n00bs READ these first (PLEASE)!!!:1. LDM's Basic Saber-build Step-by-Step Tutorial 1A. Maul's Saber Dictionary 1B. THREAD INDEX 1C. Econo Sound Diagrams
    TCSS the #1 Part supplier of LDM customsabers!

  5. #5

    Default

    Thanks for the fast replies
    I already tried go slide the shroud over the hilt - because of this I have some small scratches now. I though I could try it with an interference fit. The shroud just has to expand a few mikrometers so I'm optimistic.

  6. #6

    Default

    Got to love that desing!

    What color will your blade be? Red like the crystal chamber?
    Oh and do you have the CF already?

    Good luck with the shroud problem..

  7. #7

    Default

    The color of the blade and the crystal chamber will be green. I just had no green 5mm flash LED, so I took a red one.
    I don't have the CF by not, I will have to wait until the next run.
    Next week I won't update this thread because I'm not at home but I will have time to continue building on the Mediator and some other sabers, too ...
    I hope I can update in two weeks.

  8. #8

    Default

    In the last days I found some time to continue building the saber. I decided to build the chassis before making the overlay.

    At first I abraded a 32mm PVC tube down to 31,75mm (=1,25“) with a dremel. It’s hard to find non-metric parts here in Germany. Dirty work. After that I had to clean up my whole flat.
    Then I drilled holes for the momentary switches and the slots, so that you can see the crystal chamber.


    After that I had to fit the crystal chamber to the chassis. Because of the diameter of the MHS pommel inserts I had to make discs that would fit to the chassis.


    Now the chassis again. Cut slots to insert the crystal chamber. It ended up like this.


    First attempt – failed. The crystal chamber waggled because I worked uncleanly. So I had to make new disk. The result is satisfying.


    Now I could start making a mounting for the li-ion and the board. After that I cut two windows into the chassis to be able to reach the board better when I need to disassemble the saber. Two further slots were cut to slide the mounting into the tube. I also glued the momentary switches into the chassis.
    The parts:


    And this is the result


    I put he chassis into the saber – fits well.


    A little test with light.


    I hope I will be able to make the overlay soon. The first tests to build one were … temperate.
    Until I can wire the saber up I need to wait for a V5. I hope Erv will offer some of them soon Then I can finish the mounting entirely.

  9. #9

  10. #10

    Default

    Emo sinktube is pensive.


Tags for this Thread

Bookmarks

Posting Permissions

  • You may not post new threads
  • You may not post replies
  • You may not post attachments
  • You may not edit your posts
  •