Page 4 of 10 FirstFirst ... 2 3 4 5 6 ... LastLast
Results 31 to 40 of 100

Thread: The Force Fx MHS

  1. #31

    Default

    First quick review.

    More later when pics are uploaded.

    While this saber looks pretty good it feels a lot like a toy. There are more metal pieces than I thought, the core tube, the emmitter shrouds, and the pommels are all aluminum, everything else is plastic. (note the inner and outer diameters are completely useless for MHS without some serious grinding)

    Brightness is good, almost identical to my converted annakin, so less bright than a well driven lux but surprisingly good.

    Sound is good, three sets i assume all three are from previous sabers. Blue sounds just like my anakin, red has the single clash sound that has been described, green is similar to blue but different enough to be interesting.

    And yes, the blade is shorter.

    If they had made the core a little heftier and if the sections had more aluminum or if these were $40 cheaper I would run out and buy another one immediately. As it stands it's main value lies in the sound board with a few interesting parts for other projects. If there was a good supply of Ultras or Plecters I wouldn't even be considering these, but given the current scarcity of sound boards these are a heck of a lot better than a hasbro. I'll see what it looks like when I tear it down.

    pics to follow.

  2. #32

    Default

    Ok, now the pics.

    As mentioned it looks a lot better than it feels. If these go on sale I wouldn't hesitate to get a couple as wall hangers or to bulk up a collection. I'm still iffy on how good a toy it is, I am feeling like any kid who has held an FX will not be impressed by the weight and plastic feel of these. The loose fitting parts also make it kind of slip and clatter adding to the cheap feel.

    In a couple days I'll start the teardown and we will look at it as a source of parts.

    Forgive the poor lighting, my on camera flash is not ideal for product work and I had nothing handy to use to diffuse it.

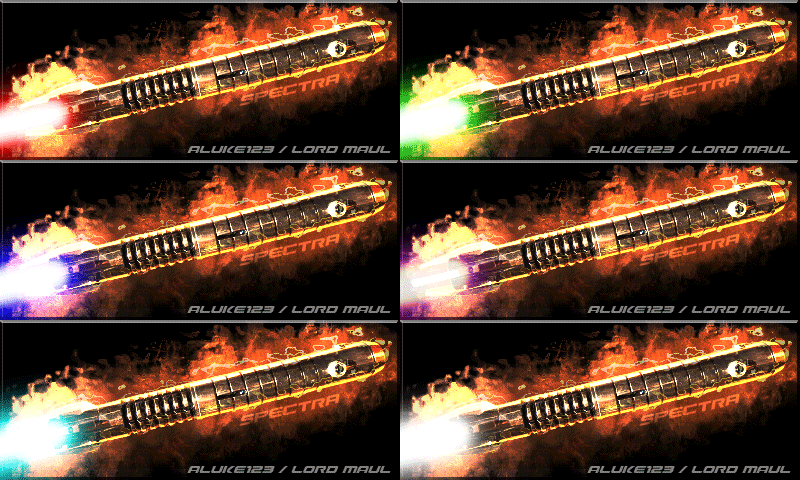
    So... Here are a couple of configurations I put it in, changing parts is pretty quick and easy and while all the configurations look pretty classic there is room for some creativity.


    Here is the bare hilt along with all the parts that are aluminum... except my cat he's made of fur and meat.


    I will get a better pic of the switch during teardown, but it's difficult to use when the covers are off. Of course the color selector is right next to it and can ONLY be gotten at when the cover is off, which is tolerable but it would have been nice to be able to switch without having to remove the pommel and slide parts out of the way.

    I will note hear that the saber actually feels halfway decent when swinging just the bare hilt.

    People were interested in the emitters so here are some closer shots, remember these do not fit around an MHS section so don't get all exited like I did when I discovered they were metal. Maybe they can find use with some kind of adapter, but I suspect I will be using them on a ray gun or something.


    And a closer look at the pommels


    The hilt has three cover sections and three of each. the sections are in three different lengths so you are kind of forced into using them in their intended slot if you want the switch to line up and the pommel so screw in. There is nothing keeping you from trying though which could frustrate younger kids.

    Here are the foregrips (between switch and emitter) These are all plastic.


    Here are the grips, same deal. They do look pretty good though, on first glance you would expect to feel rubber.


    The switches are kind of the most interesting arts from a propbuilding perspective, I can see finding uses for these although the clip levers are just sad. In each case the switch is a button pushing straight in, these then hit the recesses switch in the hilt proper. It's pretty easy to get a false hit, so it tries to power up then immediately powers down, it's also easy to power down when spinning the saber.


    This one may be the most interesting of the bunch, it has a bubble strip! It's also the button so it would need to be gotten out and cut down, but if you have the part anyway...


    A quick comparison of the length then on to colors.


    It's shorter, not cripplingly so, I actually like the length as an off hand blade, i may have to make a shorter saber for fighting two fisted.

    The colors are actually pretty impressive and bright enough to be noticed. I am sure it wouldn't stand up to a properly driven lux, but it's going to be enough to get some "Whoas" and to get that awesome look in kids eyes when they see it for the first time.


    And finally a side by side with my Annakin with a Luxeon driven straight off the MR board, as you can see they compare quite favorably with me thinking the Lux is a touch brighter and my wife swearing they are identical.


    So, any details you all want me to go back and photograph, or any questions about the parts so far?

    .

  3. #33
    Council Member
    Sith Lord
    Lord Maul's Avatar
    Join Date
    Jun 2006
    Location
    Seattle area, Washington
    Posts
    5,169

    Default

    Great pictures man!

    So on the control boxes, you push the entire bubble strip or circuit card down? That seems really hasbro like.
    Aluke123 on every other forum - Old grumpy moderator here

    Thread Index, The Saber Building Dictionary, and The Basic Saber-Build Tutorial - Read Them!

  4. #34

    Default

    Yep, but the post is right in the middle so pushing down on the edge just gives you the rapid on/off burst.

  5. #35
    Council Member
    Sith Lord
    Lord Maul's Avatar
    Join Date
    Jun 2006
    Location
    Seattle area, Washington
    Posts
    5,169

    Default

    Man, is that a crappy setup or what?

    The Obi pommel is waaaay to short as well. Doesn't look good AT ALL in this picture:
    Aluke123 on every other forum - Old grumpy moderator here

    Thread Index, The Saber Building Dictionary, and The Basic Saber-Build Tutorial - Read Them!

  6. #36

    Default

    OK, I got tired of scaring the cats with it so here is the breakdown.


    Here we have the bare hilt with the switches (which are latching by the way). You will need to remove the plate which is quite easy, just loosen the three screws and it comes right out.


    Now we can clearly see the board and switches


    Now we have to pop the black switch cover off the RGB switch and push the power switch down or they will not clear the opening (oops).


    The power switch is actually kind of fragile, and by experience I can tell you it's not easy to put back together if you knock it apart. Oh well it will probably be replaced by a better one when this goes in an MHS hilt.


    Now we have to knock these two pins out with pin and hammer.


    They each have one knurled end so you want to make sure that's the one you knock out, if you go from the wrong side just knock them back in.


    Yank those pins out and the inner sheathe can slide free.


    But look! Another pin! Same drill as the last two (IE a hammer, an actual drill is really overkill here)


    This one had the knurled end on the opposite side of the first two, but there is no guarantee they stuck to that across the board.


    Now we need to remove the screws holding the board in, easy as pie.


    Prop up the board and you can unplug the blade.


    Now the entire blade slides free.


    There is another plug holding the board to the battery terminals/speaker but it's too far in there to be dealt with easily, we will wait until we have cracked the inner sheathe in half to get that out.


    Oh look, another pin! Now this one is just plain mean. It's only on one side so when you knock it out it falls into the lamp assembly and can't be gotten out until you open that. This is the last chance to turn back, after here reassembly may be tricky.


    But then what fun is that? With the pin knocked in the lamp slides easily from the blade.


    Through the lens you can kind of make out what looks like a Luxeon star.


    With the number of wires going into this I am guessing the impact sensor is in here as well. A test of the board minus the lamp proves this to be true.


    Crack! One swift tap with a hammer and a little prying with a screwdriver and there they are, one star mounted LED minus ANY sort of heat sink and one impact sensor.


    Thanks to tireless detective work I suspect this may be a prolight! I do some hunting and track them to here: http://www.led-bulbs.com/eShop/10Bro...ry=Prolightrgb This appears to be their 1watt RGB which I guess they are underdriving to get away with having no heat sink? Or do they just not care if it has a pretty short lifespan?


    I have cracked the inner sheath apart and liberated the board and battery terminal. Here's what we were after!


    Here are the other sides in case you have some use for that information.

    So in summary, a very easy breakdown, an interesting LED, and a sound board.

    From here my next question will be what is the output of the board, unlikely it would be enough to drive a LUX in a really satisfying way, I think I would want to run the LED in parallel and just use this as sound. On the other hand it seems a waste to have these nice ramp up and ramp down outputs just sitting there. I think telltale LEDS letting me know which sound I am using may be in order?

    So $100 for a sound board that will still require a LUX driver and the attendant hardware for that. I think my final conclusion is that these are a very poor value compared to an Ultrasound or Erv, but may at times be a viable option when they are unavailable (which according to my statistical sampling is so far 100% of the time :)

    Look out for these on sale, either as a toy for the nephew or a source for a sound board when all other sources have failed.

  7. #37
    Council Member
    Jedi Council Member
    xwingband's Avatar
    Join Date
    Nov 2005
    Location
    The training simulators, duh!
    Posts
    5,899

    Default

    Neat... I guessed it was an RGB. Prolight was a good guess too. It's a 1Wer. Heatsinking is a non-issue with it. No need to underdrive, it produces very little heat anyway.

    Good to know if one ever comes my way.
    RED LEADER Standing by!

  8. #38

  9. #39

    Default

    Quote Originally Posted by Luar Selbor
    How big is the sound board?
    Oops, yeah I should have tossed a quarter in there for scale or something :)

    The last pic is fairly close to life size at 72dpi so about 1" by 3" I would estimate.

  10. #40

    Default

    So you think it will fit in a saber with a 1" ID?

Bookmarks

Posting Permissions

  • You may not post new threads
  • You may not post replies
  • You may not post attachments
  • You may not edit your posts
  •