


Baking your hilt in olive oil to look rusty and old.
There's a lot of different reasons for weathering, but I think my favorite is because it gives the saber a sense of history. For every scratch and scar, there was a story that goes a long with it... it might be exciting... it might not, but there's a story to be told regardless.
Anyway to the actual process... I tend to ramble.
First off...
Take everthing out of the hilt, and everything off the hilt. Anything that will melt or burn should NOT be going in a hot-hot oven:
- electronics
- switches
- o-rings
- insulating material
- grips
- shrouds
- screws
Also, when you get ready to cook it, break it down as far as possible. If it an MHS - that's easy, if it's a custom hilt or has odd pieces, take them apart as much as possible too.
The idea is to have single -separate- parts. The reason for that is, different materials, different sizes, and thicknesses of the metal pieces will absorb heat at different speeds.
For example if you cook them together, a blade holder will be lighter than the 2" double female piece that it's attached to, because it's thicker and absorbs heat slower... plus, the heat may warp the thread if they're under stress, and may not come apart after they cool - yes, I discovered that the hard way.
Continuing...
Once you have your parts separated, you have to prepare them for the way you want it to looks. Believe it or not, the texture of the metal/aluminium will dictate how the coloring will spread.
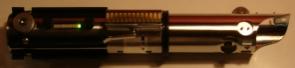
Again, for example, on Mongrel, I sanded the entire saber down with 100-grits sandpaper (pretty rough), but what that did was make little, tiny grooves in the hilt pieces where the oil could grab onto, thus holding more in place and eventually making it darker. The smoother the hilt, the less the oil can pool - and the coloring will be more dispersed.
Before you start cooking your dedicated hilt parts, I recommend a test run. Use another piece of hilt, another MHS part, whatever... the point is so you can see how fast the coloring occurs, and can compensate for times and thicknesses of the different parts. This is something you'll have to judge for yourself, and likewise, have to make a call on how much longer or shorter the other parts should cook.
I also recommend cooking them all separately - as in, one at a time. This offers considerable more control of the coloring of the individual parts.
The Oil.
I used medium olive oil. It's good for sweating onions and garlic and I use it in most of my sauces - just because it tastes more mild. That's what I had, and it was just the first thing I grabbed.
Really, though, olive oil has a higher amount of sugar than most other oils, and that's what causes the coloring. So this is certainly not "must"... feel free to experiment, I encourage it.
Preheat your oven. This is very important. And make it HOT! I'm talking like 550 degrees - That's as hot as mine goes
Application.
When you have your parts ready, and they're to the desired texture, you can apply the oil. All I do is use a paper towel and dab the oil on it, and apply a thin, yet even, spread... like you're greasing a pan. It shouldn't be so thick that it runs, but at the same time, you want the entire part covered. You'll be able to see the non-covered parts pretty quickly once it's in the oven.
I just put some non-stick tin foil around a pizza pan, and place the parts -stood up on end- on the foil.
Start with the largest or thickest piece. The part that you think will absord heat the slowest. To get good, even coloring, it should take about 30-40 minutes. It's okay to check on it ever 5 minutes or so, the oven is certainly hot enough. But once you get it to the color/coverage that you like - take it out.
Shock it immediately after you pull it out. By that I mean, once you take it out of the oven, run it under cold water.
This serves two functions: 1) the rapid cooling "locks" the coloring in and 2) it rinses away any oily or sticky substances left on the hilt.
By "lock", I mean it prevents the part from getting any darker and the texture will contract and hold in the coloring... so it won't rub off right away.
Once it's cooled off. Use a dish cloth or paper towel to dry it, just dab, don't rub. And don't forget to dry the insides and the threading on MHS parts. Which, btw, you shouldn't have put oil on the threaded parts awyway.
This largest/thickest piece will be your measuring device to gauge the coloring for all the other parts. Obviously, you'll want to match the parts an much as possible, but it won't take as much time with the smaller parts, so remember to watch it and take it out when it's ready.
One good thing about this technique, is that it's totally non-committal. If you don't like the way one particular part turned out - sand it all off and try again. It's that simple.
It's been mentioned, that if you don't use a sealant right away, it will fade. Yes, it will fade, slowly, but it will fade. You can take pictures of it to see how well it's fading or if you just want to play with it until it looks good, that's fine too.
But if you plan on sealing it - wait to install the electronics. I used clear-coat epoxy, and to really get those epoxy coats super-duper tough, you have to cure them... in the oven again... so it wouldn't make much sense to install the electronics and then have to take them out again to apply the coating and then stick it in the oven again.
This is a "guide", not "proceedure"... if you don't like something, you don't have to do it... this is just what I've found works best for the uses that I like. If you want the same results, go with this... if you want different results, try it another way. Experimentation will only allow you to learn more... to apply it better the next time... to produce more accurate and consistant results.
Good Luck!
eastern57

 Reply With Quote


 TCSS the #1 Part supplier of

 ...YUP!


Bookmarks