Page 1 of 3 1 2 3 LastLast
Results 1 to 10 of 21

Thread: 1.25 sink tube Qui gon Tutorial

  1. #1

    Default 1.25 sink tube Qui gon Tutorial

    Firstly this is my first tutorial so forgive any mistakes.

    I wanted to build a Qui Gon jinn style saber but I still wanted it to have a smaller diameter handle, all of the other sabers I have built are sink tube and I came up with the following idea.

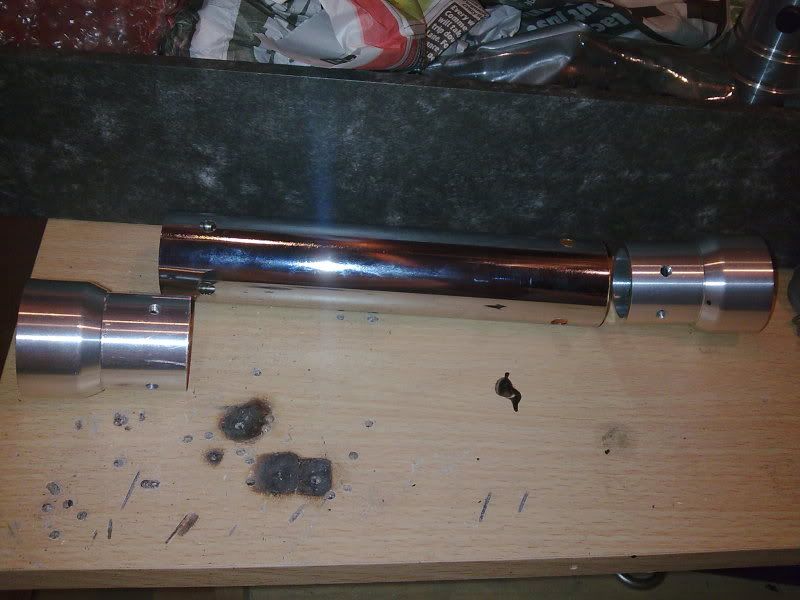
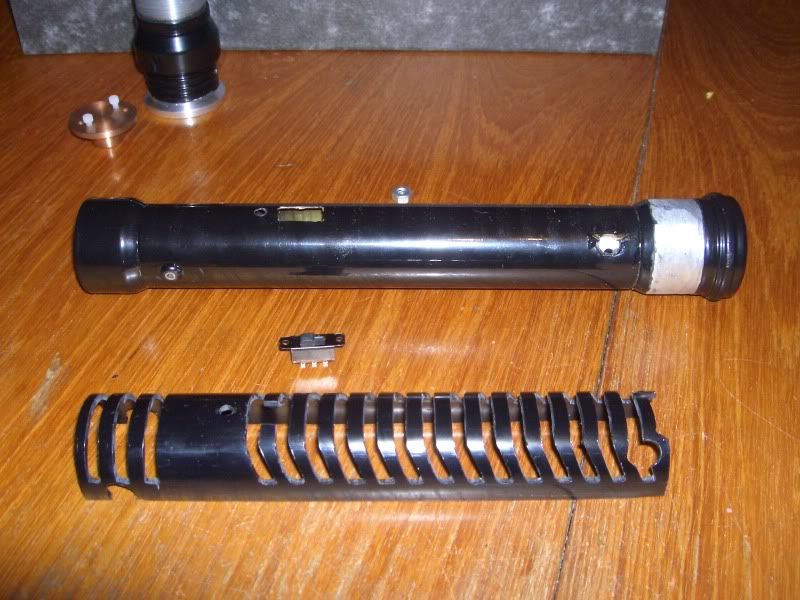
    A 1.25 sink tube forms the base of this saber, cut to size, I compromised a little on the length of the saber to get a compatible looking diameter, my first attempt would have looked too "stocky". The overall length of the saber is about 11' 3/4". I cut the sink tube to size and drilled and tapped the 1.25 sink tube adapters to take the 8/32 round head bolts.


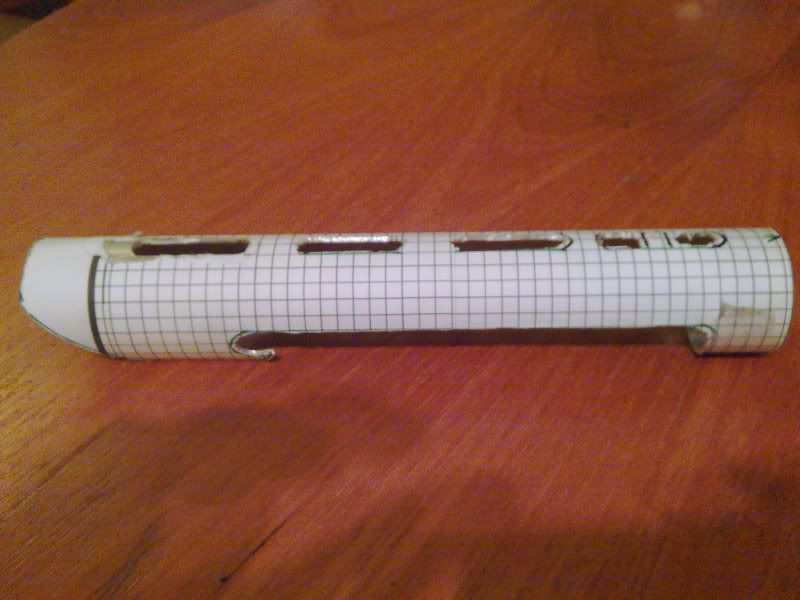
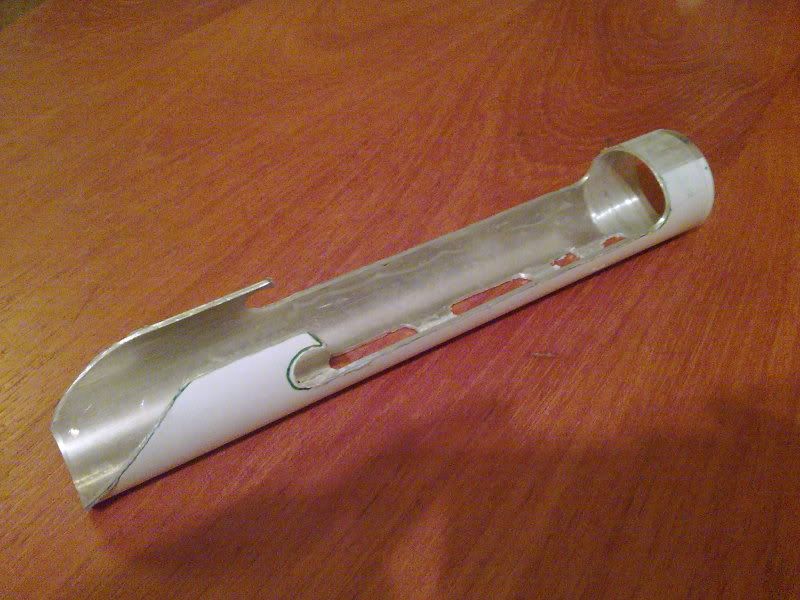
    Next was to make an overlay to look like the ridges on the prop. I searched the internet but couldn't find a template so I marked out my own on a sheet of printer label that I had printed a grid on. I studied all the pictures of the prop I could find to copy a shape for the template. I then stuck this on a 1 1/2" black plastic waste pipe. This overlay would cover the sink tube but not overlap on the adapters at either end.


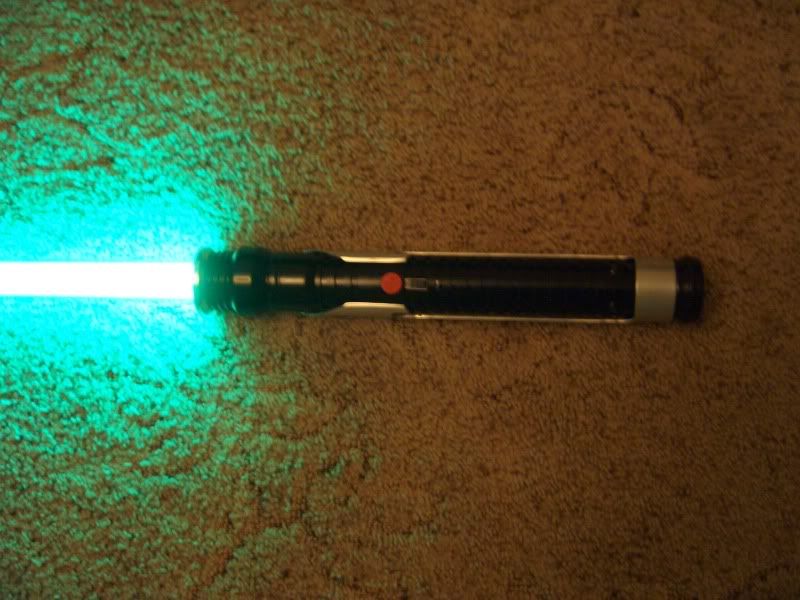
    Added Blade holder 18, Pommel 7 and pommel insert 7, and sent them of to be powder coated. The switch is a black slide switch brought from my local electronic store (Sorry Tim !) this would be set between the top ridge of the handle, just below where the red thumbscrew would sit. both positions are marked in the photos above. The outer shroud was cut from a piece of 1 1/2"
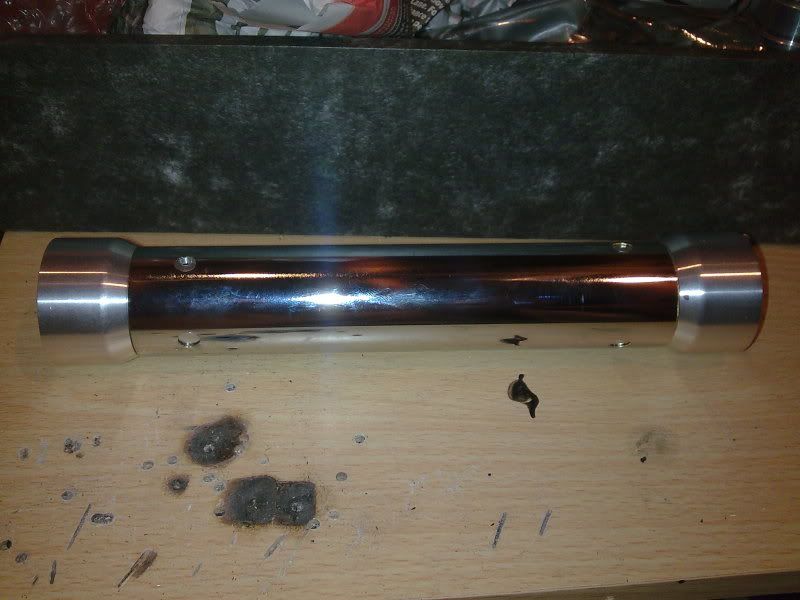
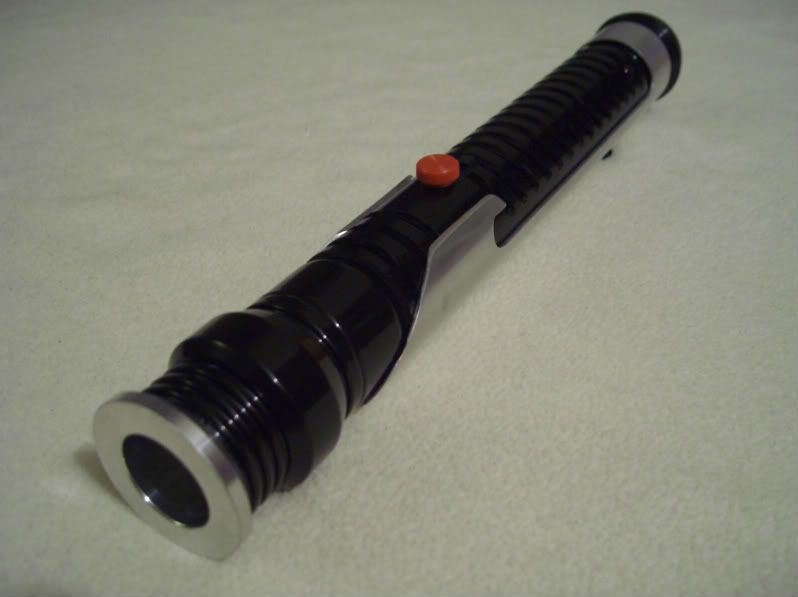
    aluminum pipe given to me by an ariel installer. I did have to grind down the interior of the pipe and the outside of the rear sink tube adapter to get it to fit but if you buy the aluminum sleeve that Time sells you won't need to do that. I downloaded a template from the inter-web and printed it again on to some sticky label then set about it with the dremmel. to remove the sticky paper after I had finished I soaked it for about half an hour in luke warm soapy water. Then sanded the shroud with a fine wet and dry and finally went over it with some metal polish.


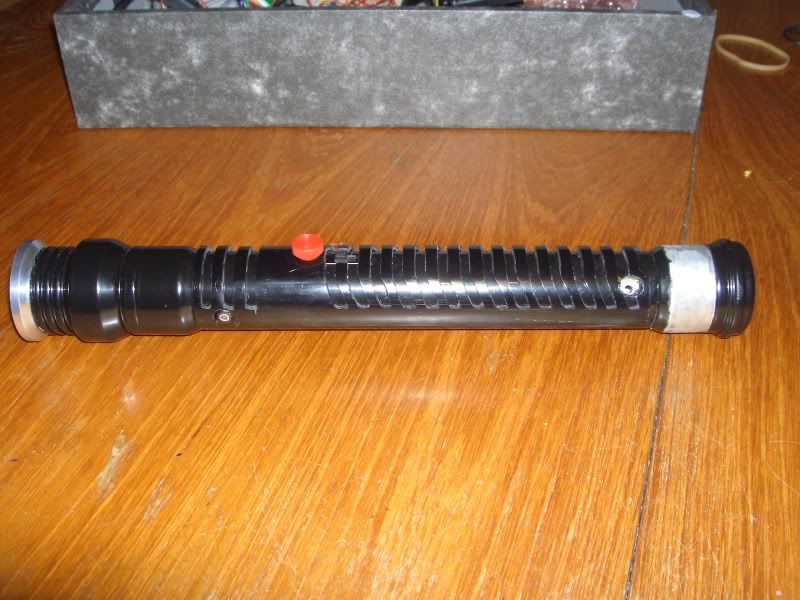
    With the main body back from the power coaters I cut a rectangle for the switch and drilled a hole to take the red thumbscrew, put the filed, sanded and finished overlay into place (the following pics don't show the plastic overlay in there finished state,) and then the thumbscrew holds it in place via a nut on the inside of the tube.


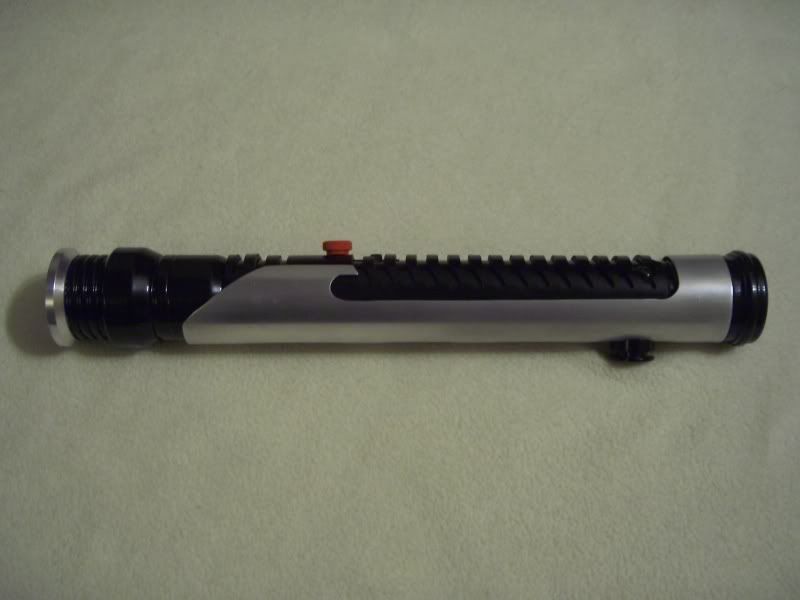
    you can see where I had to grind down the sink tube adapter to fit the shroud, Electronics were added, sorry no pics, got a bit carried away and forgot to take any. You do have to remove the plastic shroud to solder the switch in place. Because of the inside diameter of the sink tube adapters being only 1 inch you can't fit a battery holder through them, this means I have to remove the whole adapter to change batteries a recharge port is Ideal, sadly i didn't have one, but I will probably upgrade later. My speaker is on the end of my Battery box and it doesn't sit inside the pommel. shame but i do need to remove it for the batteries. To assemble the main body, remove the rear adapter and slid down between the jaws of the shroud until the first ridge of the plastic overlay lies alongside the swept back curves of the shroud, when it is in place push the adapter back into place and add the securing bolts. I put two on top and one underneath through the covertec, which is why it is not in the correct place.

    and that is it.


    Hope this is of some use.

  2. #2

    Default

    Well done. Way to make the simple saber look great and easy.

  3. #3
    Council Member
    Jedi Council Member
    Jedi-Loreen's Avatar
    Join Date
    Dec 2005
    Location
    Not of this Earth
    Posts
    6,077

    Default

    "Easy? You call that easy?"


    That looks like a lot of work cutting out that plastic sleeve. But it came out nicely.

    Nice little tut. But yeah, would have liked to have seen your electronics set up.
    In order to see the Light,
    you must sometimes risk the Dark.
    TCSS MODERATOR


    BLUE 8 Ready to ROCK and ROLL!

  4. #4

    Default

    Not that im trying make light of anything. Some of the sabers around here seem to be much more complicated. This hilt looks really good for what 5 or 6 parts.

  5. #5
    Council Member
    Jedi Council Member
    Jedi-Loreen's Avatar
    Join Date
    Dec 2005
    Location
    Not of this Earth
    Posts
    6,077

    Default

    I count 7. For the hilt.
    In order to see the Light,
    you must sometimes risk the Dark.
    TCSS MODERATOR


    BLUE 8 Ready to ROCK and ROLL!

  6. #6

    Default

    I didn't realize sabers where classified by the number of parts used in their construction.

    Anyway I like the PVC "Middle shroud" I didn't know that the 1.5 waste tube would overlay a 1.25 sink tube that nicely.

    Very nice looking saber and a good tut on how you did it. I would think that doing a movie-replica saber would have its own set of challenges since you are much more "locked in" to the design.
    Good judgment comes from experience. Experience comes from bad judgment. -Jim Horning

    The beatings will continue until morale improves. -KMFDM "Free your hate"

  7. #7
    Council Member
    Jedi Council Member
    Jedi-Loreen's Avatar
    Join Date
    Dec 2005
    Location
    Not of this Earth
    Posts
    6,077

    Default

    He doesn't say that the black plastic waste pipe is PVC. Black pipes are often ABS.
    In order to see the Light,
    you must sometimes risk the Dark.
    TCSS MODERATOR


    BLUE 8 Ready to ROCK and ROLL!

  8. #8
    Jedi Master Kal El Rah's Avatar
    Join Date
    Jul 2008
    Location
    High in the hiltops of the SIMI Valley
    Posts
    1,378

    Default

    That came out great, excellent work and a great saber.
    I'M JUST A SPY(LOL)

  9. #9

    Default

    Quote Originally Posted by Jagahati View Post
    I would think that doing a movie-replica saber would have its own set of challenges since you are much more "locked in" to the design.
    Yeah that is the toughest part, you are tied into a set design, and I was very aware that it had to be resonably close to the prop for it to be accepted for what it is intended to be. However having said that I see all of the areas that I couldn't match the original in, I know that the top of the handle should be flat, the cut outs on the bottom are in the wrong place as is the covertec clip. But I designed this build to be "Off the shelf" as I have no lathe or machine to work with and I am very happy with how it turned out.

  10. #10

    Default

    I think the innovation used in this shows a willingness to use what is on hand and an amazing power of imagination and ingenuity... My hat goes off to you sir!

    Just looking at it i thought it was a conversion at first until i did some reading...WELL DONE!!!

    *stands up and claps wildly*
    Every time Tim ships an order... an angel gets its wings


    "Just get one and go nuts, that's how this hobby works. Get stuff. Go nuts. Period." ~FenderBender~

Bookmarks

Posting Permissions

  • You may not post new threads
  • You may not post replies
  • You may not post attachments
  • You may not edit your posts
  •