Results 1 to 10 of 31

Thread: Hi! Just set up my first MHS.

Hybrid View

Previous Post Previous Post   Next Post Next Post
  1. #1

    Default Hi! Just set up my first MHS.

    Figured I'd wait until I actually completed something before I'd post.

    Well, firstly, let me say how much I've enjoyed gathering information from around this forum. It's all here! Everything I ever needed to know about putting something together that I'd like.

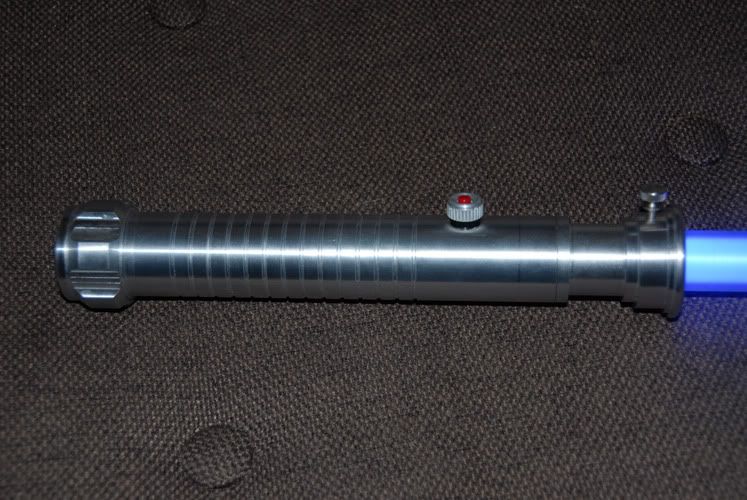
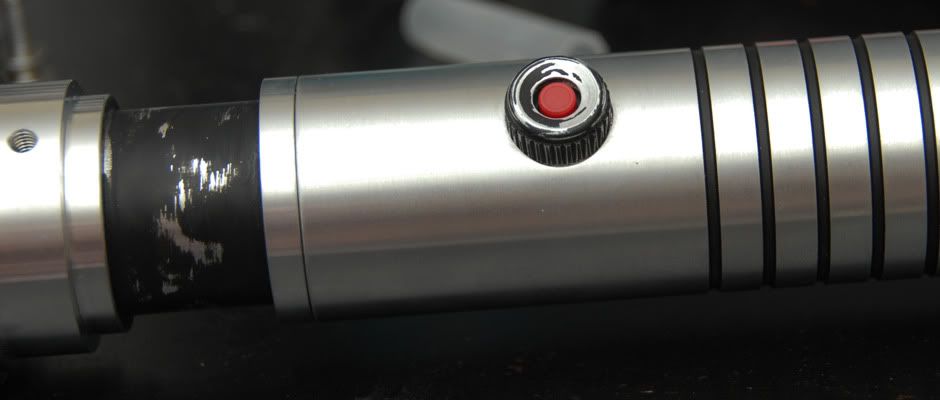
    I've also got to hand it to the MHS system. Until I had the pieces in my hands and started messing with them, I simply had no idea how well planned out it is. Plan it out, and results are so easy to get. I apologize in advance for the flash in this picture... it's not great.


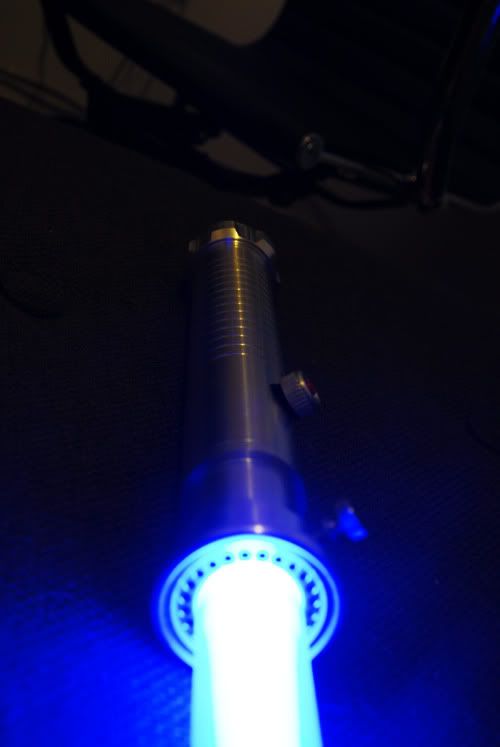
    Right now, I've got a K2 Royal Blue in there. Yep, as described, the K2 is intensely difficult to solder to properly. Did manage to get it after a bit though, and I'm incredibly happy with the results! This thing is a torch even in daylight, and with the blade off it's more powerful than any flashlight I've ever owned.


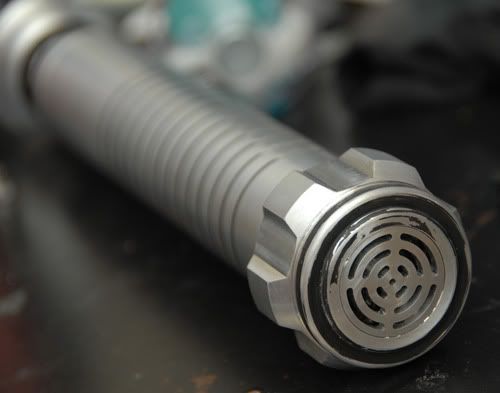
    So what's next? I don't see myself as building a lot of sabers, simply improving this one over time. First on my agenda is painting the inset areas black, and I've ordered a choke that I think is necessary for this particular design to be what I'd like. Here it is: http://www.thecustomsabershop.com/MH...le-2-P296.aspx

    In the future? I'm probably going to get an Ultra Sound 2.5 module set up later on, and I'd really like to find a way to integrate a little bit of leather and weathering into my saber to some degree. I'd also like to get a few other types of LED... so I can swap colors when need be.

  2. #2
    Council Member
    Jedi Council Member
    Jedi-Loreen's Avatar
    Join Date
    Dec 2005
    Location
    Not of this Earth
    Posts
    6,077

    Default

    Nice work. We like seeing a completed saber in people's first posts.

    Swapping LED colors is fun.

    One suggestion though. Take off the bezel nut and the plastic nut from the outside of the switch, take out the switch and put the plastic nut on, all the way down to the base of the switch stem, to use as a spacer. Then
    put the switch stem back through the hole and screw on the bezel nut, then you've got a lower profile switch and the nut fits properly. That's the way that was designed to work.
    In order to see the Light,
    you must sometimes risk the Dark.
    TCSS MODERATOR


    BLUE 8 Ready to ROCK and ROLL!

  3. #3

    Default

    Right you are! Thanks, it's all fixed up now. Looks much better! I kind of figured this was how it was supposed to look, but wasn't sure if I had threaded the nut properly.

    I've got to say, nothing really prepared me for how solid this thing feels in the hand. I had the Vader FX saber for a bit, and while it had some metal parts, it just didn't balance right or feel very stable.

  4. #4

    Default

    Quote Originally Posted by Jedi-Loreen View Post
    Nice work. We like seeing a completed saber in people's first posts.

    Swapping LED colors is fun.

    One suggestion though. Take off the bezel nut and the plastic nut from the outside of the switch, take out the switch and put the plastic nut on, all the way down to the base of the switch stem, to use as a spacer. Then
    put the switch stem back through the hole and screw on the bezel nut, then you've got a lower profile switch and the nut fits properly. That's the way that was designed to work.
    What a great idea.

    How long have I been here and not known about a plactic spacer and just dealt with the switch being a bit......odd. Ha ha. Think the fella that sold me my first saber lost the spacer.

    This just goes to show how much collective knowledge there is that isn't always posted.

    Great first build dude, I like the ideas of improving over time. Your first built saber I feel is a little more special and so should be improved at some point.

    Love seeing someone who has done almost everything in a basic build before even posting.

    Well done.

    Oh and before anyone goes nuts I brought my first parts from a guy on ebay. Not Tim, who is just plain awesome in his creation/s.
    Obi-Wan: "If you spent as much time practicing your saber techniques as you did your wit, you'd rival Master Yoda as a swordsman"

    Anakin: " I thought I already did"

    Obi-Wan: "Only in your mind, my very young apprentice"


  5. #5

    Default

    And lo, I have begun the part of this process I've really been looking forward to: weathering and personalizing my saber.

    I don't know about anyone else, but I'm a really huge fan of camera equipment or anything from the 70s or 80s that was originally painted black but because it was intensely worn or loved, the underlying surfaces have begun to show through.

    I really like the process of thinking... how would this have been used? Which part of it would be worn down based on that usage?


    I figured the pommel would have taken quite a bit of scuffing, resting on things and generally knocking into stuff often.


    The button bezel I hadn't initially thought about painting black, but the after doing the neck and the pommel it seemed like a necessary route for the overall balance. Thanks again for the heads up on the bezel positioning again, Jedi-Loreen!


    The neck is loosely based on the weathering I've seen on a lot of the Luke ROTJ sabers. I'd figure an initial paintjob would be pretty marred by the sparks / slag / whatever shot off of the stuff the blade cut through. I lined the cuts in the grip with black as well.

    So I'm still waiting on the choke, but I think that'll really do the trick to finish off this design... I'll weather it in a very similar way to the emitter.

  6. #6
    Council Member
    Jedi Council Member
    Jedi-Loreen's Avatar
    Join Date
    Dec 2005
    Location
    Not of this Earth
    Posts
    6,077

    Default

    Nice. I really like the way the weathering looks on the bezel nut.
    In order to see the Light,
    you must sometimes risk the Dark.
    TCSS MODERATOR


    BLUE 8 Ready to ROCK and ROLL!

  7. #7

    Default

    You have my respect sir.... very nice!
    Every time Tim ships an order... an angel gets its wings


    "Just get one and go nuts, that's how this hobby works. Get stuff. Go nuts. Period." ~FenderBender~

  8. #8

    Default

    Looks good! Keep it up!
    "You've failed, Your Highness. I am a JEDI, like my father before me..."

    -Luke Skywalker, ROTJ

  9. #9

    Default

    Word of Advice man. LUBE YOUR THREADS! they can get stuck pretty easily, just use some WD-40 or any type of thread oil. trust me you will thank me later. i had a bad experiance to were i ALMOSt had to buy a new V-grip and Number Six Blade Holder beacuse they would not come apart. luckily i was able to get them apart cleaned up the threads and applied some lubricating oil and Bingo! Never got stuck again.

    other than the warning Great Saber man keep up the good work. And i know what you mean about upgrading the look and stuff over time. i allready have plans for mine.
    Last edited by Darth Vane; 11-21-2009 at 06:47 AM.
    ABANDON ALL HOPE, YE WHO ENTER HERE!
    Canto III of Dante's Inferno


    Beware the Power of The Pope!

  10. #10

    Default

    I've gotten everything back together, and I'm very pleased with the results. The large red thumbscrew fits perfectly and is the ideal length... and I actually think that the weathering job on my new emitter looks even better than the old one!

    I've sawed down my blade a little bit but that seems to make it brighter and more even which is a bonus and I can safely swing it around in the house without hitting any ceilings. Not all bad!

Bookmarks

Posting Permissions

  • You may not post new threads
  • You may not post replies
  • You may not post attachments
  • You may not edit your posts
  •