Page 1 of 2 1 2 LastLast
Results 1 to 10 of 15

Thread: Installing a Switch Bezel Nut?

  1. #1

    Default Installing a Switch Bezel Nut?

    I did some looking around but don't seem to find any 'tutorial' on the install of the TCSS Switch Bezel Nut (http://www.thecustomsabershop.com/Sw...-Nut-P270.aspx). Lots of pics with the SBN installed, but little about how to do so.

    Does anyone have pics or a walk through about how to use the original nut from the TCSS LED Kit (latching switch), on the inside of the hilt I take it, so it meets correct spacing of the button within the Switch Bezel Nut?

    Thanks.

  2. #2

    Default

    It's threaded to fit the corresponding momentary/latching switches. All you do is drill tap for the momentary/latching switch and screw it on top

    How can we be expected to think outside the box when we work in one?

  3. #3

    Default

    I assumed as much from the pic on TCSS, but wanted to be sure.

    So you basically take the nut (black plastic in this case) off the switch that comes with the TCSS LED Kit, replace the nut with the new Switch Bezel Nut, and then you can use the original plastic nut as a spacer under the hilt body as needed?

  4. #4

    Default

    Yep thats about it

    How can we be expected to think outside the box when we work in one?

  5. #5
    Council Member
    Jedi Council Member
    Jedi-Loreen's Avatar
    Join Date
    Dec 2005
    Location
    Not of this Earth
    Posts
    6,077

    Default

    I have no idea what Spaznick it talking about with drilling and tapping, you don't tap the hilt for those switches.


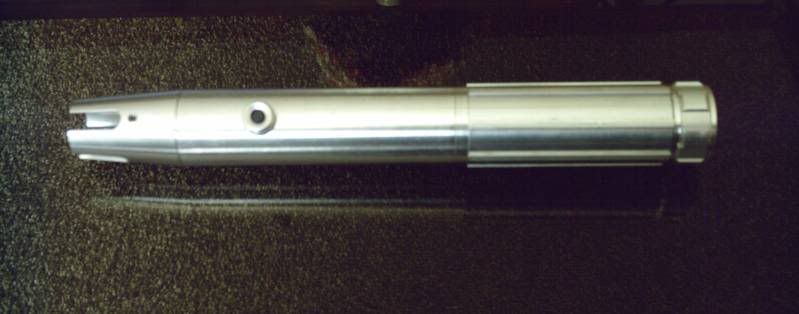
    You just kind of have to figure it out for yourself. I used one on this saber:


    What you may have found out is that the switch stem is too tall not to have some sort of spacer between it and the inside of the hilt, because the Bezel Nut only screws on so far, leaving the switch too loose. And you may (or at least I did) find out that the switch nut is actually too thick, recessing the switch too much so that you can't press the button down enough to activate the switch, even though it says in the Store that you can use it. I did not find that it worked as is. (I've replaced switch types or broken switches, so I routinely use the "extra" plastic nuts as spacers when I'm using another plastic nut on the outside)

    What I did was to get a 5/16" washer. The hole was a bit to small for the switch stem, so I enlarged it with my Dremel, then cut off the "sides" of the washer so it would seat more flush with the inside curve of the hilt.

    I suppose you could try sanding or cutting down the plastic nut that comes with the switch, but I didn't trust a piece of plastic that had to be thinned, so I wanted to use metal.

    It's more work, but at least I'm sure it won't break inside the hilt.
    In order to see the Light,
    you must sometimes risk the Dark.
    TCSS MODERATOR


    BLUE 8 Ready to ROCK and ROLL!

  6. #6

    Default

    Might be better just to buy a guarded switch and get it over with it seems.

  7. #7

    Default

    I used a drill press to drill out a hole for the switch (in the hilt) then I sanded it down. Maybe I just did things the long way?

    How can we be expected to think outside the box when we work in one?

  8. #8

    Default

    To install any switch that is the method, but I think it's being said that the hole has little to do with the SBN, only the switch stem itself.

  9. #9

    Default Rubber Washers.

    I use the basic switches too w/ the bezel nut and I thought the button stems were too low, so I used two rubber washers 5/16" x 3/4" x 1/16". I put the washers on before inserting the switch in the hole, then screw on bezel nut. The rubber washers conform to the inside curve of the hilt and grip the inside of the switch as well. The button height was perfect too, for me anyway. Just an idea that worked for me. The guarded switches look cool and function great but leave little room inside the hilt (they are long switches). If you use these, you might want to solder your wires at a 90 deg. angle on the leads.
    Yoda always said there would be days like this.

  10. #10

    Default

    The rubber washer idea was my next step. I figured something that would form to the curve of the inner side of the hilt would make this a lot easier. Thanx for the confirmation DH.
    Last edited by Darth Abominor; 08-30-2009 at 07:37 PM.

Bookmarks

Posting Permissions

  • You may not post new threads
  • You may not post replies
  • You may not post attachments
  • You may not edit your posts
  •