Page 1 of 3 1 2 3 LastLast
Results 1 to 10 of 21

Thread: (Frusterated) Homemade Hardware Saber

  1. #1

    Default (Frusterated) Homemade Hardware Saber

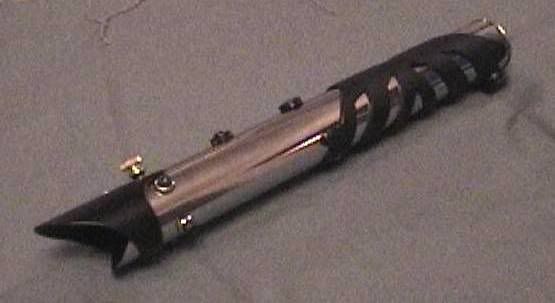
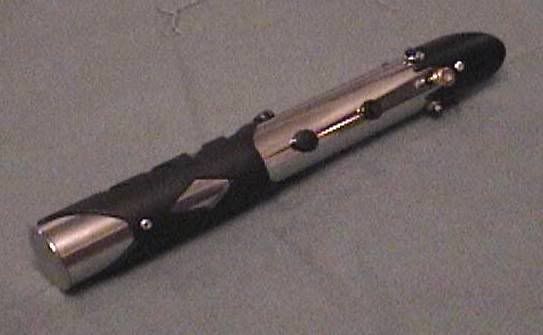
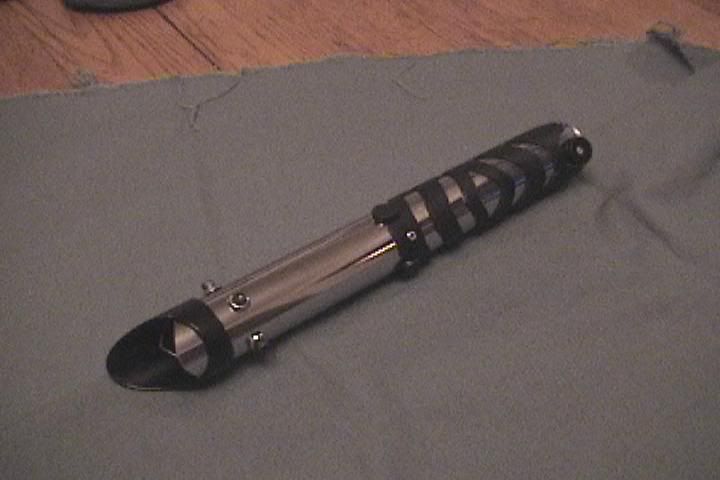
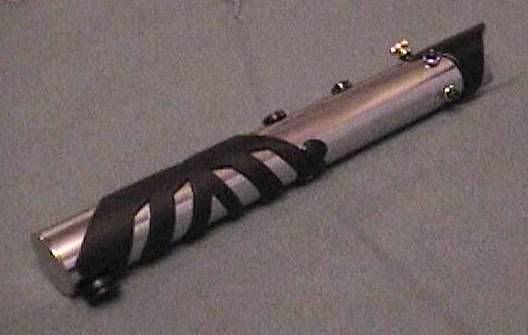
    Off and on for the last few years I have been trying to makes homemade lightsaber, I do not want anything fancy no LED's or electronics. I have a basic hilt made from chrome sink tube and the blade made out of PVC spray painted blue. I used O rings on the bottom of the hilt for a grip and have it so the blade can be screwed in and out of the hilt. However I have not been able to find any good sights with really good instructions, every sight I have gone to says this or that and I am tired of not finding anything that fits the hilt so right now all it looks like is a chrome tube with some O rings. I want it to look more authentic so if anyone has any good instructions on what to get at a hardware store and how to make it fit for the hilt I would greatly appreciate it.

    I figured out how to get the blade in the hilt using some of the instruction from the Big Yellow Box's double bladed lightsaber. However mine is only single bladed as I want it.

  2. #2
    Council Member
    Jedi Council Member
    Jedi-Loreen's Avatar
    Join Date
    Dec 2005
    Location
    Not of this Earth
    Posts
    6,077

    Default

    Well, you've been to The Big Yellow Box, but that site is old and not updated anymore. Could you not find the parts from the lists on that site?

    I've seen too many unfortunate sabers that just look like a bunch of plumbing parts and hardware stuck together, they don't say "lightsaber" to me.

    Sometimes you just have to try things and see if they look good. It takes a little bit of an artistic eye.

    Take a look around here for some examples of sink tube sabers and maybe the guys will tell you how they made theirs.

    Here's my first light up sink tube saber that I'm still pretty proud of today, even though I made it 7 years ago. I got the inspiration for the grips from the BYB site.


    In order to see the Light,
    you must sometimes risk the Dark.
    TCSS MODERATOR


    BLUE 8 Ready to ROCK and ROLL!

  3. #3
    Sith Adept dgdve's Avatar
    Join Date
    Aug 2009
    Location
    Virginia (near DC)
    Posts
    647

    Default

    "damn girl thats gotta be from the el days"(very nice)
    ... but i must agree with the lady. Just dont let your saber run you, you run your build.. if you look around here you will see the LATEST in design idea's as well as tech discussion, in short your on the cutting edge of saber building here at tcss. Just search the gallery "user albums" and look at all the different sabers, borrow this, cut that and the next thing you know you have a completly personal saber which will make you very proud a design all your own. Dont give up on lights even if your "electronically challenged", tim/stryder(owner operator of tcss) sells "led kits" that include everything you need(minus a blade and blade holder) to get your saber up and running in whichever color you like . The pvc sabers are INCREDIBLY durable there are youtube vids showing guys running over them with cars and dropping them from 3rd story hotel balcony's just crazy stuff... pvc+blade(thick walled) are nearly indestructable(in normal use conditions).. paint the pvc a nice chromium/flat black emitter/pommel couple coats of clear and youd be happy and its inexpensive as well

  4. #4
    Jedi Initiate annon's Avatar
    Join Date
    Aug 2008
    Location
    charlotte nc
    Posts
    341

    Default

    If you're having trouble making your saber look authentic, try copying design elements from the sabers in the movies. The sabers in the OT were basically a bunch of junk parts anyway (don't get me wrong, those are my favorite sabers).
    As said above, have a look around the gallery for some inspiration.
    Also, you can always post pics of you saber for some constructive criticism on how to make it look better.
    Don't worry about your first saber being perfect, like all things, you'll get better with practice.

  5. #5

    Default

    i'd love to see pictures. Ich am like the Bruno of lightsabers ich will sort aus your lichtshaber visout a problem

    TCSS Resident Annoyance
    NOOBS: Don't be annoying, thats my job, GO HERE

  6. #6
    gthmnyt2580's Avatar
    Join Date
    Apr 2007
    Location
    Gotham City with a saber on my utility belt
    Posts
    61

    Default

    you can also add different screws and fancy knobs and what not to make it seem like it has additional dials and switches....i believe they're called "greebles". I could be wrong with the term. Since i dont have access to a lathe, both my sabers were built using the Big Yellow box tutorials as well as the tutorials here....i've come to learn that a rotary tool and some PVC pipe, misc screws and an open mind definitely come in handy when adding that little extra design element. For instance, instead of using regular phillips or flat head type screws, use hex screws. Throw in a thumb screw like Jedi-Loreen has or a knurled screw like this one by the side where the emitter is to make it look like a blade retention dial;


    You can also just add a push button for decoration to add to the effect. And if you want to evenutally add electronics to it, at least you have the switch already. But i defintiely couldn't agree more with what everyone else said, browse the gallery here and you'll come up with a number of different things you can do. Draw something up and post it here to view. There will be a ton of helpful people here with suggestions and advice.

    gthmnyt = Gotham Knight

  7. #7
    Council Member
    Jedi Council Member
    Jedi-Loreen's Avatar
    Join Date
    Dec 2005
    Location
    Not of this Earth
    Posts
    6,077

    Default

    I also used hex screws with finish washers underneath. They press against the PVC blade holder (with speed nuts on the inside of the hilt) and also add a design element to the saber.

    My blade retention screw is actually a brass knurled nut epoxied onto a brass screw. I had not yet discovered McMaster-Carr and their myriad thumb screws and other cool hardware.

    My grips and emitter shroud are made from PVC pipe that I cut and carved with a Dremel.
    Last edited by Jedi-Loreen; 08-17-2009 at 04:24 PM.
    In order to see the Light,
    you must sometimes risk the Dark.
    TCSS MODERATOR


    BLUE 8 Ready to ROCK and ROLL!

  8. #8
    gthmnyt2580's Avatar
    Join Date
    Apr 2007
    Location
    Gotham City with a saber on my utility belt
    Posts
    61

    Default

    Quote Originally Posted by Jedi-Loreen View Post
    ...I had not yet discovered McMaster-Carr and their myriad of thumb screws and other cool hardware...
    Doh!!!...i forgot about that site. I think i'll need to replace a few of the screws as well as the set screw on my latest saber.

    gthmnyt = Gotham Knight

  9. #9

    Default

    we need one of those in britain if you ask me (or any brits here for that matter.)

    TCSS Resident Annoyance
    NOOBS: Don't be annoying, thats my job, GO HERE

  10. #10

    Default

    I found the big yellow box sight as well as some others a few years ago, I only found this sight about a month ago so I have only just begun to tap the information in here. My problem is that most of what I have seen tells you what parts to look for but do not give good instrutions on how to get them together. Or some even mention the use of a rotary tool to cut holes in the chrome tube or PVC tube but do not give instructions on actually how to do that. Or even what rotary tool they are refering to. I have a dremel but so far none of the atachments are that good at cutting a precise type of hole. I will keep looking and I do appreciate all the feed back.

Bookmarks

Posting Permissions

  • You may not post new threads
  • You may not post replies
  • You may not post attachments
  • You may not edit your posts
  •