


Hey Everybody!
So, like many others we ordered a Starkiller saber from MachinedFX back in December. Well, we just got it about 2 weeks ago and sat while we decided what to do with it. Also, like many others, our saber came with some...."issues" that needed to be addressed if we were going to convert it. We had ordered ours with electronics, so it came with the typical lamp lit plastic glob for a crystal, and a luxeon LED sitting on a ring, no heatsink. It also had this kind of sinktube cap thingy for a pommel and didn't really think that it fit the look of the saber well. So......things we changed in order to get it sound ready:
Heatsink: As stated it didn't come with one, and with a properly (or even halfway) driven LUX III you need one, so we machined one out of aluminum and left a tail on it to come down into the crystal chamber window and to add to the decorative look of the crystal chamber. We wanted the crystal chamber to be both as realistic looking and as fully functional as possible. We made the heatsink with a tapered kind of disc pattern that gives the look of a functional piece of the saber as well as serving as the heatsink. I took some file edges to the heatsink while it was on the lathe to kind of roughen it up to keep with the "well used" look of a weathered saber.
Brass Rod: Like everyone else, we were supposed to get one, and, like many others we got shorted. So I threaded a brass rod into the bottom of the heatsink and then dimpled the end so that the very tip of the crystal goes into it to give it a more cohesive look than just a rod hanging down into the chamber.
Crystal: The original had a plastic hunk that I guessed could have passed for a crystal at a distance. But I wasn't going to go through all this trouble and not put a REAL quartz crystal in there ;D
Crystal holder: I wanted the crystal to be properly housed as well as have a custom chassis for the soundboard. So I machined a custom aluminum crystal holder that also serves as the head of the soundboard/speaker chassis. The holder is also vented to allow sound from the rear of the speaker to come through the crystal window to help enhance the sound quality.
Soundboard Chassis: I wanted something to securely hold the soundboard and still fit in the space constrained interior of the Starkiller. So using the Crystal holder as a base, I mounted the board and speaker assembly to it with standoffs making the whole assembly rigid and streamlined to fit in the 1" interior..
Batteries: As mentioned, the Starkiller is kind of stingy on its interior space due to the peep-show you get with the crystal window ;D So I went with a pair of 14500 Li-Ions wired in parrallel for 3.7V 1800mah.
Pommel: It didn't really have one :P It came with a painted sink tube cap. So I went back out to the shop and made a custom one out of aluminum and it houses the recharge/kill port. This also gives some added weight to the rear of the saber to better balance it.
Switch: I didn't change it. I felt that the switch in the covertec was fine as it maintained the reverse grip activation used by the character in the game and was appropriately placed for this purpose.
All in all, I'm satisfied with the conversion, It will make someone a great costume accessory or display piece. We took a frog and made a prince! I chalk this experience up to the note that we learned what we are and what we aren't going to do with the Vader's Vault Limited Edition Starkiller run that we are working on.
It will be going on eBay in the next few days unless we get an offer we can't refuse firstSo keep an eye out for it!
The Pics:
The Custom Crystal Holder and soundboard/speaker chassis:
The Optics assembly with custom heatsink and brass rod:
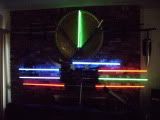
The Video:
http://www.youtube.com/watch?v=YElQYpVHJpg


 Reply With Quote


 ...YUP!


Bookmarks