That is really cool!! i have a pretty cool single shot with a little red light on it... and a big green flashlight attached... i think i might try painting it up, sound easy enough...


That is really cool!! i have a pretty cool single shot with a little red light on it... and a big green flashlight attached... i think i might try painting it up, sound easy enough...
Grey Leader:Standing By.
Recruiting now. Contact me for Emblem.
DONATE YOUR LIGHTSABER TO THE FIGHT AGAINST AUTISM!!! ASK ME HOW!!


Thanks, sor.
In order to see the Light,
you must sometimes risk the Dark.
TCSS MODERATOR
BLUE 8 Ready to ROCK and ROLL!
excited i have some time to play tomarow so i might get to take apart blaster and re-paint it
Grey Leader:Standing By.
Recruiting now. Contact me for Emblem.
DONATE YOUR LIGHTSABER TO THE FIGHT AGAINST AUTISM!!! ASK ME HOW!!

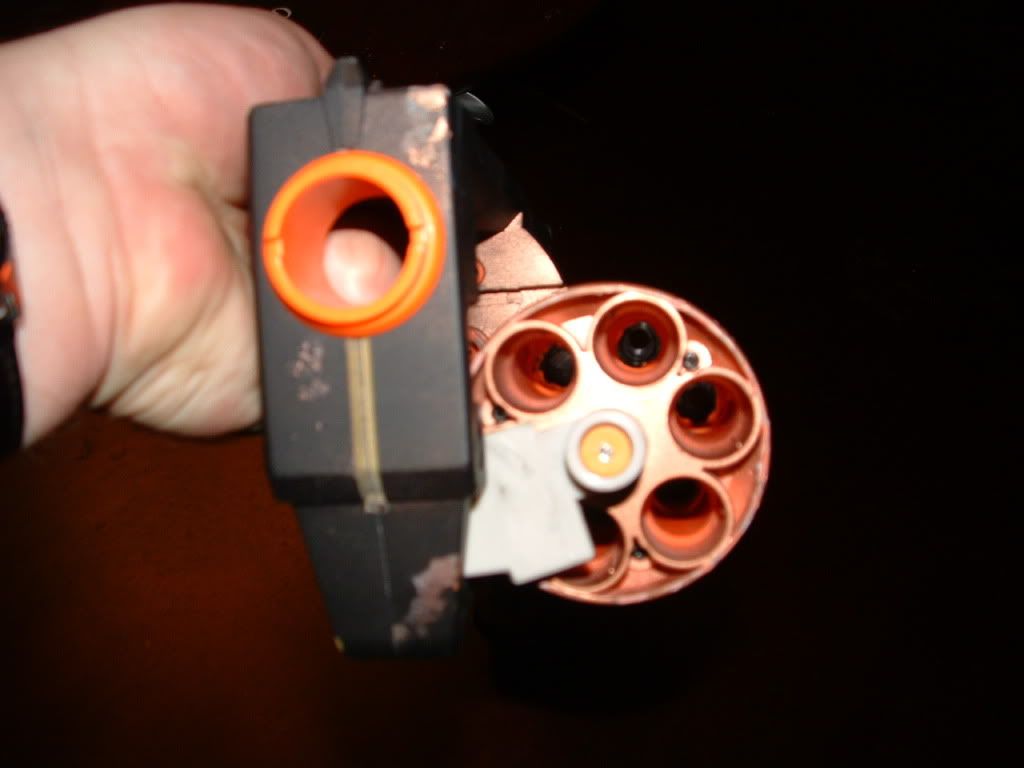
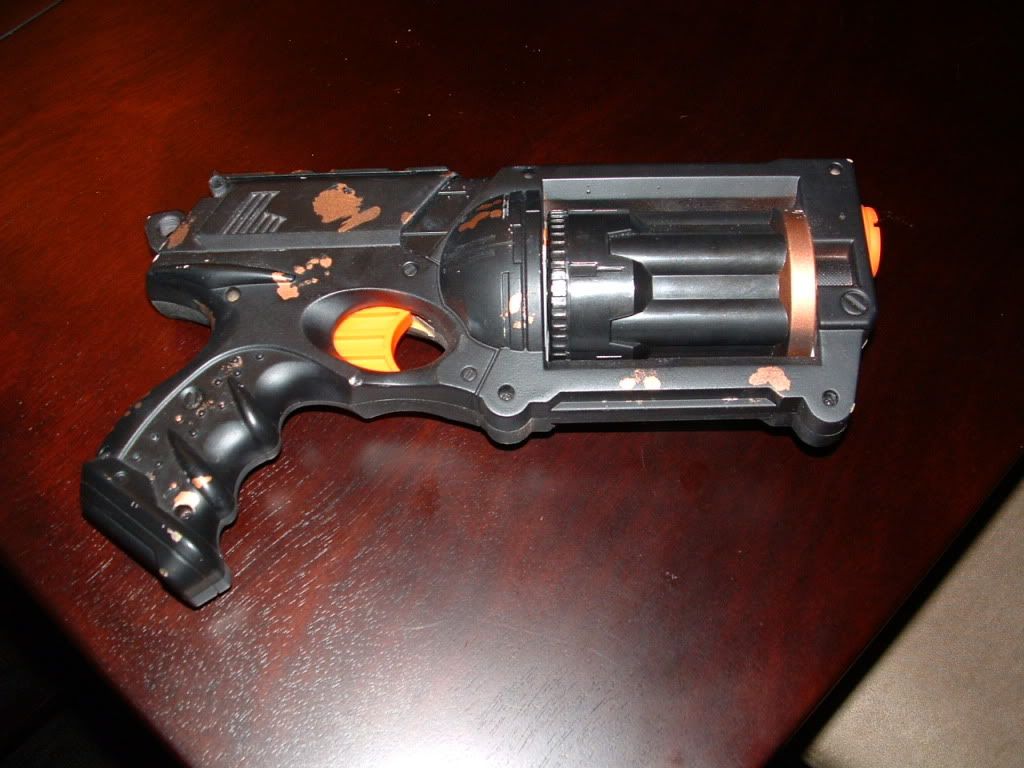
Here's my Maverick. I need to do some touch up paint, but I removed the air restrictors (I can now get about 35-45 feet) and removed the cylinder block. Third pic explains what that means.
Last edited by ArkaiHalon; 08-07-2009 at 06:33 PM.

I'll post my super secret and super awesome blasters once I finish painting them up. Unless any of you are over on the Mercs site. You might spy the progress thread.
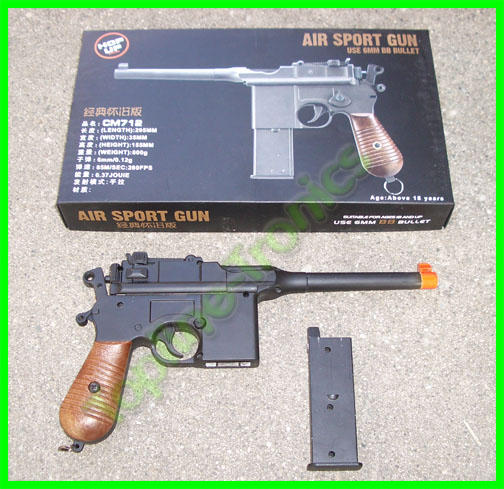
Here's my finished metal airsoft Mauser conversion to a DL-44.
It started out like this:
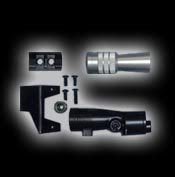
Then I bought this kit from Blast Tech:
Unfortunately, I used this pic as an example when I drilled holes for the piston halves:
Then later I decided I didn't like that position and filled in the original holes with JB Weld and drilled new ones in the center of that part. I also didn't like the look of the shiny, sort of irridescent looking grips. I know there's real wood that looks like this, but those just looked too fake.
I tried putting the flash hider onto the short part of the barrel that part of the frame, so I wouldn't have to cut down the end of the barrel that comes off, but it was too fat due to the barrel taper, I would have had to find some copper tubing or something for the set screw on the flash hider to screw down on.
I finally had some time to work on this after finishing some projects for other people. My intent right from the start was to put an LED in the barrel. I didn't want to do sound, because that would be a lot more work, I wanted to keep it fairly simple.
The first thing I did was take apart the magazine. I had the idea to cut it down and house the N cell battery pack inside. But once I saw all the metal I'd have to remove inside it to get the batteries to fit, I decided it would just be easier to make a new fake magazine out of some sheet styrene that I had.
After I made that, I took apart the Mauser. Fortunately, everything is attached to the left side of the frame, so the springs and parts didn't go flying everywhere like I was initially afraid they would. Here's what the inside looked like:
There's lots of empty space in front of the trigger to mount the momentary switch that Do-Clo sent me last year before Tim started carrying the small momentaries that are now in the shop.
I made an overly-complicated mount for the switch using a cut down steel mirror bracket sandwiched between some pieces of styrene with JB Weld holding it all together. It's held to the frame by a black button head screw and nut, and even more JB Weld, I didn't want it to move.
After that JB Weld cured over night, I attached the scope mount (I added a second screw, because it kept pivoting on the single screw that came with the kit), reassembled the gun and used more JB Weld to attach the barrel tip and fill in the seam.
I borrowed a few bottles of acrylic paint from a friend to use when I weathered parts of the blaster. While the JB Weld on the barrel was curing, I went to work on the grips first, I couldn't wait to get rid if the shiny fake look of them.
I sanded the edges somewhat roughly, then took some finer sand paper to the areas where a right hand would be gripping it. Then took a fine paint brush and darkened the grooves and indented areas for the screw holes, then did a light wash of black over the hole grips. Now they looked like worn, old dirty wood, just the look I was going for.
The scope is a resin copy of an old M19 tank scope made in 1941 that's black painted brass. Here's a real one:
My resin one was a nice shiny black. I wanted to give it a look like it was so worn and well used that the black paint was now very thin and the brass was starting to show through, and pretty well worn off of all the high spots. I used a color called Molten Bronze to achieve the brass effect, putting a thicker layer on the high spots and giving the whole thing a light wash, except for the low spots that would get very little wear. Then I sprayed it with a matte clear once I was happy with it.
I wish my crappy camera could pick up the details of what I did. I may try and borrow a better camera for some better photos.
After the JB Weld for the barrel cured, I sanded the seam and filled in a couple spots with some glazing putty, then cleaned off the frame with alcohol, because I used WD-40 when I tapped a few new screw holes, then painted the frame a flat black.
While the paint was drying I weathered the flash hider using a little more thinned black acrylic paint in the grooves. The "business" end has real carbon on it, but I'm not telling how I did that.
After I let the paint on the frame dry for a few hours, I sanded some of it off of the high spots. It needs a bit more weathering to match the rest of the weathered pieces, but I'll let that happen more naturally.
Here it is fully assembled:
And the main reason I wanted a metal airsoft Mauser I could take apart:
It's just a 5mm Superbright LED. I didn't want it crazy bright and blind anyone like they were looking into a Luxeon saber with no blade in it.
And here's the fake magazine that holds the N cell battery pack:
Hope you like my project.
Now, I need to finish my X-Wing pilot costume so I can start carrying it to Conventions and Events for the Rebel Legion.
Last edited by Jedi-Loreen; 08-13-2009 at 07:24 PM.
In order to see the Light,
you must sometimes risk the Dark.
TCSS MODERATOR
BLUE 8 Ready to ROCK and ROLL!

Looks great, nice job!
New to the forum: READ, READ, READ! it's the best way not to get flamed.
Time for a kirby dance <('-'<) (><) <('-')> (>'-')> (>'-'<)<('-'<) (><) <('-')> (>'-')> (>'-'<)

Great job, Lori! You are a master!
Thanks, guys.
In order to see the Light,
you must sometimes risk the Dark.
TCSS MODERATOR
BLUE 8 Ready to ROCK and ROLL!

That looks fantastic Loreen! I considered doing one of those myself but ended up breaking the barrel of my plastic mauser when I tried to mod it. I'm just going to stick with making an e-11 to go with my Luke ANH Costume.
Psab
Follow Your Bliss
 Posting Permissions


 Reply With Quote


Bookmarks