Very nice! That is a sick polishing process you described above... very nice work, I admire your patience


Very nice! That is a sick polishing process you described above... very nice work, I admire your patience
"Run when you have to, fight when you must, rest when you can."


Thanks again all...I wasn't sure how well the polished look would go over (I just do what I like). I eventually want to play with doing a weathered one but that will be on down the road. I haven't read up on how to do that yet so I have a lot of studying to do before I attempt it.
check the post just above yours. I describe it pretty well (I realize you probably posted from the first page so you probably didn't see that). Not being rude just don't want to type all that out again lol.Originally Posted by Lonewind

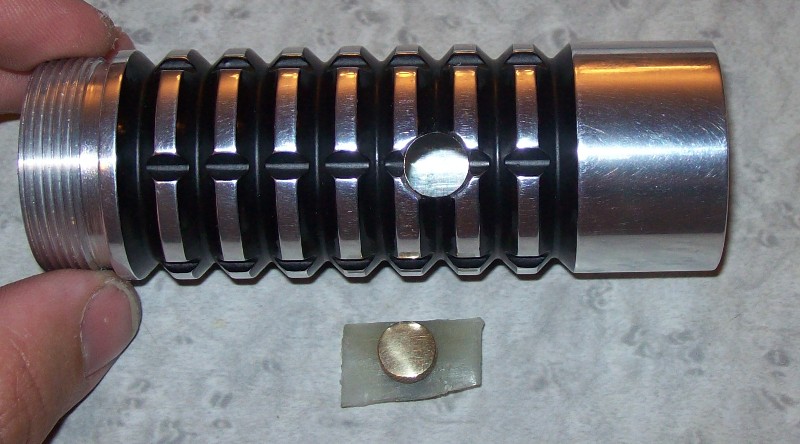
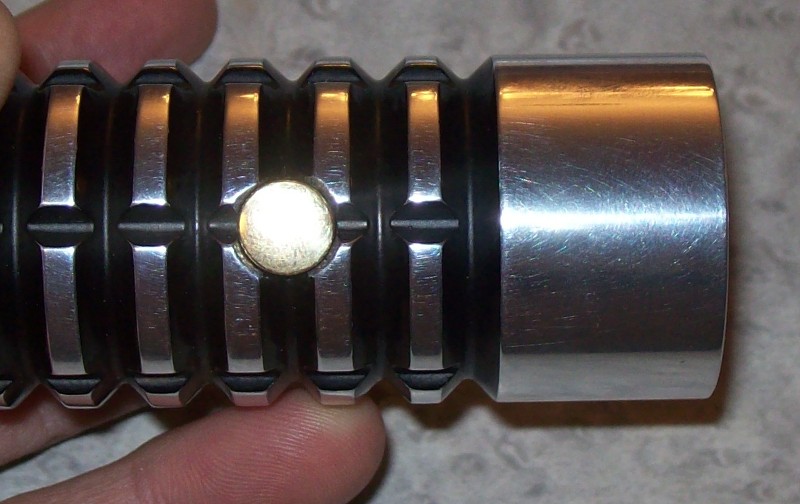
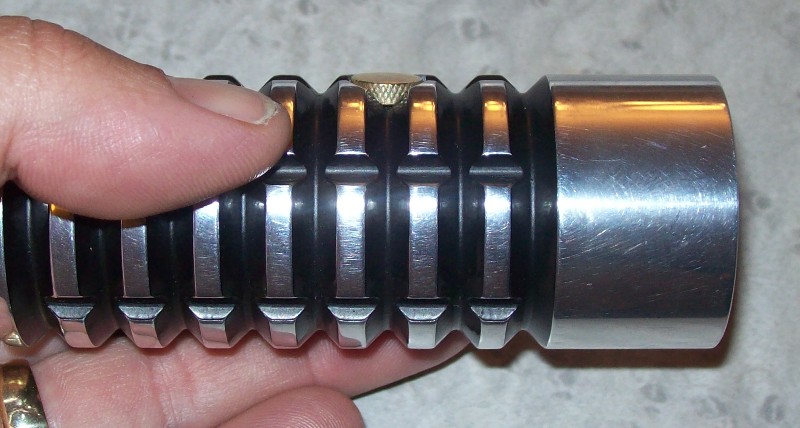
Well the brass is raised but in recessed slots. That MHS piece is the piece that Tim originally had the grip separators that came with it so that when you put the rubber T grips on it they would be flush with the separators. I bought it thinking I could do something with it even though Tim doesn't sell the separators any more. I originally got a round rod I was going to use but when I ran across the square bars I went that route. They are 1/8th square and the milled slots in the piece is only about 1/32nd deep or a little more so most of the bar sticks up out of the slots. The slots are a little wider than 1/8th.
I really like that piece and wanted to buy another one or two but they are not available anymore and I don't think Tim is going to carry them anymore either.
OOH SHINY

Whoa, terrific hilt... I like it a lot. Congratulations for pulling off such a beauty!
Only you can say that without any pride.
Got a Question? There's a thread for that...
~Do what you can, with what you have, where you are.~Teddy Roosevelt
SollusVir everywhere else... FXsabers, Youtube, etc...
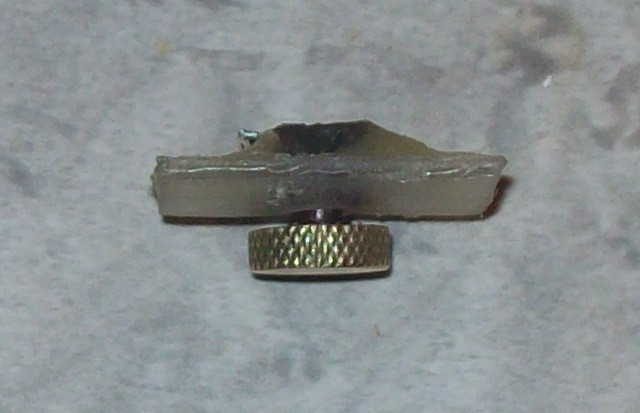
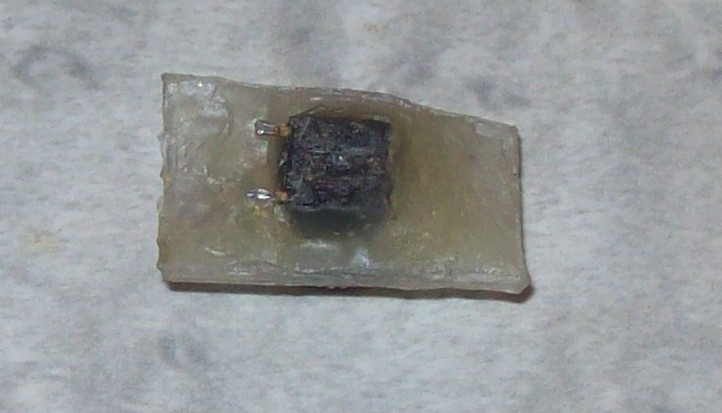
quick little update here. I was never really excited about the button. I didn't like how it stuck up and it felt flimsy so I decided to recess it. Since I am using a tactile switch I had to make a little mount for it. I just cut a piece off of the extra length of a blade and used a plastic epoxy (loctite plastic bonder...its good stuff) to epoxy the switch to the plastic piece (its not pretty but it should hold fine). Then I epoxied the button onto the switch. Next I drilled out the button hole.
I am much more pleased with it this way. Although its not mounted yet because I have to let the epoxy completely cure it is much more secure feeling since it cant tilt from side to side (tight fit in the hole). I also like how it looks flush as well.
Anyway here are some pics of the process in case anyone is interested.
I should have it finished and back together by Friday. I will probably work on cutting my overlay for v2 of the saber while I have it apart since my other extension came in.
Last edited by Zook; 06-03-2009 at 09:49 PM.

That looks great Zook! It fits in nice!

(O_O)>o====7--------------------
Join the dark side!
................When they're sleeping, take the browies and cookies and the IMAX TV and run!!!!!!!!!!!!

A Beautiful Saber. I might have to build one like it. Great use of the milled slots piece. Hopefully Tim stocks them again.
Great job on the button too.

Sweet switch mounting, that is one fancy looking - yet subtle switch!
Great job on the saber, very majestic and flowing, and the new and improved reccessed button is inspired - definite improvement and good of you to share how you did it. Nice one!
 Posting Permissions


 Reply With Quote
")


Bookmarks