


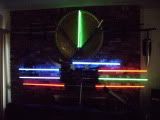
Note that this is just the wiring. When I've finished the whole conversion, I'll post a tutorial. This was one of the first MR Force FX Lightsabers, and used EL technology, rather than LEDs. The blade looked awful when not turned on (the tube is completely clear and the EL sheet inside looks like a loose, rolled-up length of paper), and was generally creaky. It apparently had a variety of problems, but since it is the only FX version of the saber used by Anakin in Episode II, it remains in high demand. I got hold of one that did not light up for a pretty good price, and decided to try to convert it to a Luxeon III. In terms of wiring, this was surprisingly simple. The most intimidating thing, apart from the clunky, alien-looking EL board, is the 6aa battery pack: 9 volts!
As it turns out, only the EL driver requires the 9 volts; the sound board gets only 6 volts, and works fine with just 4.8 volts. The sound board is the most compact of any I've ever seen, and is disk-shaped, so it uses space in the hilt efficiently.
The first thing you want to do is check out Rath Miran's Anakin AOTC Disassembly Tutorial.
After you've dismantled the saber, you want to remove the battery pack. This just requires a careful application of violence (or a Dremel). Just be careful not to damage the sound board at the top end or the speaker at the bottom end.
You're going to replace the battery pack with a 4aaa battery pack. I suppose you could use a 4aa pack, but I prefer the smaller, more space-efficient 4aaa pack. You can also scrap the original speaker and use this battery/speaker-pack. The speaker grille from the Anakin saber fits perfectly on the end of this pack, and is even held in place by the speaker's magnet.
Next thing you want to do is chop off the EL driver.
You can discard this or use it as a paperweight. (It's heavy!)
Next, you want to remove the motion sensor from the tip of the blade. (Yeah, it's in the tip of the blade.) Since the six-year-old glue is probably brittle by now, it should not be too difficult to pry off the end cap of the blade, in which the sensor is housed. The wires--more like a cord, really--leading to the sensor are thick and a bit odd, but you'll have to shorten them considerably, and once you've cut it and stripped the ends, you'll see how it works, and should able to reconnect them.
The two yellow leads from the switch will connect to the negative lead of the Luxeon III and the negative lead on the sound board (which was severed from the EL board).
The positive lead from the Luxeon III is joined to the positive lead from the battery. (The sound board and LED share the same positive lead.) You can do this either by attaching directly to the battery wire, or, if you want to be neater about it, you can solder it to the positive post on the top side of the sound board. (Ask me if you don't know which one I'm talking about.) So here's the quick-and-dirty diagram.
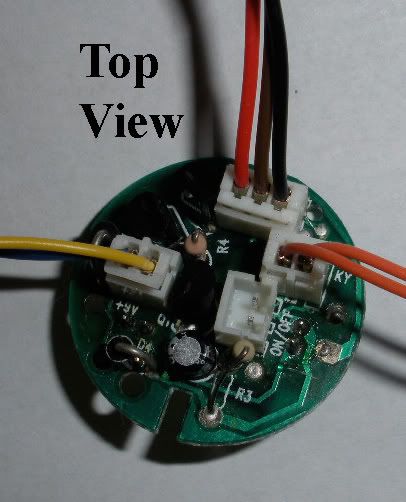
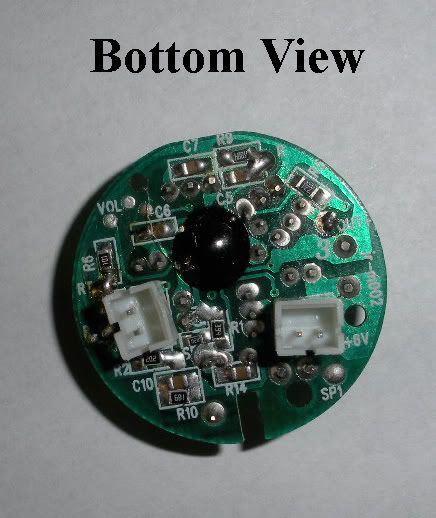
And here are close-ups of the sound board.
Top:
Bottom:
One problem with this set-up is that light and sound don't match up perfectly. When you turn the saber off, the Luxeon goes out instantly, but the sound board goes through a surprisingly long "ramp-down" effect. This is kind of lame.Adding a latching Corbin Luxeon driver might alleviate this problem.
Hope someone finds this useful.
EDIT: Before you proceed, you should know that I had little luck with this conversion (despite a great deal of effort, as the thread shows), and ultimately abandoned it. Just a warning.


 Reply With Quote


") I'm in no hurry to try another conversion on the second.
I'm in no hurry to try another conversion on the second. ) Either way, after watching your video, it suddenly occurred to me: I could simply drill two holes in the blade holder right beneath the existing red and green "lights," and let the light from the Luxeon shine through. That was a real "duh" moment. Like they say, the simplest solution is often the best. Of course, the blue light would probably make the red light purple, but it would be better than nothing. It's not too late for me to give this a try, but first I need to fix my blade holder in the hilt more firmly (not to mention doing something about the motion and clash detectors, and the sound so quiet it could pass muster with a librarian).


Bookmarks