Let me know how it turns out!


Let me know how it turns out!
Any intelligent fool can make things bigger and more complex. - Albert Einstein
Reaganomics not Obamanomics


What? you want me to do all the work?Don't you want to try something different and cool too?
I have an old MR vader hilt that I sanded the outside layer off, I'll try it on that... I'm pretty sure it's copper.
Well I dont have the extra scrap lying around to buy anything so unfortunatly I cant try it.
Any intelligent fool can make things bigger and more complex. - Albert Einstein
Reaganomics not Obamanomics
Just giving you heat

This is a great idea Eastern... you should HELLA do a video tutorial on this the next time you build a saber that has some or lots of weathering to be done...Originally Posted by eastern57

BTW all, if I haven't mentioned it, many of Eastern's sabers will show up as "cameos" in the upcoming new CF release vid... it's gonna be fun.
~~ GREYTALE NOVASTAR (Writer, Director, Choreographer, Sound Designer, Actor, Saber Designer, Vocal Artist)
~~ Balance of Power, EP I: "Into The Lion's Den"
~~ Balance of Power, EP II: "Ashes of The Phoenix"
~~ The Crystal Focus Sound CD Compendiums... are HERE! ~~
~~ Nova & Caine's Staged Combat System... comin' SOON!
~~ Crystal Focus Wiring Guide

Hey Eastern,
Did you ever have any issues with fumes or contamination to your oven when baking the clear coat epoxy?

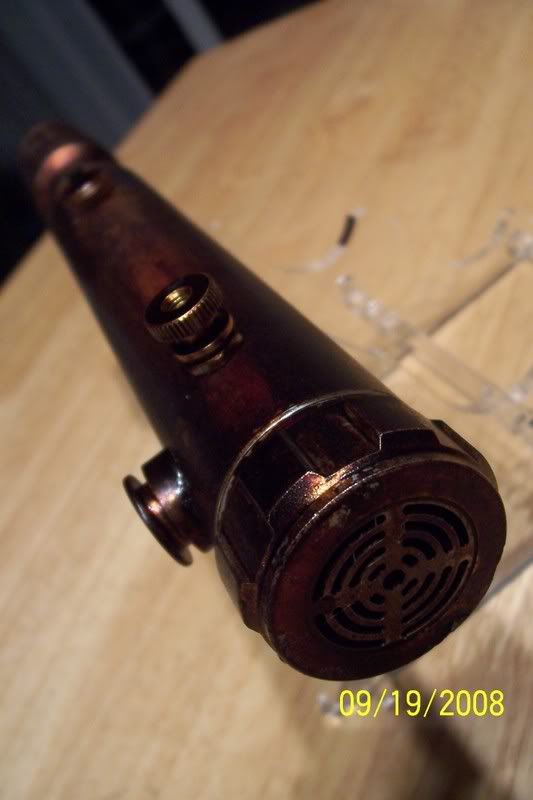
The kill switch seen here is a brass knob. I used regular olive oil and 3 "bakings" to get this finish. It's the one near the covertec knob
butthurtz is a path to the darkside.
Fear leads to anger. Anger leads to butthurtz. Butthurtz leads to suffering
Yes, you mentioned it. And every time you do, my head gets a little bigger
Excellent question to bring up. No, not with epoxy, nor with enamel paint...
BUT, I DID get some funny smells with Rust-oleum Reflective Finish. You know when you're barbecuing and you have to light the coals and let them heat up? Think "pre-heating charcoal with too much lighter fluid"... that smell.

does this work on powder coated or anodized parts?

I tried this a few times, but the effect always looks drippy. I've tried applying thin coats, sanding, laying the piece in the oven at different angles. Always comes out looking drippy.
 Posting Permissions


 Reply With Quote
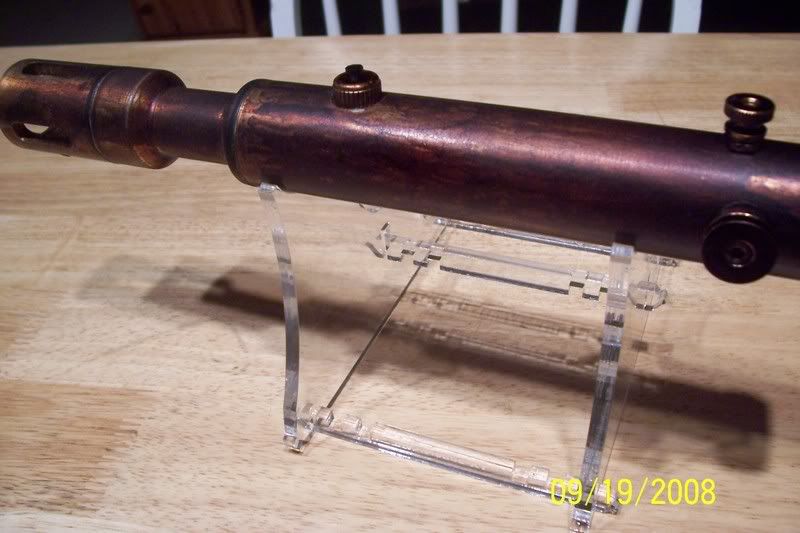
Bookmarks