They'd be more used than say, a coffeee mug or something, I'm sure!


They'd be more used than say, a coffeee mug or something, I'm sure!
Got a question? Start Here. Have you tried the Thread Index yet? Most questions can be answered there.


Oooh. I love that brass saber with the red blade.
I might have to consider attempting to do that if/when I do another saber. (First, though, I'm still waiting on a couple extra parts for my first one!)
Very nice sabers.
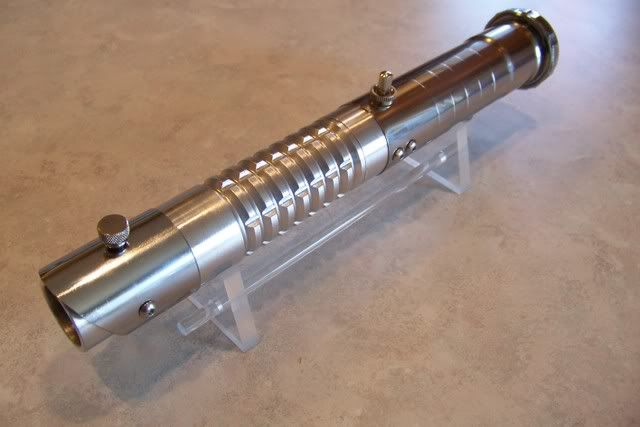
I finished off another of the brass sabers:
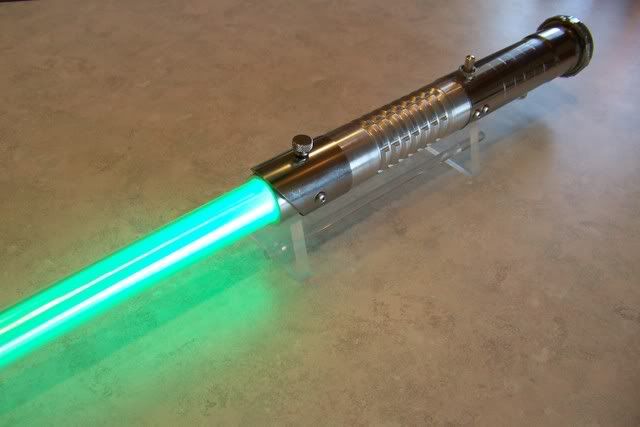
Brass Saber #5 is done!
I replaced the cheap plastic switch with a more expensive, but better looking metal one. It also doesn't cause the saber to power up cycle if you bump the switch like the plastic ones do.
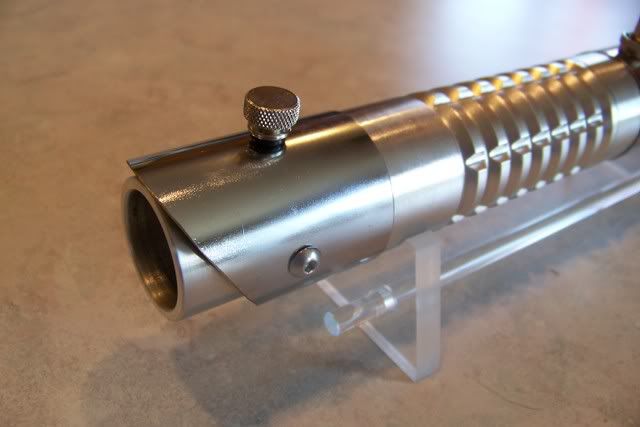
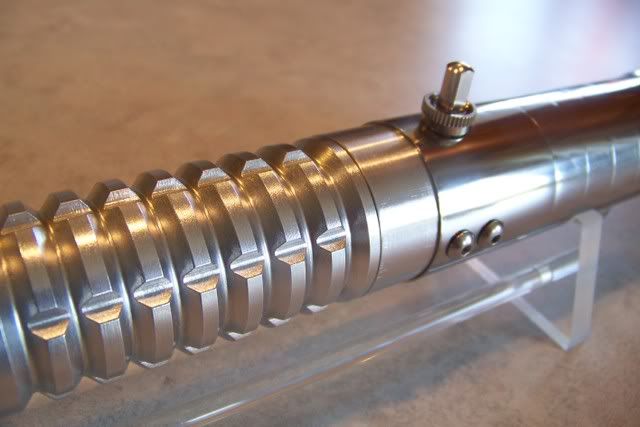
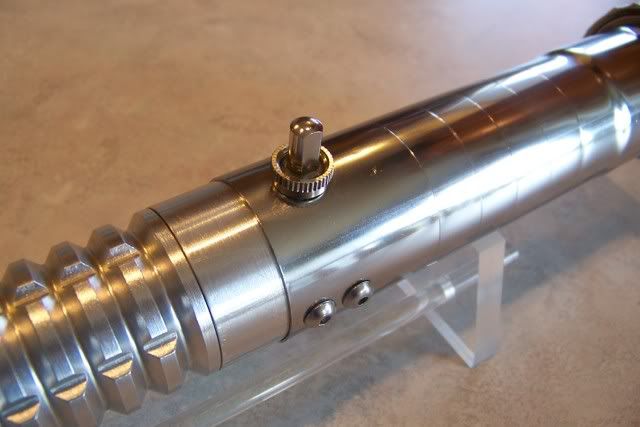
The recharge port is directly beneath the switch. This isn't easy to do, but I managed to get it in there. This is the same as what I did to BS#4 and CS#4. To make the saber rechargeable in the hilt, just install 4 NiMH 1.2v batteries, and get a smart charger and plug adaptor from the Store. The difference bewtween this one and BS#4 is the grips. This saber has a v-grooved ribbed MHS extension, and features 3/8" spaced grip marks on the rear of the hilt.
To access the batteries, you just unscrew the nut from the hilt, remove the washer/foam/strainer, pull out the speaker/resonator assembly....
pull out the battery pack by pulling on the blue wire attached to it, and change the batteries! Reverse the process to re-install. Very simple! I do all of my sabers like this.
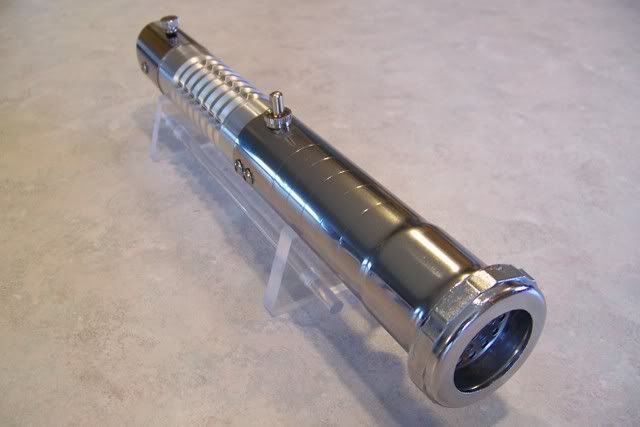
I also finished off Chrome Saber#4:
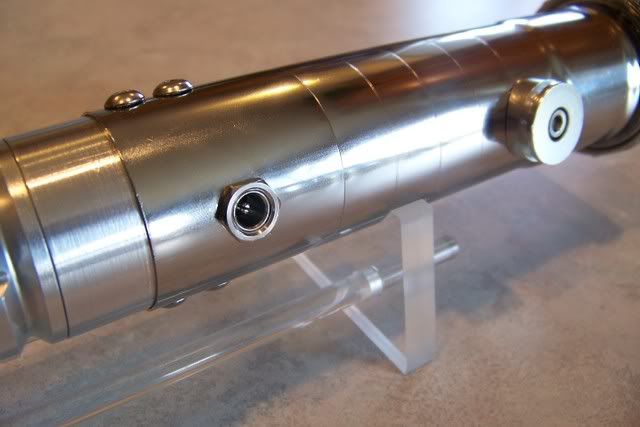
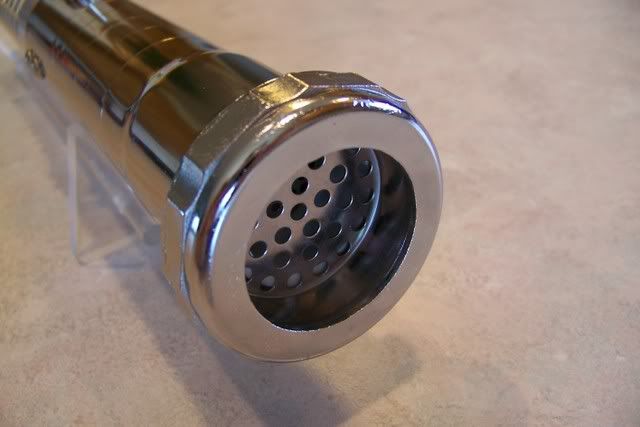
I think it turned pretty nice! It has the recharge port wired to also act as a kill switch during recharging, has the improved metal push button switch from the hardware store, and also has a recessed speaker grille. I did this by using the same laundry strainer I used in the MPS pommels of BS#2 & 3, except I didn't cut it up like those two. It just fits in there with rubber gasket around it and is held in place by the nut. The nut I actually got at Lowe's, and looks like it is intended to reduce a 1.5" plumbing drain down to a 1.25" tailpiece. Regardless, it looks cool on the saber as a pommel/end cap! Sounds good, too....I shot short video of it, but haven't uploaded it yet. I made the blade for this one and also for BS#5 during a Tornado warning yesterday. I had no idea how close the storm came to my house until I was on my way home from work this afternoon! Trees and roofs ripped off less than 2 miles from house!
EDIT:
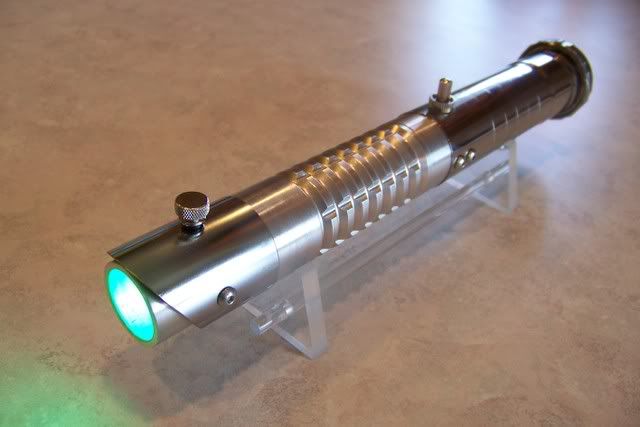
Here's BS#5 with it's blade:
Both sabers use a 36" (34"exposed) thin-walled polycarbonate blade with internal sanding and about 5 feet of cellophane wrap.
Last edited by Jay-gon Jinn; 06-07-2008 at 04:52 PM.
Got a question? Start Here. Have you tried the Thread Index yet? Most questions can be answered there.
I love the Chrome Saber it looks sweet


and very shiney!
Full of Win & Awesome. Current ranking, 10 internetz.
Sponsoring internetz increases levels of Win & Awesome.
Barmic youve got me started on something now

love the emitter shroud on the chrome. ***eh!
As usual, really nice stuff Jay!
I have developed a newfound respect for the quality and precision of work you do with these sabers - I just built two very simple, basic sink-tube sabers and it was hell! It's very difficult for a noob to get a nice cut and exact placement of holes. Luckily, they turned out functional, which is what I was aiming for, if not beautiful.
My MHS:
After a very long hiatus, I decided to finish off BS#7 today!
I started with the wiring ofthe MR Luke Skywalker ROTJ soundboard:
I added some scoring lines to the emitter:
This saber also has one of the metal switches I get at my local hardware store:
I put scoring lines on this one at about 1/4 of an inch apart to simulate the rear grip:
I slid all the electronics into the hilt and put 'er together:
Here you can see the recharge port and the CT knob:
Like the rest of these brass sabers, to change out the batteries, unless you're using NiMH rechargeables, just unscrew the end cap:
Then remove the speaker/resonator assembly:
Pull the battery pack out by tugging gently on the orange wire:
And Voila:
I happened to have a red led mounted, so I used that to start off with:
It also features the TCSS quick-Change LED System:
One advantage this has over BS#6 is that I split the emitter shroud form the sleeve. I found it to be a challenge to swap out the led, so I modified this saber. Simply unscrew the emitter, and remove the lens assembly:
Select the desired color of led:
And re-assemble, then you're good to go:
I hope everyone enjoyed reading about this build as much as I did doing it! This is the last one one for awhile, as I need a bit of a break from building. Maybe after the OT at work slows down a bit.
Last edited by Jay-gon Jinn; 07-07-2008 at 01:12 PM.
Got a question? Start Here. Have you tried the Thread Index yet? Most questions can be answered there.
Not to double post, but I just realized I never posted anything about BS#6! It was finished about a month ago, and turned out pretty good too:
This one, like BS #'s 4 & 5, features the optional recharge port, as well as TCSS's quick-change led kit. Changing the led is a bit of a job, though, as it's hard to get hold of the blade holder. It is shown there with a Cyan bin 6 led, but i also have a red Lux III that I could pop in there as well. It uses 4-AA batteries, just like the ones before it, and has an upgrade to a TCSS Premium speaker, in case it ever gets a better soundboard, which btw, is an MR Luke Skywalker ROTJ.
Got a question? Start Here. Have you tried the Thread Index yet? Most questions can be answered there.
 Posting Permissions


 Reply With Quote


Bookmarks