Page 1 of 2 1 2 LastLast
Results 1 to 10 of 17

Thread: A work in progress.

  1. #1
    Council Member
    Jedi Master
    Obi-Dar Ke-Gnomie's Avatar
    Join Date
    Jul 2007
    Location
    Ontario, Canada
    Posts
    1,578

    Default A work in progress.

    I know how much you folks like pictures, so I thought I'd share what I have done so far.

    Let's start with the basic parts list:

    Blade holder #3
    Hilt #1
    1" thick walled blade with 4x wrap
    3w Royal Blue LED
    Covertec button
    Sink tube
    Armitage Shanks handwheel


    I cut the sink tube with my next saber in mind. The extra piece will be sanded down to the brass and polished for the emitter shroud.

    I have some nice thin neoprene with a peel and stick backing, and my original plan was to cut several curvy shapes out of the sink tube and cut the neoprene to fit in those areas to make a cool looking grip. I decided that that was a little too complex and decided to keep it simple.

    I found a piece of thin black leather with a really neat grainy texture. I'm going to cut it to the shape I want, (just one big piece instead of several smaller ones,) and just glue it to the outside of the sink tube.

    I still have lots to do, but it's cool to see it taking shape. Stay tuned for more pics.

    It looks so awesome outside after dark! My neighbours must think I'm nuts!

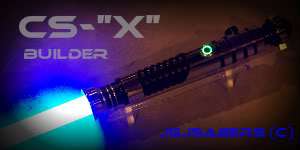
    Here are some shots of it lit:


  2. #2

    Default

    Great work... that shroud is beautiful! I wish I had more patience with that stuff.. haha

  3. #3
    Council Member
    Jedi Master
    ArkaiHalon's Avatar
    Join Date
    Aug 2007
    Location
    looking for a diet DP
    Posts
    1,294

    Default

    very nice. very nice indeed.

  4. #4

    Default

    Nice work on the shroud!

    Got a question? Start Here. Have you tried the Thread Index yet? Most questions can be answered there.

  5. #5
    Council Member
    Jedi Council Member
    Jedi-Loreen's Avatar
    Join Date
    Dec 2005
    Location
    Not of this Earth
    Posts
    6,077

    Default

    Quote Originally Posted by Jay-gon Jinn
    Nice work on the shroud!
    I'll say! When I've done things like that for EL sabers I've built, the end piece was just ugly scrap.

    How did you cut that so cleanly as to have a nice end piece like that?
    In order to see the Light,
    you must sometimes risk the Dark.
    TCSS MODERATOR


    BLUE 8 Ready to ROCK and ROLL!

  6. #6

    Default

    my guess would be......very carefully.

    I have a similar "S" curve in mind and take heart that you were able to do it so cleanly.....keep the pics coming.
    All things a beginning have.
    As all things do an ending.
    Be not too hasty from one to the other to move, or much will you miss, along the way.

  7. #7
    Council Member Novastar's Avatar
    Join Date
    Mar 2007
    Location
    San Jose / San Francisco, CA
    Posts
    4,082

    Default

    Great job, Obi Dar!!

    Loreen, as to cutting sink tube, it's not that bad if you simply draw a line of exactly what you want, then go nuts with the shears by cutting about 1/4" ABOVE your line (in other words, get the general shape, but who cares if it looks nice... yet).

    Then--use something more precise to cut if you have it... and try to make one long, clean cut, still leaving just a tiny, tiny, little bit near the drawn line.

    Finally, use a file or hand drill w/ grinder bit adaptation to carefully and accurately lay down the law over the sharp areas, clunky edges, and all that. Unless you *WANT* sharp points and edges, then you can just leave them in.

    I don't know if that helps you or anyone else, but it is what I did for my simple Flange v3 sabers and they came out fine.
    ~~ GREYTALE NOVASTAR (Writer, Director, Choreographer, Sound Designer, Actor, Saber Designer, Vocal Artist)
    ~~ Balance of Power, EP I: "Into The Lion's Den"
    ~~ Balance of Power, EP II: "Ashes of The Phoenix"
    ~~ The Crystal Focus Sound CD Compendiums... are HERE! ~~
    ~~ Nova & Caine's Staged Combat System... comin' SOON!
    ~~ Crystal Focus Wiring Guide

  8. #8
    Jedi Council Member vortextwist's Avatar
    Join Date
    Nov 2006
    Location
    Nebraska
    Posts
    2,328

    Default

    very nice man.


    BLUE 3- Ready

  9. #9
    Council Member
    Jedi Master
    Obi-Dar Ke-Gnomie's Avatar
    Join Date
    Jul 2007
    Location
    Ontario, Canada
    Posts
    1,578

    Default

    Thanks all!

    This is my first Luxeon saber, and it's nice to get the positive feedback from the more experienced builders.

    To do the cut, I just used a cut off wheel on my Dremel. I started cutting 1/8" from my line and got it roughly to the shape I wanted. Then I shaped it with a stone bit and brought it up to the line. Then I cleaned up the other piece and made the line smooth on it too. I probably lost 1/4" or more of material between the two pieces.

    The trick is to take it slow, and take several small "bites" with the Dremel. It took me about an hour to cut and shape the two pieces.

  10. #10
    Council Member
    Jedi Master
    ArkaiHalon's Avatar
    Join Date
    Aug 2007
    Location
    looking for a diet DP
    Posts
    1,294

    Default

    well, it's darn right purty. good work.

Bookmarks

Posting Permissions

  • You may not post new threads
  • You may not post replies
  • You may not post attachments
  • You may not edit your posts
  •