Page 3 of 4 FirstFirst 1 2 3 4 LastLast
Results 21 to 30 of 34

Thread: Weathering. Share your methods and experiences.

  1. #21

    Default

    Well,
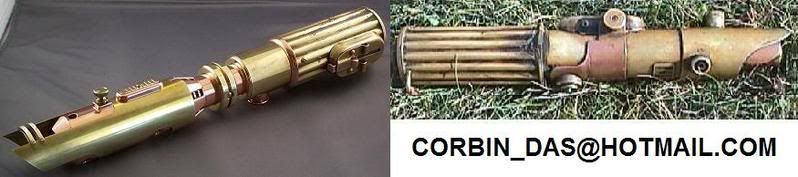
    Several of you may be familiar with my Malius saber. It was the first major weathering job I did. Like the Killer Penny saber, this one is also brass and copper. It also uses the same grip material. In fact, the whole reason the KP got made was the Malius saber had gotten its grip section screwed up by a guy that was supposed to be brazing a threaded plate onto it for me. He got lazy and blasted several holes through through the piece. If that hadn't happened, I wouldn't have searched for another grip section so hard. When I finally found it, I had repaired the original piece enough to be used....so I had a spare.

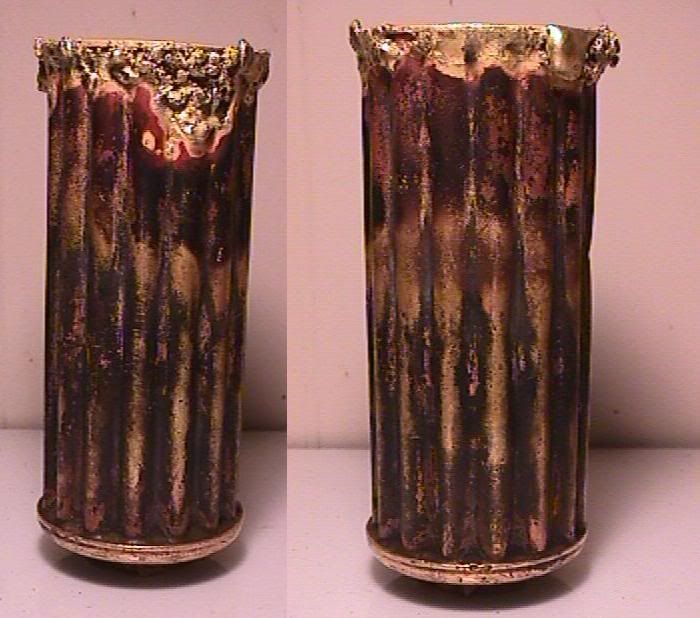
    Here's the original weathering job on the Malius. This is EXTREME weathering though. Meant more for a display piece than something you'd carry around. Think museum artifact:


    This look was achieved by dark (almost black) lacquer that was thinned down and sprayed onto the piece. I then used a pencil torch to scorch the surface of the lacquer in a few places. Not quite to where it would bubble, but almost. Then I used a Scotchbrite pad and lightly scuffed up the areas, removing some of the scorched lacquer. Where I wanted it to be more "clean", I just didn't spray it, or I'd mist it from like 4 feet away.

    Around the activation box, I used pig manure (strong with amonia) and left it on the piece for a couple days. This corroded the brass quite well. During these two days, the saber was burried in my back yard too.


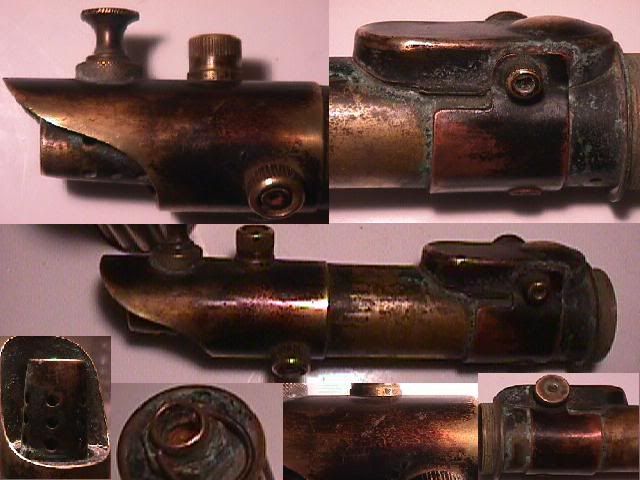
    Here's the grip section that was almost destroyed:


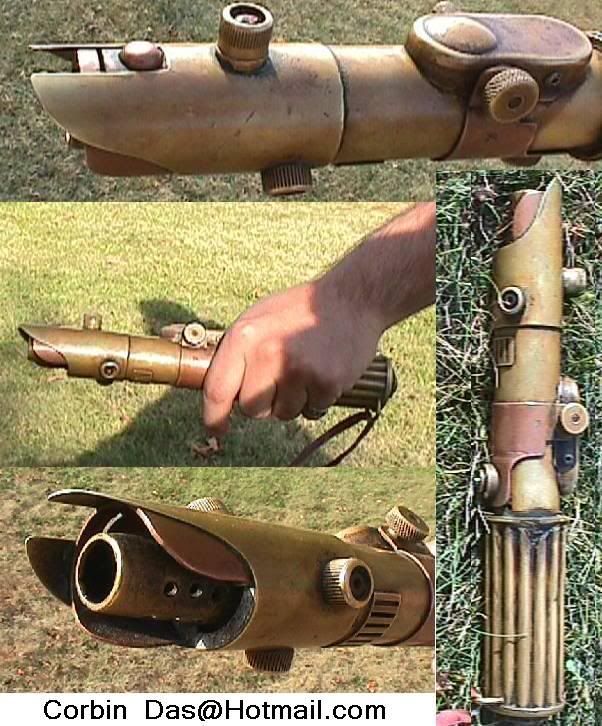
    After handling, much of the weathering wore off and here's what it looks like now:


    Corbin

  2. #22

    Default

    Quote Originally Posted by Corbin_Das
    Around the activation box, I used pig manure (strong with amonia) and left it on the piece for a couple days. This corroded the brass quite well. During these two days, the saber was burried in my back yard too.

    Corbin
    Pig manure? Seriously? What ever works i guess.

    A weathering effect I have used (mainly on miniatures) is a mix of 1 part black paint and 3 part windex. Shake well and spray on the piece give it a few minutes to dry a bit. Then lightly brush it off with steel wool. Make sure you have some score marks and details for the paint to fill.
    "I cannot change the past. I meant to do good. But the dark side is slippery, as you yourself should know. I tried to hide. I tried to die. And finally, I tried to atone." - Ulic Qel-Droma

  3. #23

    Default

    Its not saber related but its weathering.

    I forget who it was but they took there jedi robe and rolled it up and tied it up and tossed it in there horse barn for a while then washed the smell out. Turned out pritty good.
    Any intelligent fool can make things bigger and more complex. - Albert Einstein

    Reaganomics not Obamanomics


  4. #24

    Default

    Mine is simple. Just an idea in the initial stages, since I don't have my parts yet. Steel wool, and three to four months for the whole hilt. Maybe a little longer for the extra pieces I'll (eventually) get. Maybe some sand-paper and black paint and a little grime for the 'tarnish'.

  5. #25

    Default

    The thing I've noticed is that if you "artificially" weather a saber, the easier it is to rub it off with handling. Even natural weathering can work this way. The technique Ace used to weather the copper on the KP saber seems to be pretty resistant to handling though. It was a blow torch that discolored the surface. I like how it turned out.


    Corbin

  6. #26

    Default


    The grip sections and emitter were painted black (plastikote) then drybrushed with a dark silver then a light silver. Very thin red/brown paint was then brushed into the cracks to stain them.

    The clamp and sinktap were also painted with black plastikote but when the plastikote was almost dry most of it was rubbed off with a cloth. A few touches of red/brown were put on the clamp, none on the sinktap.

  7. #27

    Default great job

    Exceptional job Scott!

    I particularly like the ribbed section. It looks like very worn metal.

    BRAVO!

  8. #28

    Default

    Okay I know this is an ancient thread But It seemed the place to put this. I took Tabasco hot sauce. in a bottle cap, In a large ziplock with the sleeve for about 4-6 hours and got this.


    Hokey religions and ancient weapons are no match for a good blaster at your side, kid.

  9. #29

    Default

    No worries, this is a good example of when it is OK to necropost. I'm curious, where did you hear about this technique?

  10. #30
    Council Member
    Jedi Council Member
    eastern57's Avatar
    Join Date
    Mar 2008
    Location
    USA
    Posts
    1,958

    Default

    Indeed. Love me some weathered sabers! Nice effect, Ari. Subtle, but noticably aged.

    Do you think it's the vinegar and pepper that helped it along? I ask because I, too, use cooking products on my sabers.

Bookmarks

Posting Permissions

  • You may not post new threads
  • You may not post replies
  • You may not post attachments
  • You may not edit your posts
  •