Page 1 of 2 1 2 LastLast
Results 1 to 10 of 41

Thread: SparrowHawk's "Threnody" KoTOR-Inspired Saber (Lots of Photos!)

Hybrid View

Previous Post Previous Post   Next Post Next Post
  1. #1

    Default SparrowHawk's "Threnody" KoTOR-Inspired Saber (Lots of Photos!)

    Hello SaberWorld! Greetings once again from the Outer Rim (aka the arid Southwest USA).

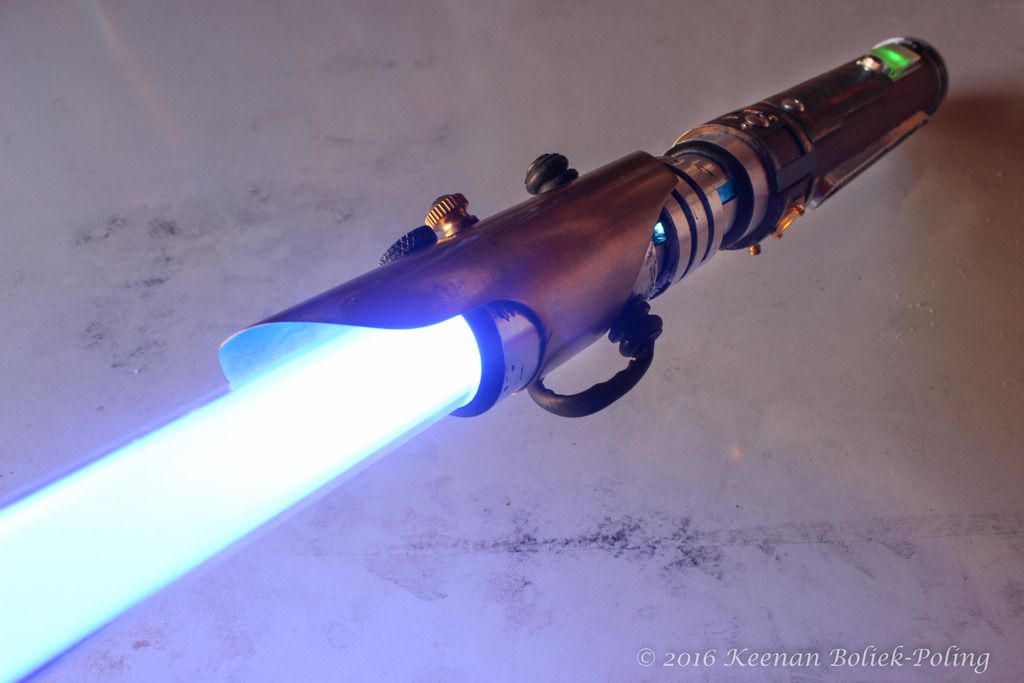
    After many months of designing, puzzling, ordering, building, and re-building, I would like to present my first custom designed saber, Threnody. The origin of the name stems from an old Greek root, meaning "a song of lamentation" or from threnos "to drone, murmur, hum." I liked the fit, and so there ya have it.

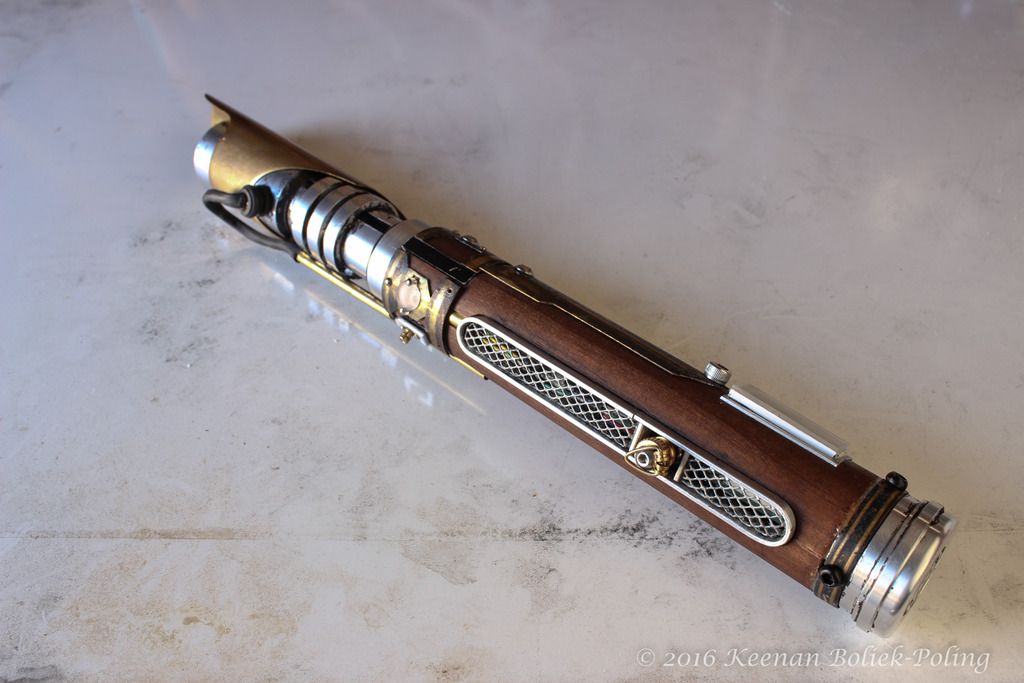
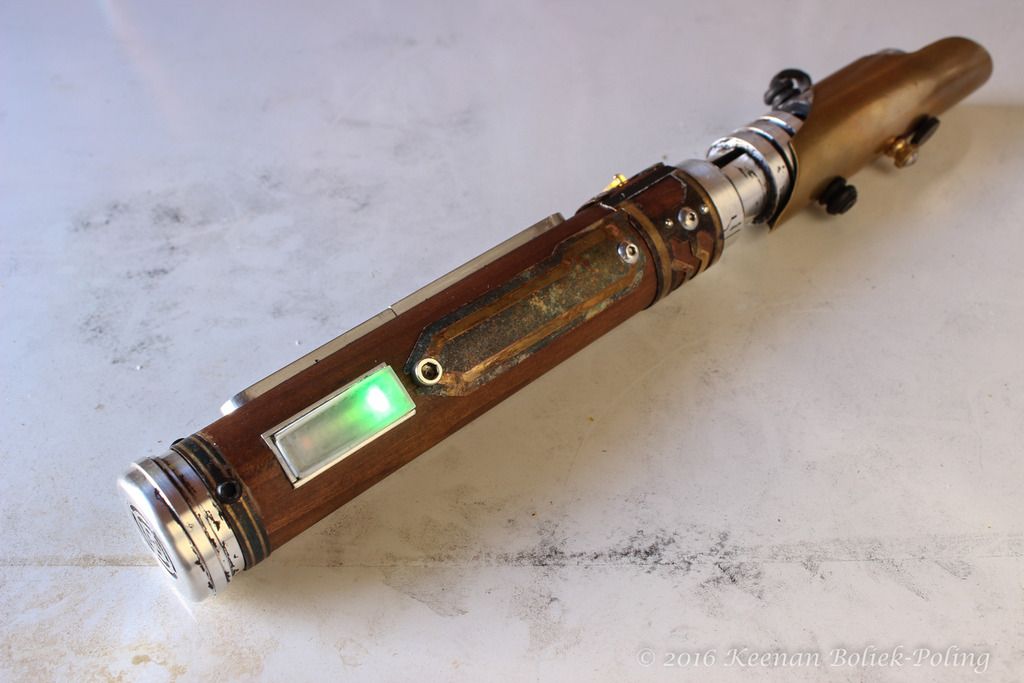
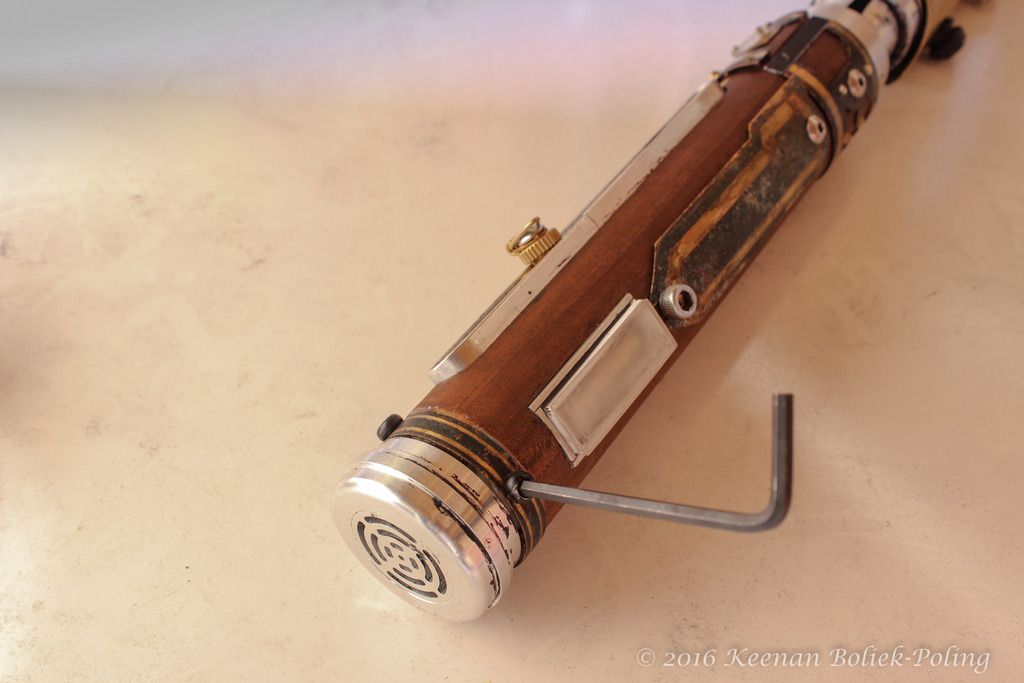
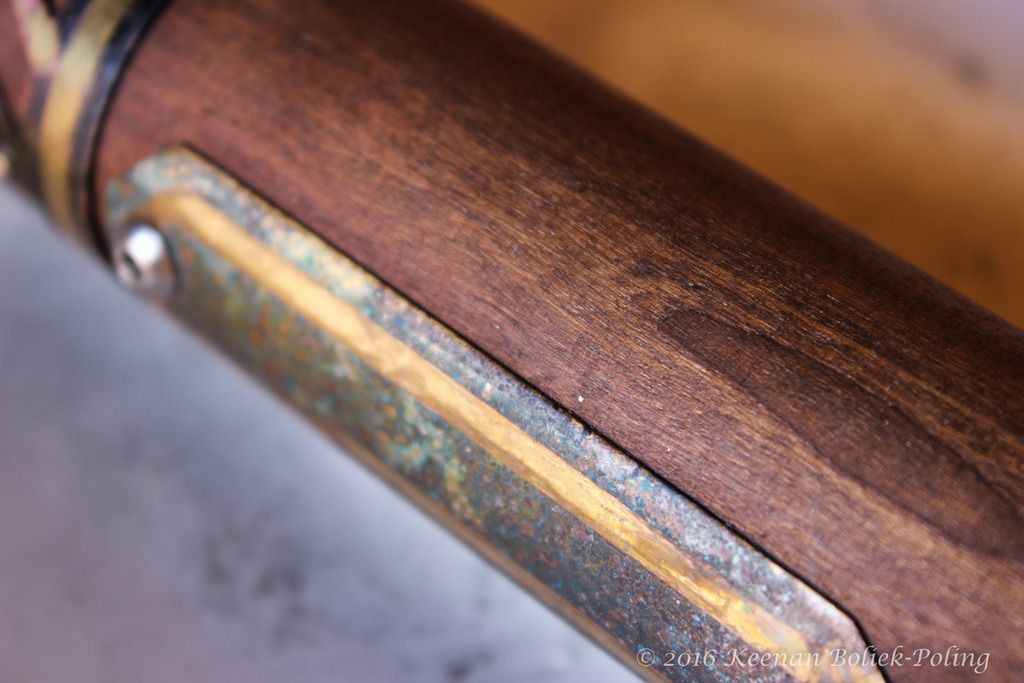
    It may surprise you to know that Threnody is a saber mostly constructed (structurally) from PVC tubing! The PVC has been covered with aluminum veneer and a cherry hardwood sleeve. The tools I used were all hand tools, files, xactos, drill, Dremel, and lots of patience.

    If you're interested about the whole build process, you can check out my WordPress blog, Binary Sunset Design, where I've documented the build log with lots of photos, and check out this post "The Final Steps" that shows how the PVC and aluminum veneer components were made, as well as resources and a dedicated and detailed page for the Petit Crouton v3.5 wiring diagram that I made for the saber.


    During the design, my concept was to create a saber that lived in the Knights of the Old Republic era, perhaps made on some backwater world, on a forested planet by a Jedi who became stranded for some time. So components of the saber have been replaced, repaired, and modified, using materials found from the forest or traded for at the spaceport. Eventually this Jedi takes on an apprentice. Later when on his deathbed, he gives this lightsaber to his pupil, and she then continues the legacy of the saber.

    Might be a bit lore-heavy, but I liked the used, weathered, cared-for quality of the original trilogy, and I think a lot of the magic of Star Wars comes from creating a galaxy that has a lived-in character to it. The props convey the essence of the story, and become characters of their own. I also borrowed some design ques from the saber used by Orgus Din in the Old Republic MMORPG (though I must confess, I have never really gotten into the new OR game much; it's hard to beat the original BioWare game, pesky Gizka and all )


    But I digress...

    The Specs:
    • Petit Crouton V3.5
    • Color Extender
    • 7.4V 14650 Li-Ion pack
    • Power Level Indicator board
    • R/G/rB Tri-Rebel (ordered back when we didn't have the Tri-Crees in the store!)
    • 28mm Premium Speaker
    • 2.1mm Recharge Port
    • R.I.C.E. port, located in crystal chamber (more on that later)
    • Crystal chamber, with amethyst quartz crystal, wired to mirror blade color and FX


    The Materials:
    • Entire PVC core chassis and construction throughout, covered with aluminum veneer.
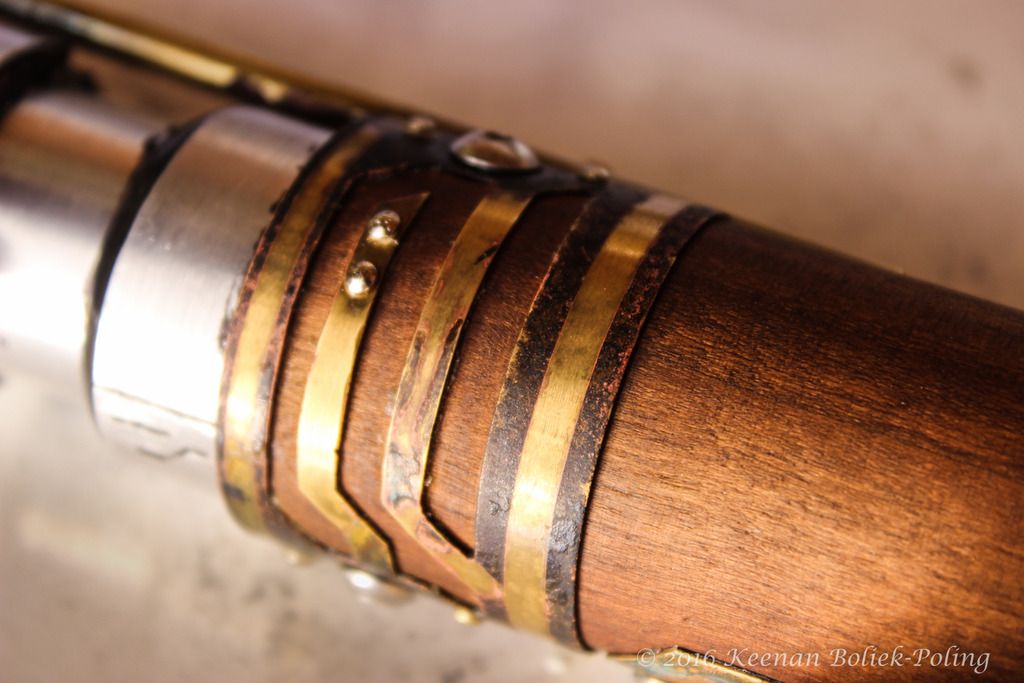
    • Cherry hardwood sleeve for main body.
    • Aluminum detail components.
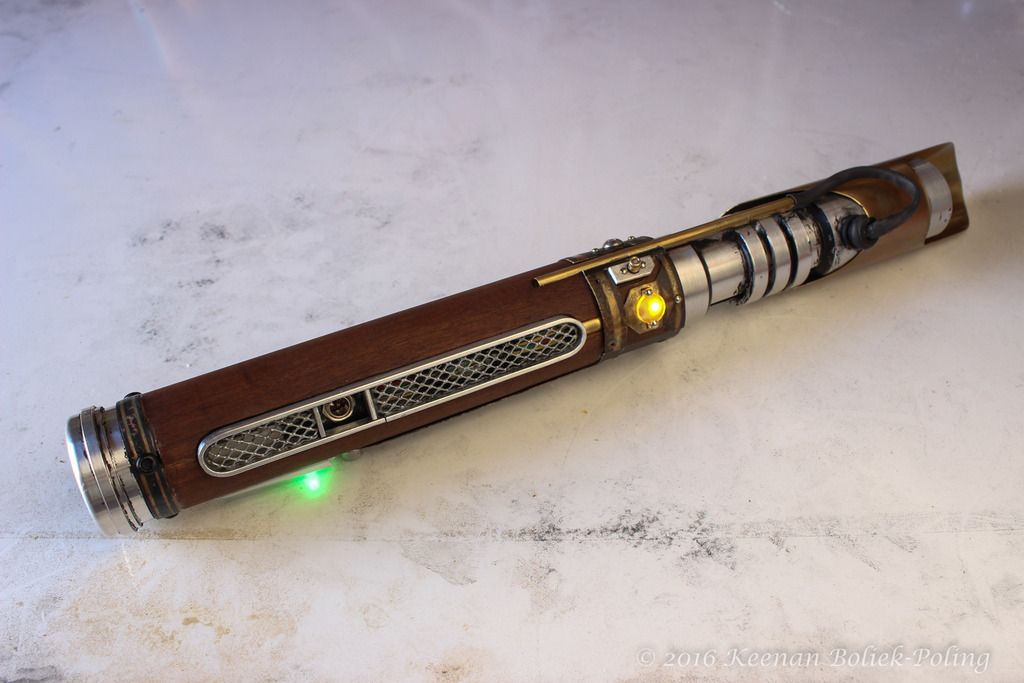
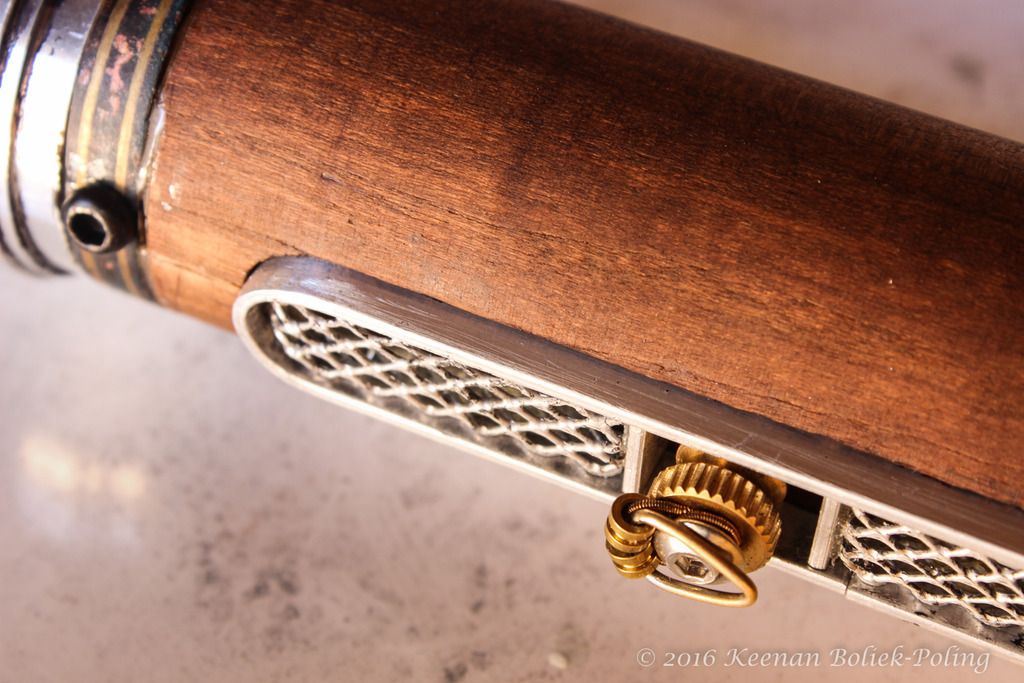
    • Brass switch plate, with custom auxiliary switch and backlit acrylic activation switch.
    • Brass components aged with ammonia vapor patina process.
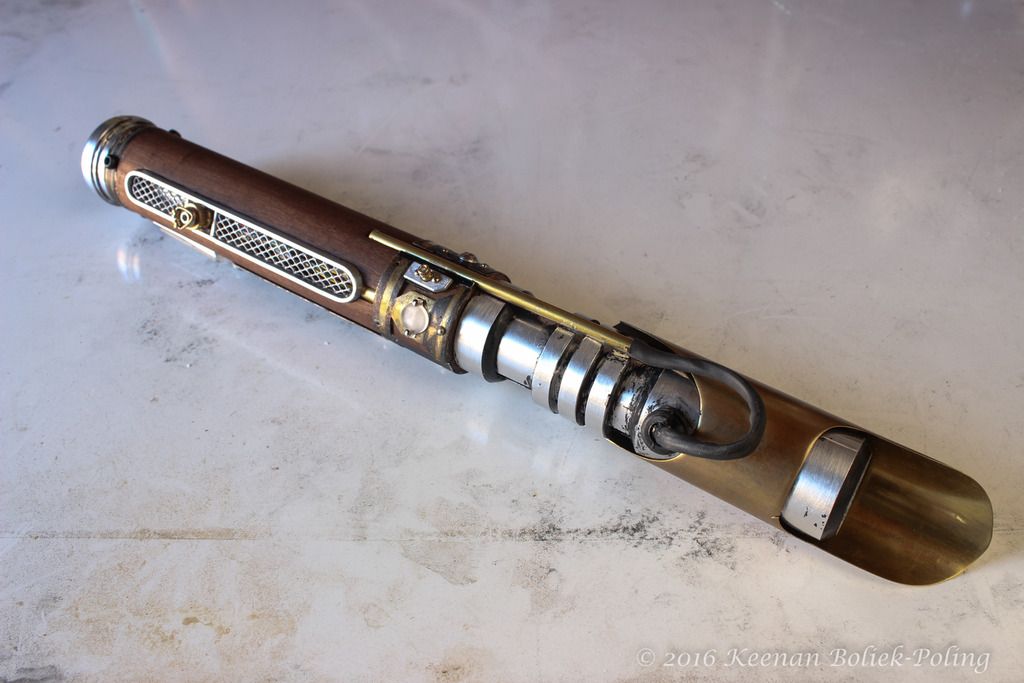
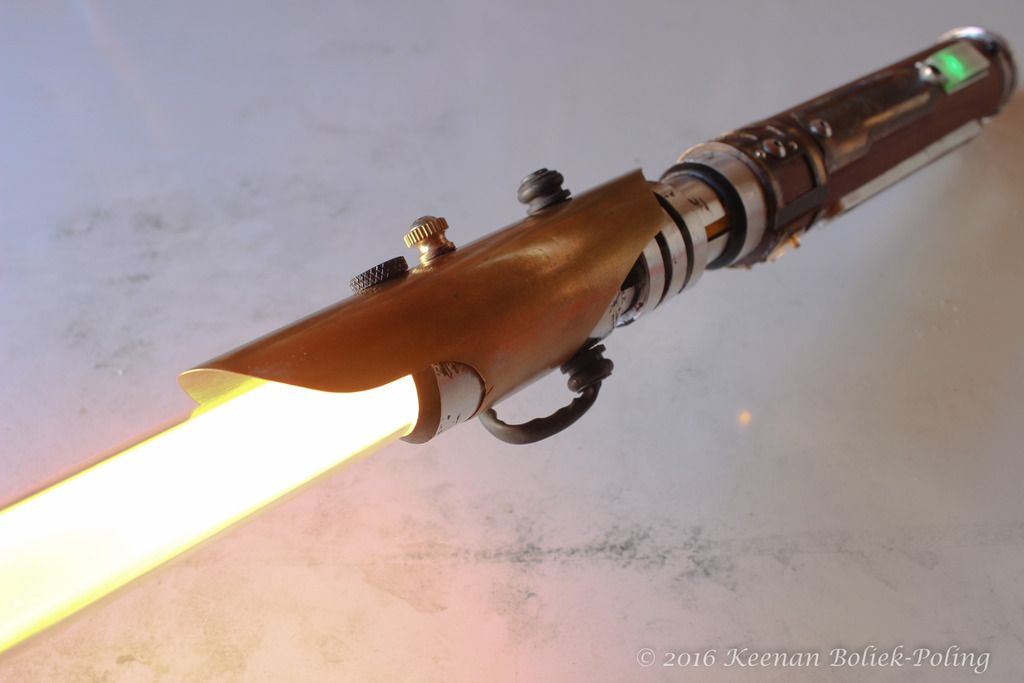
    • Brass shroud.
    • Genuine amethyst quartz crystal.
    • Acrylic radiator discs for CC.
    • MPS Style 7 Pommel, with Style 1 MPS Insert: TCSS
    • 1" OD Heatsink module: TCSS
    • 1" diameter thin walled polycarbonate blade from TCSS, with custom cellophane diffusion film installed.
    • "Bullet" style blade tip: TCSS.


    The Glams:
    (Since Photobucket's website is a huge memory hog, I'm inserting the full width images here, instead of the thumbnail links, for everyone's sanity.)


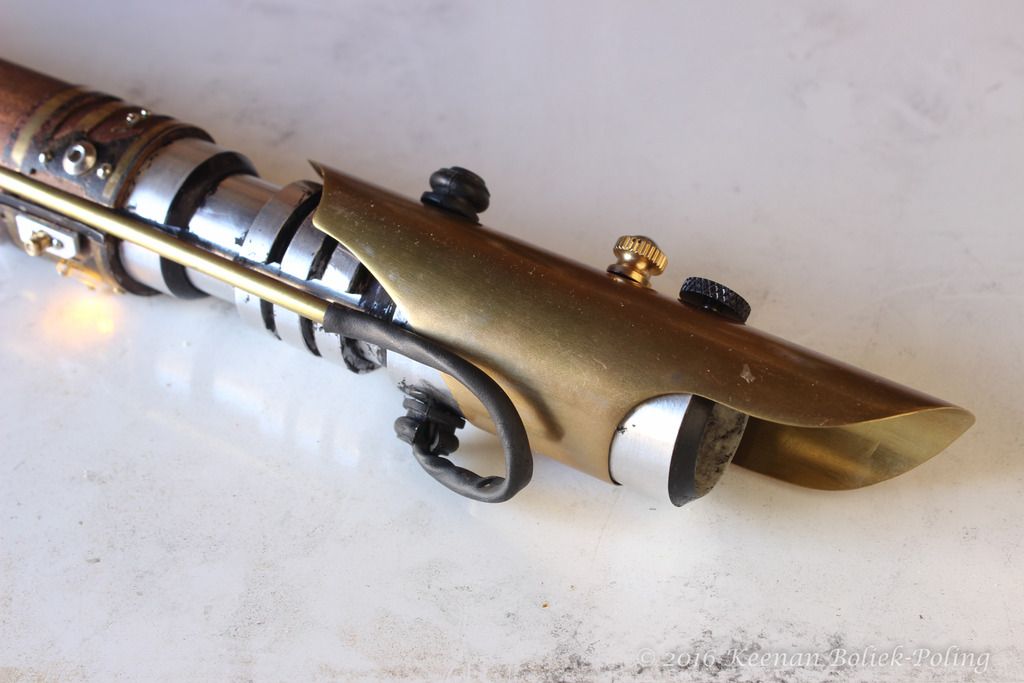
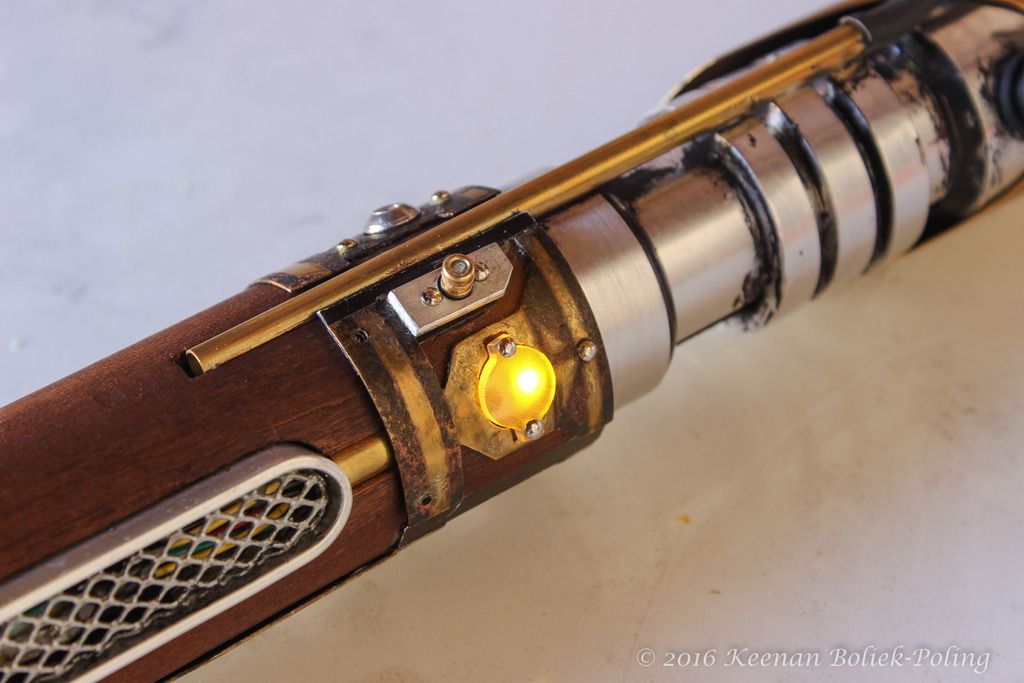
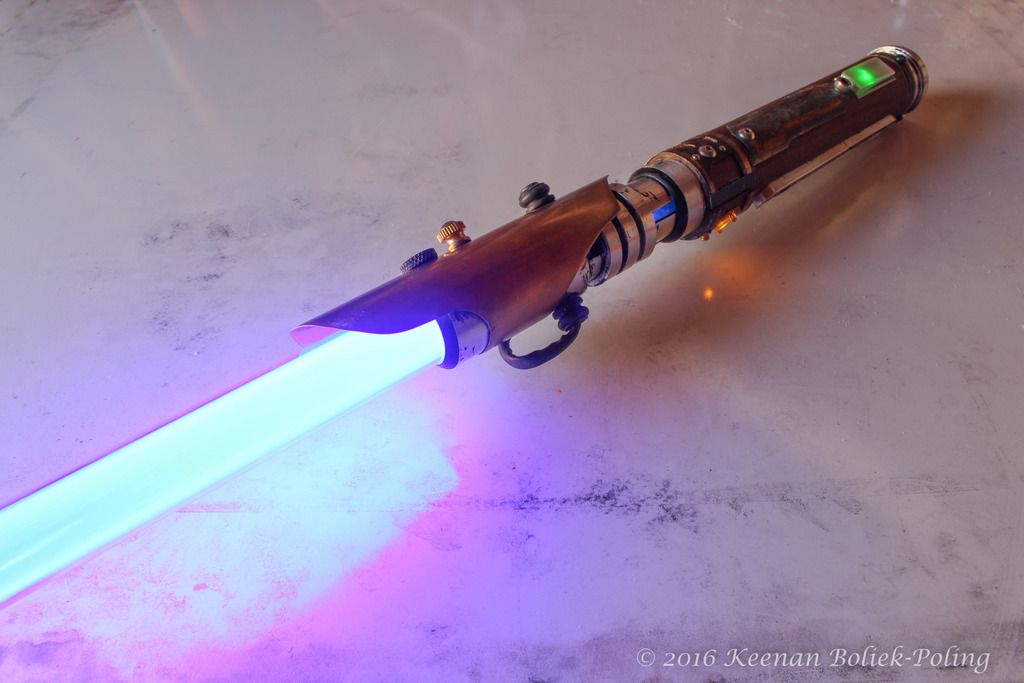
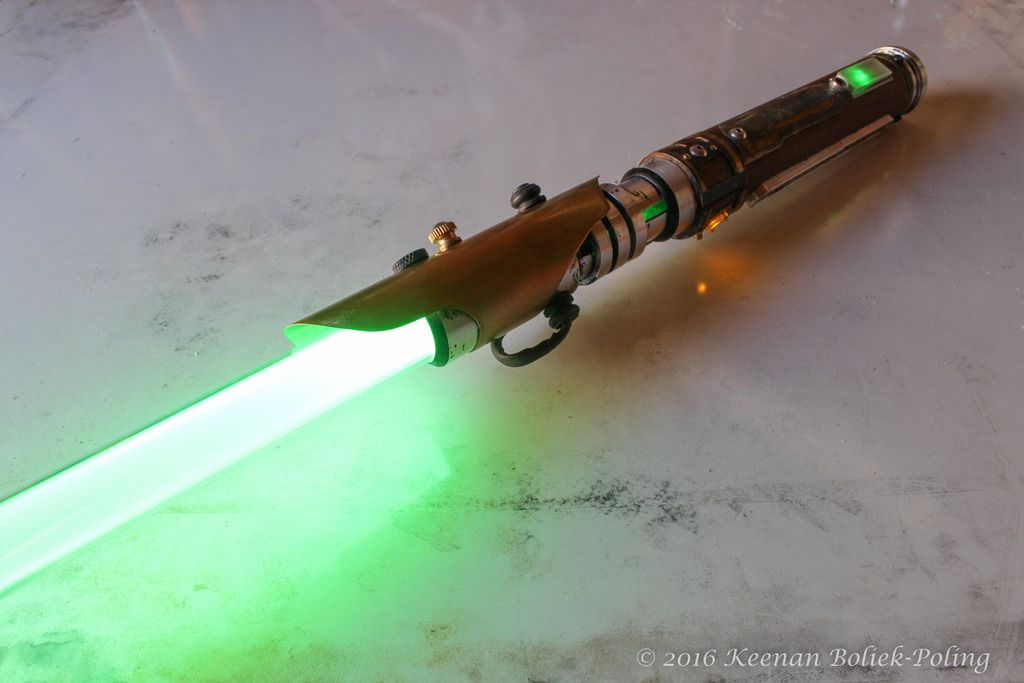
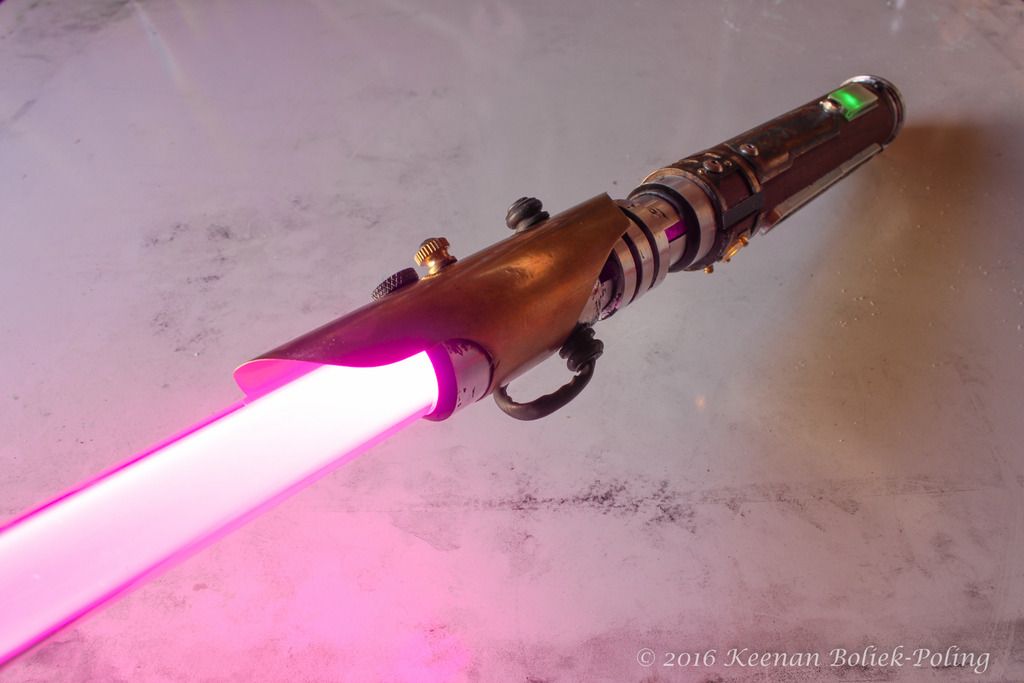
    Here you see the custom brass switch plate I made, with the illuminated Act. switch, and the custom Aux. switch on the left. Also, the brass tube running the length of the body is for the Tri-Rebel's wires. The crystal chamber design forced me to put them outside the hilt, rather like Kylo Ren's patched-up saber. Not ideal, but it works.

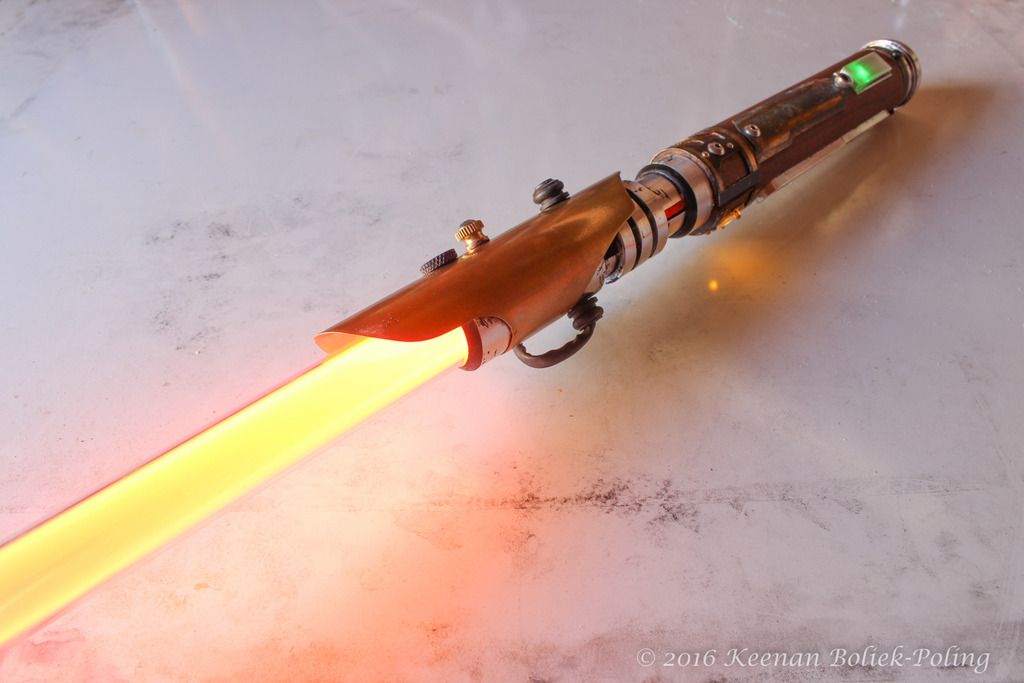
    On the fly color profile shifting:


    "Tatooine Sunset" a la Madcow.


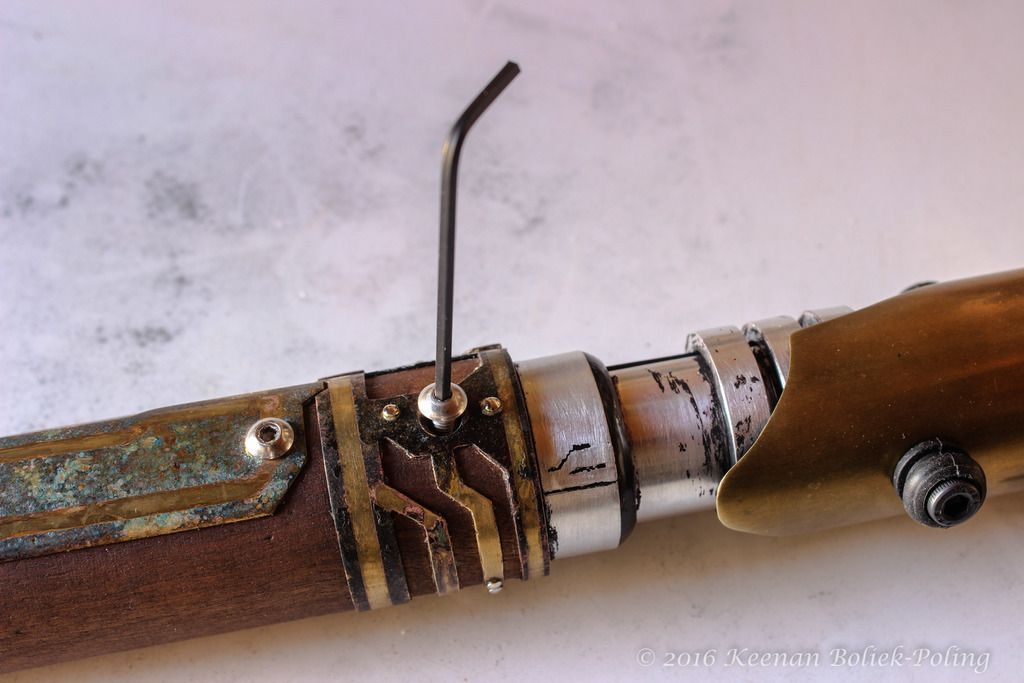
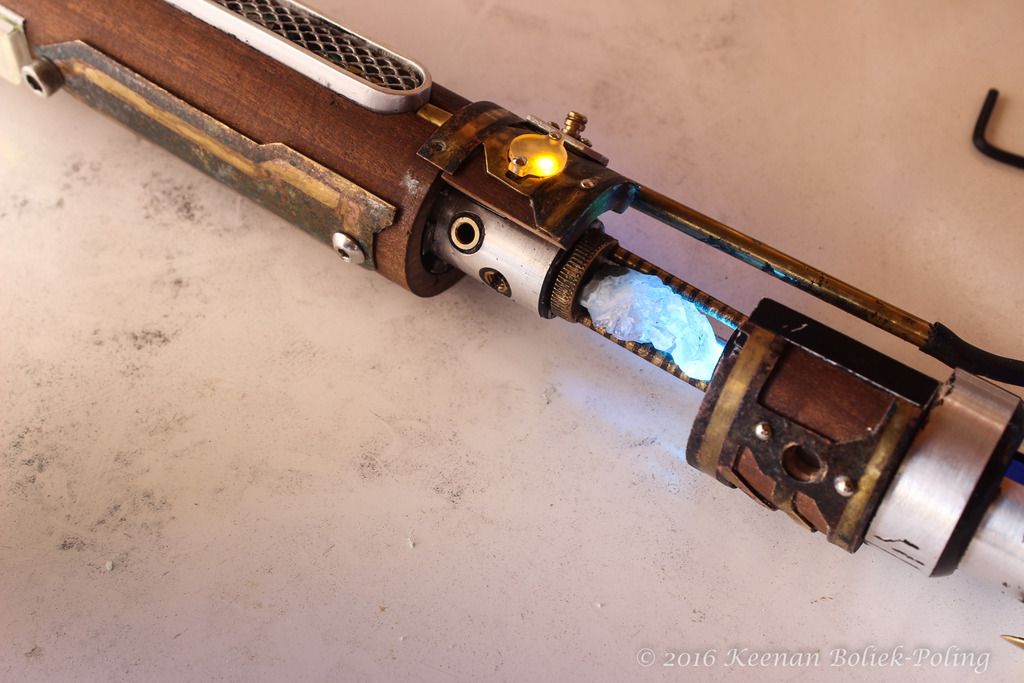
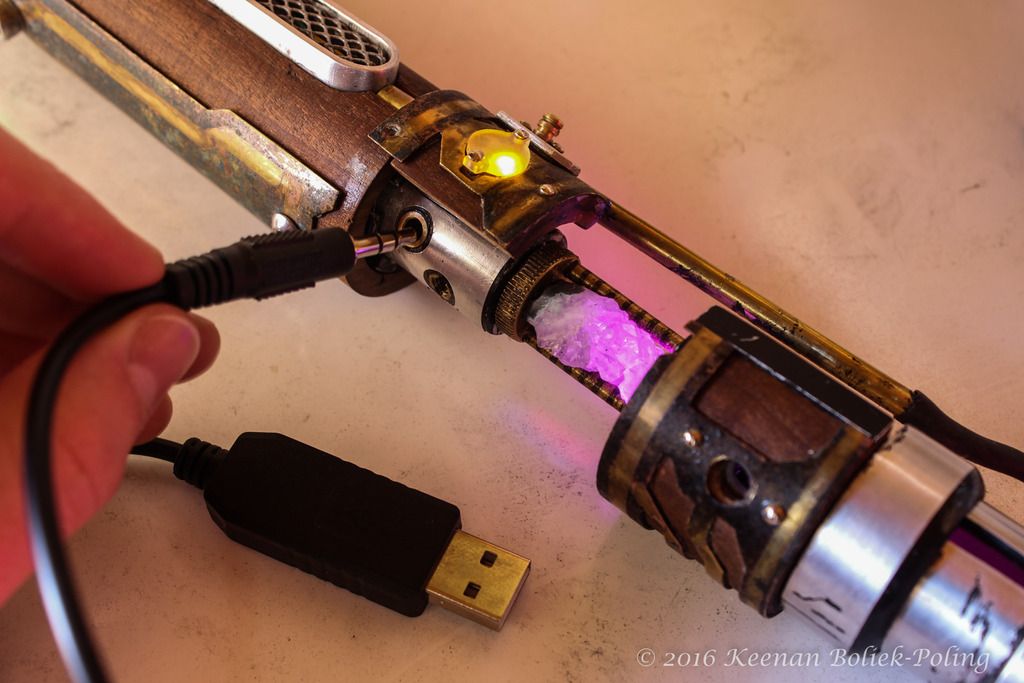
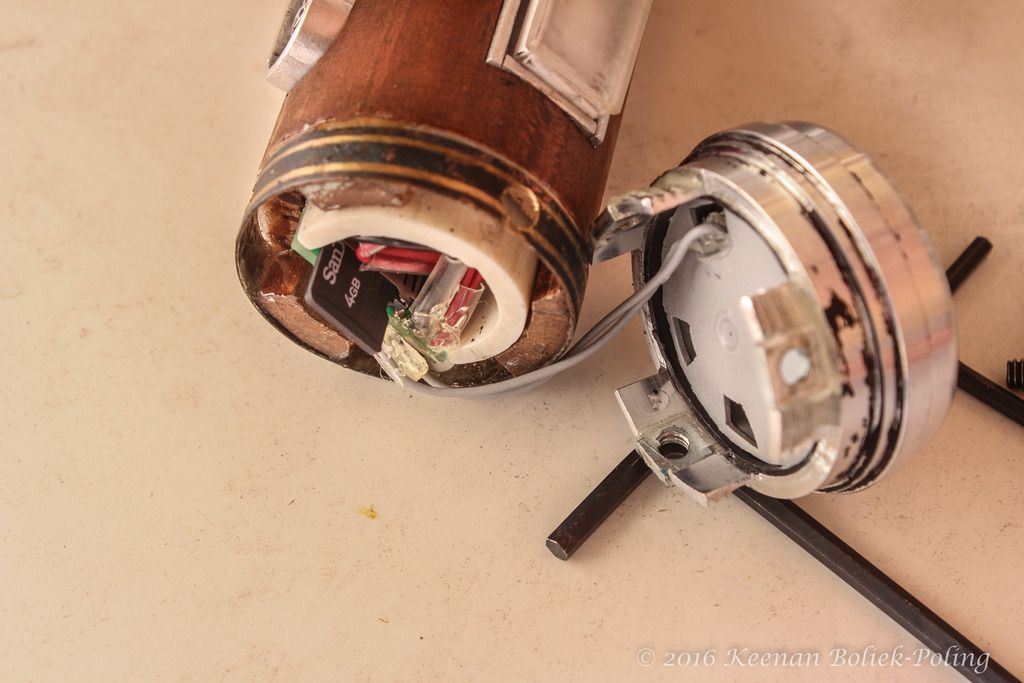
    Access to the crystal chamber and internal features:


    The R.I.C.E. port is mounted in the crystal chamber core, trying to make it function like a "real" saber would.


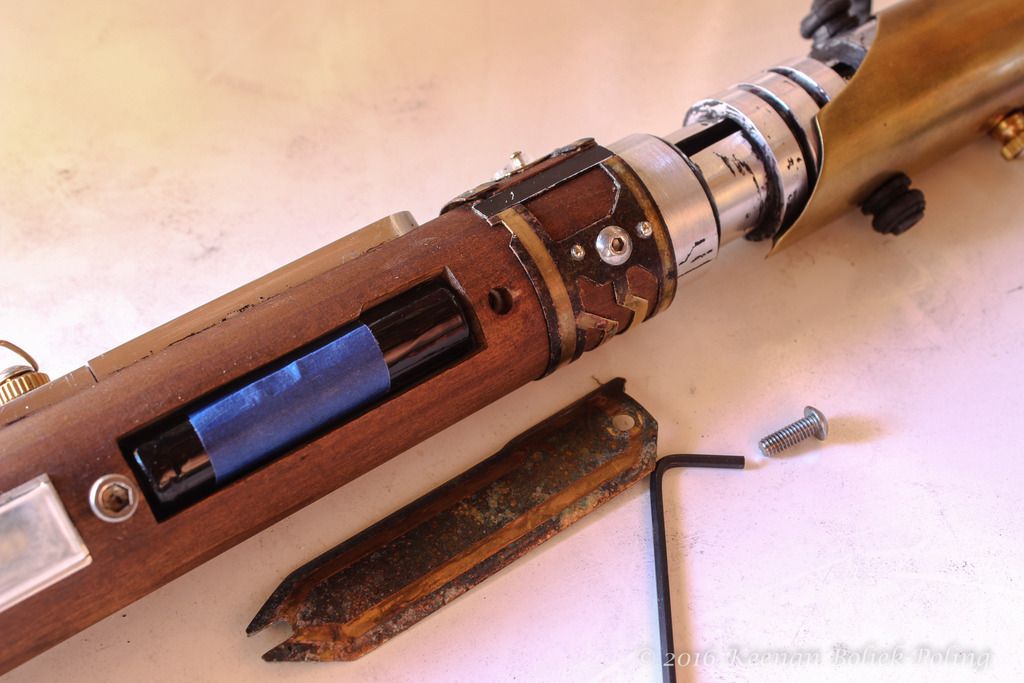
    Access to the 7.4V 14650 battery pack, which didn't in the hilt very easily, haha.


    Custom Kill Key.


    Based on feedback and interest in this prototype, I may endeavor to build a small production run based on this design, but with fully machined aluminum construction with an "epic reveal" saber core and tangible crystal chamber. BUT as per TCSS forum rules, I will conduct any and all such business elsewhere (FX-Sabers, etc.).

    Many thanks to TCSS for fantastic service, Plecter Labs for genius toast tech, and FJK, Silver Serpent, and many others who helped me through the early noob phases! I feel like I've taken my first steps into a larger world...

    See you in the Forums!
    -SparrowHawk
    Last edited by .: SparrowHawk :.; 06-23-2016 at 12:36 PM.

  2. #2

    Default

    This is a masterpiece. Congratulations on a gorgeous build!

  3. #3

    Default

    Awesome saber. I love all the detail.

  4. #4
    Sith Warrior darth_chasm's Avatar
    Join Date
    May 2015
    Location
    United States
    Posts
    1,756
    Blog Entries
    2

    Default

    Freakin awesome dude. Great job!
    末末末末末末末末末末末末末末末末末末末末末末末末末 末末末末

  5. #5

    Default

    Well done indeed. Also like all the details. Great looking saber.

  6. #6

    Default

    That's awesome! I would never guess it was PVC.

  7. #7

    Default

    Wow! That's fantastic work!

  8. #8

    Default

    Very nice saber. Love the wooden section. What is the idea behind the external cable?
    With the Blast Shield down I can't even see.. how am I supposed to fight

  9. #9

    Default

    Quote Originally Posted by Sawyer View Post
    Really love what you've done here! I'm especially a fan of getting wood worked into sabers- yours looks really nice!
    Many thanks, Sawyer! Yes, I'm a fan of wooden components too, and that was the original inspiration for the whole design of this saber! If you haven't seen Arklight Arsenal's builds yet, check these YouTube demos out, he uses walnut and maple veneers to make some gorgeous designs:

    Arklight Arsenal's "Rhabdos" custom lightsaber: https://youtu.be/LvMM2-kyilc
    Arklight Arsenal's "Aegis" custom lightsaber: https://youtu.be/xkAvF9aKbSA


    Quote Originally Posted by Sloda Foade View Post
    Very nice saber. Love the wooden section. What is the idea behind the external cable?
    Sloda Foade, thank you! I had a lot of fun with the cherry wood sleeve.

    As to the external cable, it was one part design flaw, one part material choice, and one part work-around, haha. Because I used PVC for the body and the choke section, the thickness of the walls of the upper section really limited the internal space of the hilt. Add a crystal chamber with "reveal mode" and I plain ran out of space for the Tri-Rebel's 6 wires!

    So I went Kylo Ren style and routed the wires through the brass tube and flexible cable sleeve on the outside. This allows the upper section to slide up and reveal the crystal chamber and RICE port. It works, it's not ideal, but I learned a lot during the process and have major re-design plans for Threnody 2.0.
    BinarySunsetDesign.wordpress.com

    "Only in silence the word, only in dark the light, only in dying life; bright the hawk's flight on the empty sky." -A Wizard of Earthsea by Ursula K. Le Guin

  10. #10

    Default

    Interesting, I assumed it was aluminum leaf. You can get the same look with hi grade aluminum tape. If you can locate an injection molding or vacuume/pressure forming tool maker or molder supply source they have adhesive backed aluminum veneer in 1mm thichness. The adhesive is ment to be permanent to aluminum tools...it actually reacts with the PC and won't come off. Cyanoacrylate glue though it forms a chemical bond to the pvc only has a mechanical bond to the alluminum. It also has a low shear strength when applied to metal, hence the use of it as a temporary thread locker. Rotational force on the veneer may force it loose.

    A Two part epoxy would probably give the best hold, but any metal will need roughed up because the surface friction is all that will hold the glue. It will also be very messy until you master the application method.

    Edit: trick on the tape will be finding it without the companies logo printed on it!
    Last edited by FenixFire; 07-02-2016 at 08:17 AM.

Tags for this Thread

Bookmarks

Posting Permissions

  • You may not post new threads
  • You may not post replies
  • You may not post attachments
  • You may not edit your posts
  •