Nice work! What's your process?


Nice work! What's your process?

That's coming on nicely. Gonna be an awesome reveal. Excellent work as always sir!
NICE WORK! Love the special sauce, tuned out great!

Like a shiny new (actual copper) penny!
Thanks for the kind words all. I'm really happy you guys like it! Trust me when I say those photos don't do it justice.
As for process or what it is etc., thats one of maybe two things I'm not going to outline in this build. It was a lot of research and experimenting, so I'd rather people do the work to figure it out. A magician has to keep some secrets right?
Probably, but I doubt they'd be worth their weight in goldOriginally Posted by sks1138


Work on the core continues.
For now, I am focusing on the crystal chamber part. Specifically the piping and little accent pieces. I'll give an update on the actual crystal set up in a later post. If you remember from an earlier post, I decided I was going to give some coiled wire a try to see how it looked and I have to say, I'm pretty pleased with the outcome.
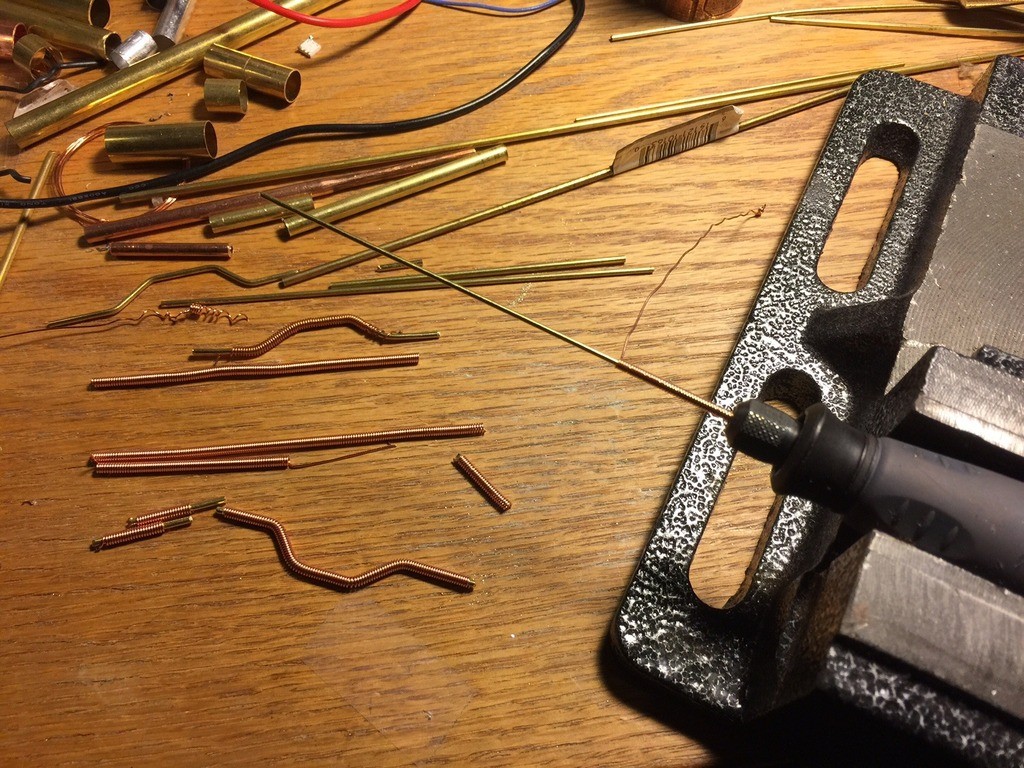
PREPPING THE COILS: This is a pretty easy process but does take some getting used to and a steady hand.
- First, you select the size rod you need for the desired coil ID. If you want to get super crazy with spacing and planning you can take the diameter of the wire you are coiling, multiply that by 2 and add that to the ID and you have your coil's OD.
-After you've selected the rod you want, chuck it up in your Dremel or hand drill. I chose the Dremel mounted in a vise, it's a little easier this way.
-Once your rod is in the Dremel, stick the end of your wire between two of the jaws of the chuck and bend it toward you. Then grab the wire with your forefinger and thumb and hold it firmly, but not too tight with your forefinger up against the rod. Make sure your Dremel or drill are on a low setting.
-Turn on the Dremel/drill and as the wire coils on the rod, move your hand along the length of the rod. Go too fast and you'll get gaps in the coils. Go too slow and the wire will begin to coil backwards over itself. Gaps are much easier to fix than overlapping. After a little practice you should be able to get some nice coils made.
Below, you'll see I've done several different sizes in varying colors.
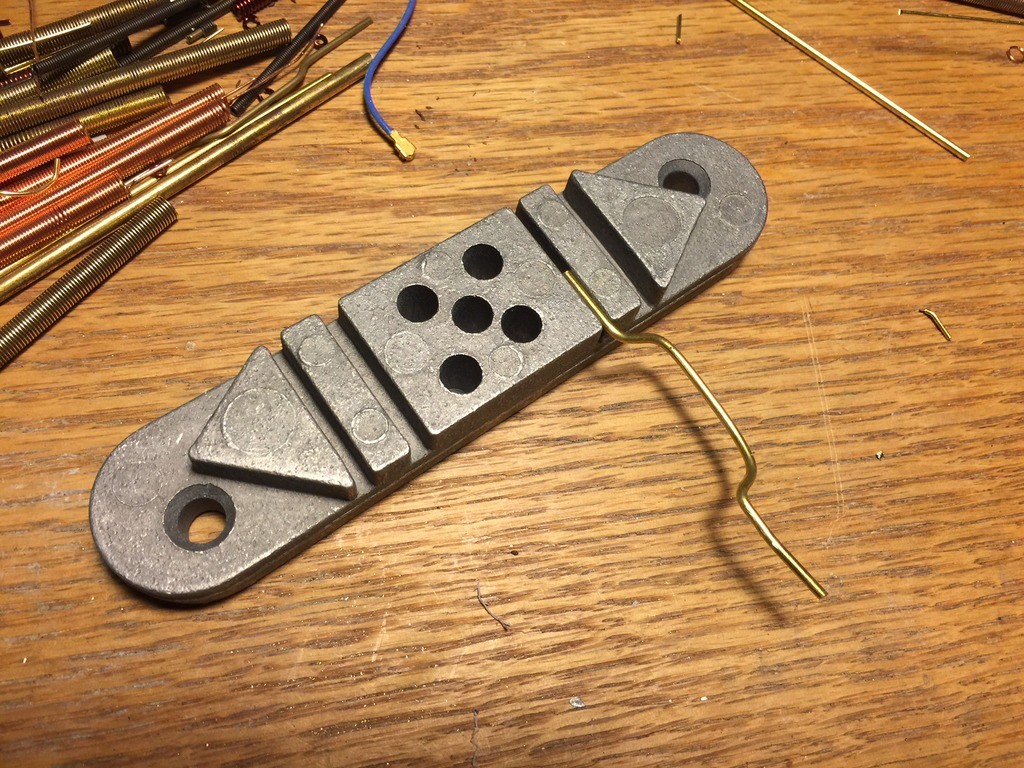
PREPPING THE ROD:
To create some depth and interest, I decided to give a selection of the piping some bends.
-First cut your rod a bit longer than you need as bending it will take some of that length away. And, you can always trim the ends once your bends are in place.
-Then, bend as desired with your chosen tool. I use a wire bending jig that I picked up at the art store for maybe $7, but you can use anything you like, like pliers, table, etc. If you want precise angles, you can use 30/60 and or 45/90 triangles to help out. I chose to freehand.
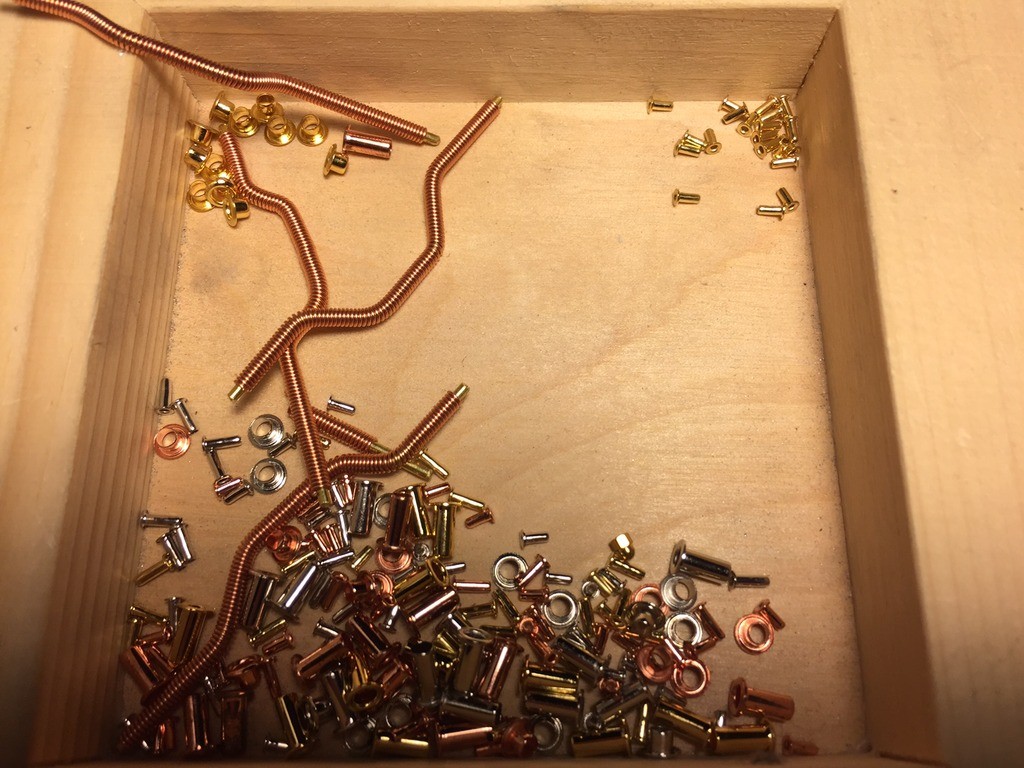
Once these two steps are done, all you have to do is slip the coil on the rod and you're good. Some twisting may help when going over the angles in the rod. In this pic, you'll notice some little bits and bobs I picked up at the art supply. I used these in place of the little scale hardware I had planned. I ended up dropping and loosing a few and they're not cheap, so I went another route which you'll see below.
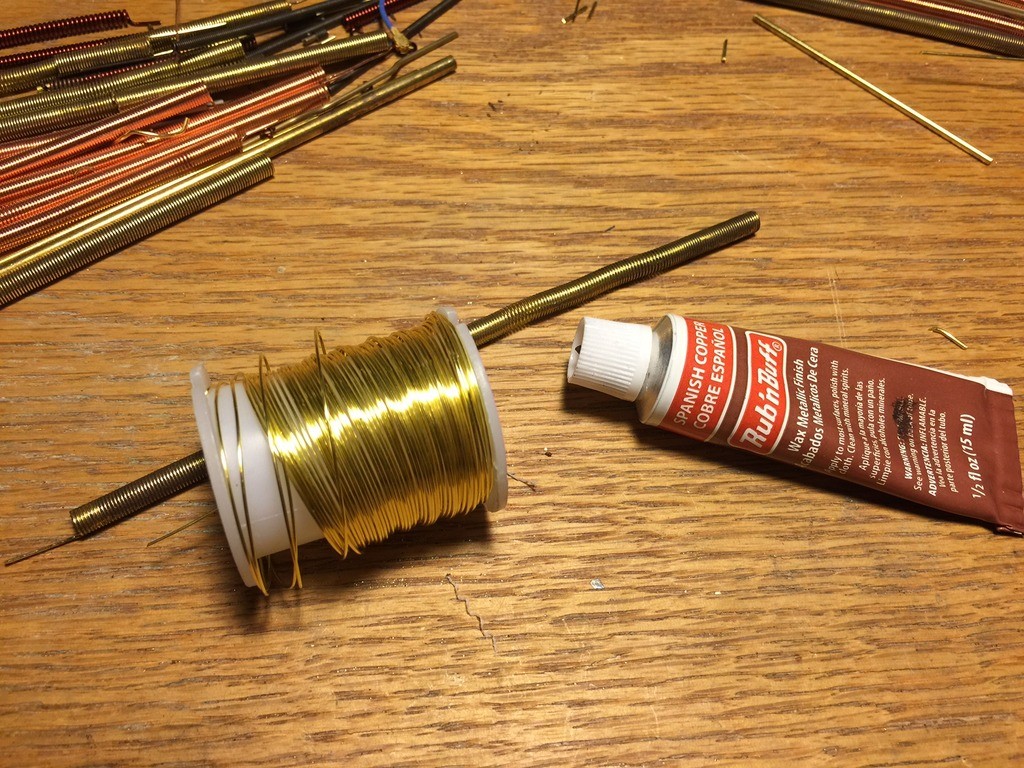
Some of my coils, especially the brass, were a little too shiny for my liking. I chose to weather them a little with some Rub 'N Buff.
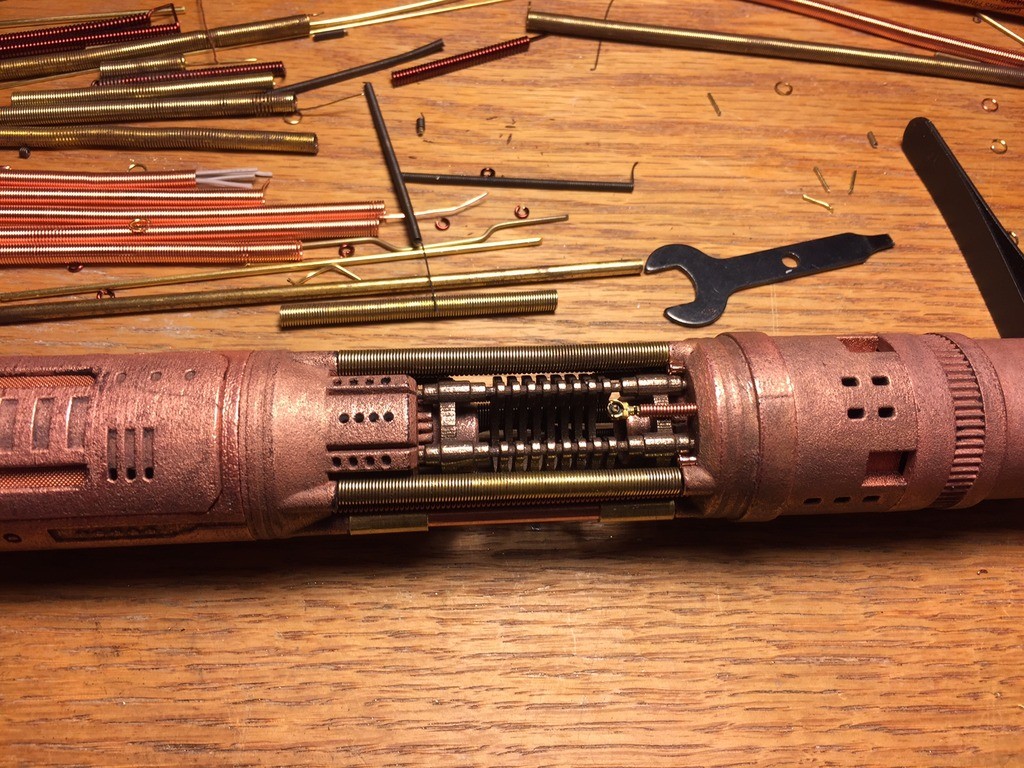
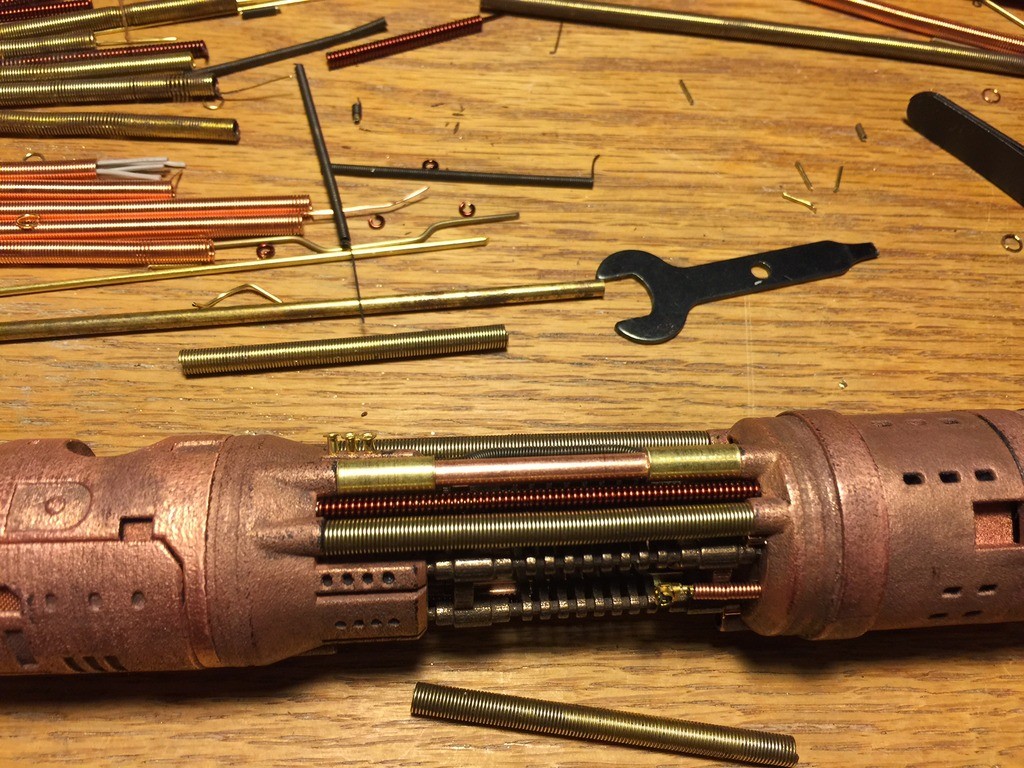
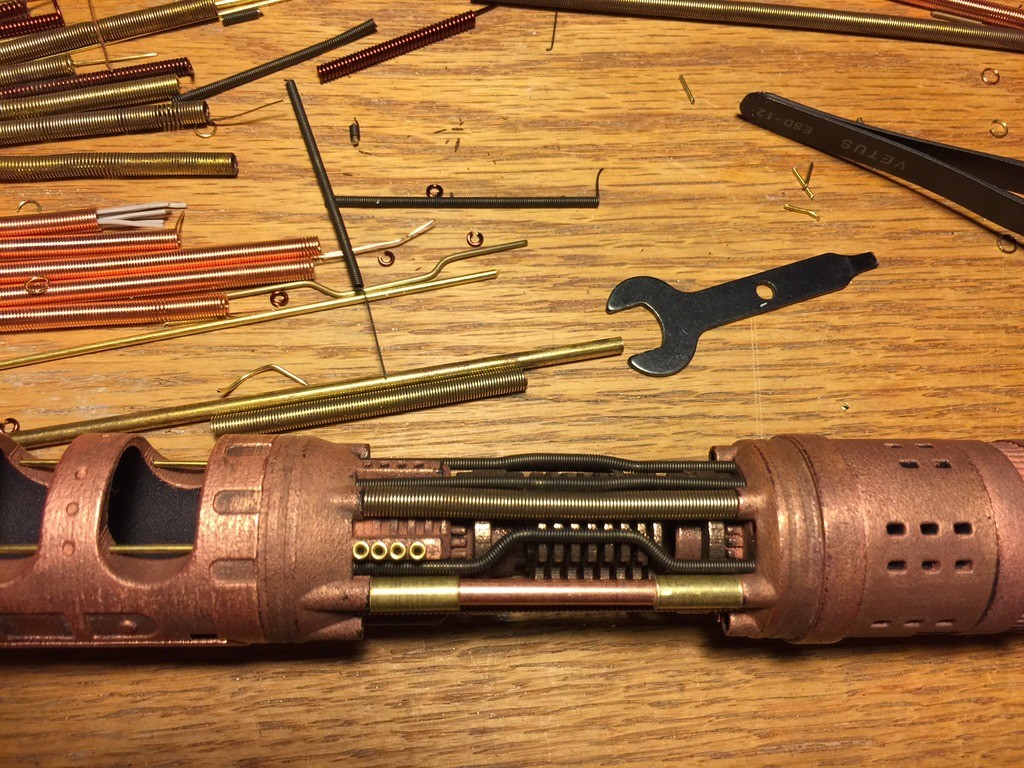
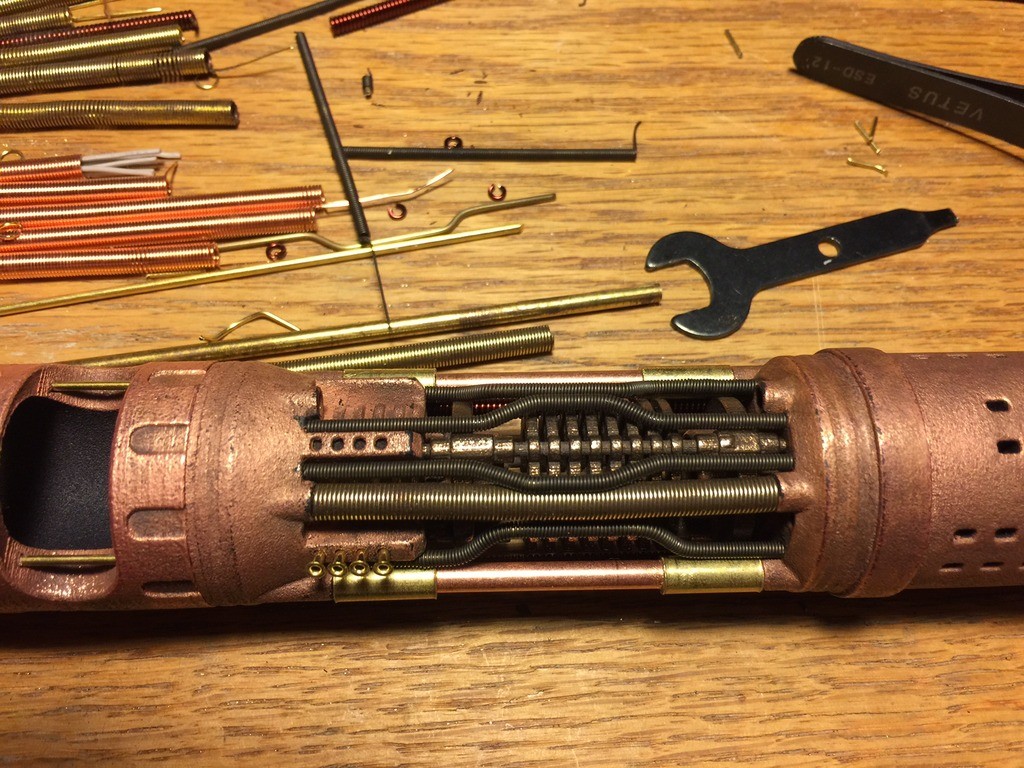
Here are a few pics of some of the pieces installed. I planned ahead and placed divots in the models so that everything can be sandwiched between the two chamber ends. This way there is no gluing/etc. and everything can come apart nicely if needed.
Here you can see where I'm using some of those little jewelry pieces. You can also see I painted the inside of the board case to match the exterior. This way it looks uniform, but the interior remains non-conductive.
And last, just a little peak at the led module which came in yesterday. It fits so snug I can ditch the set screw I had planned.
Now I'll be cutting my crystals to size and figuring out some mounting hardware for them and the leds. Stay tuned!
Last edited by darth_chasm; 07-20-2018 at 04:25 PM.

once again, im in awe of the beauty of your work. I cant imagine it getting any better but im only guessing that you are no where near done with this, so really looking for each and every update

It's the little details that set a good saber apart from a great saber. You have a LOT of little details. I'm very interested to see where this ends up. I'm sure it'll be amazing!
We all have to start somewhere. The journey is all the more impressive by our humble beginnings.
http://led.linear1.org/1led.wiz for the lazy man's resistor calculator!
http://forums.thecustomsabershop.com...e-to-Ohm-s-Law for getting resistor values the right way!
Beautiful work
Stunning darth_chasm!!!! It looks absolutely amazing man!!!
 Posting Permissions

 Reply With Quote


Bookmarks