Page 6 of 7 FirstFirst ... 4 5 6 7 LastLast
Results 51 to 60 of 70

Thread: Not Another Graflex Build

  1. #51

    Default

    Thanks! The final stretch is proving to be a challenge but I'll figure it out.

    GROUND/SHORT ISSUE


    I have ordered replacement plugs for Activation Box 15 and will be reconfiguring things a bit internally. Firstly I am purchasing a jar of Liquid (electrical) Tape that will be replacing hot glue as my go-to insulation. The only downside I'm seeing is that this stuff is pretty much permanent once it sets. This means I need to be 110% sure I did it right before applying it.

    SOLDERING WOES
    The time has finally come to replace my cheapo soldering iron. About a month ago I replaced my only tip with a wood burning set. Unfortunately these tips are either too big or have since disintegrated after extensive use. I am purchasing a new iron with a set of proper tips. UPDATE: New iron and tips came in this morning. Just waiting on the Liquid Tape.

    HILT WORK
    I'm home sick today but can't sleep. Might take another crack at the lower hilt wrap while I have the time.
    Last edited by girot; 01-24-2016 at 03:18 PM.

  2. #52

    Default

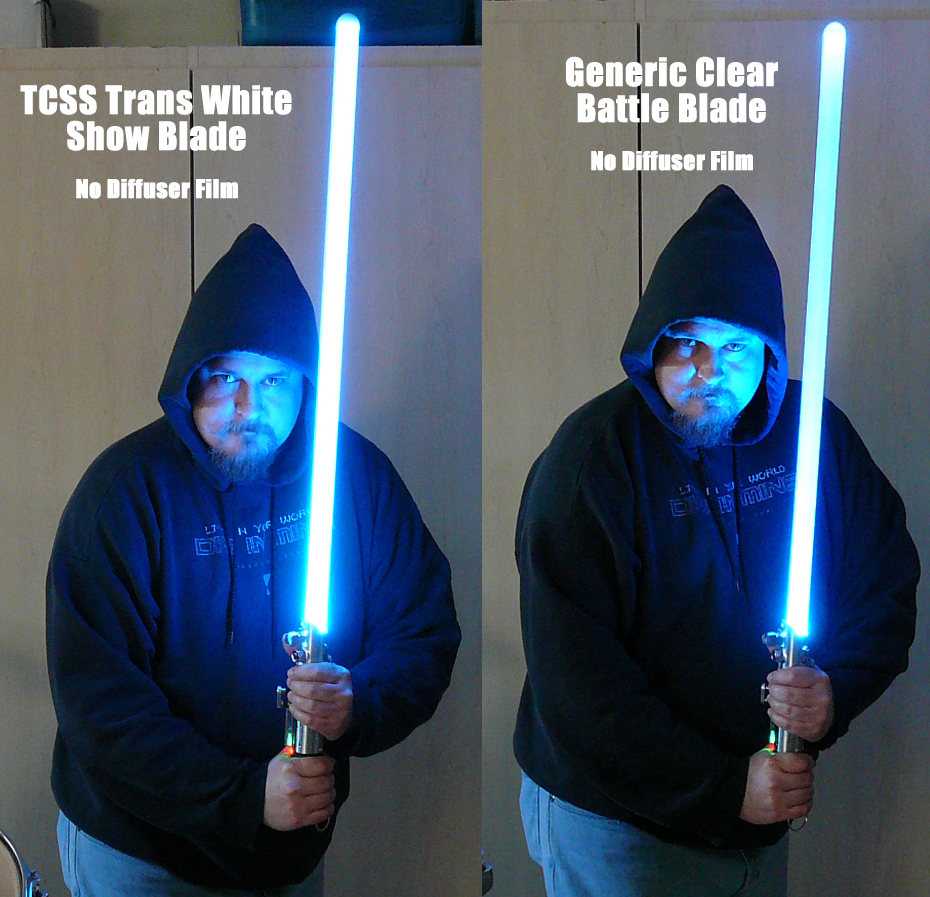
    BLADE COMPARISON (Blue+Green Cree at full power)

  3. #53

    Default

    Looking good! I definitely prefer the trans white blade, based on the pics, which may or may not be reflective of reality.

    On my own sabers my favorite blade combination is the trans white blade with film wrap. I have only tested a double wrap and have not yet tried a quad wrap. IMHO, the diffuser doesn't work as well, had to be the exact length as the blade (else if rattles around), and it can often fall out when swapping blades/plugs. Always go for the wraps .

  4. #54

    Default

    Perhaps a thin plastic sheet could be cut to fit between the activation box and body? Maybe .010 or .005 inch THK polycaronate sheet?
    Some larger heat shrink could possibly solve the ring contact area. Hopefully you find something that works for your needs.

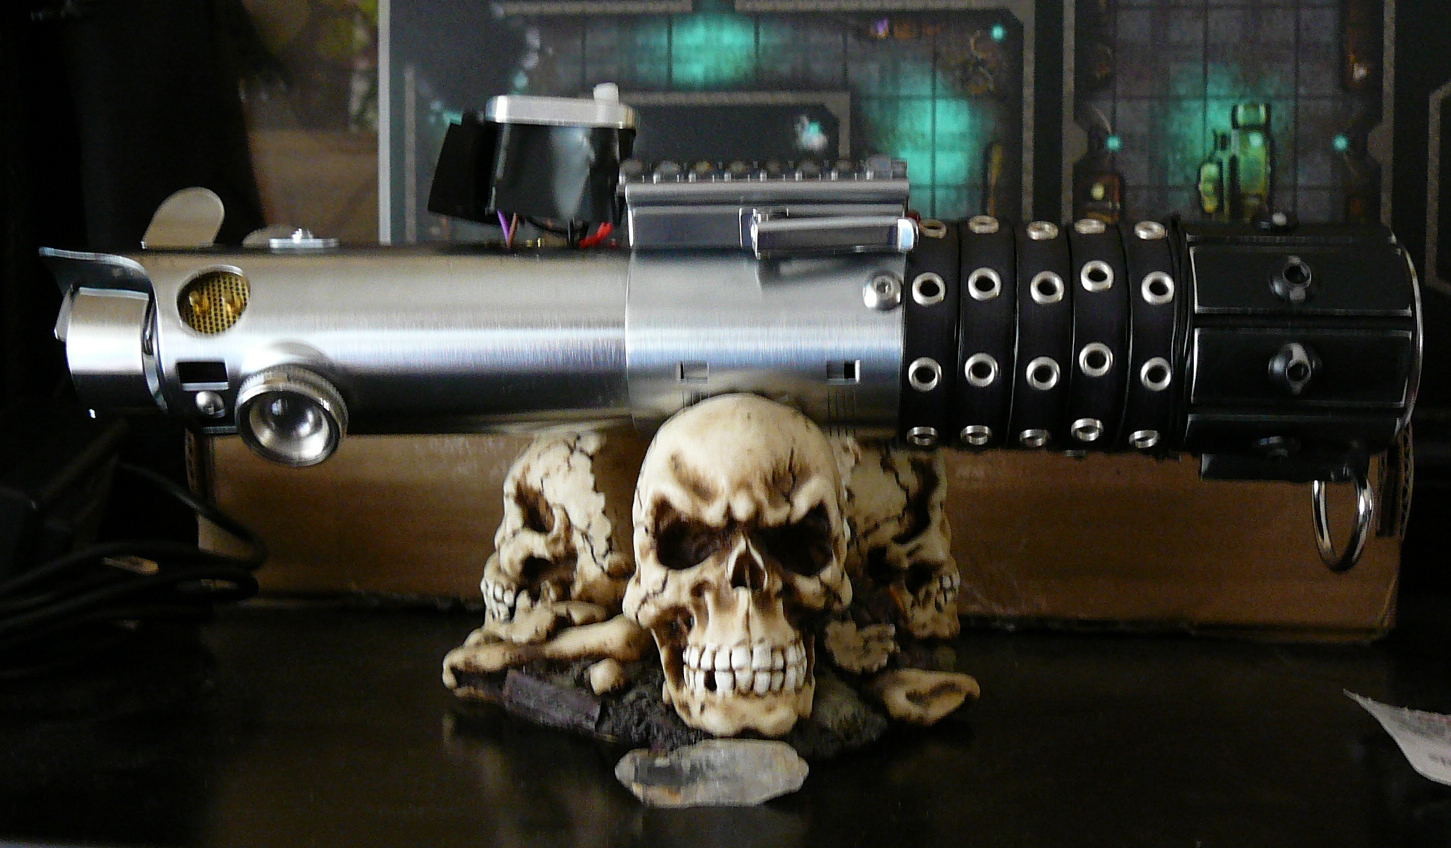
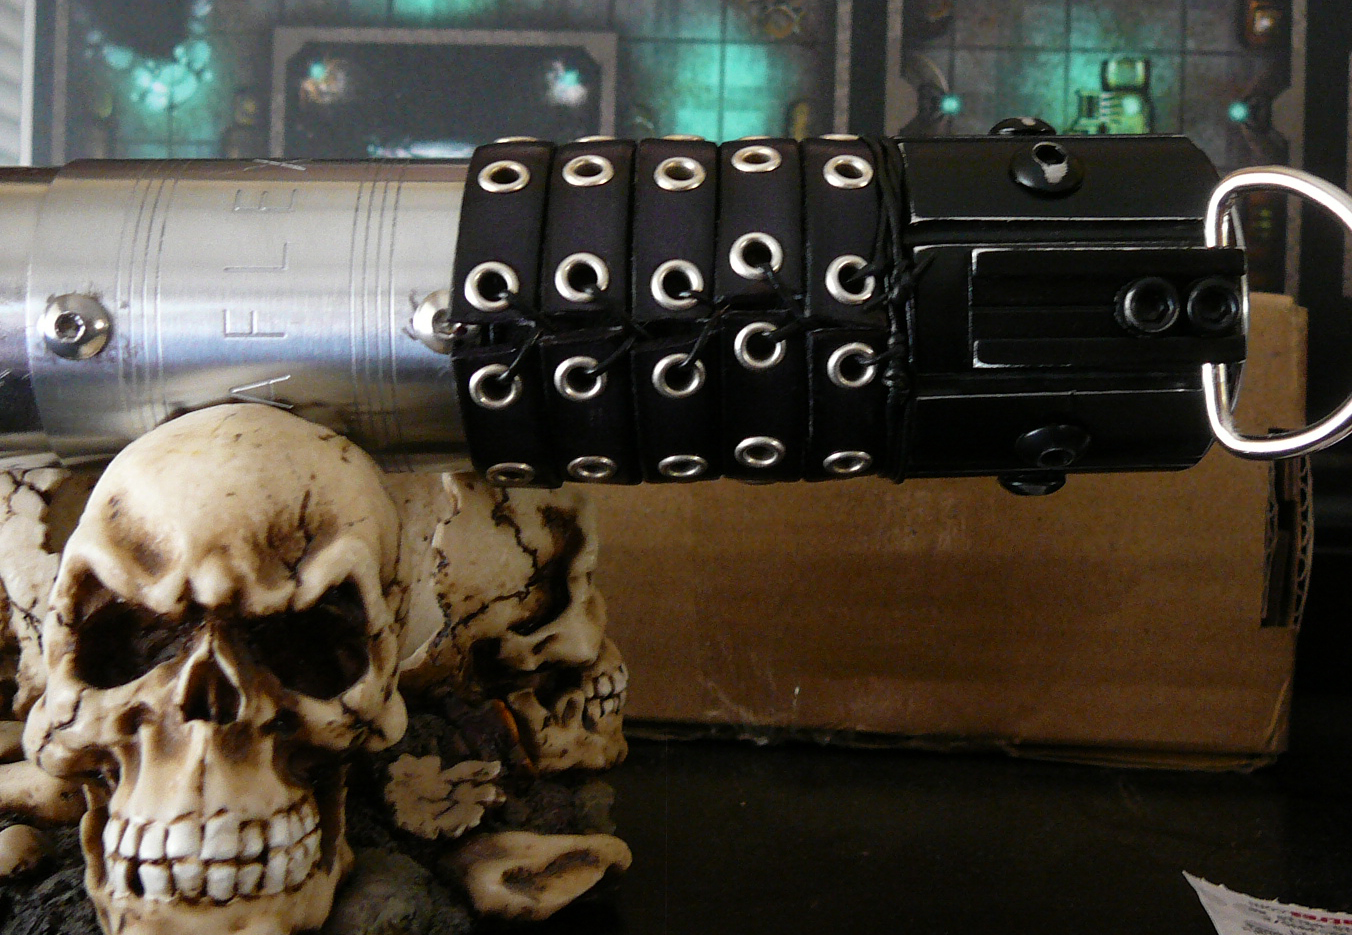
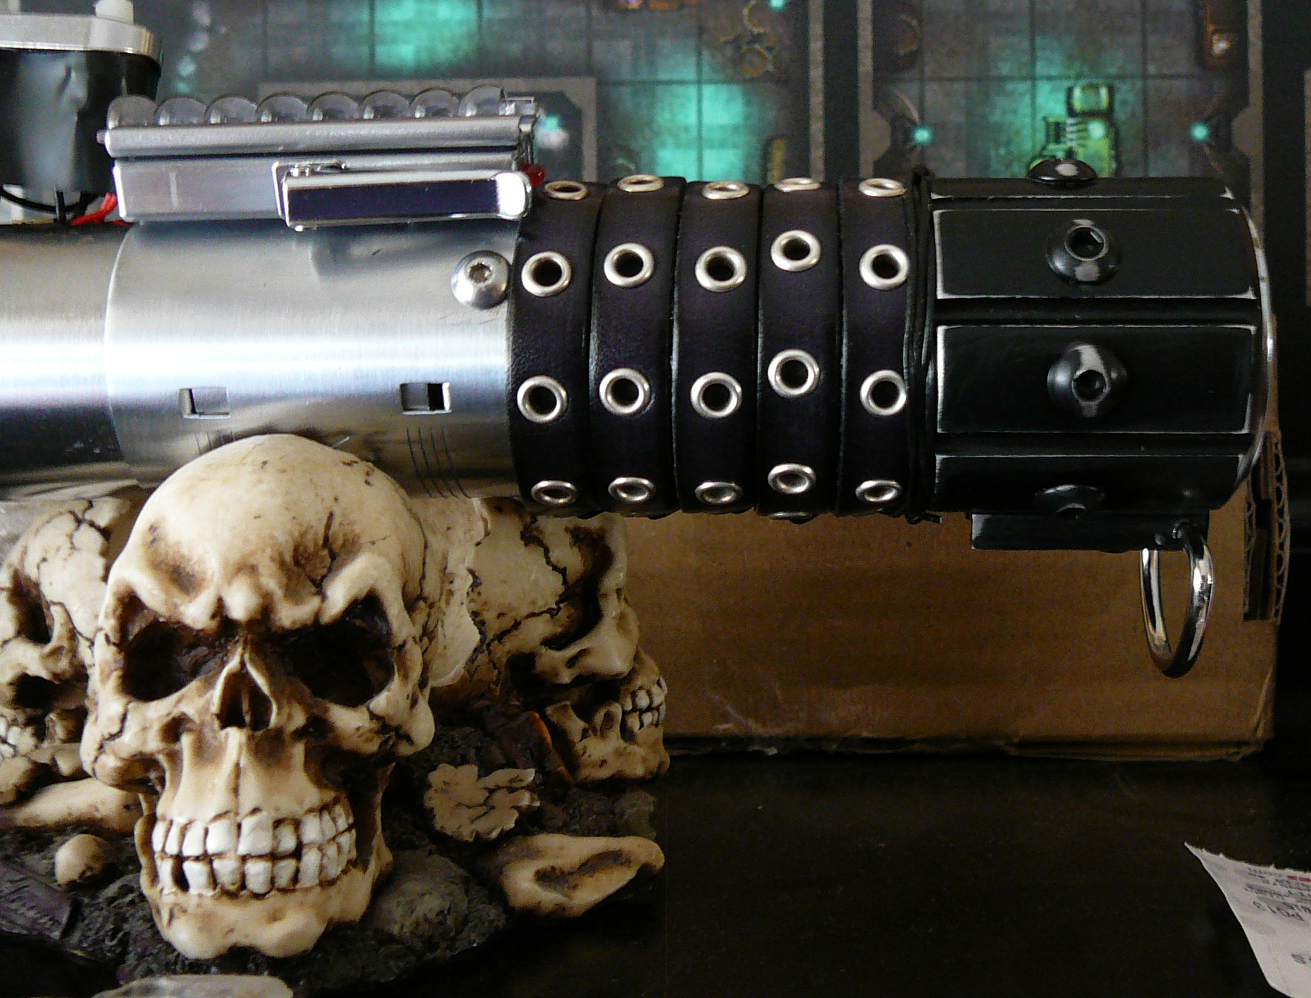
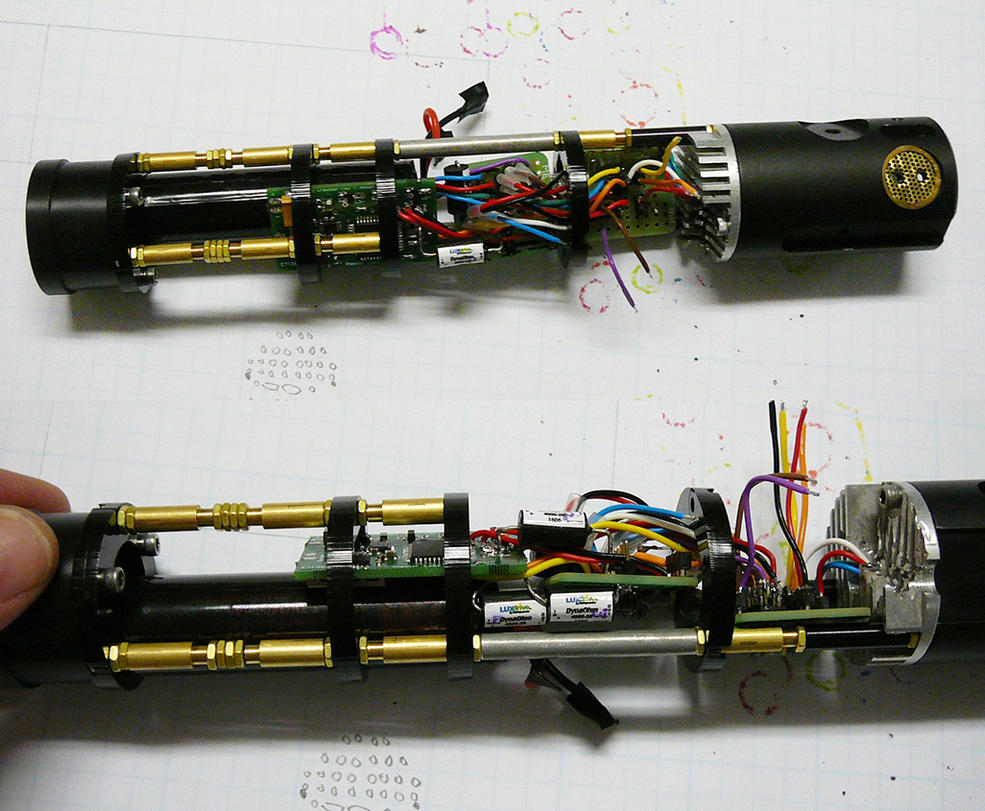
    The saber is coming along nicely, despite the small issues. I really like the looks of the dual activation box and the pommel area.

  5. #55

    Default

    There are still several items on their way but I will probably take another crack at the Sakabato this weekend. If I'm going to have to do another full rewire I am going to wait until the rest of my ordered parts come in before I start taking things.

    My first attempt at leather wrap was successful but not what I was looking for. Ordered something new and will get to try that out next week.
    UPDATE: The new stuff is too beefy to wrap a full 1.5 OD hilt, though it would look pretty damn good on a MHSV2 extension. Ordering something different.

    I am going to reattempt some aging/carbon scoring using acrylic paint. I am a fairly accomplished miniatures painter so I'll be doing it all by hand. That'll likely be my next move.
    Last edited by girot; 01-29-2016 at 07:31 PM.

  6. #56

    Default

    HILT WRAP


    Oh, that movie ticket stub is from opening night of TFA.

  7. #57

    Default

    I love the wrap and the stack of skulls. I bet you can run a flat piece of brass with holes in it to keep the holes lined up.

  8. #58

    Default

    Having come to a standstill on my TFA build I decided it would be a good idea to finally gut Sakabato for it's latest rewire...

    CHASSIS/ELECTRONICS WORK
    Since making the command decision NOT to do a Crystal Chamber I've gone ahead and combined the upper and lower chassis into a single chassis. This will make the entire process SO much easier! The dreaded 9-pin connectors have been disposed of. I still needed an organization solution for mounting resistors, making clean splices, and generally adding neatness/flare to my crystal-less chassis. To that end I'm using 1"x1" protoboards.


    Pictures of the boards in use coming soon…

    One board is going into the upper chassis to manage the emitter assembly and activation box 15 (recharge/RICE). Seriously considering moving one of my switches to the red button, I'm pretty much over the clamp switch thing.

    There is going to be a second board in the middle to clean up the jungle of wires coming out of the clamp. There are four LEDs and two switches in there and it gets messing way to fast. THIS IS WHERE MY GROUND WAS. I had to completely rebuild everything. By adding the protoboard I can keep it all organized and prevent future stress damage.

    Having discovered how to make my own battery modules has been extremely helpful in every way but cram-fu. Somewhere in this mess I am going to have to find room for a PBC. Ideally I’d like to try to stuff it into the tiny bit of space I have left in the upper hilt, right off the Recharge Port, but we’ll see how the clamp rework goes. I’ll stuff it down there if I have to.

    Lastly, I am going forward with adding the 5mm RGB LED to the inside of the chassis. Though I am not doing a full detail CC I can at least get the lighting FX going on inside. With all of the holes in that part of the saber the light will shine through nicely and add just the right amount of flavor.

    HILT WORK: Weathering
    After the great success I had with weathering the commission saber I recently completed I am considering attempting something similar to Sakabato. I realize there are a lot of mixed feelings out there about weathering a vintage graflex… but this poor flash tube has had the crap kicked out of it at every step of this journey. If I leave it as is I think it looks sloppy/half finished. I’m hoping that a bit of paint in the right places will add the depth of character I am looking for.

  9. #59

    Default

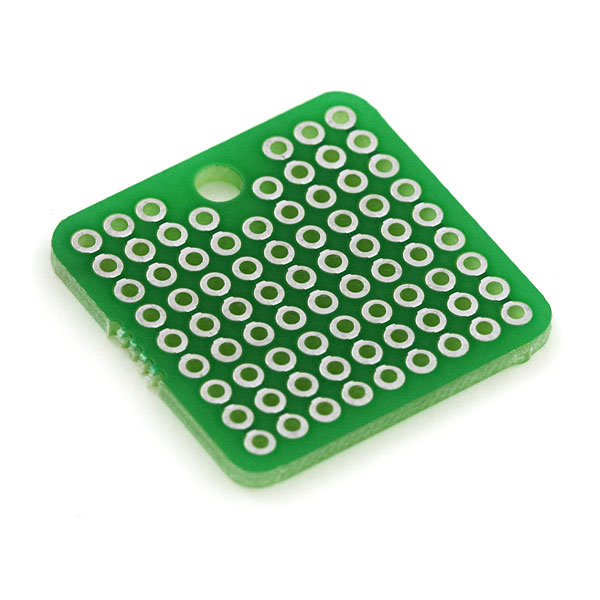
    PCB is in. Forgot to order the battery though, lol, so I'll get that taken care of later today. TFA build gets priority this weekend, and with the high "sh*t happens" factor of that build, I'll likely get back to Sakabato next week.

    I did manage to get the upper hilt protoboard wired up so throw up a pic of that Thursday morning.

  10. #60

    Default

    Now, before you come at me with torches and pitchforks, let me give the following disclaimer: What you are about to see was entirely experimental and done purely for the fun of it. Since I couldn't have the CC I wanted (for now) I opted to just go all Frankenstein on Sakabato. I even have a lore explanation for it, lol. So here is the monstrosity...


    In a vain attempt to manage the absurd amount of resistors I need I used the 1"x1" protoboards I mentioned in a previous post to try and keep things nice and organized. For the most part I succeeded. I even managed to squeeze in the 5mm RGB LED for the would-be crystal chamber. I may not have a achieved a masterpiece right out of the gate, but I am still very pleased how it all came out.

    Next up is to finish the light weathering I'm doing to the hilt. I need the paint to cure fully before I can begin installing the clamp electronics again. Though the rest of the country is enjoying a nice chill it's still getting warmer and warmer out here on Tattooine. The dry heat is helping the paint (and glue in some cases) to cure much faster than expected. If all goes well I should have Sakabato back together and ready for a reveal video by lunchtime this Saturday.

Tags for this Thread

Bookmarks

Posting Permissions

  • You may not post new threads
  • You may not post replies
  • You may not post attachments
  • You may not edit your posts
  •