Page 1 of 2 1 2 LastLast
Results 1 to 10 of 14

Thread: Advice needed - simple rechargeable circuit with port, light up switch + LED.

  1. #1

    Default Advice needed - simple rechargeable circuit with port, light up switch + LED.

    Hi everyone.

    I'm new here and I'm planning do to a custom saber build. Powder coating is too expensive for me atm so I'm going to leave that one at bay.

    I want to have a circuit that contains:

    1 x 4 x AA Battery holder (mountable)

    1 x recharge port

    1 x Light up latching switch

    1 x Rebel Star basic Blue LED

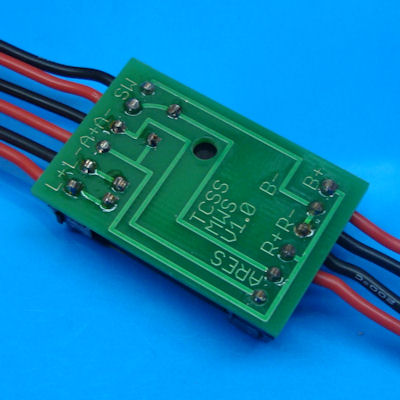
    I am hoping to do it using the MWS and all JST connected. This way I can have the LED emitter switchable and change the colour of the blade quite quickly if needed.

    Do I need anything else? It'd be great to hear some advice.

    Many thanks in advance.

    Adam H

  2. #2

    Default

    Welcome to the forums!

    You're going to need either a resistor (cheaper, doesn't come in MWS) or 1000mA BuckPuck (better, especially for swapping LEDs).

    Also, the CREE LED modules are far brighter than the Rebels and can all run on the same mA, red rebels can only handle 700mA (if that is a possible color you would switch to later).

    Typically using 4xAA you replace the batteries when they drain or pull them out to charge in whatever charger they came with. I'm not sure if the MWS recharge port can be substituted for that charger, it is meant for the Li-ion batteries sold in the store (you would need to find a source in the UK as these can't be shipped internationally). Probably easier to just drop the recharge port from your build if you have rechargeable AAs for now and maybe upgrade later.
    Last edited by solaren; 04-15-2015 at 03:21 AM.

  3. #3

    Default

    Hi Solaren,

    Thanks for your response! I didn't get an email notification haha. I would be happier getting a Li-ion battery and having a recharge port to avoid constantly replacing or externally recharging the batteries.

    Thanks for the tip on the CREE LEDs, they seem like a better choice. Also, I think I've read somewhere that the buckpuck keeps the LED bright and then cuts the power when it runs out instead of gradually letting it fade?

    With a buckpuck, Ion battery set up, switch, recharge port and an LED, how complicated is the wiring going to be? I'm struggling to get my head around it atm. Also, the switch box I have chosen doesn't seem to hold anything other than the AV lightup switches, which is fine expect I don't know how to wire them...

    Any advice is greatly appreciated.

    thanks,

    A

  4. #4

    Default

    Quote Originally Posted by adamhebbard View Post
    Also, I think I've read somewhere that the BuckPuck keeps the LED bright and then cuts the power when it runs out instead of gradually letting it fade?
    This is correct, the buckpuck provides a constant current until your battery can no longer support it.

    Quote Originally Posted by adamhebbard View Post
    With a buckpuck, Ion battery set up, switch, recharge port and an LED, how complicated is the wiring going to be? I'm struggling to get my head around it atm. Also, the switch box I have chosen doesn't seem to hold anything other than the AV lightup switches, which is fine expect I don't know how to wire them...
    All the parts you need come with MWS wiring, the BuckPuck page I linked previously lists all the connections pre-wired, which includes recharge and Accent LED switches. The best thing to do is draw up a diagram using the part photos as a guide and have members check it over for you.

    Good luck, and keep asking any questions you need. We love to help!

  5. #5

    Default

    That's really useful, thanks! Looks like I'll go for a buck puck, except they're out of stock Any idea how long it takes for them to be back in?

    Looking at the buckpuck, I see exactly how it works now, except for the ARES part. Can you enlighten me at all? I must say, I love the wishlist system so you can save it while you're logged out, it's soo useful for making, saving and keeping a shopping list. I'm choosing parts that are in stock at the moment, so everything except the buckpuck is available.

    With the 4 x AA battery holder, will I be able to wire that up and put standard rechargeable AAs in it, or will that cause issues? If it will, are there any Li-Ion batteries that have a mounting like the 4 X AA battery pack?

  6. #6

    Default

    I've been looking at the buck puck in more detail. I am planning to use this switch.

    http://www.thecustomsabershop.com/MW...ckel-P901.aspx

    At the bottom it says - You will need to jumper the accent LED resistor screw terminals with a piece of wire.

    I have drafted a very basic wiring diagram. Where would the above line come into this?

    Pic below

    Picture1.jpg

    Thanks again in advance!

  7. #7

    Default


    Just connect the two ARES terminals together with a small piece of wire. The prewired switch has a DynaOhm resistor, and you won't need an additional one for the switch LED.
    We all have to start somewhere. The journey is all the more impressive by our humble beginnings.

    http://led.linear1.org/1led.wiz for the lazy man's resistor calculator!
    http://forums.thecustomsabershop.com...e-to-Ohm-s-Law for getting resistor values the right way!

  8. #8

    Default

    That's awesome! Many thanks. I think I'm nearly ready to order. I'm not getting any powder coating but I might wrap the main handle in leather when it's built just for grip and to differentiate the colour and looks. What do you reckon?

  9. #9

    Default

    I've seen a few sabers with leather wrapped hilts. Done right, it makes for a fantastic look. Go for it.
    We all have to start somewhere. The journey is all the more impressive by our humble beginnings.

    http://led.linear1.org/1led.wiz for the lazy man's resistor calculator!
    http://forums.thecustomsabershop.com...e-to-Ohm-s-Law for getting resistor values the right way!

  10. #10

    Default

    Thanks! I only have one question now. With regards to batteries, can I use 4 x rechargeable AA batteries in this circuit, held in the mountable holder with jst connections, and charge the whole thing without it being taken apart?

Bookmarks

Posting Permissions

  • You may not post new threads
  • You may not post replies
  • You may not post attachments
  • You may not edit your posts
  •