Page 1 of 2 1 2 LastLast
Results 1 to 10 of 16

Thread: Solaren's Essence (First-ish Saber)

  1. #1

    Default Solaren's Essence Build Log (First-ish Saber)

    So my first batch of parts finally arrived! It may look a little confusing, but half the parts I wanted were out of stock and the blade holder and pommel were both pretty low when I bought these. I picked up enough odds and ends to start working things out spatially, so my first few posts will be more proof of concept progress.


    Day one progress will be posted after work.
    Last edited by solaren; 03-20-2015 at 01:33 PM. Reason: Title change

  2. #2

    Default Day One

    Laying out the hole locations for small momentary switches.


    Finished first attempt at mini switches. I will post some detailed pics of my setup here later on when I get around to doing another version. This one has a couple problems, the switches are unsupported on the bottom which is an easy fix with a redesign of my retaining plug. The second problem is getting the exact length I need, both of these ended up a little short. There are a couple places I can tweak this when I make another set, the actual turned copper being the big culprit because I don't have a reliable way to accurately repeat cuts on pieces this small.


    Switch controlling basic LED ran from 2xAA, then a second LED in the pommel to test the other switch. Not a very dramatic display, but more a confirmation that the small LED circuits work correctly.


    And finally a piece I made that may go in a crystal chamber someday. 3mm LED in a hinged standoff from McMaster. Another little piece to practice before I get to the larger parts of the build.


    Last edited by solaren; 03-20-2015 at 01:35 PM.

  3. #3

    Default Day Two: Attack of the Pommel

    So, I've had a few false starts on parts of this project since I last posted. Mostly just tinkering to figure some things out, so nothing to really show from that.

    Today, I tackled the speaker mount/pommel situation. One thing was very clear after my first dry fit of the chassis parts: I chose the wrong speaker mount to go with my pommel. The pommel 3 V2 has so much space inside, it is practically a mini extension. Would it work? Sure, but it may have required extending the design by an inch. Or, I could modify the V5 mount I got and make it into a V4 which would slide down into the pommel and still leave plenty of room for a recharge port inside.

    I was planning to make some modifications for wiring the recharge port and an accent LED or 2 around the speaker mount anyway, so I started by sanding down the lip that locks the speaker mount in place and test fitting it in the pommel with the recharge port. Sitting flush with the end of the pommels threads there was about 0.2" of clearance (as measured by one of the metal chassis discs sandwiched in between the two parts) between the face of the speaker mount and the recharge port connections. I think this is enough room, if not the speaker mount can back out of the pommel to allow more room, it will eventually be held in place by a set screw.

    Then I marked out some locations for wiring, cut a guide with a cut off wheel then rounded and shaped them with a cutting bit. Realized that each channel was only going to hold one wire, so I added 4 more channels, and this is the finished speaker mount:


    After the mount was prepped and test fit with wires I moved on to soldering the accent LEDs I had picked out for the pommel, a 2Hz flashing power indicator and a wide angle conical top led that will light with the blade. The conical top spreads the light around the pommel nicely and looking directly inside it doesn't blind you.

    All the parts ready for a test:


    And assemble with both LEDs on.


    YouTube videos: Blinking Power LED & Both LEDs at once

    Now that I've stepped back and watched the videos I think maybe the 2Hz LED is too fast, I may step it down to a 1Hz. And depending on the sound card I eventually get it may or may not stay on with the other LED.

  4. #4

    Default Day Three: Finally

    Finally worked out the process for a part that was giving me some trouble. I do a lot of woodworking, so I really want to include that in this saber. I've been trying to turn various pieces that I can attach or slip over the MHS pieces since I started working on my concepts. Unfortunately, my tools are pretty low-end and thus, not very precise which led to a lot of frustration. My last iteration was a success, now I'll have to wait on my next order of parts to arrive to make the final piece. But here is an outline of how the test piece turned out:

    First limitation: My drill press is cheap. This means I need to bore the holes before turning the piece, a slight flex under pressure means that the center bore is not 100% straight but taking it slowly and flipping the piece to finish the bore eliminates most of this.
    Second limitation: I do not have a jaw chuck for the lathe. To overcome this I cut some short sections of dowel that press into place and have enough friction to turn the spindle.


    Next problem: Doing all this by hand is not as accurate as machine shop lathes. It took a bit of trial and error to figure out where to stop on the size to not make a part too small after final sanding. Somewhere between 1.48 and 1.5 inches worked out well for my 1.45 inch target for this piece. (I played it safe and left it 1.5 as shown but had to do quite a bit of extra sanding at the end.)


    Now the easy part, transferring design guides to the part. My friend thought this part was magic or something when I helped him turn something. He was like, "You can just draw on that...Woah!".


    Finished part (I didn't have an extra set of hands for live action turning pics, sorry). Those walls are pretty thin where it will connect, but my plan is to load the threads of a .75 MHS extension and gender changer with JB Weld and then fit the wood around that, so it should be plenty strong once assembled. I will probably add some decorative pins around the connections which may add some strength to the joint.


    Part with my male MHS pieces. I didn't quite get the depth right on the connecting part, but that will be something I measure out once I have the pieces I'm actually using with this process.


  5. #5

    Default Day Four: New Parts, Switches V1.5

    Second shipment of parts arrived today! Not pictured, blade material and cap. Still waiting on a Prizm to make it across the pond from Erv.


    Test fit of the exterior pieces, its a little longer than I had imagined...maybe the interior pieces will let me cut an inch somewhere.


    Today I worked a bit on the second iteration of my switch setup. Here is the interior view of the first pass.


    Turning a piece of dowel into a plug that will hold the switches in place without relying on hot glue.


    Final pieces for the assembly. The grooves in the choke were cleaned up a bit to even them out, a 6-32 hole was added to secure the switch plug. For the plug I used the dremel to create a couple matching grooves to allow the plug to tighten a little closer to the choke, then drilled holes in the back corners to hold the prongs of the switches and allow wires to pass through, finally I bored a hole to allow wires from the main LED to pass through.

    The switches come with four prongs (unmodified switch on the left), to fit into this assembly I break off the prongs on one side and straighten the other set out (middle switch), then add a thin layer of hot glue to cover the remaining metal of the broken contacts because that side will be pressed into the aluminum of the choke (visible on switch sitting in the plug.


    And a test fit shot of this assembly. I'm much happier with this version, it is cleaner and has wire routing built in for later. I'm not going to wire these switches until I get the copper buttons turned and fitted. I will probably wait until I figure out how long the wires need to be to reach the Prizm and/or if I have room for some disconnects to allow for breaking the saber down easier.


  6. #6

    Default

    Whew, been a while. Lots to update.

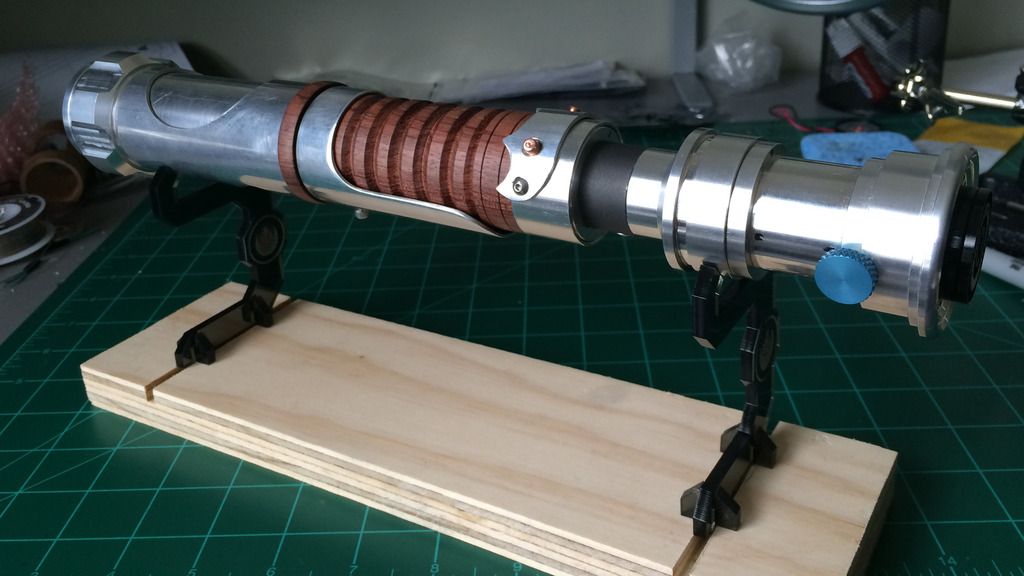
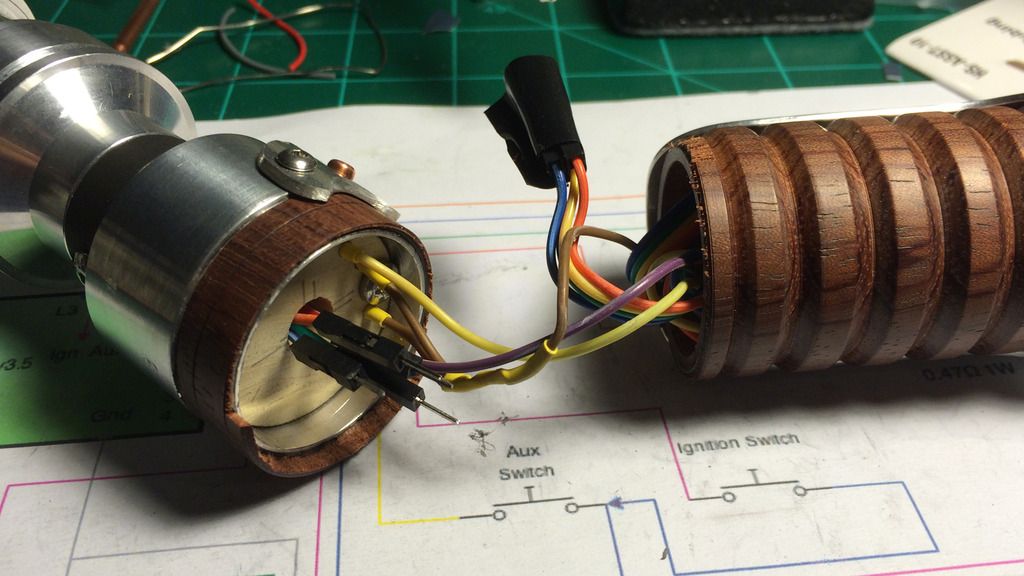
    So things were going great...I got to this beautiful saber:


    Then this happened:


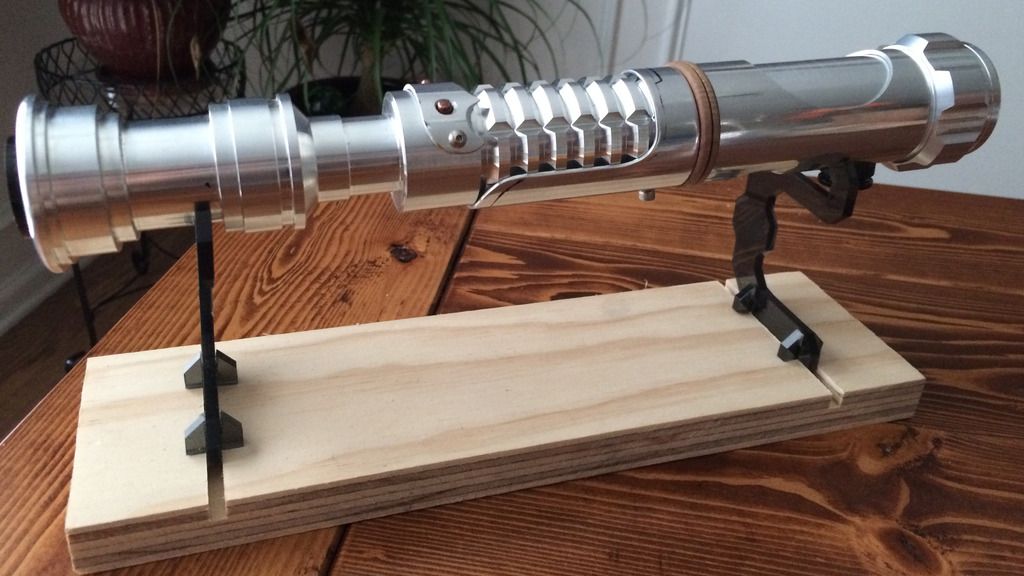
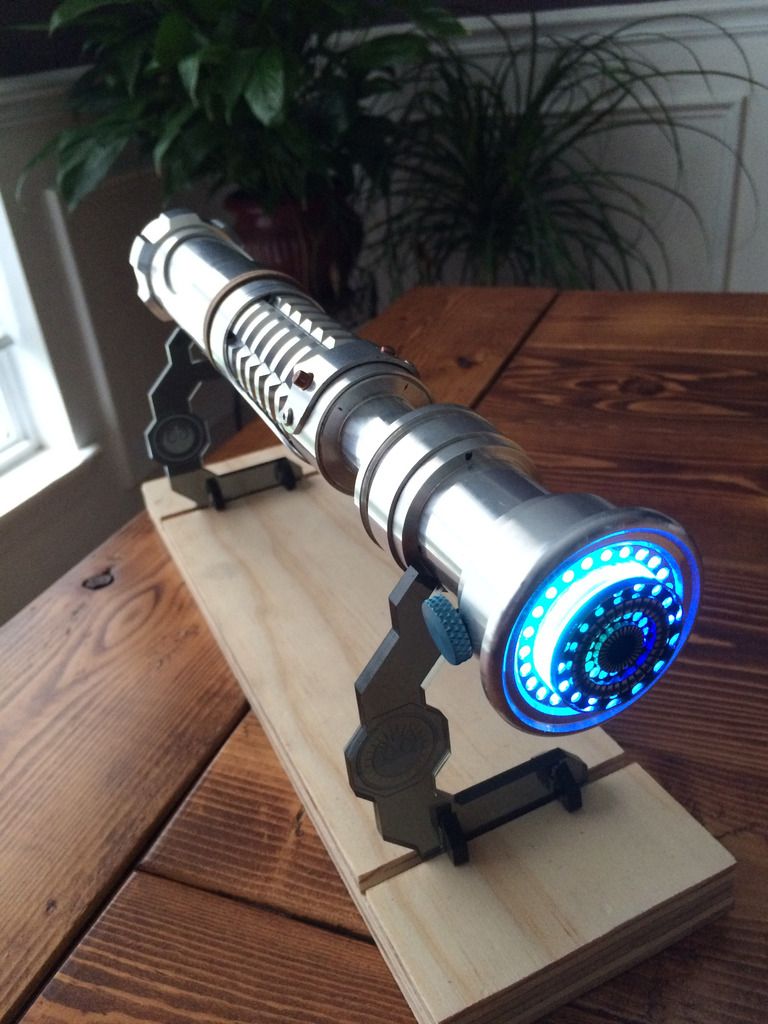
    Though I loved the wood, I couldn't keep spending money on more adapters and extensions, so I ordered the original metal piece from my design. I redrilled and tapped for the switch holder and reassembled the pieces. And now I have this, calling it version 0.5:


    Lots of work still to do to get to version 1.0 status, planning to recut the upper shroud to the shape outlined in black to better fit the spacing of the metal extension. The bottom grip still needs to be etched. I will either paint the extension or the shrouds to break up the silver some. The switch holder plate needs more shaping on the edges. I would also like to turn a new trim ring using the last of the wood from the extension pictured above.

    Once all that is done, I will move on to version 2.0. I will move on to building a better chassis that will accommodate a crystal chamber and hold the recharge and rice ports more securely.

    Unfortunately, I'm having to put this on hold for a while and call version 0.5 'finished' for now.

  7. #7

    Default

    Amazing saber, where did you get that blade plug?

  8. #8

    Default

    nice work!

  9. #9

    Default

    Quote Originally Posted by Taki117 View Post
    Amazing saber, where did you get that blade plug?
    Thanks!

    The plug is from one of the sites that can't be named. I got the plug and a couple covertec clips from there because I liked the details.

    I added a piece of acrylic around the plug that gives it that bright ring. I'll post a pic of my modifications when I get back home on Sunday.

  10. #10

    Default

    Interesting and informative thread. When I saw you turning up that wooden section I had a feeling that it would be a weak point in your build, sorry to say. However, it did give me ideas on how to add wooden accents using V2 parts. Interesting switching arrangement, I would have used delrin, but that's a personal preference. I really like the overall design and would love to see how you put together your internal chassis.

Bookmarks

Posting Permissions

  • You may not post new threads
  • You may not post replies
  • You may not post attachments
  • You may not edit your posts
  •