Page 3 of 8 FirstFirst 1 2 3 4 5 ... LastLast
Results 21 to 30 of 71

Thread: My Custom MHS Saber

  1. #21

    Default

    Not having much luck today on the FX boards so I turn to the people at TCSS. Iv'e been looking at etching today and ended up liking the idea of acid etching. In terms of understanding the process, I found some good tutorials (Goodman's in particular), but he used free hand drawing for the template, people will tend to use adhesive printer paper now right? Just don't want to try freehand the design I had in mind.

    Just so I'm understanding how it works I was planning on drawing the design up on my computer if I can (or scan a hand drawn), print it on printer paper, use an iron or something to transfer the image, make sure the resist is applied properly, and then throw the tube into the acid.

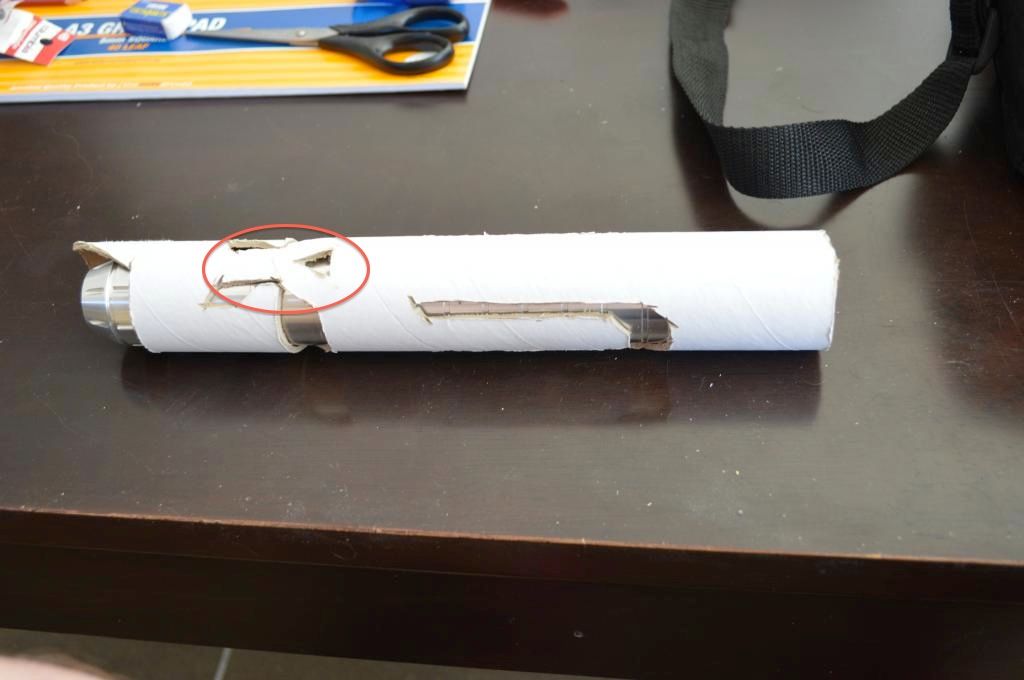
    Here's what I had in mind for the etching:-

    -First off I'm thinking of having some irish style vine etching along the Y shape of the overlay:


    -Something similar to this but without the clovers so that the design is still subtle and not too recognisable:


    I'm hoping that cutting out the overlay first with the dremel won't make applying the resist too difficult (feel free to share any thoughts on that).

    Right now i'm hoping with my questions in mind as well, that the main difficulty now should be just making sure that the image would transfer easily enough.

    I have a while to think about all this, while I'm away from my tools and what I had down so far, just thought I might get my head around other things I had been planning.

    Thanks guys
    Last edited by JMurphy; 07-14-2014 at 06:36 PM.

  2. #22

    Default

    There's stuff called "Press-n-Peel Blue Transfer Film" that works with a laser printer, and will do what you want with minimal fuss. It's used primarily for etching circuit boards, but works well for our purposes as well. Some touch-up may be required with enamel paint before you drop your piece in the acid, so check the transfer closely beforehand.
    We all have to start somewhere. The journey is all the more impressive by our humble beginnings.

    http://led.linear1.org/1led.wiz for the lazy man's resistor calculator!
    http://forums.thecustomsabershop.com...e-to-Ohm-s-Law for getting resistor values the right way!

  3. #23

    Default

    Thanks Silver Serpent, funny you mention circuit boards, because this tutorial really helped me understand the etching process http://www.robotplatform.com/howto/p...Transfer_toner

    I'll look into the press n peel fil, as well

    I think i'm all good for now on the questions front then

  4. #24

    Default

    It's a little trickier doing the toner transfer on a cylindrical surface versus a flat surface, but the principle is essentially the same.
    We all have to start somewhere. The journey is all the more impressive by our humble beginnings.

    http://led.linear1.org/1led.wiz for the lazy man's resistor calculator!
    http://forums.thecustomsabershop.com...e-to-Ohm-s-Law for getting resistor values the right way!

  5. #25

    Default

    It's a pretty small area, so it shouldn't be too bad. Could I get away with using something like glossy photo paper?http://www.officeworks.com.au/shop/o...heets-epppg4x6

    I think this is similar to what some people have used but it can be way cheaper than the film you suggested :P

  6. #26

    Default

    Glossy photo paper works. Or you could go *really* cheap and print on a page of glossy magazine paper. Just tear a sheet out of an old magazine and print directly on it. The ink they use for magazines won't transfer like the toner will.
    We all have to start somewhere. The journey is all the more impressive by our humble beginnings.

    http://led.linear1.org/1led.wiz for the lazy man's resistor calculator!
    http://forums.thecustomsabershop.com...e-to-Ohm-s-Law for getting resistor values the right way!

  7. #27

    Default

    Interesting, and I definitely have plenty of magazine pages (thank you game informer), I guess i'll just start from the cheapest untilI find something that seems to work.

  8. #28

    Default

    Hi all,
    So of course my brain isn't satisfied with just the etching and powder coating, now wanting to include some fine brass mesh as well.

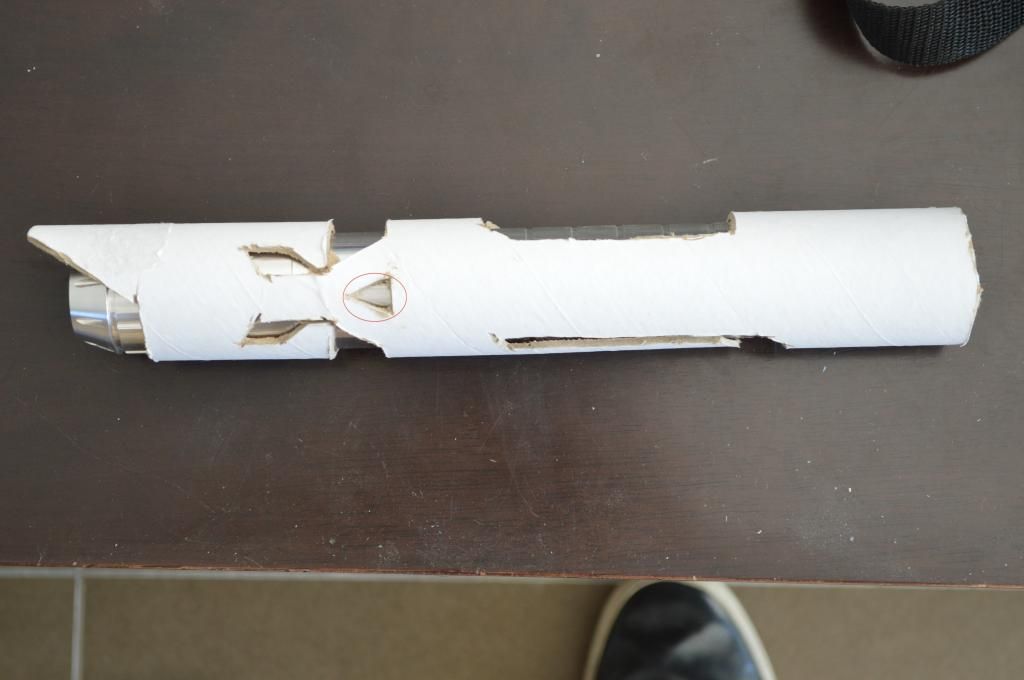
    I was thinking having the mesh fit in the following spot: (so just fitting within the triangle shape)


    Now it's the placing of the mesh that has me stumped, simply because the fitting of the overlay and underlay should be very snug and therefore near impossible to fit some mesh between them. I had the idea of cutting the piece just so it would fit tightly into the triangle shape but can't figure out how I might secure it, any ideas I had would make the mesh super difficult to remove once it was secure, e.g strong glue (I have not decided if that would be a problem though).

    It has been suggested that creating a lip on the inside of the overlay may work but it may be pretty difficult to pull off.

    So pretty much looking for any ideas on how to execute this?

    Thanks guys

  9. #29

    Default

    It would be easier to mount the mesh on the underlying part of the hilt, rather than the overlay. It will need to be flush or slightly recessed, or you will have issues sliding the overlay into place.
    We all have to start somewhere. The journey is all the more impressive by our humble beginnings.

    http://led.linear1.org/1led.wiz for the lazy man's resistor calculator!
    http://forums.thecustomsabershop.com...e-to-Ohm-s-Law for getting resistor values the right way!

  10. #30

    Default

    I agree with SS, it is always better to mount meshes from the underside of a shroud or a hilt. It may not necessarily be easier, but it is better.
    TCSS MODERATOR
    All n00bs READ these first (PLEASE)!!!:
    1. Forum Guidelines
    2. FJK’s “Down and Dirty” guide to Ohm’s Law

    "Yeah, yeah, I've heard it all before... you want blindingly bright, super loud, running 1138 blinkies off of the cheapest sound card you can find AND you want all of it to run on a battery the size of a dime, and run for a very, VERY long time. That one cracks me up every time..."
    My email: fjk_tcss@yahoo.com

Bookmarks

Posting Permissions

  • You may not post new threads
  • You may not post replies
  • You may not post attachments
  • You may not edit your posts
  •