Page 7 of 8 FirstFirst ... 5 6 7 8 LastLast
Results 61 to 70 of 71

Thread: My Custom MHS Saber

  1. #61

    Default

    Quote Originally Posted by setelf3of5 View Post
    Do you need the inside of the shroud painted at all? Maybe the emitter end, where you do see the inside...but all you need are the decorative edges painted, not the inside of the shroud....you will never see that part of it.
    The spraying of the inside was not planned; just didn't think it would be a problem. The emitter end is doable (I pull the main body out from the pommel end anyway), and with that I should be ok for the inside of the shroud. Apologies when I typed out the problem I thought some of the pommel end would also be exposed as well, but it will not. So assuming that the inside shroud is now ok with some sanding etc, i'd be moving on to the main body.

    But I'm still not sure if painting the main body will cause a similar problem again. Like if I had a problem with the inside of the shroud being painted, won't I have a similar problem when the main body is painted?

  2. #62

    Default

    Quote Originally Posted by cakira21 View Post
    you'll have to sand the paint off of the ID of the shroud and sand the OD of the parts of the saber you want to paint. that way you'll have some clearance for the paint layer to fit between. it shouldn't take too much sanding to get the clearance you're looking for. just remember when you paint, even if you do several coats, when you spray a coat mist the paint light enough to where you can still see some of the layer below it but spray enough to where it's mostly covered. and give it a little time to dry, if you're using spray paint in the aerosol can maybe 5-10 min between coats then do another "mist" coat, and repeat until the part you wanted to paint is covered evenly. that should keep the paint layer nice and thin. most people will put several coats of paint on a part that they want painted and they'll spray it until it's completely covered each coat and they wind up putting way too much paint and they'll get runs everywhere and beading on the edges. and they'll have to sand it all off an start over. I hope it works out for you.

    **EDIT** to help you sand the inside of the shroud, get a dowel rod, and wrap the sandpaper around the dowel rod, use it as sort of a "sanding block"
    Yeah I was trying to do the mist coating as I figured out that was the way to go after some practice, that was going well until I had a problem with the paper I was using to cover another part painted that I did not want to spray. Ink from the protective paper soaked into the paint and so I had the weeks grocery specials on my shroud, lol.

    To fix that I sanded what I could, but that meant I sprayed more than I intended to cover the problems. I became frustrated with that so I wasn't careful in letting the piece dry and created some bad spots, so I ended up spraying some more. The shroud is still a little blemished but I don't have enough paint to start over.

    Anyways i'll sand a bit more and see how that goes, i'll also try to be much more careful with my layers and letting it dry. I might even lacquer the outer layer first to give a bit more protection while I sand the inside. White blemishes easy, haha.

    Thanks again cakira21

  3. #63

    Default

    Alright guys,

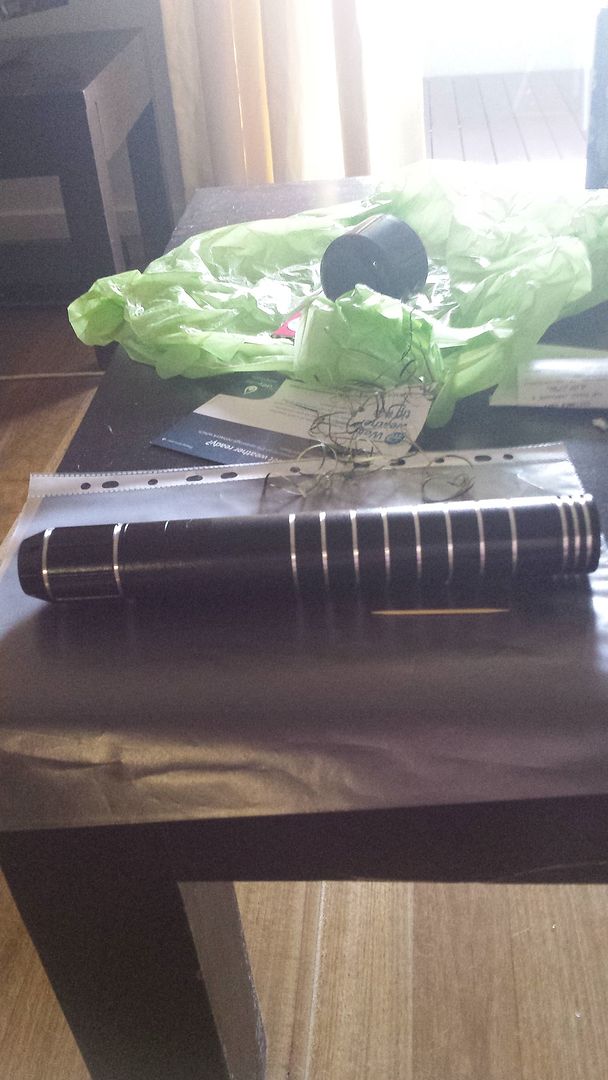
    So I just took the micro tape of the main body to get a good look, and I think it's looking pretty great! I did have one slip that sort of messed up the paint a bit when painting the emitter end. Also the emitter end is a bit darker than the rest. I think that mostly comes with not being able to paint the whole piece at once (currently hold it all in my other hand as I spray).

    Anyways here's a pic:


    If I do have to redo it for whatever reason I think i'll invest in some sort of mechanism to place the hilt on my clothes line in order to paint the whole thing in one go, because the main issue has been the slipping with protective sheets I use, and mismatching colour over the painting being split in two sections. With how I'm doing things now I don't think I'd be able to do significantly better until getting more equipment.

    Still sanding the the shroud, hopefully that works but I also wanna be careful I don't send too much too. So I sense some scratches in testing. If it works out though i'll be happy with how things are

    I'll be sure to crop my pics in the future as well :P

  4. #64

    Default

    painting is a skill. but once you have it, you have it. it's looking good so far though. hanging your parts def helps, and if your gonna paint more than one part at a time make sure you hang them with enough space to work around. if the parts are to close you'll get over spray from one part on the other. different colors will definitely show up. but if you get over spray from the same color it'll look like a dull spot on an otherwise shiny paint job. or on a matte finish it'll look like a slightly different texture matte.

  5. #65

    Default

    Yeah I'm gradually improving on the paint technique, just that line where the shade changes might still be visible once the shroud is on. But if everything goes together fine I probably won't be too fussed about it for a while at least.

    The clothing line will give me a bunch of space to do the whole lot (on both the main body and shroud) at the same time without worrying about spraying the wrong pieces. But i'll only be looking into that if my current attempt goes wrong enough to warrant a retry. Main thing is getting that shroud fit, I bought a roll of book covers to act as a rod, i'll stick the sand paper onto that, should be able to sand evenly now over the whole inner shroud.

    Only time will tell! tThing is I don't wanna over sand the inner shroud, so preventing that might call for a few fitting attempts; do that too early and I risk scratching. Feels like quite the balancing act at the moment, haha.

  6. #66

    Default

    Another one of my mini-updates,

    My make-shift rod and sandpaper technique wasn't working, I just could't get solid/consistent pressure. So I went back to using my hands and really concentrated on the pommel end. Good news after using 240 grit for about an hour, is that I can slip what I sanded over the main body, and it fits with NO scratching! Just gotta grab some more 240grit to move through the rest of the shroud

    Oh and also my first attempt at fittings things went horribly, so I had to sand back the emitter end, probably for the best because the coats were not even and could do with being redone, what happened just confirms me fixing that now

  7. #67

    Default

    Hey all,

    Finally got the shroud to a point where it will fit the main body with paint

    [img width=300 height=125]http://i158.photobucket.com/albums/t118/jimmy_murphy1/Saber%20Fitting_zpsxjhv4sk2.jpg[/img]

    I'll start repainting today, although after just redoing the emitter paint; I gotta feeling I might have to redo it yet another time (may have been to thick again, but gradually getting better).

    Otherwise once I get that layer just right, it'll be all just a matter of waiting for paint to dry

  8. #68

    Default

    Hey guys,

    Just a quick update/question; as I already mentioned everything is fitting after I repainted the main body (emitter end).

    I've just had a small problem in that there is still some scratching in fitting, is there anyway I can reliably find where those scratches are coming from?

    I can kind of infer from where the scratches start but I really wanna be sure without refitting too much. The scratches can be hidden mostly, but I really wanna get the causes out of the shroud before painting it. Otherwise i'll end up with too many scratches and will be looking at repainting; while also not fixing the problem.

    Thanks guys

  9. #69

    Default

    from my experience, most of the time, the scratches come from the edges of the shroud where you cut the pattern out, rarely do i get a bur in the ID where there isn't an edge, unless it gets hung up on a bur on the OD of one of the MHS pieces that i modded, just make sure you sand all the edges from the inside. there really isn't an easy way to get to them all to sand, it just takes a lot of elbow grease and patience.

    **EDIT** it's looking good btw.
    Last edited by cakira21; 05-19-2015 at 06:53 PM.

  10. #70

    Default

    Thanks man

    I thought I had the edges covered, but obviously I must have missed bits. I hope you're right though, otherwise figuring out the problem will be tricky. Fingers crossed I get them out on the first go, because the more I try a fit and fail, the more scratches will show up; making it harder to figure out where the problems are.

    So close!

Bookmarks

Posting Permissions

  • You may not post new threads
  • You may not post replies
  • You may not post attachments
  • You may not edit your posts
  •