-


 Covering mistakes with MHS sleeves/shrouds
Here is something I figured I would throw out here for fellow noobs.
I have only been in the saber scene for about a year now and but I have learned a lot in a short time. A lot of that learning comes from mistakes, of course.
Now, I am cheap. I come from a long heritage of jelly jars full of random screws in the garage, so I am physically incapable of throwing anything away. Every MHS part I made a boo-boo on, I saved. Eventually, I found a way to make use of them?.shrouding.
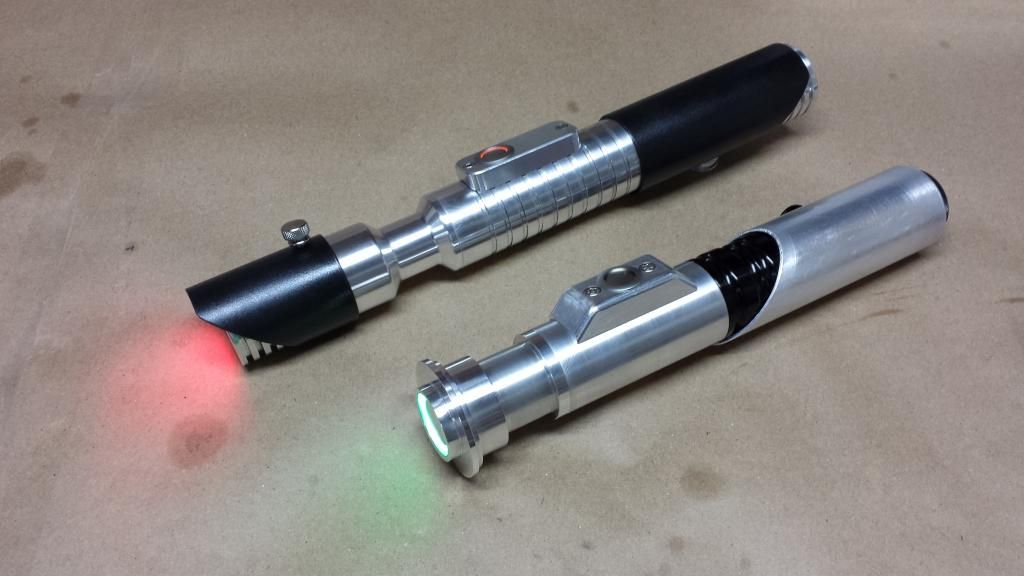
I recently posted pictures of my first attempt at making a saber shroud with the MHS sleeve material. This opened up a world of possibilities for me not just in saber designs, but in salvaging botched parts. Here are two examples.
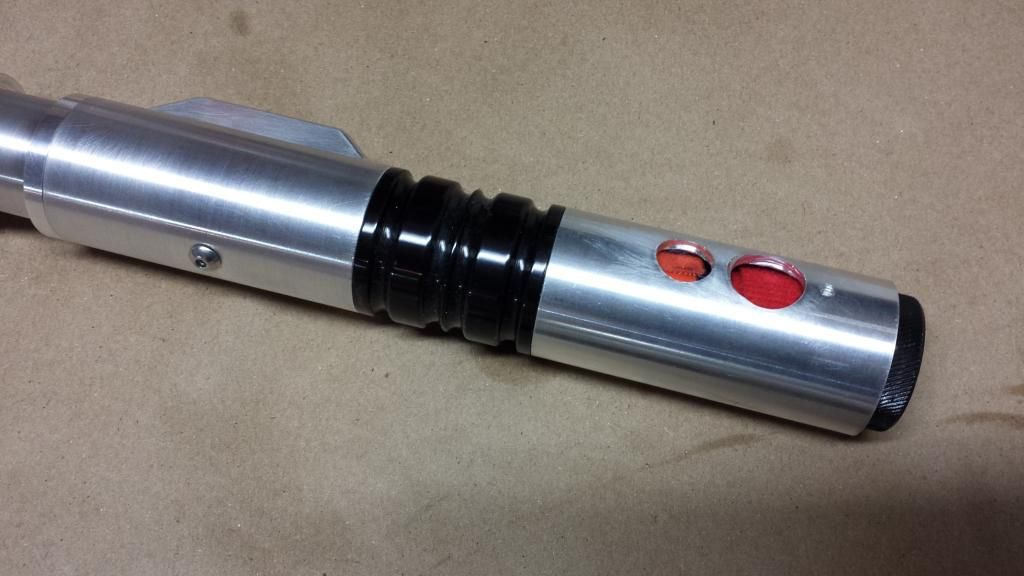
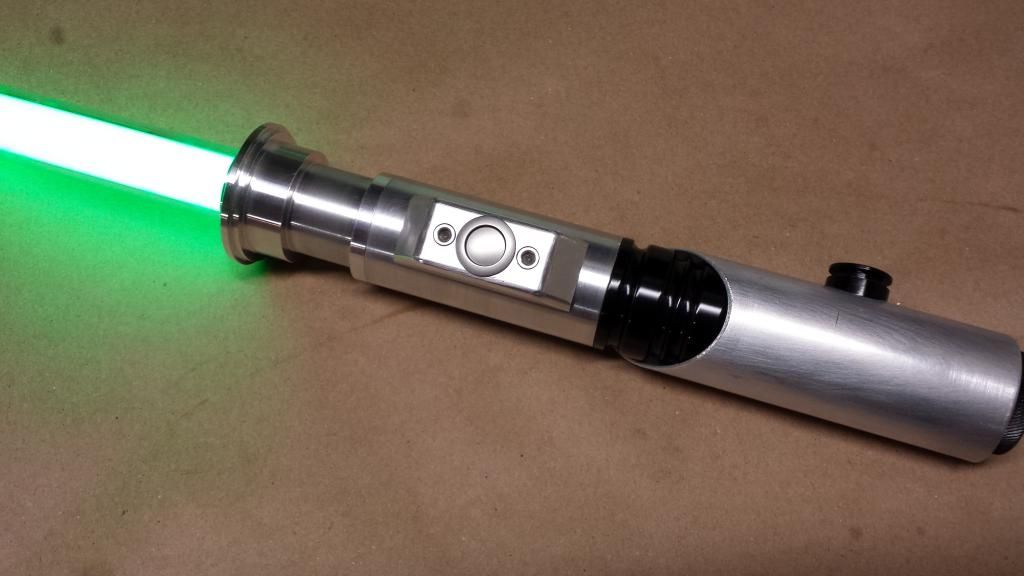
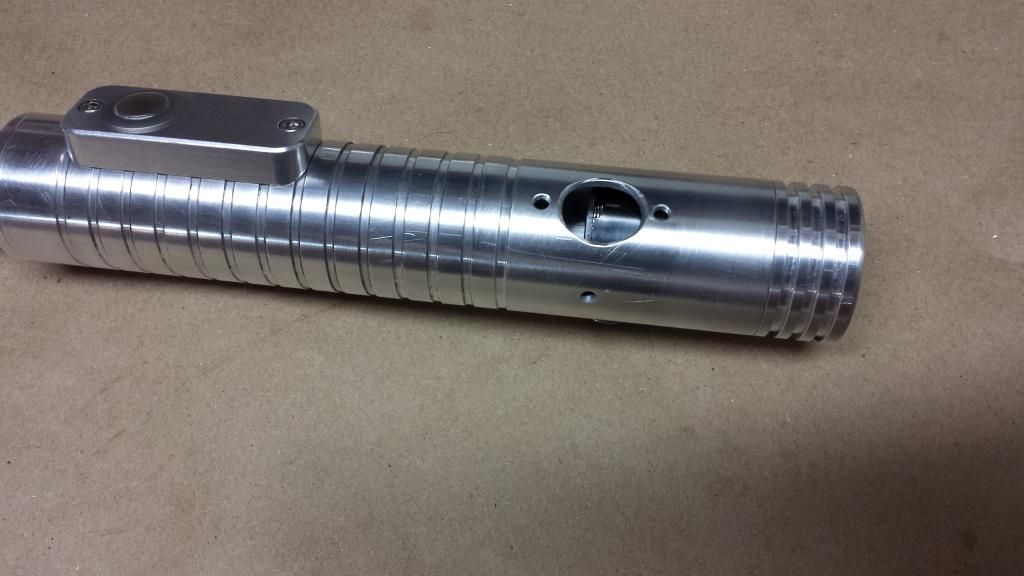

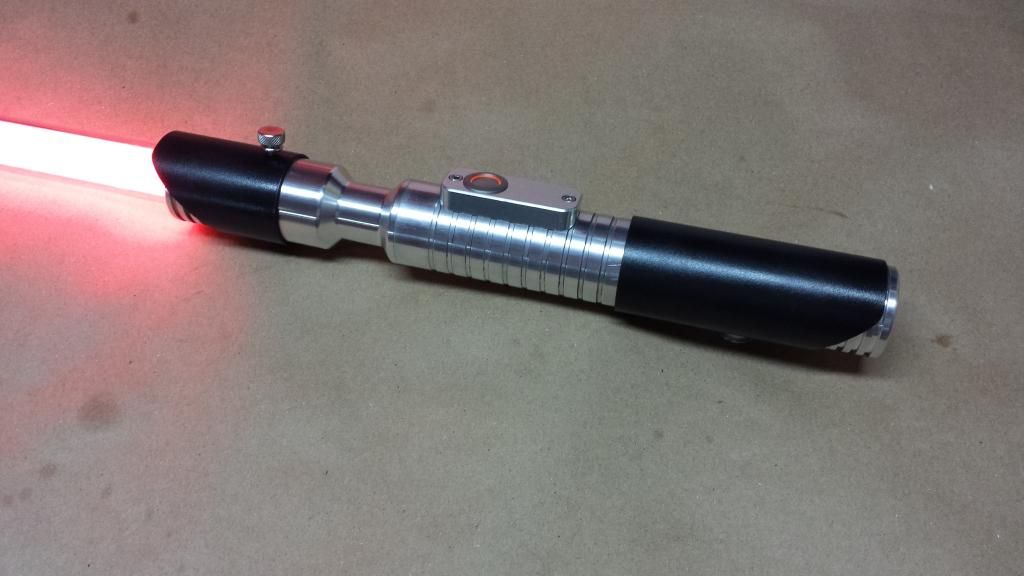
For each, the shrouds are very simple. The green bladed one is a piece that was cut at a 45 degree angle with a miter box and hack saw. The red bladed one has two shrouds which were cut the same way, but I then clipped the tip to give that toenail look. Each is used to cover up old holes in the MHS parts.
I also made use of button head screws to fill in holes not under the shroud. These little buggers, when cut down properly, will just look like a rivet and blend into the build.
Even the electronics are salvaged. The red/orange saber (by the way, first time using that color and I am loving it. It is red with a little character), is made with an MWS buck puck I saved from a recent sound upgrade. The green bladed saber uses a 16mm latching AV switch with a green ring that lit up for a few days and then stopped working. I see why these are no longer in the TCSS inventory. It still works fine as a switch, just without the bling.
One great use I have found for such builds is as hands on display sabers at Rebel Legion events. Most stuff on display is off limits to touching. Since I am not in love with these sabers, I will not mind them being handled by the public. Kids are very happy when I hand them a ?real lightsaber? to have a picture taken with. Not something I would do with a show piece I put big money into but these junk builds work great for that purpose.
I have a long way to go before being a master of this hobby but I thought I would offer these pictures up for the benefit of someone who made a mistake on their metal work. Nothing is ruined until you give up on it.
I will part with words from a teacher I had in trade school.
"The difference between a journeyman and an apprentice is not that the journeyman does not make mistakes. The difference is that the journeyman has learned how to correct his mistakes."
EDIT.
Ok, raise your hand if you thought the saber with the red blade looked terrible. Yeah, me too.
I wanted to try something different with the paint. The color was supposed to be copper, or at least that is what the top of the can told me. I was lied to. That color is more like.....metallic baby poop. Not really what I was looking for.
I tried, but sometimes, silver and black is the best...so I repainted it.....
Last edited by chicago.jedi; 05-30-2014 at 04:33 PM.
 Posting Permissions
- You may not post new threads
- You may not post replies
- You may not post attachments
- You may not edit your posts
-
Forum Rules


 Reply With Quote
Bookmarks