Page 2 of 3 FirstFirst 1 2 3 LastLast
Results 11 to 20 of 23

Thread: A better way to do sleeves?

  1. #11

    Default

    Quote Originally Posted by Silver Serpent View Post
    I've got a bench vise that I hold my saber parts with, and an old towel to prevent marks on the parts when I clamp down. My dremel is held up by a stand, so both hands are free for fine control of the the dremel's business end. If you're wrestling your parts and your dremel while you're trying to make cuts, you'll never get good clean lines. Be prepared to cut, stop, adjust the part in the vise, cut more, repeat.
    I use an oven mitt and hold the shroud in my hand, it may be considered a little (a lot) less safe, but I feel I have much more control this way. Another tip I have is to do any drilling and detail cuts first, it can get tricky cutting little angles and drilling holes when the majority of your material is already removed, also save those little worn down cut off wheels they can be very handy for tight cuts.

  2. #12

    Default

    I think you are being much too hard on yourself judging by the look of your first attempt. Very few would not make mistakes on a first piece. I know in your mind you want perfection, but keep any attempts that did not turn out perfectly for practice, or even to rework in the future with a new design, on top of that, if your saber will be weathered small dings and chunks just look like battle scars. I have seen some sabers where jagged holes have been cut on purpose to imitate damage. But as far as your work goes I think it is pretty damn excellent, you will ALWAYS see improvement with practice. Long straight lines like your design (which I really like by the way) are difficult by hand, so you have done truly well. Do not be disheartened, outer sleeve material is relatively cheap, it is only time and sore muscles that you are paying for. (Well, I don't mean 'only', like that is unimportant ) Also these parts can always be replaced! Upgrading your saber is half the fun, and gives it a truly 'used world' look. I also found to pay for the best cutting wheel you can afford, some of the no name cheaper stuff blunts quickly, change your wheels as soon as it seems to cut not as well, and I often use the grinding burrs for getting through material fast, again, using the best I can afford.
    Actually I just re-read your post with the images and you asked if it was SALVAGEABLE! It is more than that. Use it! It only looks like the real difference in the straight lines is the 'Top' cut, and where the biggest out of alignment area is you can put your blade holder screw there, if you use a larger headed thumbscrew,even a colour one to draw the eye, I am sure it could help, also, you could 'step' the wobbled cut, by making the crooked area wider, doing it in one or two steps. Might be a bit complicated, or not fit in with your design ideas though. But there are usually ways out, don't forget you are focussing on the imperfections, working on a tiny area of what will be the whole saber. It will lose some of its intensity when fully constructed with lights and sounds. Please, do not be disheartened! Wish you good luck in this and future builds!
    Last edited by brett; 03-25-2014 at 08:25 PM. Reason: more to add

  3. #13
    Jedi Knight cannibal869's Avatar
    Join Date
    Sep 2008
    Location
    Home of NUCLEAR JEDI SABERS
    Posts
    1,027

    Default

    The others give really good advice.
    I tend to us a paper template as a guide for my cuts, then sharpie them onto the shroud.
    I personally use a mechanix glove to hold my pieces while I dremel.
    For complex curves, I basically cut straight or shallow curved lines and then smooth them out once I have enough material removed.

    Practice, practice, practice. The Dremel-Fu is something that comes with time and patience. Also the more you practice and gain experience, the more you'll develop a "feel" for when things are going well. And you'll develop a better self awareness for when you're tired, frustrated, and need to take a break.

    That said, that particular shroud design -- even if you had perfect cuts, I think you would find that the distal end would start to "splay" outward anyway. It's one of those things that you'll sort of learn to compensate for over time.
    LOCKHEED

  4. #14
    Council Member
    Jedi Master
    FenderBender's Avatar
    Join Date
    Jul 2008
    Location
    Earth System - Rhode Island
    Posts
    1,531

    Default

    When I first came up with that design back in '08, I did it by hand and had to match the rear to the front as two separate shrouds. I glue grid paper on the sleeve material and draw the shroud direct onto the tube. Now, I use my mill to get the straighter lines and I don't usually have any problems with splaying. Though, you have the grooves pretty close to the end which will create a weak spot for 'tearing'. Shroud work is all about practice. I still have my first shroud for nostalgia and will never get rid of it. It serves as a reminder of where I started and what it took to get where I'm at now.....and it also provides a good laugh for my wife whenever she sees it....

    If you're new, please take the time we all consider just as precious as you and READ!

    GET LATHED!

    Official BMF and LORD OF THE STRINGS

  5. #15

    Default

    Quote Originally Posted by FenderBender View Post
    When I first came up with that design back in '08, I did it by hand and had to match the rear to the front as two separate shrouds. I glue grid paper on the sleeve material and draw the shroud direct onto the tube. Now, I use my mill to get the straighter lines and I don't usually have any problems with splaying. Though, you have the grooves pretty close to the end which will create a weak spot for 'tearing'. Shroud work is all about practice. I still have my first shroud for nostalgia and will never get rid of it. It serves as a reminder of where I started and what it took to get where I'm at now.....and it also provides a good laugh for my wife whenever she sees it....
    Ha ha! That is a great story Fender, and I think, considering the quality of your work, an encouraging one too.

  6. #16
    Board Lurker
    Join Date
    Feb 2014
    Location
    United States
    Posts
    16

    Default

    Thank you all so much for your amazingly encouraging words.

    Fender: I've been drooling over your designs for years, and of course I just HAD to to make a tribute for my first saber, regardless of whether or not I had the skill to do so. But it's really, truly comforting to hear from some amazingly talented people who all share similar stories of their first shroud work. We all have to start somewhere, and I plan on sticking with it until I can churn out something truly spectacular.

    Thank you ALL for all of your advice, words of wisdom, and techniques. More than anything, this community is what is making this process such a fun and enjoyable experience and it makes me want to continue. I can't wait to get back to work on my shroud and make something I'm proud to share.

  7. #17

    Default

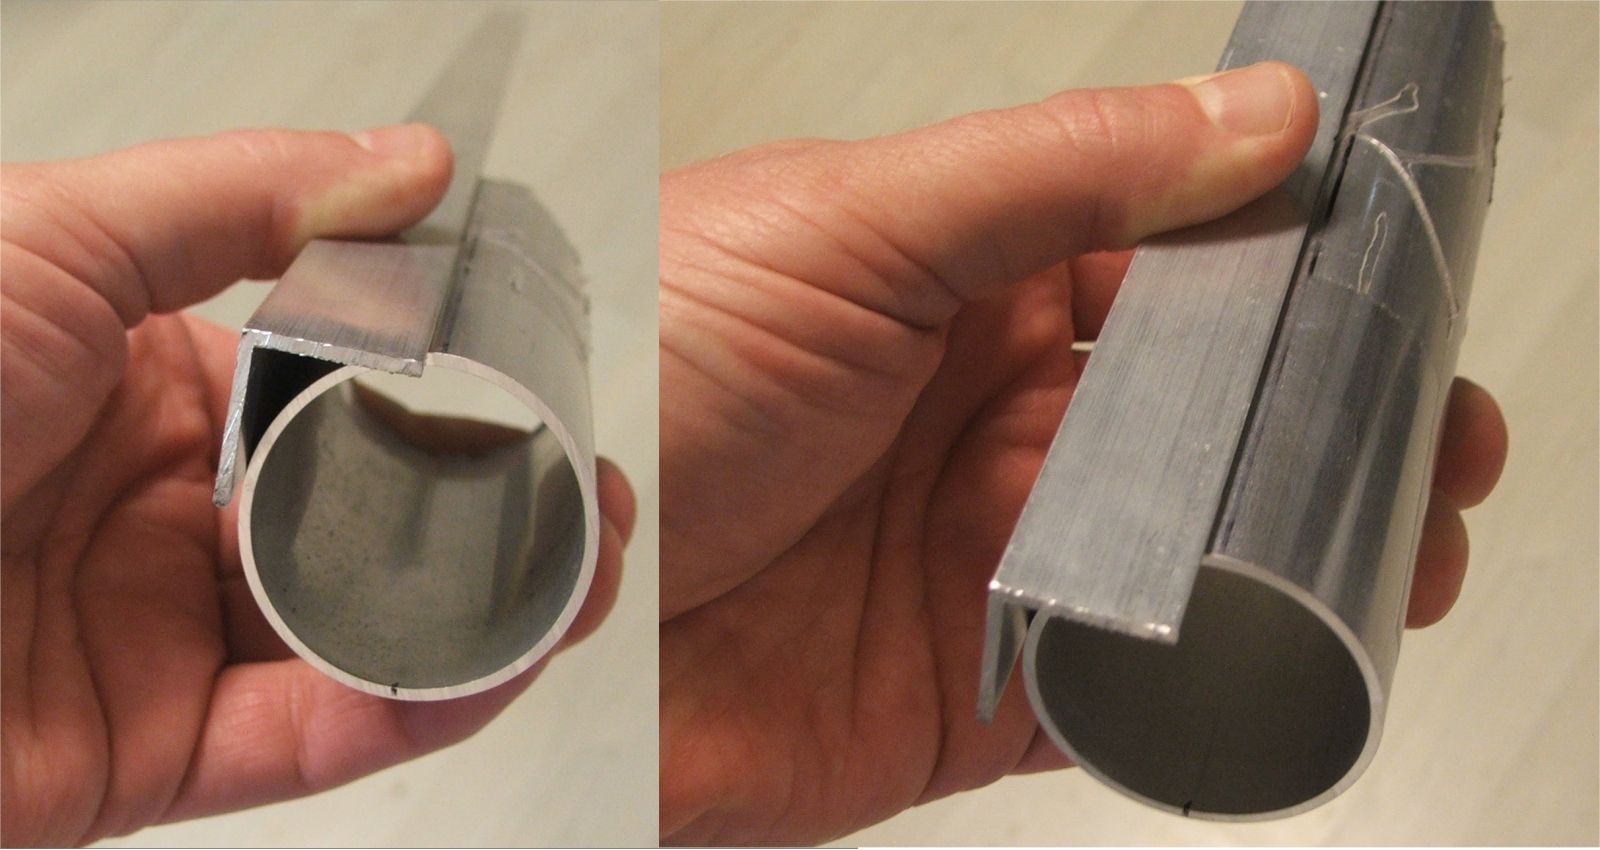
    A piece of Aluminum corner trim works great for laying down a straight line on the tubed surface. Takes the fuss out of trying to hold a ruler in place.


  8. #18

    Default

    I have also used a door jam to lay down lines on a rocket body tube. Same basic principle. I like the idea of the angle piece better though. Less chance to draw on the wall.

  9. #19

    Default

    wow brilliant with the angled trim! I too use the door jam but find making a long perfectly straight line almost impossible! I'm going to rig on up tonight!
    "NO! This one goes here, that one goes there"-H.S.

    Saber building in a nut shell, as told by a smuggler

  10. #20

    Default

    In addition to a dremel you will want a good set of small files of various shapes. Taking your time and getting the filling / smoothing step right is key to having high-quality results.

    Follow that with progressive sanding using 400-600-1000-1500-2000 grit paper. Stop when you get the finish level you like. 1500-2000 grit will give you a mirror finish. Personally I like to sand up to 1000 then do a directional sanding with 600, this gives a nice brushed look.

    -Denzil

Bookmarks

Posting Permissions

  • You may not post new threads
  • You may not post replies
  • You may not post attachments
  • You may not edit your posts
  •