Holly version two, i dont think my poor heart can handle another one.
ill watch this closely to see how you execute the slider switches, i have that in my plan for my 2nd saber but
i know not how to do it properly.


Holly version two, i dont think my poor heart can handle another one.
ill watch this closely to see how you execute the slider switches, i have that in my plan for my 2nd saber but
i know not how to do it properly.
The switches for this saber are still going to be push buttons, like Holly. I keep putting "sliders" in quotes since that's what they look like to me, but they're just a trim piece tacked on. I'd like to eventually do a version where they slide, but that's a bit outside of my milling ability at the moment.
On a side note, I've been busy at work on the saber this week and hope to have some progress to show for it later today!
hmm interesting,.... I seem to recall something of the drawings done by slothfurnace when he did his satele saber.Originally Posted by rogue9607

I shall give it a go and then post the results.
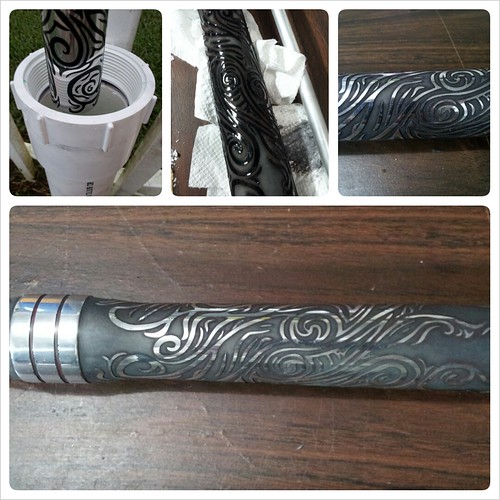
Progress has been a bit slower than I'd hoped this week as I've been encountering an unusual number of complications, however things took a good turn today and I've made most of the parts and moved on to the first piece of etching. I was able to get a really nice deep etch for the center section of the hilt. I still need to do more cleanup, and etch the detail onto the center ring.
The emitters are ready for etching, and that'll be the first item I work on tomorrow. I think this will start to come together quickly now!
Man i really need to try out this etching it looks like so much fun.
Rogue are you going to try milling the slots in the emitter this time?
The etching is a lot of fun, but also a trial and error process with a lot of learning. Oh, and INCREDIBLY nerve wracking...
Assuming the emitter etch goes well, I'll be milling out the slots a bit... ~1/8" maybe? I'll just try to get the first one to look right and go from there. I may or may not etch the inside of those slots depending on how they look, though I'm leaning towards etching them for color consistency.
Oh, and for the switches, I know Slothfurnace had sketched a working slider, but to my knowledge he never built it. I'd intended to try them with Holly (though in retrospect think it probably would've been really tough), but the switches I'd ordered for it didn't come as advertised. I was trying to use a "momentary slider" which in my thought would be a spring loaded slider that would return to open when you released pressure. What came was just a latching slider (not something from TCSS). I was never able to find the right kind of switch in a small enough package. I'm sure a mechanism could be machined that would work, but that'd be pretty involved and not something I'll be tackling for this build, however, the though has crossed my mind for a future version if any of my friends finish CNCing their mills.
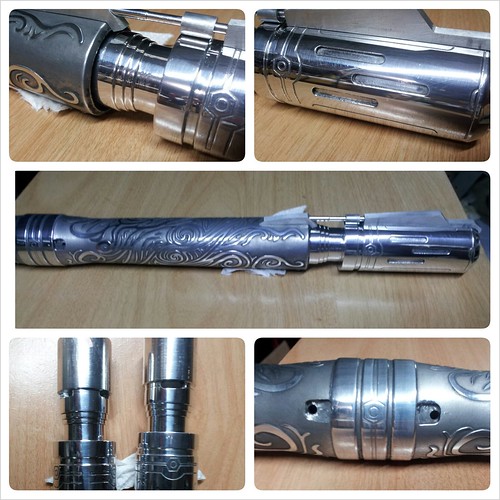
I got quite a bit done over the past couple of days. The bolts/lines are etched onto hilt and emitters. I also etched guides for the slots on the emitters and then milled the slots out. I used the lathe, boring bar holder, and a piece of 1" rod inserted into the emitter to hold the piece in place for the milling. Not an ideal setup, but certainly better than some of the stuff I rigged up for Holly. I really like the effect of the added depth. The sound holes are milled in the emitters as well as slot for the LED wires to bypass the speaker. The sound holes are hidden by an overhang in the hilt. The recesses for the momentary switches are milled out, and now I just need to get them mounted/wired without grounding out against the hilt. I've been working on the fins and rods off and on during the project and the fins and rods are fit, but I still need to polish the fins. The polishing continues as pieces are completed, and there's not much more other than polishing and assembly. I need to drill/tap for the set screws to hold the emitters in place, and possibly figure out the small fins on the switches.

damn.......
I'm speechless

Daaaaaaaaaarn that's sweet! (That's the family friendly version...)

Absolutely beautiful dosn't do this justice. What is your etching setup?
 Posting Permissions

 Reply With Quote
Bookmarks