Page 2 of 6 FirstFirst 1 2 3 4 ... LastLast
Results 11 to 20 of 51

Thread: Rogue9607's Satele Saber (Version 2)

  1. #11

    Default

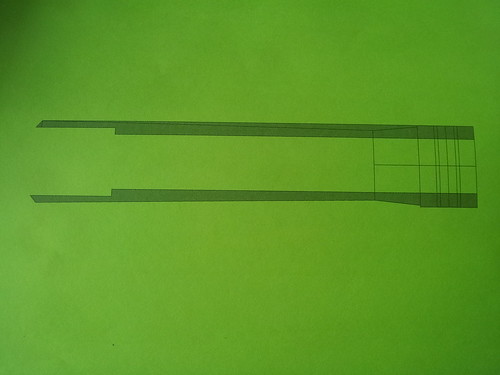
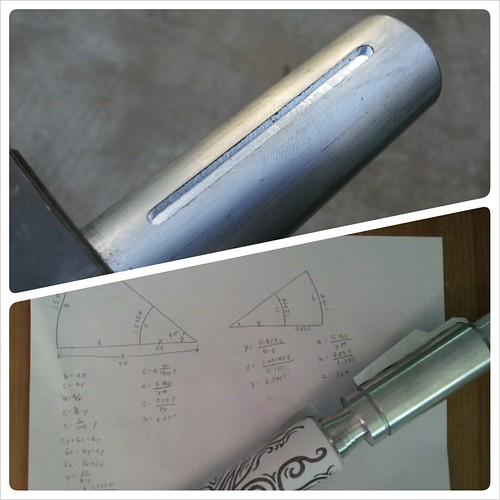
    I made some good progress this weekend after deciding to attempt the tapers in the hilt. Since the speaker will be at the base of one of the emitters, I don't need a large diameter section in the middle of the hilt and can make the entire middle section one piece. Here was my diagram that I worked off (only printed one half due to paper size limitations).


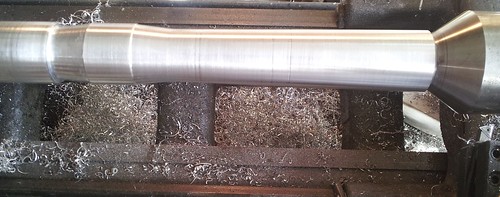
    It wasn't too bad to turn, unfortunately my cross feed slide only has a range of ~2" and I don't have a taper jig.


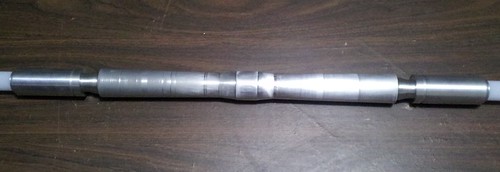
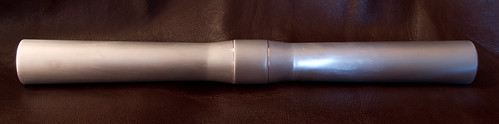
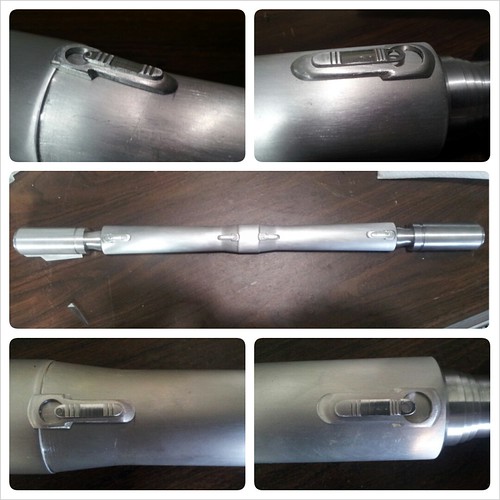
    The emitters fit quite nicely and it's starting to look like a saber! Now for a *lot* of sanding...


    I apologize for the quality of these pictures. My hands have been so dirty after these shop sessions that I don't want to pull out my good camera, and my phone has a habit of getting background items in perfect focus rather than the subject, despite my focus selection.

  2. #12

    Default

    Great work, Rogue! Cant wait to see more, and I feel ya with the phone camera, they can be sooo evil!
    With us, you are ruler of all the Sith, answerable only to the Emperor himself
    ―Darth Marr to Darth Nox

  3. #13

    Default

    So the last picture of the hilt left a lot to the imagination, both because of the amount of sanding needed and the quality of the picture. I've had some time to get some sanding done, and now have the center section cleaned up through 600 grit. I'll probably go a bit farther before switching over to a polishing wheel, but I can't feel my arms and hands at the moment, so I figured that was a good stopping point.

    After washing myself and the piece (anyone else feel like the Tin Man after sanding aluminum?), I got a decent pic of it so far:

  4. #14

    Default

    I've been spending quite a bit of time getting the artwork to appropriately fit to the tapered hilt which resulted in some fun with geometry and illustrator. Ultimately I have the two cones that I can wrap around the hilt that match up.

    Also, turned a piece of 1" aluminum so that it will fit in my boring bar tool holder. My thought is that I'll slide the emitter onto that rod, secure it with a screw, that will ultimately be hidden by a fin, and mill the slots rather than relying only on the etching. My first test slot (on the jig itself) came out pretty well.

    Last edited by rogue9607; 03-25-2014 at 12:16 PM.

  5. #15

    Default

    Made a bit more progress today with the switches. I have the bases for the two end switches done and think they're much closer to Satele's. I still need to add the button, ribbed top piece, and the small fins at each end.


    I also realized that the center switches are smaller than the outer ones, so I'll need to tweak the design a bit before making those.


  6. #16
    Jedi Knight cannibal869's Avatar
    Join Date
    Sep 2008
    Location
    Home of NUCLEAR JEDI SABERS
    Posts
    1,027

    Default

    awesome work... love the detail pics and in-progress shots. Really gives you a feel for the passion and love that goes into sabermaking, huh?
    LOCKHEED

  7. #17
    Jedi_Knight_Zekk
    Guest

    Default

    Holy smokes! This looks great so far! Super excited to see how this turns out! Now I know it's a little long term, but do you know if you're gonna stick with the cyan/blue blade? or are you gonna have some fun with the LED

  8. #18

    Default

    Thanks everyone. Holly, my wife's saber that's Satele-inspired, has an RGB LED that's lots of fun. I have it setup so that I can cycle 100 different colors for the blades/crystal, and even assign the crystal a different color, though I haven't done that beyond just trying to color match better. I think I only have 8 presets on there now though for ease of use (tiffany blue, blue, green, red, and a corresponding set with the crystal off). This saber isn't for me, and the goal is to get as accurate as possible to Satele's, so I'll be going with a blue blade. With all the work that's going into this saber, I'm sure it'll be hard to part with, but I know it's going to a good home and will be part of an incredible costume.

    I've been working on the switches the past few days and have the bases and the "sliders" shaped. I still need some more sanding, etc.


  9. #19
    Jedi_Knight_Zekk
    Guest

    Default

    Those switches are looking fantastic! And the overall look of the saber is starting to come together, even with just the switches! I can't speak from experience, but I can imagine how hard it is to give up something you've worked this hard on. But hey, maybe there's a future of sabersmithing for you! Who knows, maybe you'll be the next LDM or Vader's Vault? Congrats so far

  10. #20

    Default

    Thank you! I have several projects lined up after this one... the first of which will be finishing my own saber so that it's more than a static hilt. :P

    Hopefully etching will be early this week. To that end, I was working on sanding/polishing parts this weekend and the shot below shows some of them in different stages. I've added the center rings to the hilt piece at the top, which has also been polished and is pretty much ready for etching. The top emitter has been sanded through 1500 grit and is now ready for polishing. The switch pieces on the left have had an initial polish, but they don't have any etching. The pieces on the right are earlier in the sanding process.

    Last edited by rogue9607; 03-25-2014 at 12:16 PM.

Bookmarks

Posting Permissions

  • You may not post new threads
  • You may not post replies
  • You may not post attachments
  • You may not edit your posts
  •