Page 2 of 3 FirstFirst 1 2 3 LastLast
Results 11 to 20 of 22

Thread: Lord Zen's first saber

  1. #11

    Default The Recharge Port

    It is said that one of the final tasks a Jedi faces is the construction of their own lightsaber.
    After fitting the recharge port I can understand why…


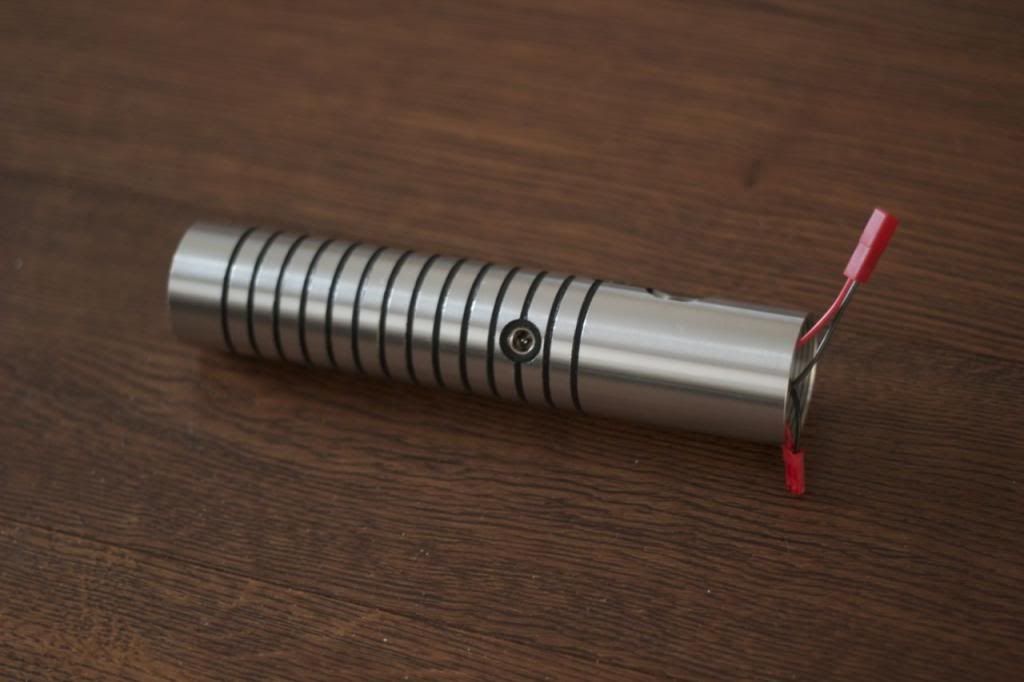
    I located the recharge port about 3 inches down the hilt and opted for a thread to be made in the hole so I could simply screw the recharge port in.

    I wired up the recharge port as per Erv's helpful photo, applying heat wrap over each connection and then over the whole circumference of the port to hold with wires tight.


    It was then I realised that in order to screw the port into the hilt that it would require liberal application of tweezers, contortions, and telekinetic force powers.

    Still, after about 20 minutes I finally managed to get the thing screwed in, and hoped I would never have to do that again.


    You can see from the photo the excellent mill work around the recharge port, keeping the same depth and width of the groves as a surround.
    You can also see a pair of JST connectors. One set for the homemade battery pack, and the other for connecting to the sound card. One is male and the other female, to make sure that I cannot connect things the wrong way around...

  2. #12

    Default Gubbins

    It is most satisfying having wired everything up, and pushing the main switch for the first time to be greeted with the famous lightsaber ignition sound.

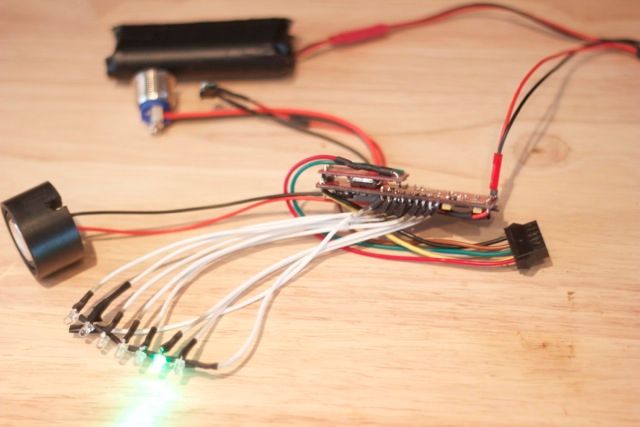
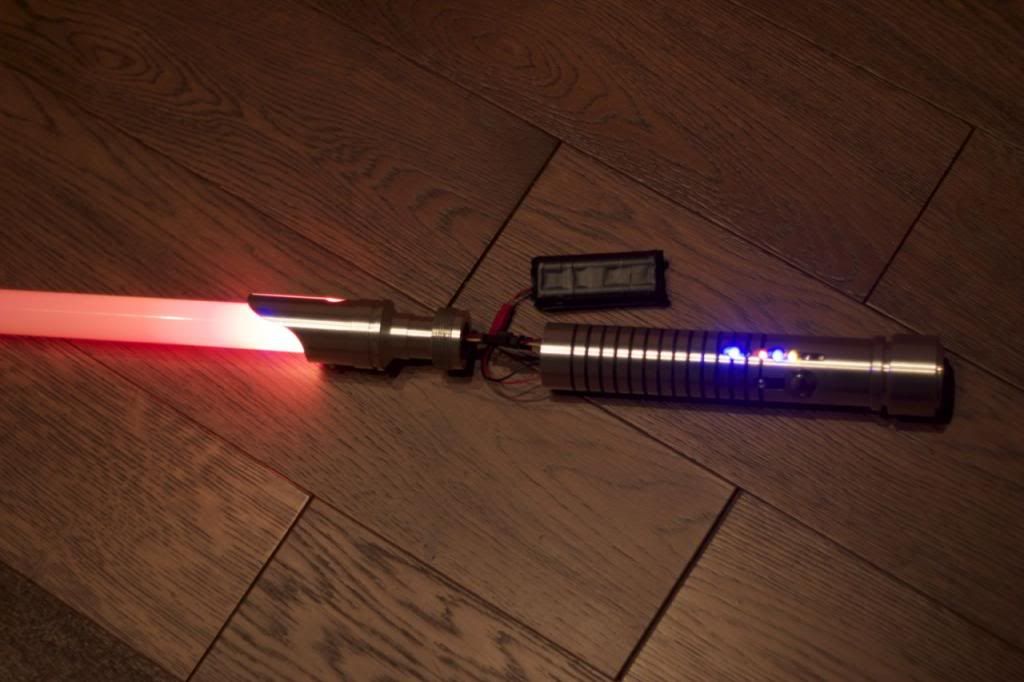
    Below you can see all the internals of the saber wired up and powered on, the 2W speaker humming and buzzing:


    On the left is the speaker, held inside a v4 speaker mount. I had to cut a small notch in the side so the left-most LED will slot into it when assembled into the hilt.

    In the far background is the 7.2V 14650 Lithium-ion battery pack, which connects to the recharge-port (out-of-shot) now firmly secured in the hilt.
    In front of the battery pack is the main activation switch, a 16mm nickel plated AV switch, and next to it the tiny auxiliary tactile switch.

    I mounted the igniter daughter board underneath the mainboard using a row of header pins, which kept things tidy and compact.

    Finally, there is the 6 wire quick connector that is used to connect to the LED Engin.

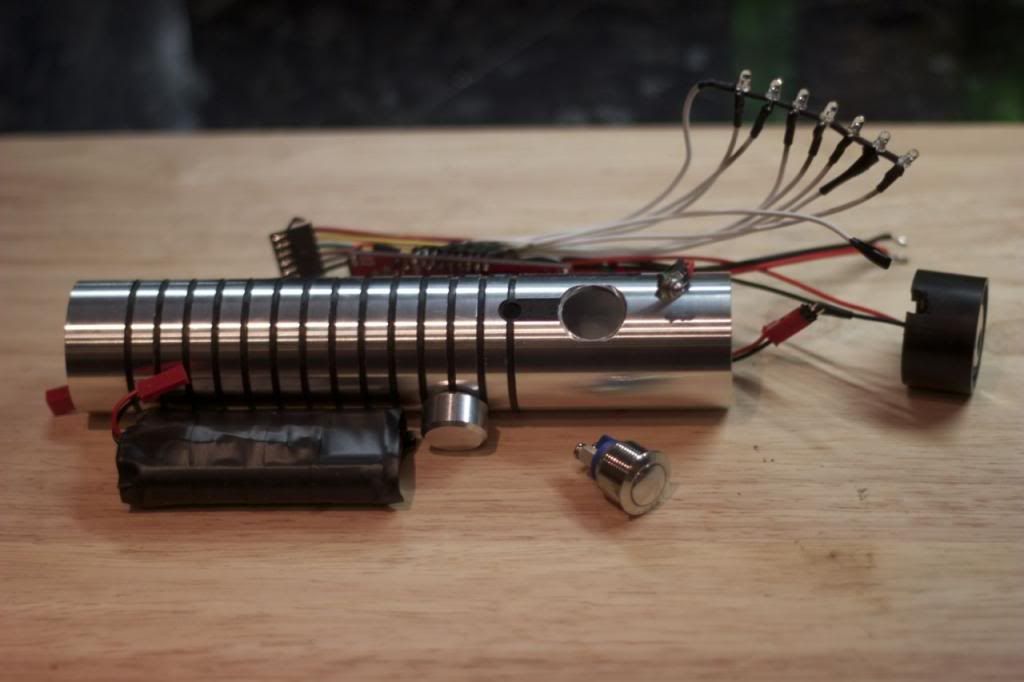
    The next photo shows all of the internals lined up next to the hilt:


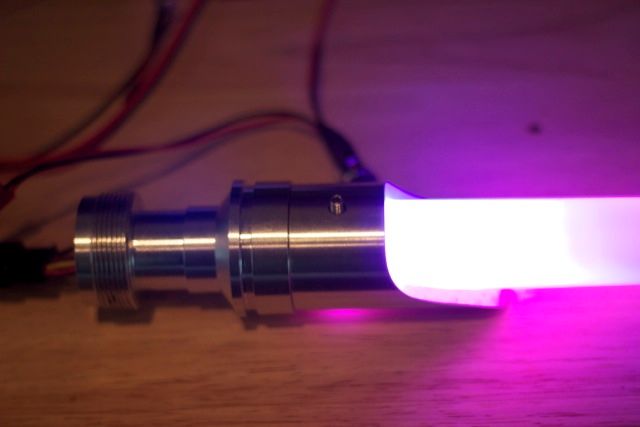
    And this photo shows the blade holder, blade and LED Engin illuminated with the correctly configured colour:


    I then proceeded to create 9 different saber "fonts" each with a different sound, main LED and flash colours, and accent LED blinking patterns.

  3. #13

    Default

    Looking good. One nitpick: Is that electrical tape wrapping your battery pack? You might want to find some heatshrink instead. Electrical tape has a tendency to come loose when it gets warm and gunk up the inside of your saber. Check with some online battery suppliers, some of them carry heatshrink for packs that size.
    We all have to start somewhere. The journey is all the more impressive by our humble beginnings.

    http://led.linear1.org/1led.wiz for the lazy man's resistor calculator!
    http://forums.thecustomsabershop.com...e-to-Ohm-s-Law for getting resistor values the right way!

  4. #14

    Default

    Thanks Silver Serpent,

    But I'm afraid it gets worse than that...

  5. #15

    Default Damn you, Cram-Fu!

    This is the part where things start to go badly...

    Having wired up all the electronics, tested they worked, the battery pack would recharge, and each of the separate font colours and sounds had been configured, it was time to put all of the gubbins into the small metal tube.

    The original plan was to seat the sound card and daughter card on top of the battery pack - but this didn't quite work by a frustratingly small amount. So the sound card was positioned so that the daughter card hung over the end of the battery pack.

    While sliding the battery pack and sound card into the hilt the pack became caught on the recharge port legs. Pushing a little harder resulted in the pack easily sliding in. A little too easily it turned out - I had snapped the legs off the recharge port.

    So, sliding the pack back out again, I was faced with the task of removing the recharge port and replacing it. Fortunately the local electronics store stocked equivalent sockets. This time I pre-cut and bent the connection-tabs so that nothing extended beyond the main body of the socket - making it a little more robust. I then had to re-engage in the activity of contortions and force-mastery to get the new port back in the same location in the hilt.

    The next fun activity after seating the battery pack and sound card, which fitted by fluke more than design without obstructing the AV switch, was fitting the accent LEDs in place.

    I had foolishly used a totally inappropriate gauge of wire, so the LEDs put up more a a fight about where they wanted to be versus where I wanted them to be. Using a wooden chopstick I manipulated each LED to its dedicated hole, which was made tricker by the fact all the LEDs looked the same. Sadly not all of the LEDs made it alive. The 3rd LED along didn't make it.

    I then screwed in the AV switch, backed with a couple of o-rings to have a nice fit against the internal curvature of the hilt. The speaker mount was slid in using the notch cut into it to slide over the far LED.


    I then connected the LEDEngin to the sound card using the 6-way quick connector and tested everything still worked. It was after making this join and attempting to screw in the blade holder that I discovered the next horror. The blade holder wouldn't screw all the way in. And that was just annoying.

    The cumulative effect of the daughter board not fitting on top of the battery had shifted everything along.

    The saber would have been fine if I didn't need to fit the battery pack in it:


    So this is where the difficult decision came. I decided to take it all apart again…

    I cut all the wires to the accent LEDs and set about making a new set - using the thinner black wire as opposed to the really thick white wire.

    I cut and replaced the wires to the tactile switch.

    I cut the 6-way quick connector cables, to shorten the connection from the LEDEngin.

    I took apart my homemade battery pack, desoldered the links and remade it with 14500s.


    I then slowly began to put everything back in the hilt again.


    The thinner gauge wire and smaller battery pack made installing things far easier - and I now had better experience of how to slide everything in.

    The final manipulation was to connect the two ends of the 6-way quick-connector - and to do this 1inch into the hilt and partially obscured by the battery pack. A pair of tweezers, a chopstick and swearing seemed to do the job.


    Finally everything is in its place.

  6. #16

    Default

    Welcome to the fine art of Cram-Fu. It's not as easy as it looks, but it does get easier with time. The swearing really does help.

    Congrats on getting the saber assembled!
    We all have to start somewhere. The journey is all the more impressive by our humble beginnings.

    http://led.linear1.org/1led.wiz for the lazy man's resistor calculator!
    http://forums.thecustomsabershop.com...e-to-Ohm-s-Law for getting resistor values the right way!

  7. #17

    Default

    Quote Originally Posted by Silver Serpent View Post
    The swearing really does help.
    It really does.. louder volumes and more frequent swearing seems to accelerate the process.

    I really like this saber. The simplicity in the hilt design is beautiful, the array of accent LEDs is fantastic, it uses my favourite emitter (the cutout in that looks awesome, btw).. I love this saber.

  8. #18

    Default

    Quote Originally Posted by Silver Serpent View Post
    Welcome to the fine art of Cram-Fu. It's not as easy as it looks, but it does get easier with time.
    Exactly.... trying to cram the world into a saber isn't as easy as it looks, but this is how you learn. Congrats on getting it finished!
    TCSS MODERATOR
    All n00bs READ these first (PLEASE)!!!:
    1. Forum Guidelines
    2. FJK’s “Down and Dirty” guide to Ohm’s Law

    "Yeah, yeah, I've heard it all before... you want blindingly bright, super loud, running 1138 blinkies off of the cheapest sound card you can find AND you want all of it to run on a battery the size of a dime, and run for a very, VERY long time. That one cracks me up every time..."
    My email: fjk_tcss@yahoo.com

  9. #19

    Default

    Thank you all for your kind words, it is most appreciated

  10. #20

    Default Pictures

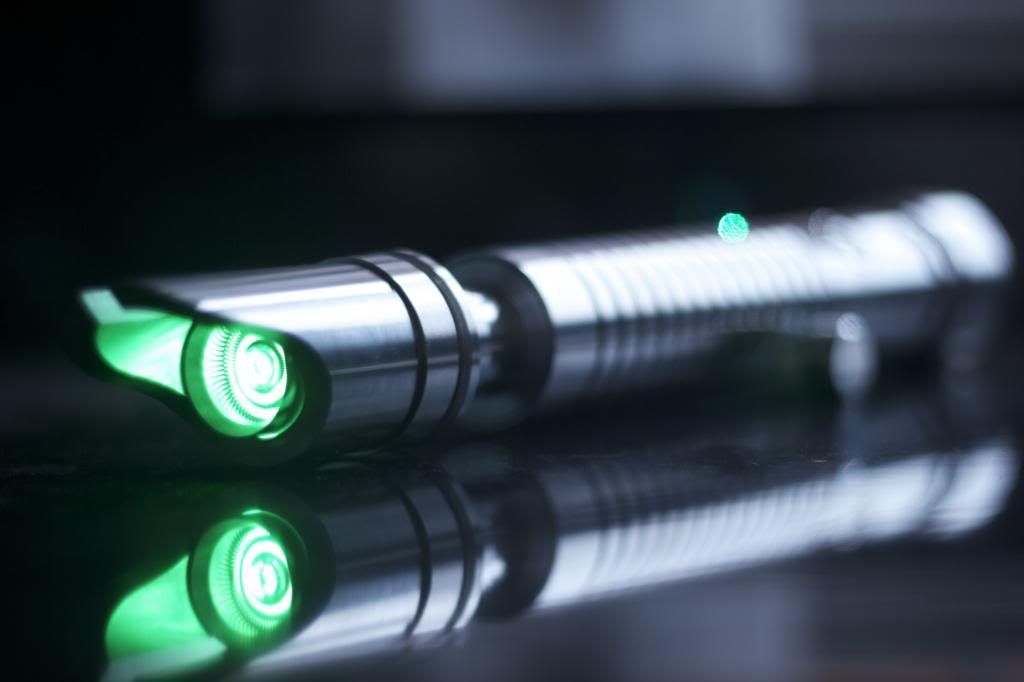
    As my lightsaber has been completed I thought it only fair to share a couple of photos
    You might also spot one of ARKM's excellent crystal razor blade plugs


    And a short video:


    Thanks for reading

Bookmarks

Posting Permissions

  • You may not post new threads
  • You may not post replies
  • You may not post attachments
  • You may not edit your posts
  •