


Resilience v2 - A custom MHS Igniter R4 RGGB Saber Build
I built this a couple of years ago and after a while, I got tired of the guarded switch and econo sound. So I decided I'd go all out for this build!
Upgrade parts:
Igniter R4 with TruColor
10W RGGB LEDEngin
TCSS 1.5W Premium Speaker or TCSS 2W Bass Speaker (poll added so you can all help me decide)
TCSS Box 2
Nickel Plated AV Switch (Momentary)
Auxiliary Switch (Momentary)
Recharge Port
7.4v Li-ion 2600mAh 18650 Battery Pack (this changed to a 7.4v Li-ion 1600mAh 14500 Battery Pack due to space constraints)
JST Connections for quick assembly/disassembly
Custom PVC Sled for components and wiring
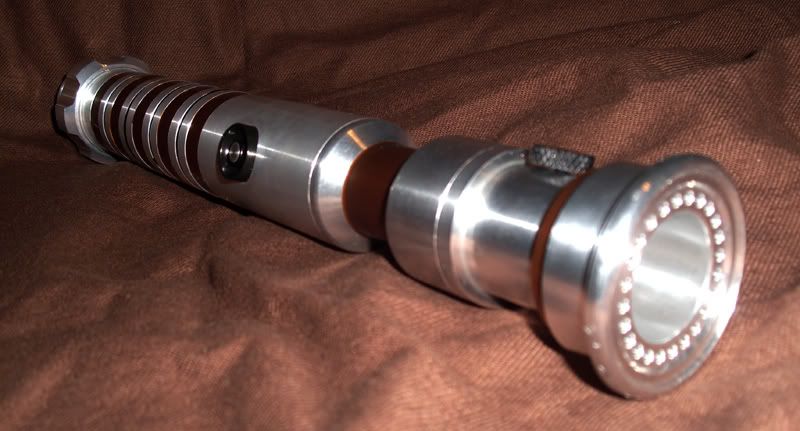
The original, Resilience v1
The guts of v1 (not impressive!)
First off, after breaking down the saber, I drilled new holes for box 2, the switches and the recharge port. No pics of this step, but I assure you that it happened
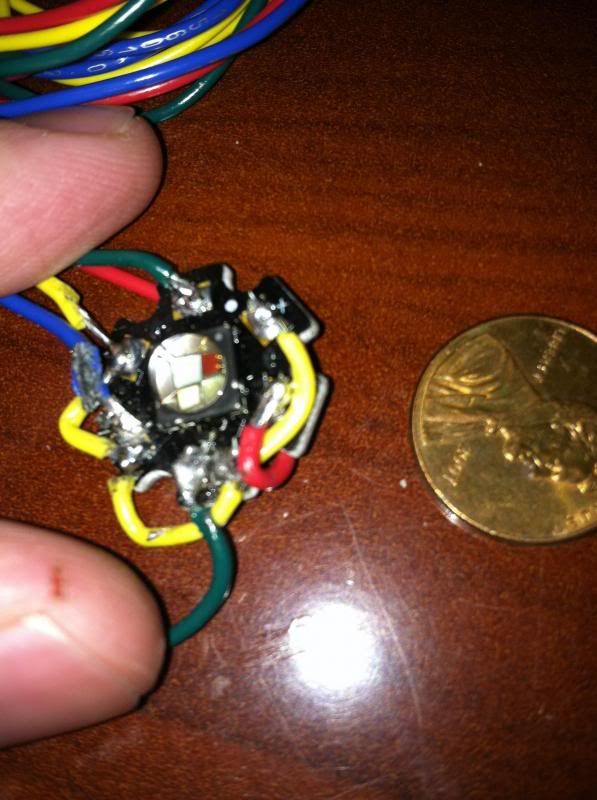
Next, I decided to go for the most difficult part. I wired up my RGGB LED. I was worried that I bridged two connections, so I stopped for the night.
I came back the next day, confidence and determination restored. Wiring the Igniter couldn't have gone better! Big thanks to Naigon for making such a great & user-friendly product. Igniter forever!
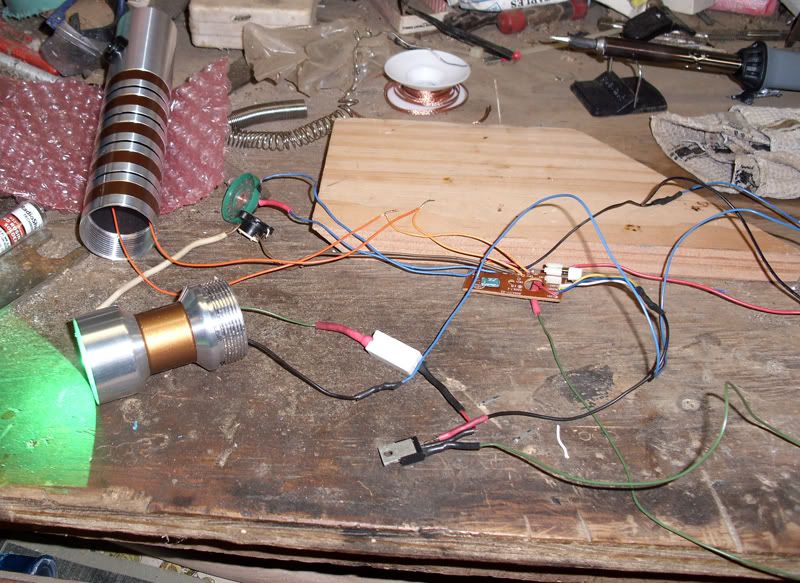
After wiring up the board, I did a quick set up for the JSTs and LED to test it out.
Wired up...
...and powered on!
I still think I managed to bridge those connections on the LED, as the green dies were firing when I went through the default sound fonts on the Igniter, but the blue and red never lit up at all. No worries though, as I already have a back-up LED at home. Next, should be able to wire up the new LED, clean up all of the other wiring and install everything into my PVC chassis and pop it on into the saber! Thanks for checking it out and let me know how I'm doing!
Sorry for the lack of build log pictures after this point, but it was the next dayI couldn't find my phone and my camera was charging when I was working that night.
I had to slightly alter my plans because I overestimated the amount of space I had in the hilt. The 7.4v Li-ion 2600mAh 18650 Battery Pack was too large for the hilt, so I went with the 7.4v Li-ion 1600mAh 14500 Battery Pack that I originally intended to use with this build. Looks like my initial instincts served me well.
So, moving on... I got the new RGGB LED installed fine and did a much cleaner wiring job on it. I wasn't worried at all about bridging connections, as wiring the Igniter really boosted my confidence. Electronics and all colors are now working perfectly.
My chassis plans also changed a bit due to an utter lack of space. I ended up having to use the thinnest possible PVC with an OD that was just a hair smaller than the hilts ID. But, it's doing it's job, so I won't complain.
I'm about to charge up the batteries and I will post pictures once it is fully charged. Thanks to everyone for your support on this successful build!


 Reply With Quote
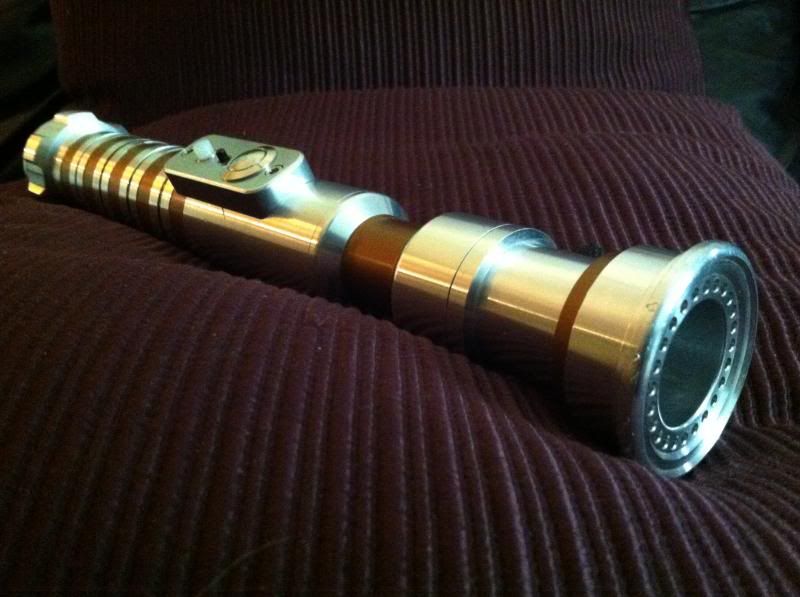


Bookmarks