Page 2 of 5 FirstFirst 1 2 3 4 ... LastLast
Results 11 to 20 of 42

Thread: Rogue9607's Scrap Saber

  1. #11

    Default

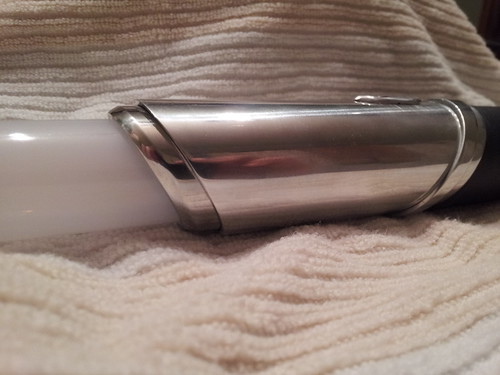
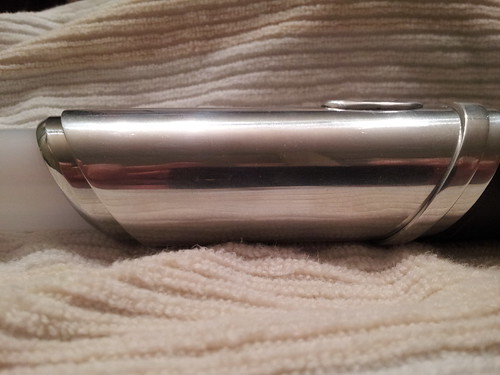
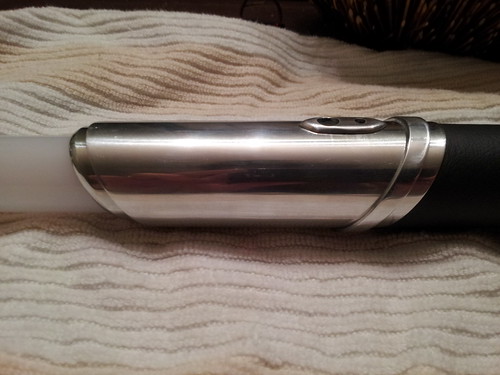
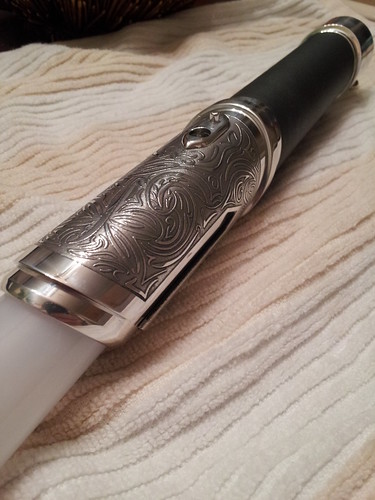
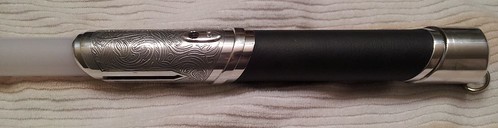
    I haven't made as much progress as I'd hoped, but it is progressing. I wanted to have the static hilt complete including etching, switch, and recharge port before SWW, so that all I'd have left was the electronics. Work/life got in the way, and it didn't help that I can't find my graphics tablet. I managed to get all of the pieces sanded, polished, drilled, and tapped so that I could assemble the hilt for the parade.


    My plan is to finish it during the weeks between parades so that it's done by the end of SWW, if not sooner.

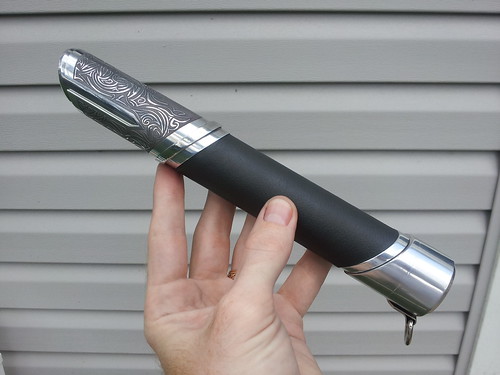
    Next step: find the tablet so I can do the etching artwork!

  2. #12

    Default

    I finally found my tablet this week and was able to make some progress on the artwork. After one scrapped effort, I think I have something I'm happy with.


    I should be able to get that printed tomorrow and hopefully transferred tomorrow night. If I have time tonight I'll try to bevel the emitter end and work on the plate for the switch/recharge port.

  3. #13

    Default

    Sweet... this just keeps getting better. I really like a asymmetry in the artwork. Any plans on etching the pommel? It might start to get a little much, though...

  4. #14

    Default

    It's coming along real well. Keep up the good work!
    TCSS MODERATOR
    All n00bs READ these first (PLEASE)!!!:
    1. Forum Guidelines
    2. FJK’s “Down and Dirty” guide to Ohm’s Law

    "Yeah, yeah, I've heard it all before... you want blindingly bright, super loud, running 1138 blinkies off of the cheapest sound card you can find AND you want all of it to run on a battery the size of a dime, and run for a very, VERY long time. That one cracks me up every time..."
    My email: fjk_tcss@yahoo.com

  5. #15

    Default

    I'm trying to decide on the pommel. My original plan was to put some kind of band around it (either similar artwork, something in aurebesh, etc). Now I'm uncertain if I want to continue the etching or have the pommel match the polish of the other side of the grip... kinda hard to explain. My current plan is to etch the top section and then see how it feels. There are several other places I'm considering etching (the emitter inside the cut outs, pommel, and the ring above the grip), but I'll just go one at a time and stop when it feels right. My fear is exactly what you said... it could get a bit much.

    I got one of the switch plates done and a good part of the second done. Not sure if I've mentioned it, but I plan to have two of these and I've been making matching parts for the most part as I go, though the second set hasn't had any sanding/polishing/drilling yet. The large hole will be for the recharge port and the small hole is for the power switch.


  6. #16

    Default

    I think an oval band like the one near the switch you showed would be good. I personally think etching down there would be overkill.
    TCSS MODERATOR
    All n00bs READ these first (PLEASE)!!!:
    1. Forum Guidelines
    2. FJK’s “Down and Dirty” guide to Ohm’s Law

    "Yeah, yeah, I've heard it all before... you want blindingly bright, super loud, running 1138 blinkies off of the cheapest sound card you can find AND you want all of it to run on a battery the size of a dime, and run for a very, VERY long time. That one cracks me up every time..."
    My email: fjk_tcss@yahoo.com

  7. #17

    Default

    I agree that etching down there would be overkill, which is why I'm only doing the upper section to start.

    Made a bit more progress last night on the blade holder. I beveled the edge with a combination of a belt sander, file, and sandpaper.


  8. #18

    Default

    I managed to get the etching done last night, though it didn't quite go as planned. I had a leak in my tape that was letting etchant slowly enter the tube. It didn't affect the pattern, but I didn't want to risk further failure and pulled the piece earlier than I'd expected to. The only downside of it is that the etch wasn't quite as deep as intended. I also cut out one of the slots. Here's a quick preview of me holding it together. I still need to cut the other side.


  9. #19

    Default

    I made good progress tonight. I cut the other side and I'm really happy with how the "shield" area looks. I polished up and cleaned all of the pieces, made a pvc sled for the eventual electronics, drilled all appropriate holes for the switch and recharge port, and made the visible part of the switch. Everything is now assembled, and the hilt is pretty much done... or at least done until after this week's parades. I don't have any electronics in this yet, but I may get a chance to work on that next week. Also, the activation switch should sit a little lower once I have the electronics in.

    All in all, I happy with how it came out considering it was designed to make use of my scrap aluminum. The only part that's bugging me a bit are the proportions. Before the front was etched, the front seemed to have more visual weight and it looked balanced. Now the front seems tiny and visually out of balance. There are a couple of things I could still do like anodize the blade holder and dying it charcoal or black, or adding some etching to the pommel. I'm in no rush and will keep it as is for now and see if my opinion changes.


  10. #20

    Default

    You are getting really good at etching. It adds such a tremendous level of depth and detail, especially when done as well as you are doing. Keep up the good work!
    We all have to start somewhere. The journey is all the more impressive by our humble beginnings.

    http://led.linear1.org/1led.wiz for the lazy man's resistor calculator!
    http://forums.thecustomsabershop.com...e-to-Ohm-s-Law for getting resistor values the right way!

Bookmarks

Posting Permissions

  • You may not post new threads
  • You may not post replies
  • You may not post attachments
  • You may not edit your posts
  •