Page 3 of 5 FirstFirst 1 2 3 4 5 LastLast
Results 21 to 30 of 42

Thread: Rogue9607's Scrap Saber

  1. #21

    Default

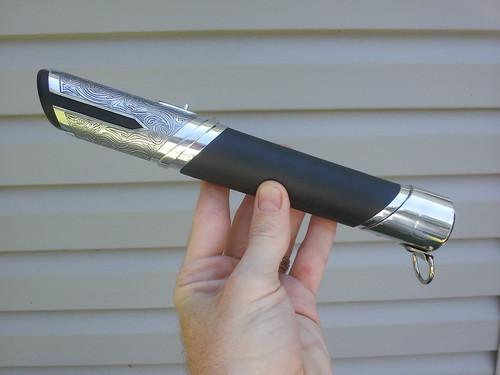
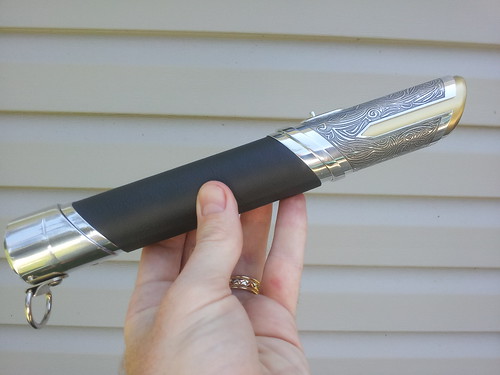
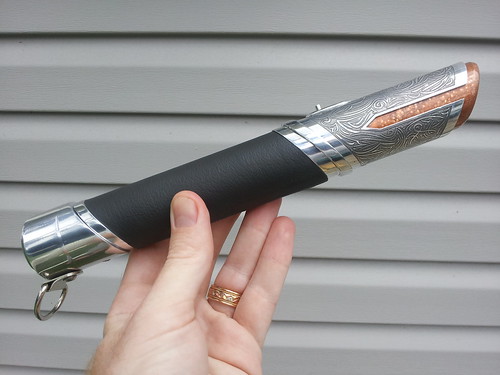
    I wasn't too sure when I first saw you start this thread what the goal was. But let me say you far surpassed my expectation of what it could become! Much like your Satele saber, this has inspired me to make sure that etching is a part of my next project. Thank you for sharing your excellent art skills, sir!
    Hokey religions and ancient weapons are no match for a blaster by your side.


  2. #22

    Default

    Looks great! If you're hesitant about the visual balance, put it away for a few days if possible - don't look at it or think about it and work on something else. Come back with fresh eyes and see what you think.

  3. #23

    Default

    I honestly didn't know what to expect either, and it has mostly been a practice exercise so that I have experience with the lathe, more with etching, and working leather into the mix. I have some other projects that I want to move on to, so I didn't want to spend a huge amount of time on this one, but I also wanted that experience before tackling them.

    Good advice about putting it away. I'll try to do that, but I don't think I'll fully be able to until at least next week, and even then I may start work on another saber so it will not be fully out of mind.

  4. #24

    Default

    your echting is just amazing!!!
    I love this saber

  5. #25

    Default

    Okay... stupid question... How do you cut out the etching pattern? Is it done by hand (crazy!) or do you have a program and machine that cuts it out for you?

    By the way, holy cow this is cool!!


    Remember, your LED will ALWAYS look brighter in pics and vids... If you're not playing with it at night, it's not gonna impress you...

  6. #26

    Default

    Laser printer and special toner transfer paper. Wrap it around the metal piece, bake, and remove the paper. Voila! You have a perfect* toner resist applied to your parts.

    *note* some touch-up may be necessary.
    We all have to start somewhere. The journey is all the more impressive by our humble beginnings.

    http://led.linear1.org/1led.wiz for the lazy man's resistor calculator!
    http://forums.thecustomsabershop.com...e-to-Ohm-s-Law for getting resistor values the right way!

  7. #27

    Default

    The shroud and etching really makes this saber!

    Honestly when I saw the earlier concept and pictures I was thinking things look a tad bland but now I take that all back.

    Hats off!

  8. #28

    Default

    Quote Originally Posted by Silver Serpent View Post
    Laser printer and special toner transfer paper. Wrap it around the metal piece, bake, and remove the paper. Voila! You have a perfect* toner resist applied to your parts.

    *note* some touch-up may be necessary.
    Exactly it... though my experience so far for the note would be "significant touch-up will be necessary". Thankfully, the solid areas seem to need more touch up than the detail and are much easier to correct. I have some pictures of the transfer/touch-up process in my Satele thread, and this one was pretty similar.

    I felt the same way about it being bland... especially as I'm standing next to my wife with her saber! I would've been rather ashamed to show mine next to hers if I didn't didn't also explain that mine was a work in progress and that I had a good vision for it.

    So I lied... it turns out I wasn't done for the week. I don't have time to anodize/dye this weekend, but I figured I'd use spay paint to simulate the effect just to see if that helped with the visual balance, to see if I even liked it, and to help decide on a color. I shot one side of the blade holder with flat black, and the other side with gold (I didn't have copper on hand). I really like the black so far, but am interested to hear other opinions. I really think it helps with the balance, though the pommel still needs something...


  9. #29

    Default

    I didn't think I'd like the black, but I do. Maybe keep the front slope bare metal to provide the same visual termination and accenting the grip gets... And yep, now the pommel needs something IMO - draw some cues from the front shroud and etch away. I say that as if it was the easiest thing in the world to do...

    Or just don't stand near your wife when she's got her saber. This is the simpler course of action.

  10. #30

    Default

    I doubt that avoiding my wife's saber would turn out well... though I agree it is simpler. I did get one person who said she liked my saber better than my wife's... though she followed that up with the reasoning that it was more feminine.

    I've been a bit slow with updates, but mostly because there isn't much new to really comment on. I've been working with the pieces for the second saber and think I have those ready to etch. I'm still undecided on the blade holder color and etch for the pommel, but I figured I'd sort that out after I had the second saber assembled. I'm still leaning towards black, though I did realize that I hadn't posted a pic of it in copper. The only copper I found in the garage had a "hammered" finish, which doesn't really help, but at least it gives a decent representation.


    I'm also thinking of making a connector section to turn this into a staff, assuming that my time doesn't get pulled in other directions.

Bookmarks

Posting Permissions

  • You may not post new threads
  • You may not post replies
  • You may not post attachments
  • You may not edit your posts
  •