I use a set screw to hold my blades in the holder. The thumb screw is just to big and bulky for my tastes and I also hold the saber real close to the top so it tended to get in my way.


I use a set screw to hold my blades in the holder. The thumb screw is just to big and bulky for my tastes and I also hold the saber real close to the top so it tended to get in my way.
Red 5 "Move Dangit! I gots Snitz to blow up!"


Nice tap and die set, James.
I learned how to use all kinds of tools when I used to be an ATM technician for Bank of America.
Many of which have served me well when I started to get into saber making.
In order to see the Light,
you must sometimes risk the Dark.
TCSS MODERATOR
BLUE 8 Ready to ROCK and ROLL!
Yep, same here. One of my brother's jumped on a saber that I built from CCTV parts and gun parts. Learning to use a large variety of tools and technology I think is a great idea for everyone that can take advantage of it.
Red 5 "Move Dangit! I gots Snitz to blow up!"

i like the look if you get it done post up some pictures
I actually did a hardware LED saber modeled after Jade's lightsaber, so maybe I can help.Originally Posted by jadedsabre
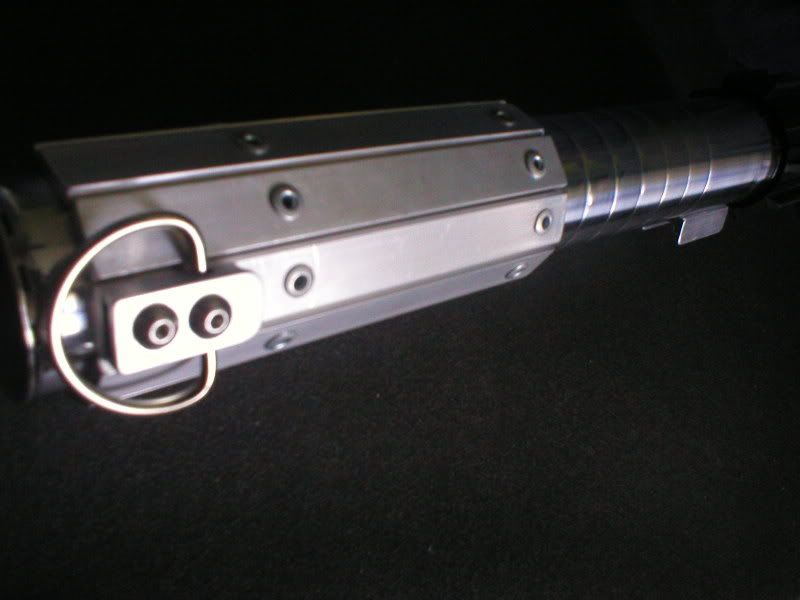
2. I used two pieces of aluminum U-shaped stuff. The smaller piece happens to fit well inside the larger piece. I attached it directly to the hilt, skipping the ribbed ring thing entirely. I used a buttonhead machine screw and a socket head cap screw.
Incidently, I would recommend getting a power switch that doesn't cause the blade to flicker when you tap it, since switch on this saber is located right where your hands are. This switch would probably work well, although I havn't tried it personally: http://www.thecustomsabershop.com/sa...?idproduct=188
3. Those grips were a major pain for me to make. If you can get them precut from that place Jedi Ranger mentioned, it'll probably save you some time. You'll still have to drill the holes though.
4. Be careful when you drill. If you put a hole in the wrong place, it's hard to move it. Take your time and measure well. You may want to get some extra grip pieces in case you mess up a few. For my hilt, I drilled the holes in all the grips first, and then used each grip as a template to help me drill the two specific holes that would fit that grip in the main body of the saber. Once I got the first grip riveted in, I was able to use it as a guide to help me get all the other grips lined up and drilled right. Jedi Ranger may have a better way to get all the grips lined up.
I used 1/2" wide by 1/8" thick aluminum for my grips. Ten pieces of this stuff fit almost perfectly around the circumference of a 1.5" diameter sinktube.
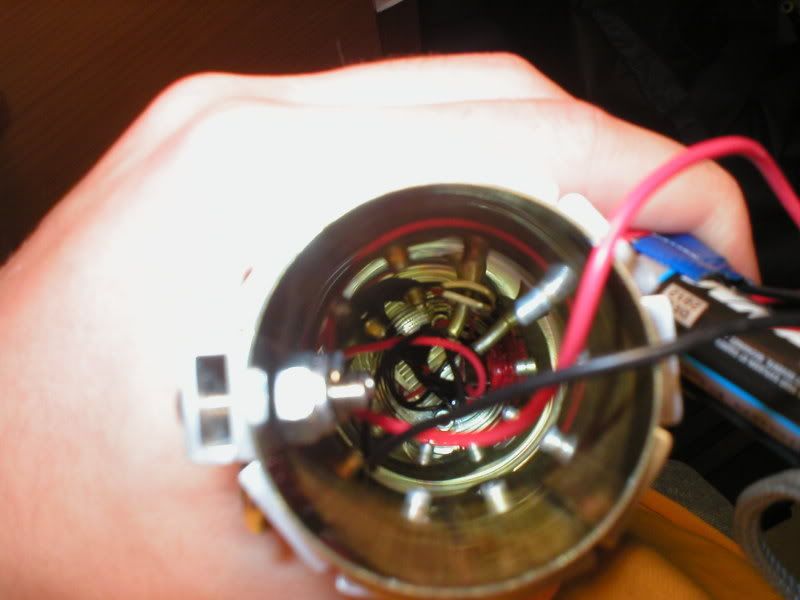
5. I used rivets and was able to fit my stuff in (battery pack, switch, and LED with heatsink). The rivets make it rather tight inside though, and you may have trouble gettting your battery pack in and out.
Actually, from the pictures I've seen of various Mara hilts, I think that buttonhead screws are what should be used, although I don't know exactly what the original Mara hilt looked like. The only thing about buttonheads is that they cost more than rivets.
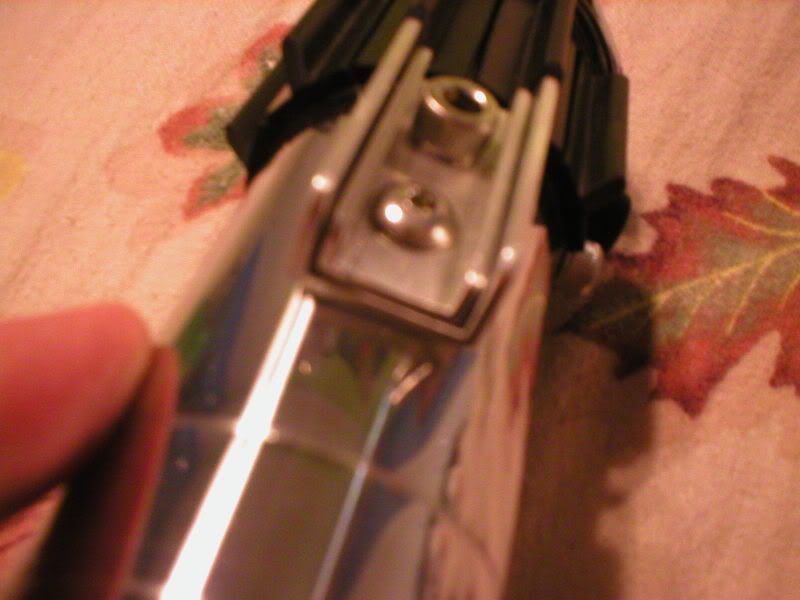
Here's a photo of the inside of my hilt:
And here's a couple of general photos:
EDIT: Hey, I'm an apprentice at last! Yee ha!
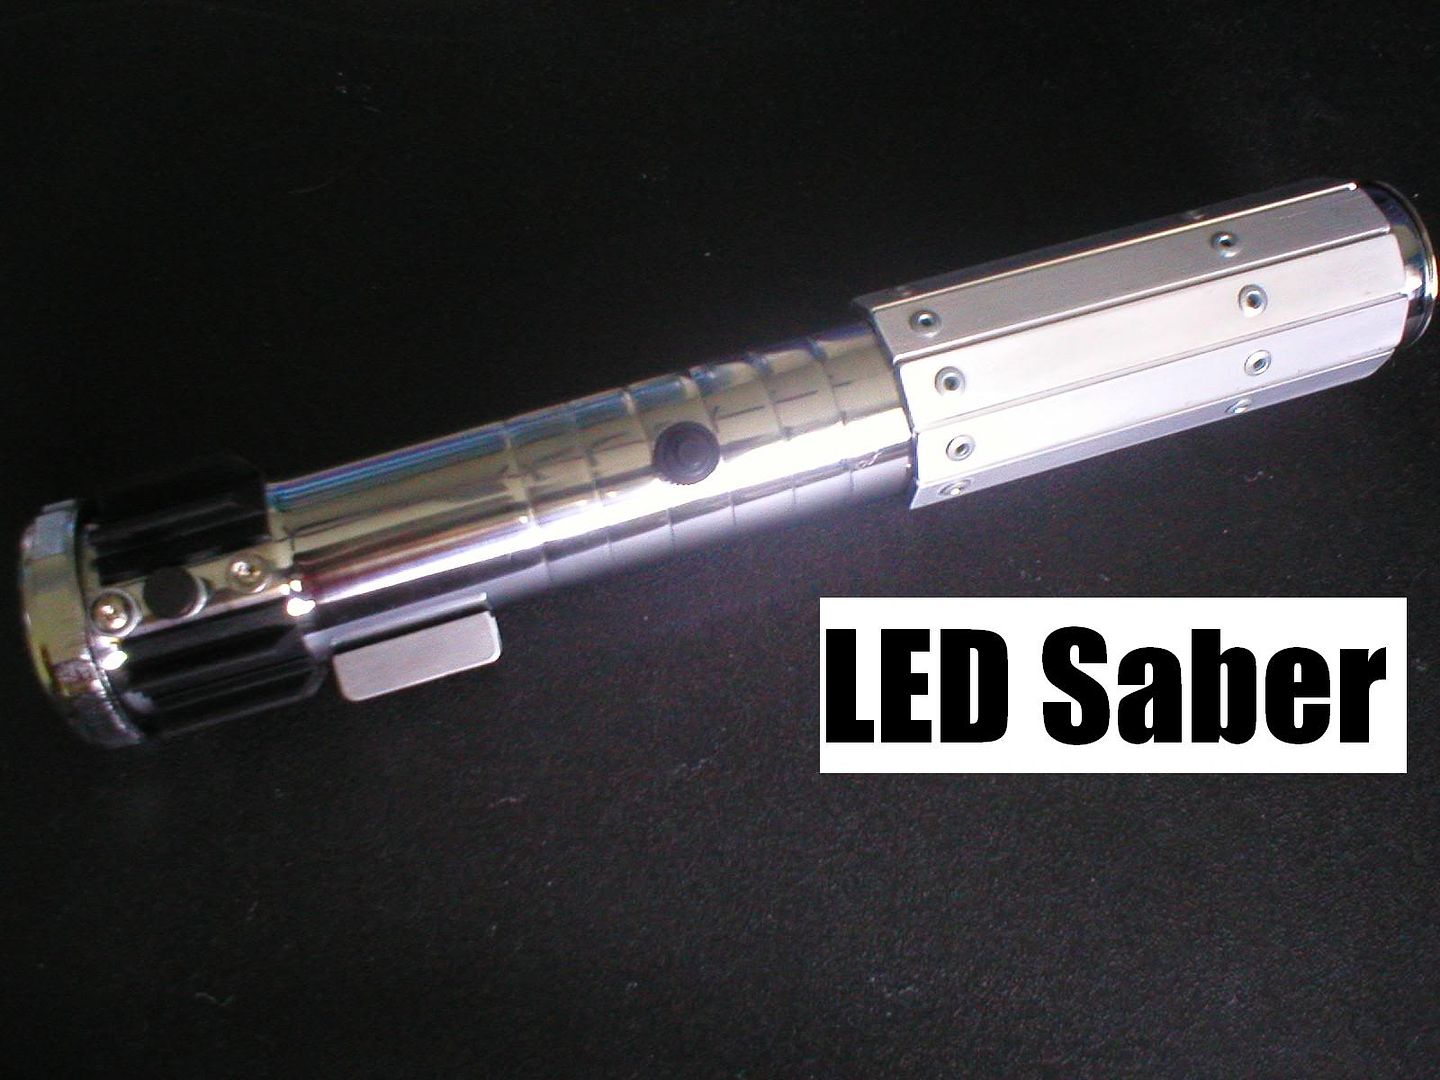
Wow, nice job!
Any pics of it lit up, with a blade?
In order to see the Light,
you must sometimes risk the Dark.
TCSS MODERATOR
BLUE 8 Ready to ROCK and ROLL!
Thanks! Sure, here's one of the blade:
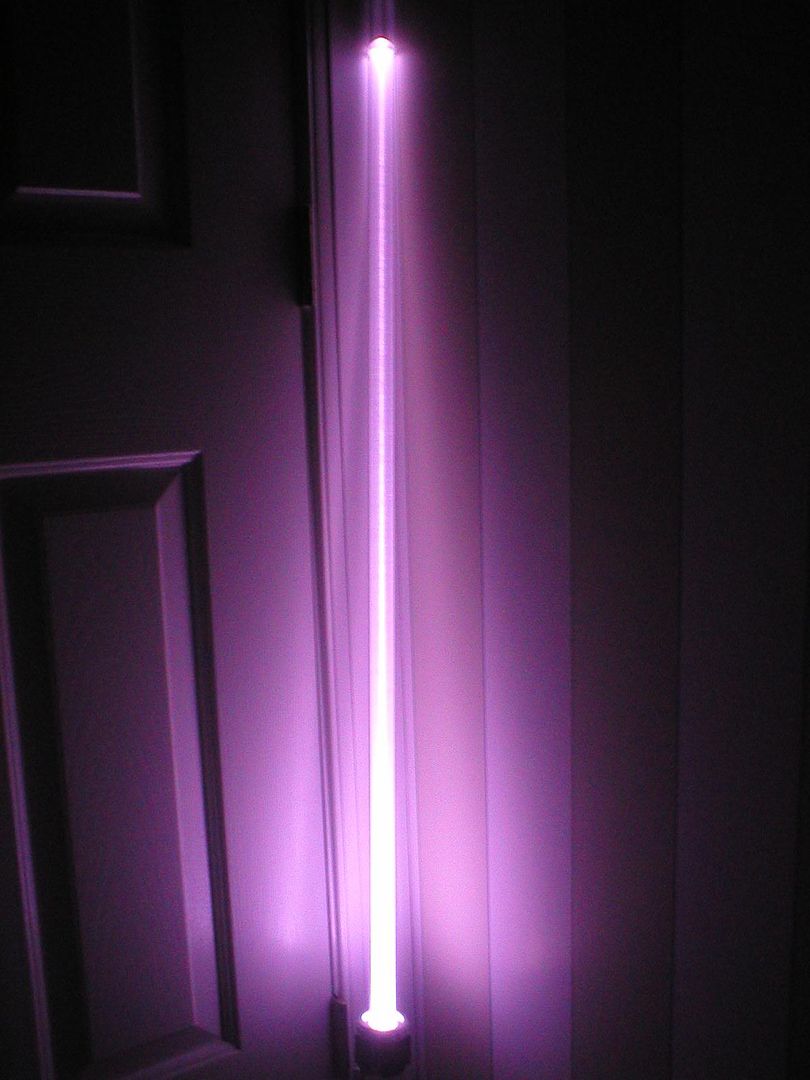
Ooooh, purty!
In order to see the Light,
you must sometimes risk the Dark.
TCSS MODERATOR
BLUE 8 Ready to ROCK and ROLL!

Nice job with that saber. I like the metal grips. How did you create the circular indentions around the middle of the hilt

could yo upost a pic of the whole hilt?
Aluke123 on every other forum - Old grumpy moderator here
Thread Index, The Saber Building Dictionary, and The Basic Saber-Build Tutorial - Read Them!
 Posting Permissions


 Reply With Quote


Bookmarks