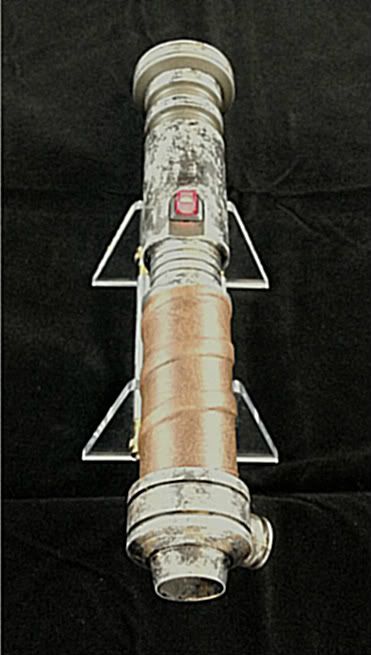
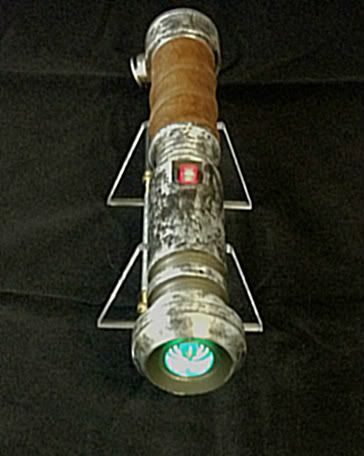
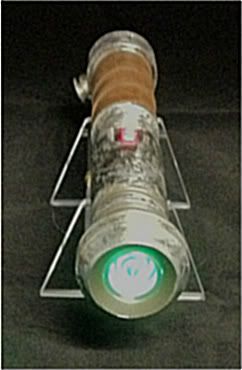
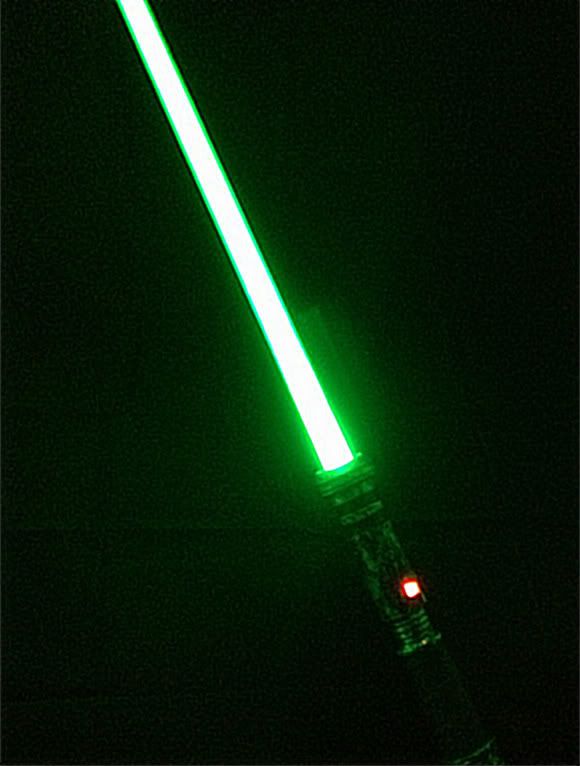
Results 1 to 5 of 5

Thread: Syo Bakarn SWTOR Lightsaber

  1. #1

    Default Syo Bakarn SWTOR Lightsaber

    Syo Bakarn


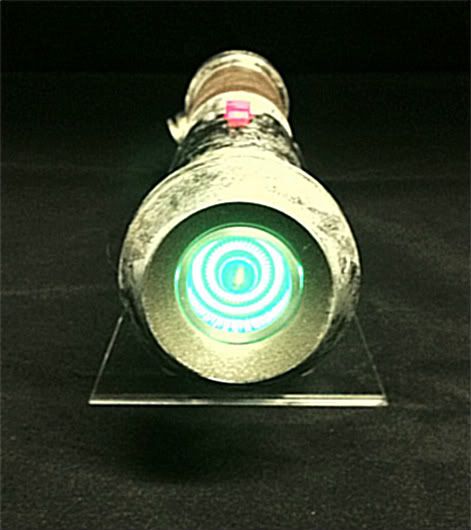
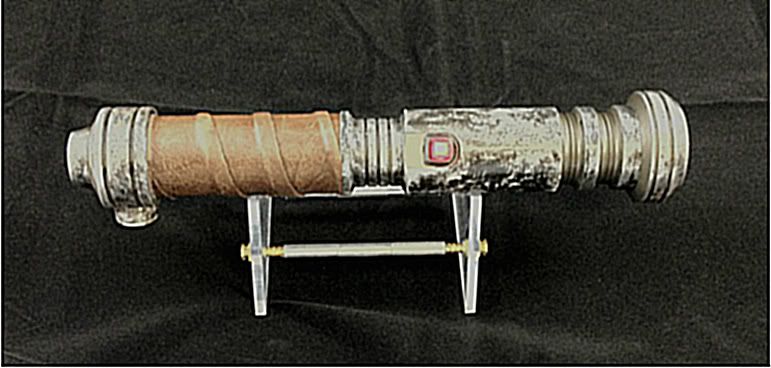
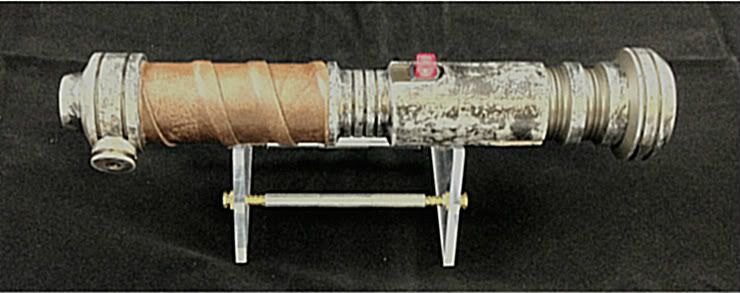
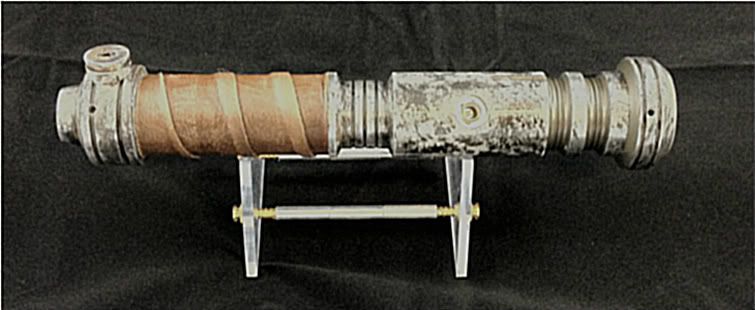
    Greetings saber fans! I wrapped up my install/weathering on my SWTOR saber and wanted to share the results. I've renamed this the "Syo Bakarn" after the Jedi Master in SWTOR. Master Syo uses this saber in the Jedi Consular storyline. I wanted to make the saber look as close as possible to what is seen on-screen but make it look as though it had been lost for thousands of years and only recently re-discovered. I did the full install and weathering on this saber and am very happy with the results

    Specs

    Single 2600mAh 18650
    In-Hilt Recharge
    MR Luke ROTJ Soundboard
    Red LED Square Activation Button
    Huey Jan 5W Green Main LED
    Heavy Custom Weathering
    1W Regal Speaker
    7/8" IndustrialAction SabreBlade™
    ARKM Turbine Blade Plug


    Selected Images (HDR Function on the iPhone = FAIL, sorry!)


    Video!


  2. #2

    Default

    Looks great man. I can't tell from the pictures, but what method did you use for weathering? It looks like you pulled it out of a sarlacc's stomach.
    We all have to start somewhere. The journey is all the more impressive by our humble beginnings.

    http://led.linear1.org/1led.wiz for the lazy man's resistor calculator!
    http://forums.thecustomsabershop.com...e-to-Ohm-s-Law for getting resistor values the right way!

  3. #3

    Default

    Thanks SS!

    I took some cues from Bizzarojoe's techniques and added my own twists. I did a lot of sanding with various grit papers, banged it up a bit with a hammer and some other tools and then dragged it through some dirt/sand outside. I cleaned it well and then applied random layers of (primarily) gloss black and gold paint. I let it dry to varying degrees and then sanded the heck out of it. I repeated the process a few times until I got the effect I wanted. For instance, the covertec wheel and the corresponding side of the saber have less weathering as I imagined the saber hanging on the master's belt and constantly rubbing or hitting up against him so I figured that area would be "cleaner".

    It was definitely a fun process. Labor intensive and long but well worth it. I'm sure I'll use it again on future sabers!


  4. #4

    Default

    Looks good.

    http://s6.photobucket.com/albums/y23...0Saber%20Hilts

    From Wikipedia: "Internet Explorer slows down GIFs if the framerate is 20 frames per second or higher and Microsoft reports that Google Chrome and Safari also slow down some GIF animations."

  5. #5

    Default

    Excellent work. Looks like you had as much fun as I did with the weathering! I never had the courage to take a hammer to my hilt, though it can produce such nice effects.

    After failing to install a Regal speaker in my own hilt, I suspect that there must have been a change in the boring of the Gladius at one point. If I remember correctly, I measured the ID at about 24mm. And there's no way anything snugly compatible with MHS will fit in such a narrow hilt. I even had to sand down my Vader board for some inital tests. One day, I'll get all the parts I want *sigh*

Bookmarks

Posting Permissions

  • You may not post new threads
  • You may not post replies
  • You may not post attachments
  • You may not edit your posts
  •