I would like more details on how you did that acid etching on those sample plates. Did you get the tutorial from online? If so what is the link? I would very much like to attempt something similar on a hilt of my own.


I would like more details on how you did that acid etching on those sample plates. Did you get the tutorial from online? If so what is the link? I would very much like to attempt something similar on a hilt of my own.
I wish I could point you to a single tutorial, but I've pulled bits from several different sources and am still tweaking my approach. I've been pretty happy with the saline sulfate solution, but I'm still wrestling with the resist.Originally Posted by meridian416

This site has some good conceptual information on the process: http://www.nontoxicprint.com/etchzincsteelaluminum.htm
This post has a more practical description and about two-thirds of the way down the page gossiphog has a comment with the mixture proportions I used (1/2 cup salt, 1/2 cup, 1 liter water), though I scaled it down for a smaller test: http://forum.make-the-cut.com/discus...tched-aluminum
Even though this instructable uses a different solution (hydrochloric acid - which I tested on an earlier piece that I don't think I posted), it talks about using PNP Blue sheets as a resist which is what I'm using on my test today. http://www.instructables.com/id/How-...t=40&offset=40
I like the PNP Blue sheets much better than the magazine paper I'd used earlier, though I'm still having issues with full adhesion of the toner. I'm attempting to fill in again with a combination of Sharpie and paint, and I'll post pics of this test later today. Depending on those results, I may need to change things up again.
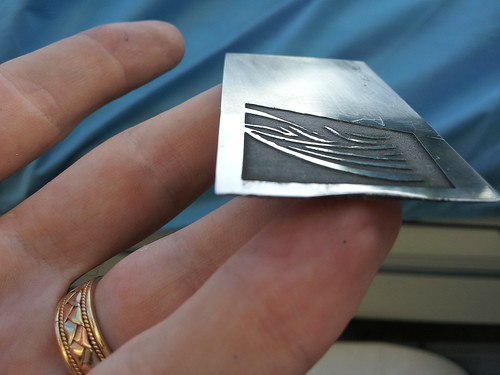
After the etch, I used acetone to remove the toner. In the last few images, I used a bench grinder with a sisal buffing wheel to clean things up with a nice result. With the test today I'll test some spray lacquer to prevent oxidation.
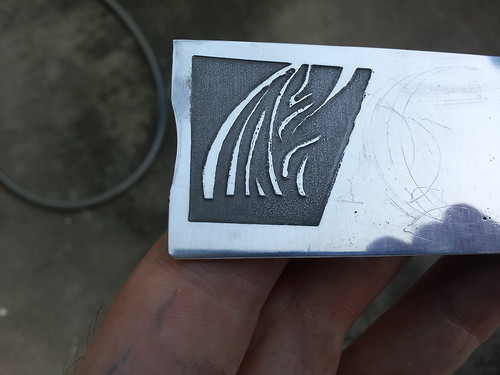
So mixed results from today's testing, but definitely some good lessons learned. As I mentioned earlier, I had some issues with toner adhesion from the PNP Blue sheets (though in all cases it was better than magazine paper). This was the fourth test. Not the best or the worst, but I figured I'd need to fill gaps in the final product anyway so I might as well proceed with the test.
My first thought was to use some enamel to paint in the detail work that was missing. I think that would work well... if my painting skills were better. I went back and used the Sharpie again, though I did go over the bad spots three times to try to build a good resist. I used the enamel around the edge and to join to the tape since in previous trials I had issues with leakage at those seams.
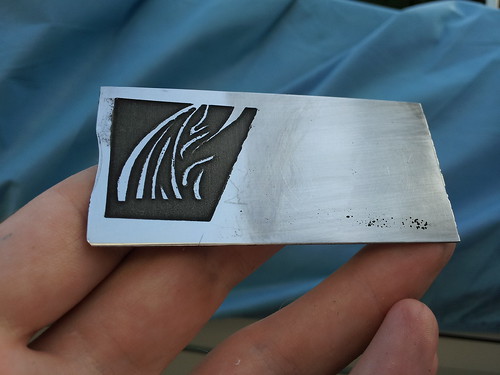
I pulled the piece out after roughly two and a half minutes since there were a few places where the Sharpie resist was failing.
I really liked the contrast/texture after cleaning and buffing, but the etch wasn't nearly as deep as I want.
I shot with some spray lacquer, and was rather let down. I'm not sure if it was my technique or the nature of the spray lacquer, but there's a definite orange peel texture. Personally, I find this less attractive than oxidized aluminum. Perhaps I'll try some wax on another test, but I'd really like to keep the shine of the bare metal while giving some protection from oxidization.
Just to note, this design was just something thrown together quickly as a test and not indicative of the final design. Right now I'm thinking about printing the design on adhesive vinyl, cutting out the areas for the resist, using that as a mask to spray on enamel, and then removing the vinyl. This should give me a good solid resist that could get the etch depth I want, but it would really test my freehand cutting skills which I'm not sure are any better than my painting skills. Any other suggestions here are welcome.

Your latest idea sound like a good one as a few coats of spray paint makes for a great resist for deep etching. As for cutting out parts of the template, I use a hobby knife with a sharply angled point, with my template resting on cardboard so that when the knife cuts through, it hits the cardboard instead of a desk or table top.
Last edited by ARKM; 07-29-2012 at 03:00 PM.
http://s6.photobucket.com/albums/y23...0Saber%20Hilts
From Wikipedia: "Internet Explorer slows down GIFs if the framerate is 20 frames per second or higher and Microsoft reports that Google Chrome and Safari also slow down some GIF animations."
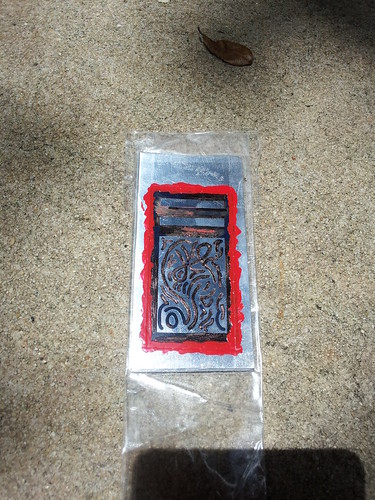
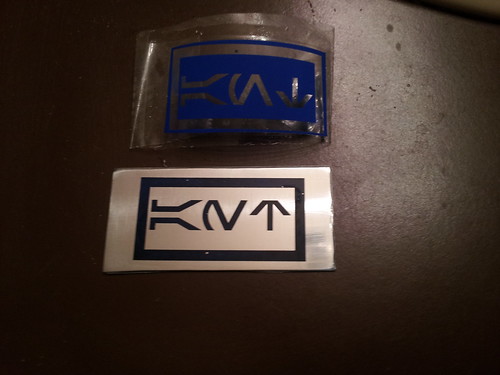
Busy day of testing. I couldn't find any printable adhesive vinyl locally but I did find some removable window stickers. Unfortunately, my printer ran out of ink before I could print on the sticker stock. I was still able to cut a test pattern by tracing from a prior print. I forgot to take any pics before the etch, but I used some spray paint over the mask to create the resist. I didn't use any enamel to seal the tape seams and had some issues with leaking (visible in the upper left). Here's the mask along with the result:
I left this piece in for 8 minutes to see how deep I could get with this resist (which I realized late was only a single coat). There was some slight pitting olong the edges of a couple lines, but the bigger issue was etch cutting into some of the thin detail.
This was significantly deeper than my test from this morning and also deeper than my test at the beginning of the month.
I used some paste wax to try to get some protection and so far am quite happy with the results. The color of the etched area was relatively unchanged and the surface appeared the same as before the wax (note that I didn't sand/buff this piece nearly as much, so there's still swirls from when I was milling the hilt/emitters).
This test was done on the back side of the test from this morning. To protect it from the mordant, I covered it with packing tape. Removing that tape also removed half of the lacquer. This doesn't say much for the durability and would be incredibly hard to fix later, so I think I've ruled the lacquer finish out.
The mask/spay paint resist has promise, but I'm concerned with my cutting skill and the time that would involve. I'm tempted to see if a scrapbooking shop in Orlando has a Silhouette they could cut a few pieces on, or if they have any leads on someone that could.
When I do saltwater etching, I use adhesive backed printer paper. There is more than one type. I used a type that is easily removable. I use Avery 6470 Removable full sheet labels...
http://s7d3.scene7.com/is/image/Aver...782-06470-p03p
I'll admit that cutting the template out is bound to have some inaccuracies though... but it is an option. Here are my results of what I have done so far using templates I cut with a hobby knife. I sanded and then spray painted the parts after etching. I then used a reverse template over the now painted, etched in areas before sanding the excess paint off using my lathe and foam backed sandpaper...

Last edited by ARKM; 07-29-2012 at 07:10 PM.
http://s6.photobucket.com/albums/y23...0Saber%20Hilts
From Wikipedia: "Internet Explorer slows down GIFs if the framerate is 20 frames per second or higher and Microsoft reports that Google Chrome and Safari also slow down some GIF animations."
Those look nice. When I was out today I saw full sheet labels and removable labels, but didn't see them combined (only removable were too small). I think what I ended up with were essentially the same, but are a plastic rather than paper surface. I'm guessing the label would be easier to cut, but not sure.
ARKM, I hadn't seen anything past "but it is an option" when I looked last night. You did a great job on those cut outs! I think I seen a post of yours with the superman etch, or at least it looks very familiar.
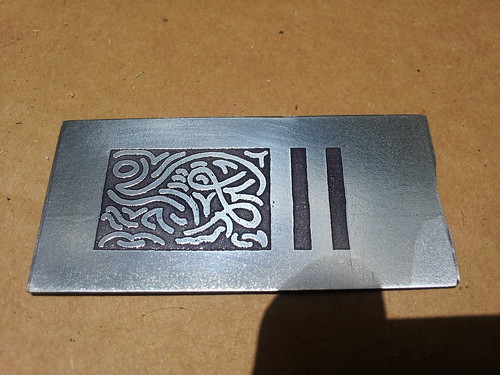
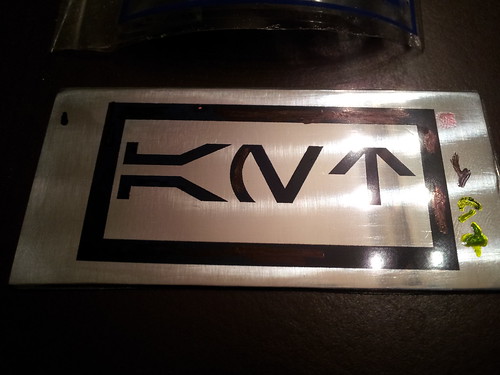
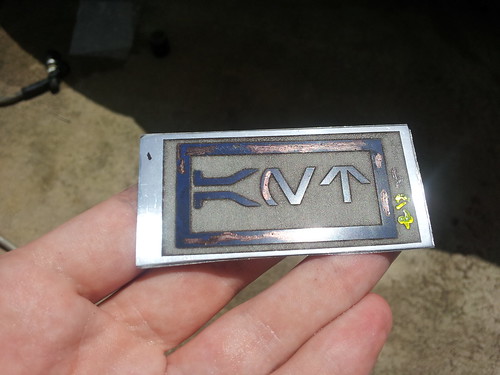
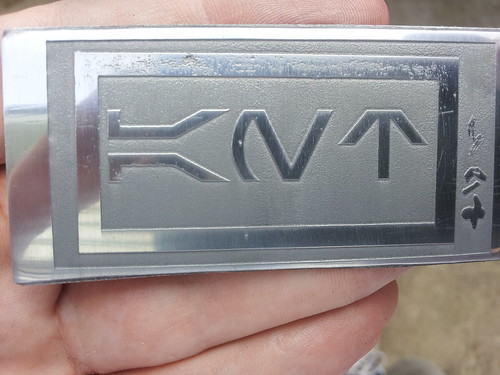
I got another test in today which was very encouraging. I refined my technique for the PNP Blue sheets by using a freshly jointed board under the work piece, and used an extra piece of aluminum tube as a roller to periodically press the transfer while ironing. The result was a very good transfer with only a couple of holes.
To patch up the gaps, I tried a couple different markers. On the top solid line and the 'A' I used a new marker that isn't even worth mentioning because it failed miserably. The other three sides and the 'N' were three coats of Sharpie. The green patches on the right were a paint pen that I thought about after I'd filled in the holes.
I left it in the acid for 5 minutes. I checked it at 4 and everything look fine... in retrospect that would've been a good time to stop, but that's what testing is about, right?
After buffing it looked pretty good! (except the part where I used the new marker)
I'm feeling pretty good about the etch now assuming I can get a good transfer. Either model paint or paint pen seem to produce solid results for the gaps even though they're harder to apply. Hopefully I can minimize the amount I need to patch.
rogue9607, thanks.
Yeah that Superman etch pic was posted in my saltwater etching tutorial thread.
Love your latest test. The lines look extremely clean. Way cleaner than I could get by cutting out a template.
Instead of using a paint pen or marker, you might try actual paint and a very fine paint brush and apply about 3 coats. You can even use spray enamel if you prefer by spraying a small puddle on cardboard to dip the paint brush into (though regular Testors enamel model paint might work just as good).
I also want to mention that I love the slider switches you machined for your saber-staff. Excellent work.
Last edited by ARKM; 07-31-2012 at 12:09 PM.
http://s6.photobucket.com/albums/y23...0Saber%20Hilts
From Wikipedia: "Internet Explorer slows down GIFs if the framerate is 20 frames per second or higher and Microsoft reports that Google Chrome and Safari also slow down some GIF animations."
Thanks! I'm really happy with the last test (aside from the fail marker), and hope I can get a good transfer onto a curved surface. In one of my tests I used some Testors model paint (the bright red in the pictures) and it did work extremely well. At the time I had concerns with my painting skill, but that was when I was trying to recreate portions of the resist not just filling in gaps.
 Posting Permissions

 Reply With Quote
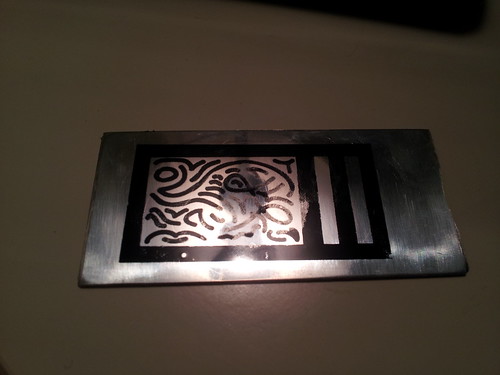


Bookmarks