That sir is a Masterpiece, and truly inspiring!
I am in eager expectation of what follows....
Nice touch wrapping the little bow. your wife is certainly spoiled


That sir is a Masterpiece, and truly inspiring!
I am in eager expectation of what follows....
Nice touch wrapping the little bow. your wife is certainly spoiled
Uhm wow. Haven't checked this thread in awhile and I had to stare at those new photos for almost a minute convincing myself that I wasn't just looking at some CGI from the game.
Very nice with the etching and the switches. Looks spot on.
The lightsaber hilt is capable of producing a blade of pure energy. The lightsaber hilt has proven to be completely safe. The saber blade however has not. Do not touch the operational end of the saber blade. Do not look directly at the operational end of the saber blade. Do not immerse the saber blade into your flesh, not even partially.
I'm still In Awe!!! (Wipes Drool!) You said First Build? (Drops Dead...)
I've been quiet while tinkering/testing/planning over the past few months for the electronics rebuild. The unique ignition/retraction sounds/behaviors have proved a fun challenge, and I think I have most of the details worked out, though there's still tweaking as I get the parts assembled. The main issue is that all of the current sound boards trigger the LED ramp-up when the sound begins. To accomplish the Indiana Jones intro prior to ignition ("Dun-da-dun-tah, dun-da-ta... pseww!"), I need a delay between the sound start and LED ramp-up.
My original solution with the Arduino + Somo cards seemed reasonable in theory, but the sound aspect never worked how I had hoped (mainly issues with the Somo cards themselves). Using the Arduino to run the PWM for the LEDs worked quite well, though the current I was using was more than my transistor array could handle and I fried a few of them.
About this time I saw the email that the Nano Biscotti was finally being sold and I quickly picked one up. My plan is to use it purely as a sound board and use a revised version of the Arduino setup for the LED driver. I have three CAT4101 constant-current drivers for the LEDs. My crystal LED will still be resistor based. The Arduino will control the color mixing and send button input to the NB for sound. I'm keeping my single press for power on, double click for color change, and long press for power off.
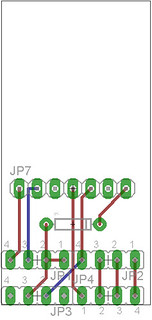
So far I've been testing on a breadboard, but just finished my first cut at the two PCBs and hope to etch them later this week. Here are the designs as they currently stand. The first will go in one half of the hilt with the Arduino and the constant-current drivers. The second is little more than a breakout board to mount the NB to as well as the LED/switch connections in that side of the hilt so I can try to keep the number of wires running through the crystal/sound chamber to a minimum.
I realize this is not the intended application of the NB, but this whole project seems to be about unique solutions. My goal is to get everything buttoned up so that this saber is fully functional by Christmas. I would say "finished", but there are a few parts that I know I'll want to remake eventually...

Looks interesting. I can't wait to see your final results.
We all have to start somewhere. The journey is all the more impressive by our humble beginnings.
http://led.linear1.org/1led.wiz for the lazy man's resistor calculator!
http://forums.thecustomsabershop.com...e-to-Ohm-s-Law for getting resistor values the right way!
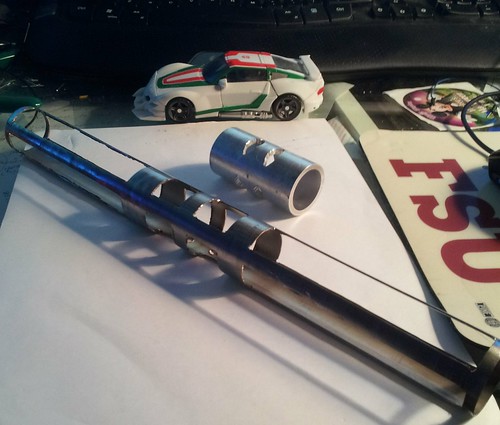
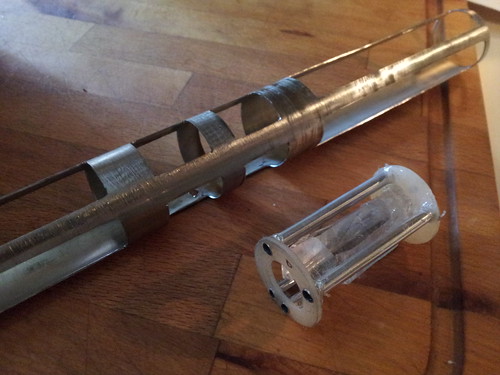
Another minor update. The piece that I was least pleased with on the initial build (well, "embarrassed" is probably a better term) was the connector between the two halves of the hilt. The sound slots in the hilt were late additions, and the matching slots in the connector turned into a complete hack job. As part of this rebuild I'm making a sled to both hold the components and act as support for the hilt. I finished rough cutting the stainless steel tube this evening. The openings at the ends will provide access to battery packs and electronics. The center openings will show the crystal, with one of the rings holding the speaker. It'll be a tight fit, but everything should squeeze in (fingers crossed). I'm not going to do much of a crystal chamber for display, just mount the crystal so that it's visible through the slots.
The old connector is the small piece. The new sled still has a lot of cleanup left after the dremel work.
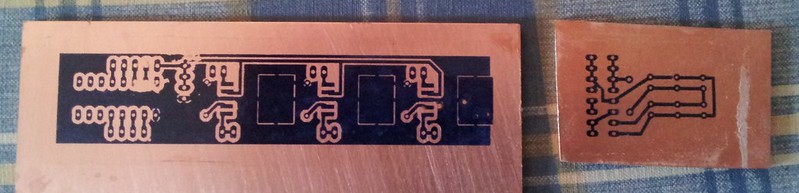
My circuit board design has gone through several revisions since I posted the design, but I finally have it etched! Next up, trimming the board to size and adding components.
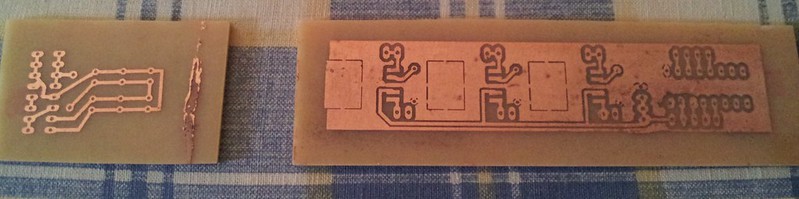
Resist on the PCB before touch ups:
PCB after etch:

This PCB board etching would look good on any other thread - but when compared to the etching on the saber itself, well, it is 'adequate'.
I know it's too late to mention this - but you could have sent the PCBs out to Sunstone or another 'one off' PCB vendor. Of course, you are the creative fellow who used a radial arm saw as a mill. I suppose that sending this work out would have broken that ethos.
This saber is nothing short of amazing. You can see why saber smiths charge so much for a detailed saber. The hours you have lovingly poured into 'Holly' boggle the mind. Keep up the good work!
I would never have thought of using a radial arm saw as a mill... But now that I have seen it done...
Last edited by hedgehog1; 02-26-2013 at 11:49 PM.
Hehe, with all the troubles I've had on the electronics front, I'm just going for guts that work instead of a nice reveal... so 'adequate' works perfectly for me! (well, assuming it does work)
I'd thought about having the board made, but, given the cost/lead time and the fact that I really don't know if it'll work the first time, I figured I'd just etch it myself. I had the PCB and transfer sheets already and plenty of left over chemicals for etching!
Thank you for the encouragement!
More progress today and I'm both encouraged and incredibly nervous.
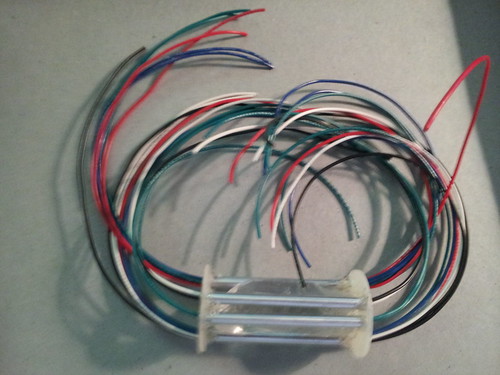
Started out making the piece that holds the crystal and routes 17 wires through the sound/crystal chamber.
Horrible focus, but here's the wires pre-routed through the tube with plenty of extra to trim to size.
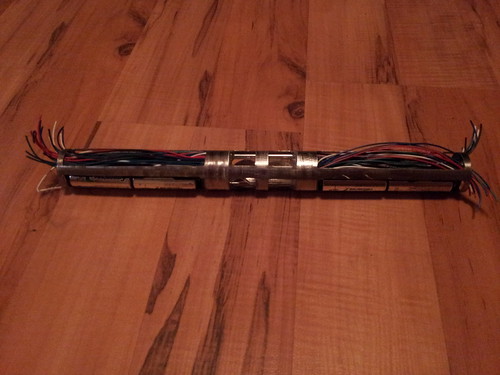
Here's the chassis with the crystal, speaker, and accent LED installed (and working).
The part that makes me incredibly nervous is installing the electronics under all of those wires on top of the battery packs. Time for my masters thesis in cram-fu/constricted soldering!
 Posting Permissions

 Reply With Quote
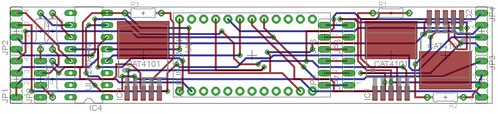

Bookmarks