


Hello fellow sabersmiths,
It's some time I'm not posting new sabers here, so I want to present my latest creation, Pyros.
This is the personal saber of one of the friends in my lightsaber class and has a bit of history behind the choices made during the conversion.
You have to know that our academy has a rule that requires all trainees and padawans to wield blue sabers during lessons until they pass the examination and receive the Jedi title. This is normally done after the completion of the two initial styles, Shii-Cho and Makashi, and can require quite a long time.
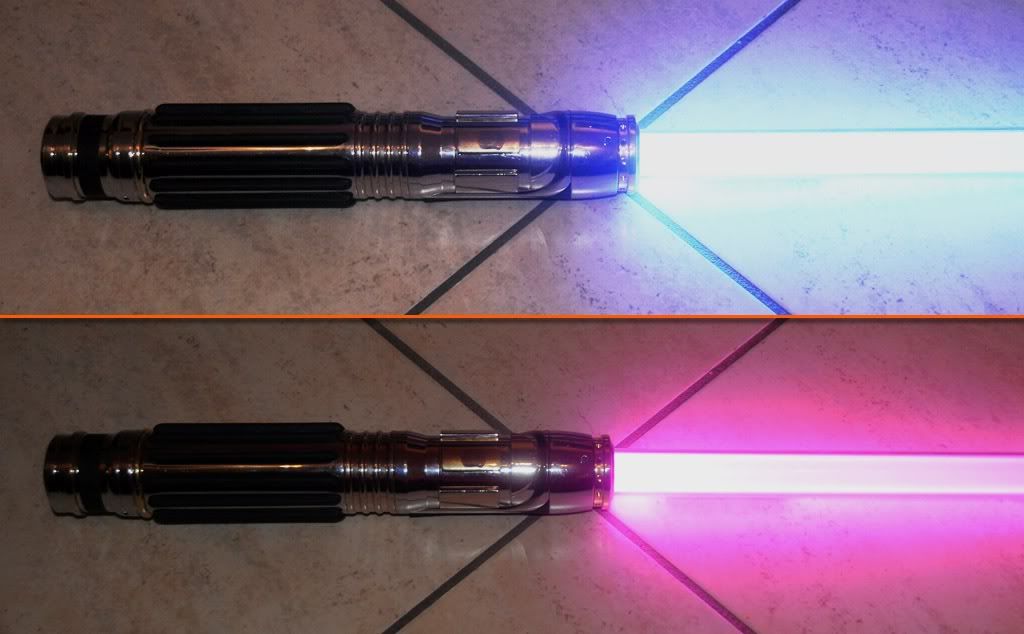
So, my friend was really sorry to be forced with a blue Windu loosing purple which is her favourite color, so I decided to give her the ability to switch the color with an additional slider switch.
Currently purple is really too much on the pink side, but this will be fixed as soon as she find some time to pass by my home so that I can open the saber again and let her choose the best shade.
The features of the saber are:
- MR Mace Windu 2005
- LedEngin RGBW, wired for sky blue and purple
- Modified MR soundboard
- Modified MR battery holder
To install the additional switch I machined a hole 180° from the main activation switch and created a small switch guard to secure it to the hilt.
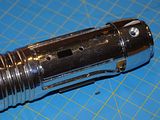
The stock MR sound board has been modified to support the increased mA rate required by the LedEngin.
Basically I removed all stock transistors and replaced transistor Q1 with a TIP41C, which is now able to feed about 1600 mA when blue and red are on without the risck of burning.
I also replaced resistor R4 with a jumper in order to properly send the transistor in saturation and increase the current rate.
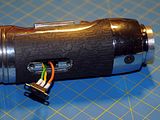
Green and orange wires are coming from the green and red die, while the yellow wire comes from the transistor collector.
This wires are connected to the additional slider to change the blade color.
The blue die is always on when the saber is ignited.
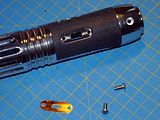
In order to provide more juice to the power hungry LedEngin, I modified the stock battery holder from 2x3 AA alcaline to 4 AA NiMh rechargeable.
The conversion is quite easy; you just need to carefully open the battery holder making sure not to break the speaker holder that will need to be glued back once finished.
Remove the two jumpers and add a wire connecting the right pads at the two ends.
At the end of the conversion the 4 batteries will be placed in the sockets where you can clearly see the jumpers connecting them in series.
The sockets where the two batteries are clearly separated won't be used anymore.
On the board I removed one of the two diodes and shifted the orange wire in its place; orange is providing the 4,8V after the conversion while red is not used anymore.
Last but not least, I decided to have a more sturdy assembly on the TCSS blade holder, replacing the 3 set screws with a more secure pair of M4 screws.
The bottom screw is used to secure the blade holder and the set screw is locking the blade in place.
I hope you liked this saber and happy saberbuilding to everyone.


 Reply With Quote


 TCSS the #1 Part supplier of


Bookmarks