-


 Lapping the MHS heatsink tutorial (pic intense)
Well since I have not seen this as a seperate thread yet I thought I would create it. Especially since I took all of the time to take all the pictures. I know that not everyone needs or wants to do this, but I thought for those of us who are never satisfied with leaving anything alone this would be of help.
Lapping a heatsink gets rid of all the marks left in it by the machining process. It helps the led and heatsink make better contact so that the heat can be transferred more easily. I would like to say that the heatsink Tim has created is a thing of beauty, and it works very well in stock form. However, like I said some of us just can't leave well enough alone. Also, this process can be used for almost any type of heatsink or piece of metal you have.
First off lapping a heatsink takes time and patience. Yes both. Trying to hurry through or not putting effort into it will yield poor results. With all of that said on to the tutorial.
WARNING! TRY THIS AT YOUR OWN RISK. I CANNOT BE HELD RESPONSIBLE FOR YOUR ACTIONS. DO NOT PM ME AND ASK ME TO BUY YOU A NEW HEATSINK! Email Tim. He will be glad to sell you one. [ ]
]
You will need a proper work area for this (preferably the sink). You need a very smooth object to place the sandpaper on. I used a glass cutting board turned over to the smooth side. You will need running water, and some dishwashing soap. The lovely scent of the soap is up to you. I prefer the lavender scent.
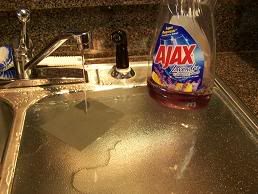
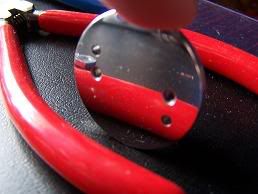
You need an assortment of wet or dry sandpaper. It must be the wet or dry kind to withstand all the water you will use. You can find it in the automotive section of most superstores. I would suggest getting 400, 600, 800, 1000, 1500, and 2000 grit. Take a piece of the sandpaper and place it on the work area. After having removed the nylon screws included with the heatsink and having turned on the water to a small steady stream, place the heatsink with the flat led mounting side down on the sandpaper.
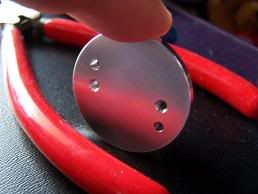
This is where patience starts coming into play. I place a mark on the side of the heatsink facing me with a marker so that I will have a reference point for when I am turning the heatsink. Starting with the 400 grit sandpaper slowly move the heatsink back and forth without applying too much pressure. At first you may have to apply some pressure to get the deeper grooves to smooth out, but around the 800 grit stage you will just be letting the weight of the heatsink do all of the work. Keep the water running the entire time to help the heatsink slide and to wash away the residue of the sanding.
I like to do about 10 back and forth passes then rotate the heatsink 90 degrees clockwise. It must be clockwise for this to work. Just kidding.[ ] After 10 more passes turn it 90 degrees more. This is where that mark made on the side facing you helps keep you on track. I continue the process of sanding and turning until the mounting side looks even and smooth. It may take some time to get a feel for this part, but soon you will be able to see when all of the surface looks evenly sanded to the grit you are using.
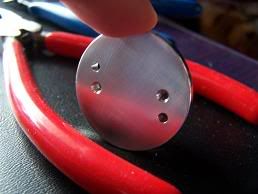
Once you are satisfied that it is smooth go on to the next higher # sandpaper. If at any time along this you feel the sandpaper grab the heatsink you need to slow down. You may need to add a drop of the dish washing liquid. This will help smooth out the passes you are making. Also, if it grabs it may mean that you are pressing too hard down on the heatsink. You have to be careful to get this right. Here are some photos of the process.
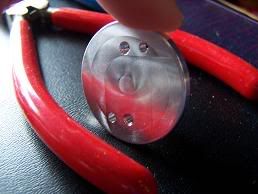
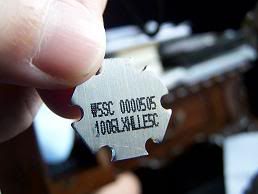
Fresh from the store

400 grit
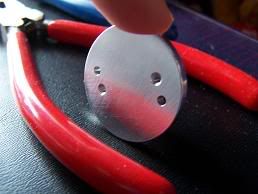
600 grit
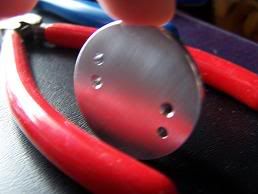
800 grit
1000 grit

1500 grit
2000 grit
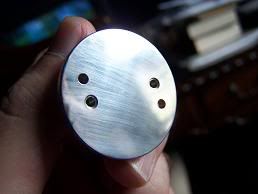
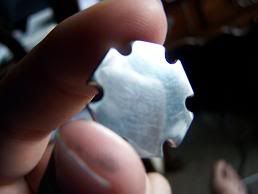
After the sanding

Don't worry if it doesn't look like a mirror at this point. It will soon.
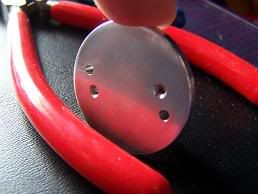
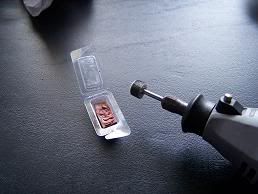
I next use my Dremel tool with a buffing tip to get rid of the marks left by the sanding. A kit I have includes the tip as well as some buffing compound. I believe Tim sells the same kit in the store. With the buffing tip and compound, buff the surface of the heatsink. I do this about 4 times cleaning off the compound in between times and turning the heatsink 90 degrees before the next time.
After buffing
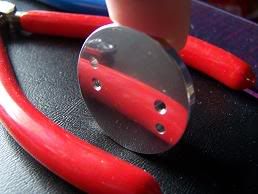
This will get the heatsink very smooth, but you must watch out to not accidentaly hit it with spinning collar of the Dremel. I have done it, and it will scratch up your new beautiful finish.
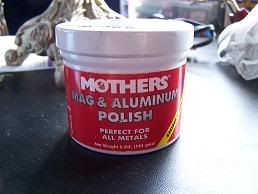
I do one more step in the process and that is polishing the heatsink. This gives it a very lusterous shine and gets out some of the marks left by the buffing. I like to use aluminium polish for this step.
This will really make it shine.
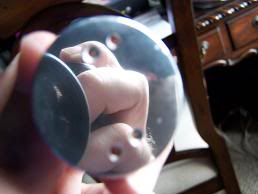
Yes that is my hairy fingers holding the camera that you are seeing in the heatsink.
I wash the heatsink with some of the dish washing soap afterwards to remove any residue or wax that the polish might contain.
That is it. You have just lapped your first heatsink. Now you will be sanding and polishing everything you can get your hands on. Well maybe not everything.[]
As I said this can be used for most any metal object.
FROM THIS POINT ON YOU ARE MOST DEFINATELY ON YOUR OWN! I HAVE DONE THIS, BUT I HAVE SOME EXPERIENCE WITH THIS PROCESS. TRY YOUR HAND ON A HEATSINK FIRST BEFORE YOU MOVE ON TO THIS. I WILL NOT BUY YOU A NEW LED. Once again, contact Tim he will be glad to sell you a new one if you mess yours up.[]
You can use this process on the leds we use as well as the heatsink for added thermal conductivity. I don't know if this helps much, but it can't hurt either. Well that is unless you ruin your led trying it. I follow the same process as outlined above, but I do not leave the water running. I just get some water on the sandpaper and turn the water off. This way the water won't get all over the top of the led if you are careful. I have had good luck with this, but it does not come out nearly as smooth as the heatsinks. This may just be my experience, or it could be the type of metal the led is mounted on just doesn't polish up that well. Either way, here are my results with lapping the led.
Fresh from the store
After lapping, buffing, and polishing
Well there you have it. My unofficial guide to lapping. Any comments or suggestions you may have to better the process are appreciated. Thank you for reading.
-
Well done! I might need to try this since my new saber has very little room for a heatsink and I'm probably going to have to go the copper washer route.
_________________________
'Your swords please, we wouldn't want to make a mess of things in front of the Chancellor.' -Count Dooku

-
hey i have mothers aluminum polish toooo, how do you polish your stuff exactly to give it that extreme sheen?
I DONT KNOW WHAT WE'RE YELLING ABOUT!!....LOUD NOISES!!!
www.starwarscustoms.bravehost.com 
-
The secret really is the sanding. Without that there really isn't a way to achieve the mirror finish. It doesn't seem like it but the machining grooves are fairly deep. It takes some effort to get them out. The polish alone will definately shine up the aluminium, but it will not give you a mirror finish.
One more thing. After having tried this on a couple more leds I can say that it works equally well for them. The base plate is made out of aluminium and polishes up well. I think that I just was in a rush to get that one done since I had been sanding for hours.
-
Council Member
Sith Lord

-
Maul I get my polish at an automotive parts store like Auto Zone, Pep Boys, or Oreily. I have also seen it at places like Walmart in the automotive section. It is in this section that you can also find the wet or dry sandpaper. Although, Walmart did not have every grit needed, so I had to buy some there and some at automotive stores.
 Posting Permissions
- You may not post new threads
- You may not post replies
- You may not post attachments
- You may not edit your posts
-
Forum Rules


 Reply With Quote


 At last we will reveal ourselves to the jedi, at last we will have revenge.
Bookmarks