-
Council Member
Jedi Council Member


 Jay-gon Jinn's Brass Saber 25 (Petit Crouton, Li-Ion, 1 1/4" sink tube ,RGB purple)
I had a friend of mine in the Rebel Legion ask me about building a saber for his fiancee that wanted to join the group with a custom Jedi costume and this will cover the build. I'll be using these parts to build it:
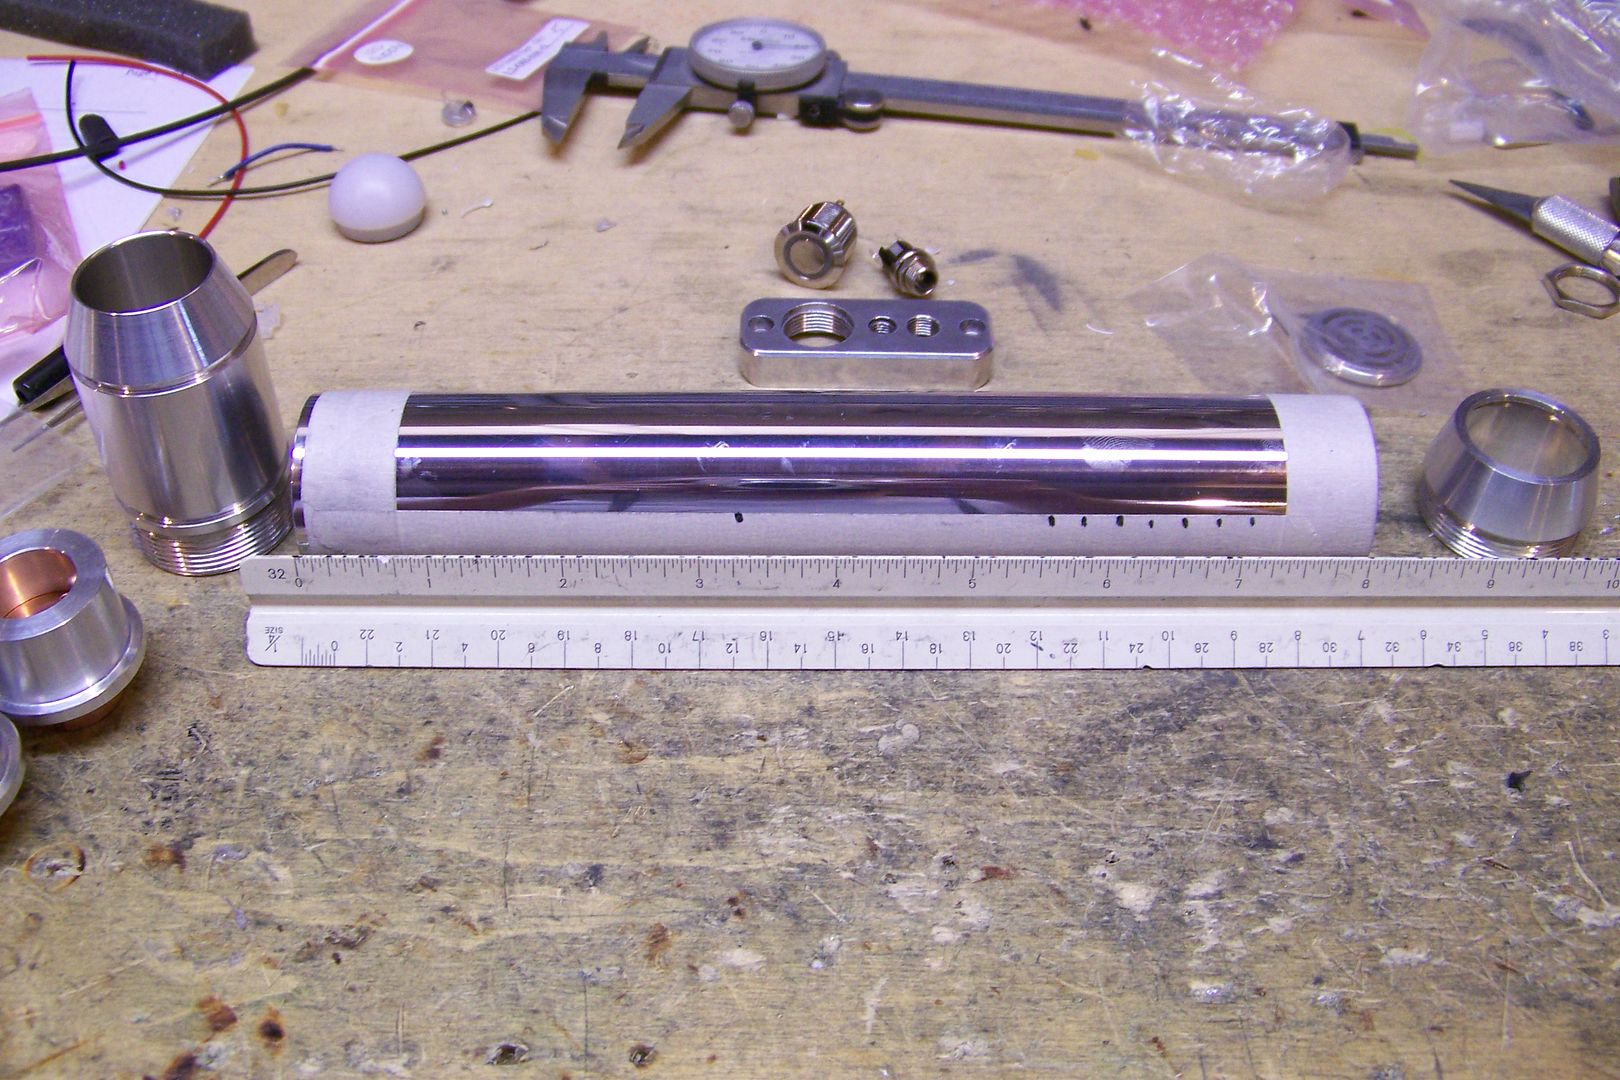
What we have there are:
-8" double threaded female connector
-Blade holder style 13 (New design)
-MPS pommel style 4
-box 2
-MPSI style 1
-white 1" thin-walled blade tip (the blade will be a trans-white as this helps with color mixing)
The basic design for this one has turned out to be no different than most of my brass sleeved (or chromed for that matter) but with a little twist added in. You'll see what I mean later! 
I set up the 8" MHS extension in the vise on my drill press after marking it off for the work I was going to do:

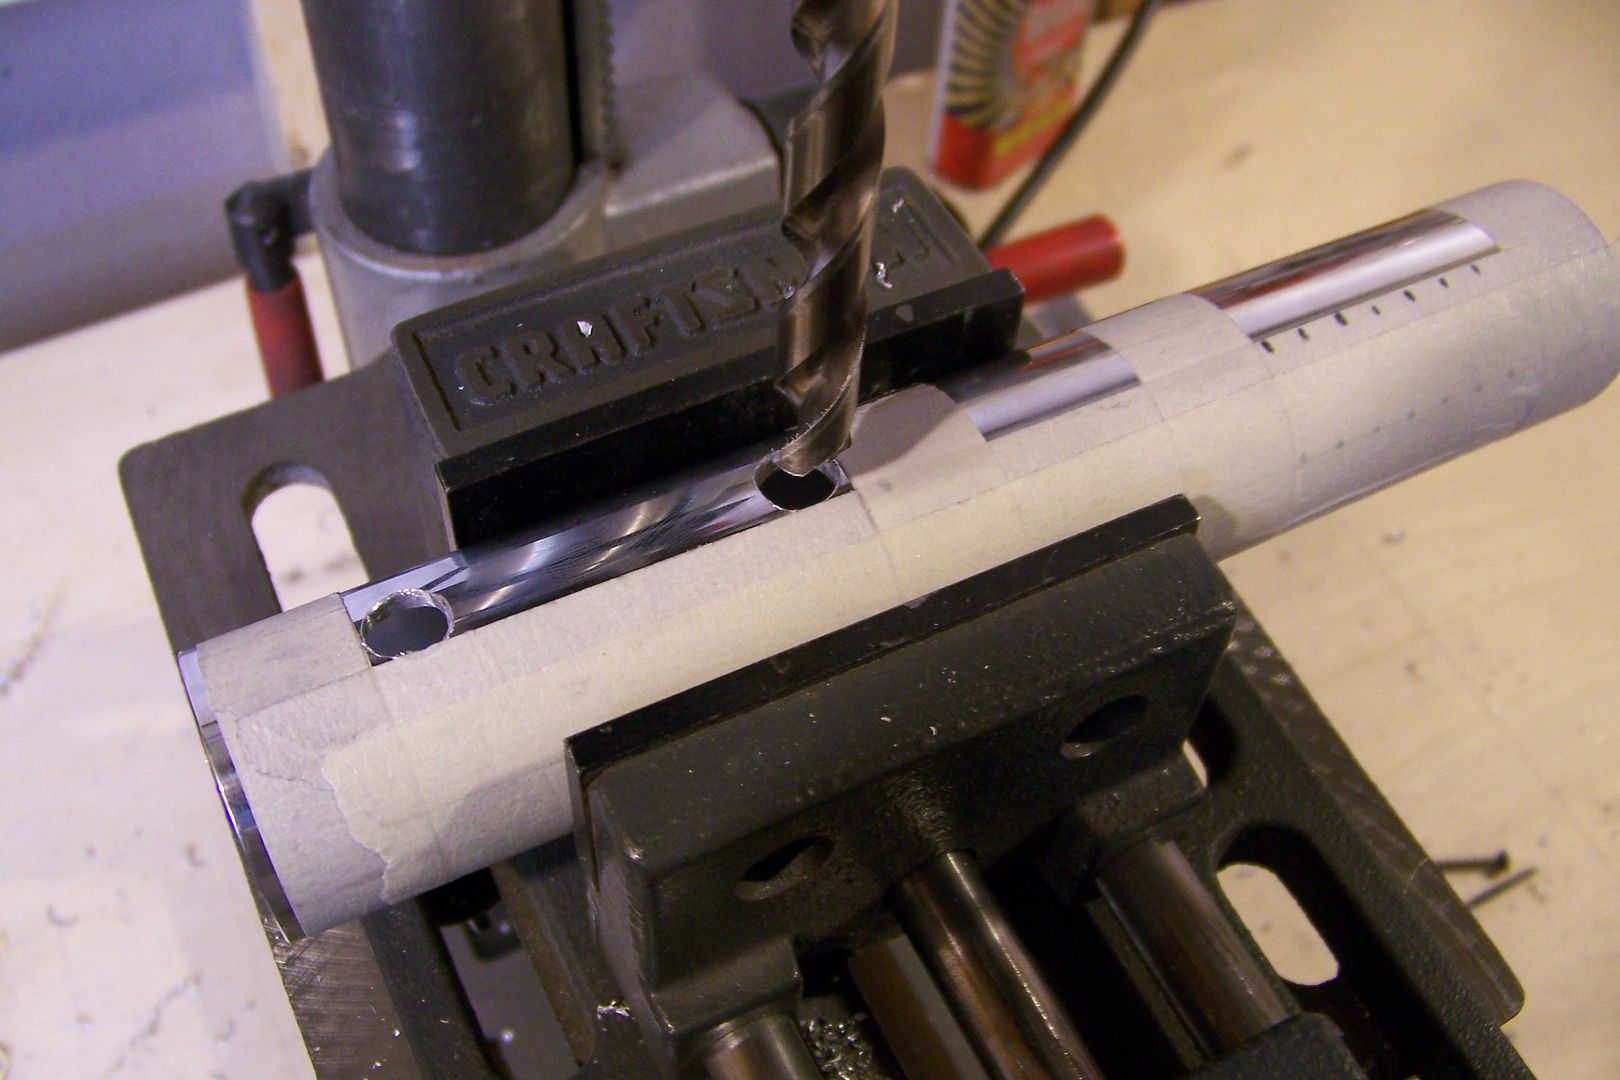
As you can see, I drilled some holes in the 8" extension....then I took the Dremel to it with a reinforced cutting disc:
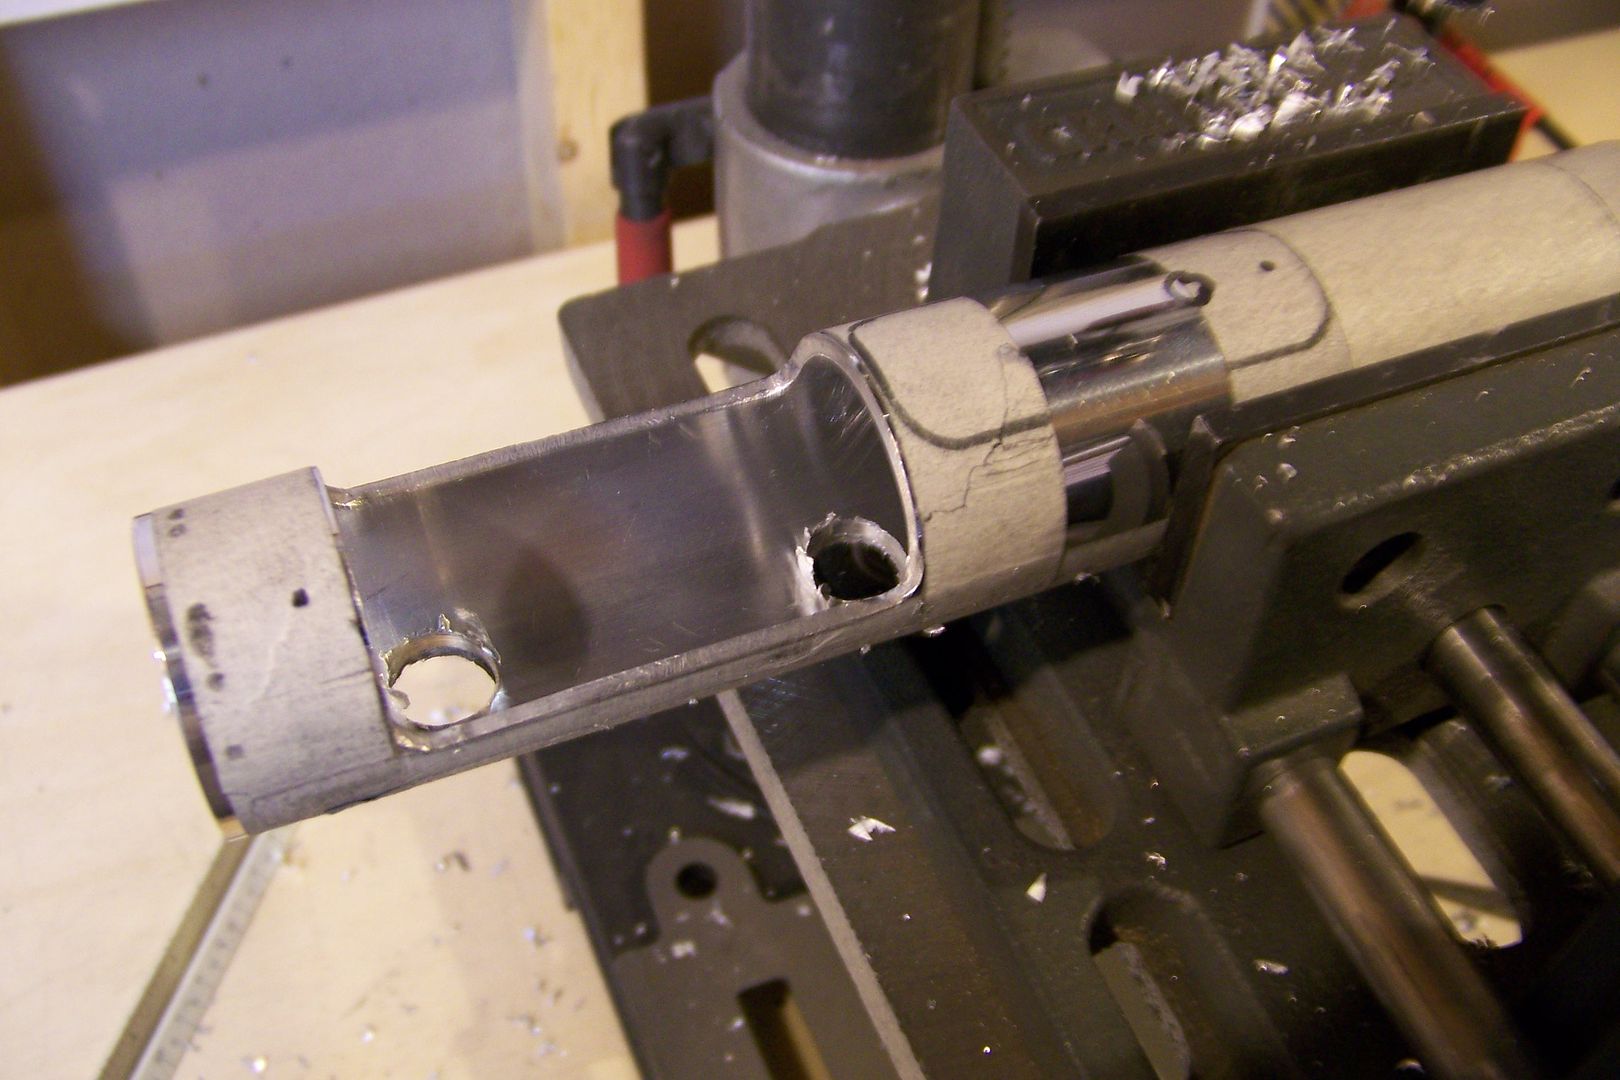
I flipped it over in the vice and set it up to drill two more holes:
Then "slotted" those two holes as well:

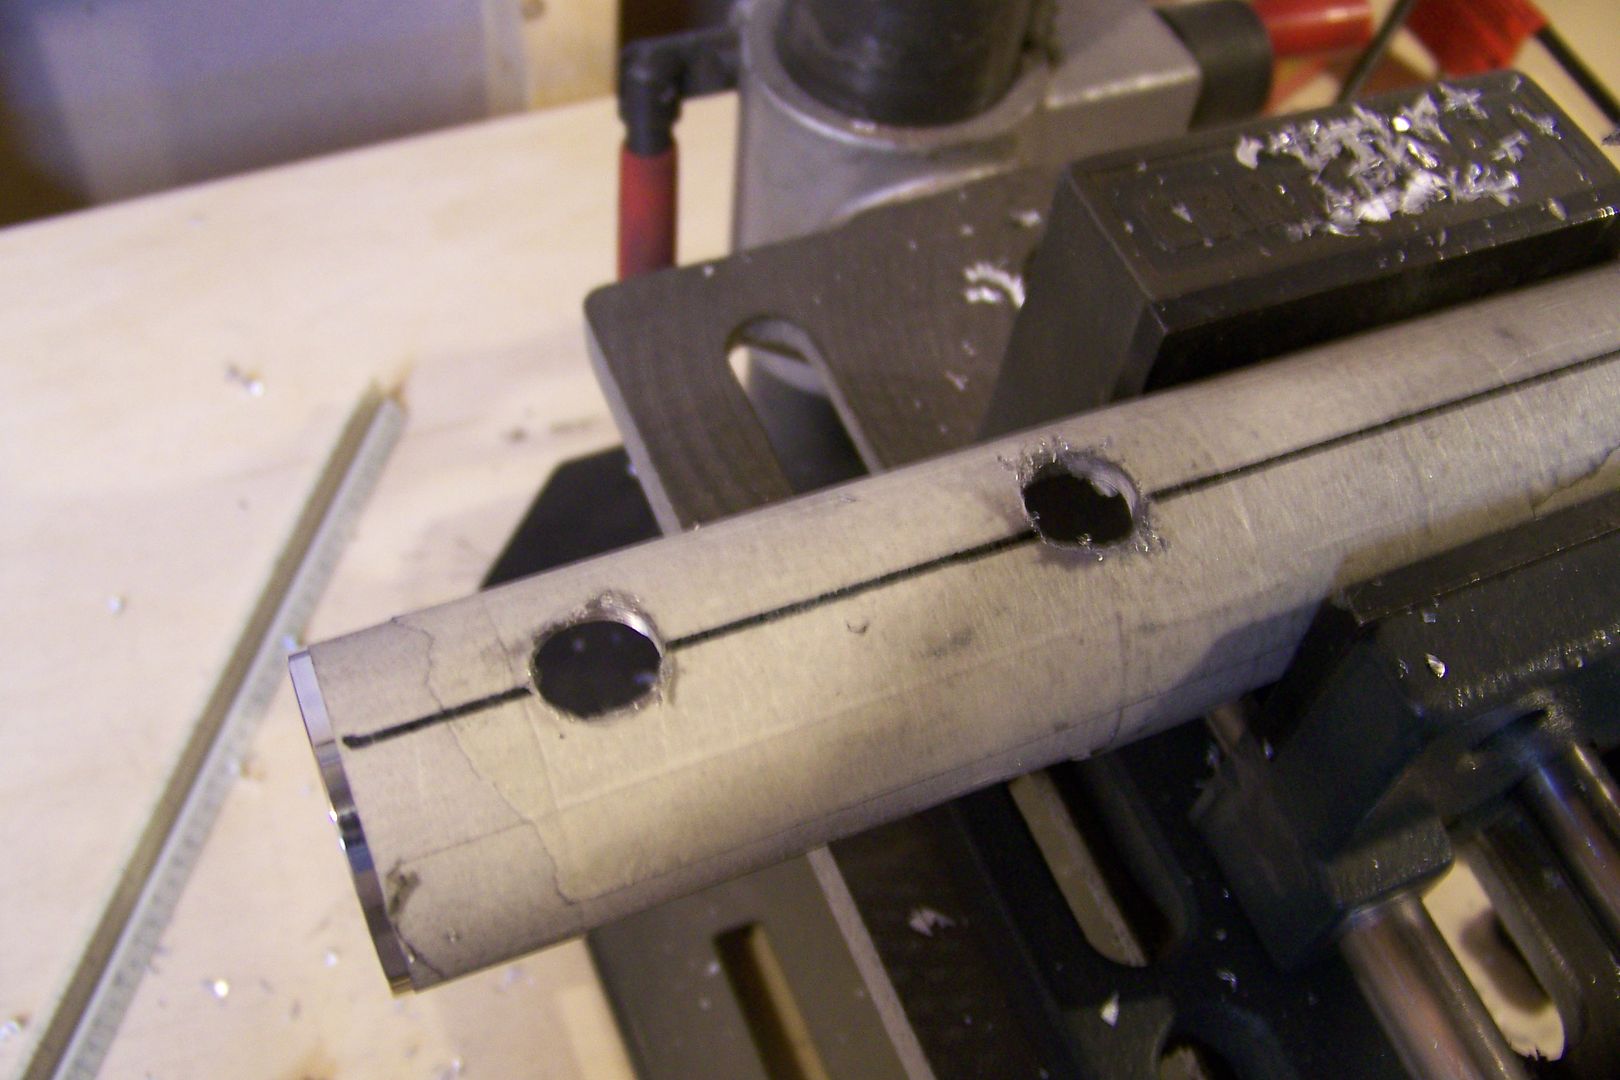
Moving to the rear half of the 8" extension, I drilled some more holes:
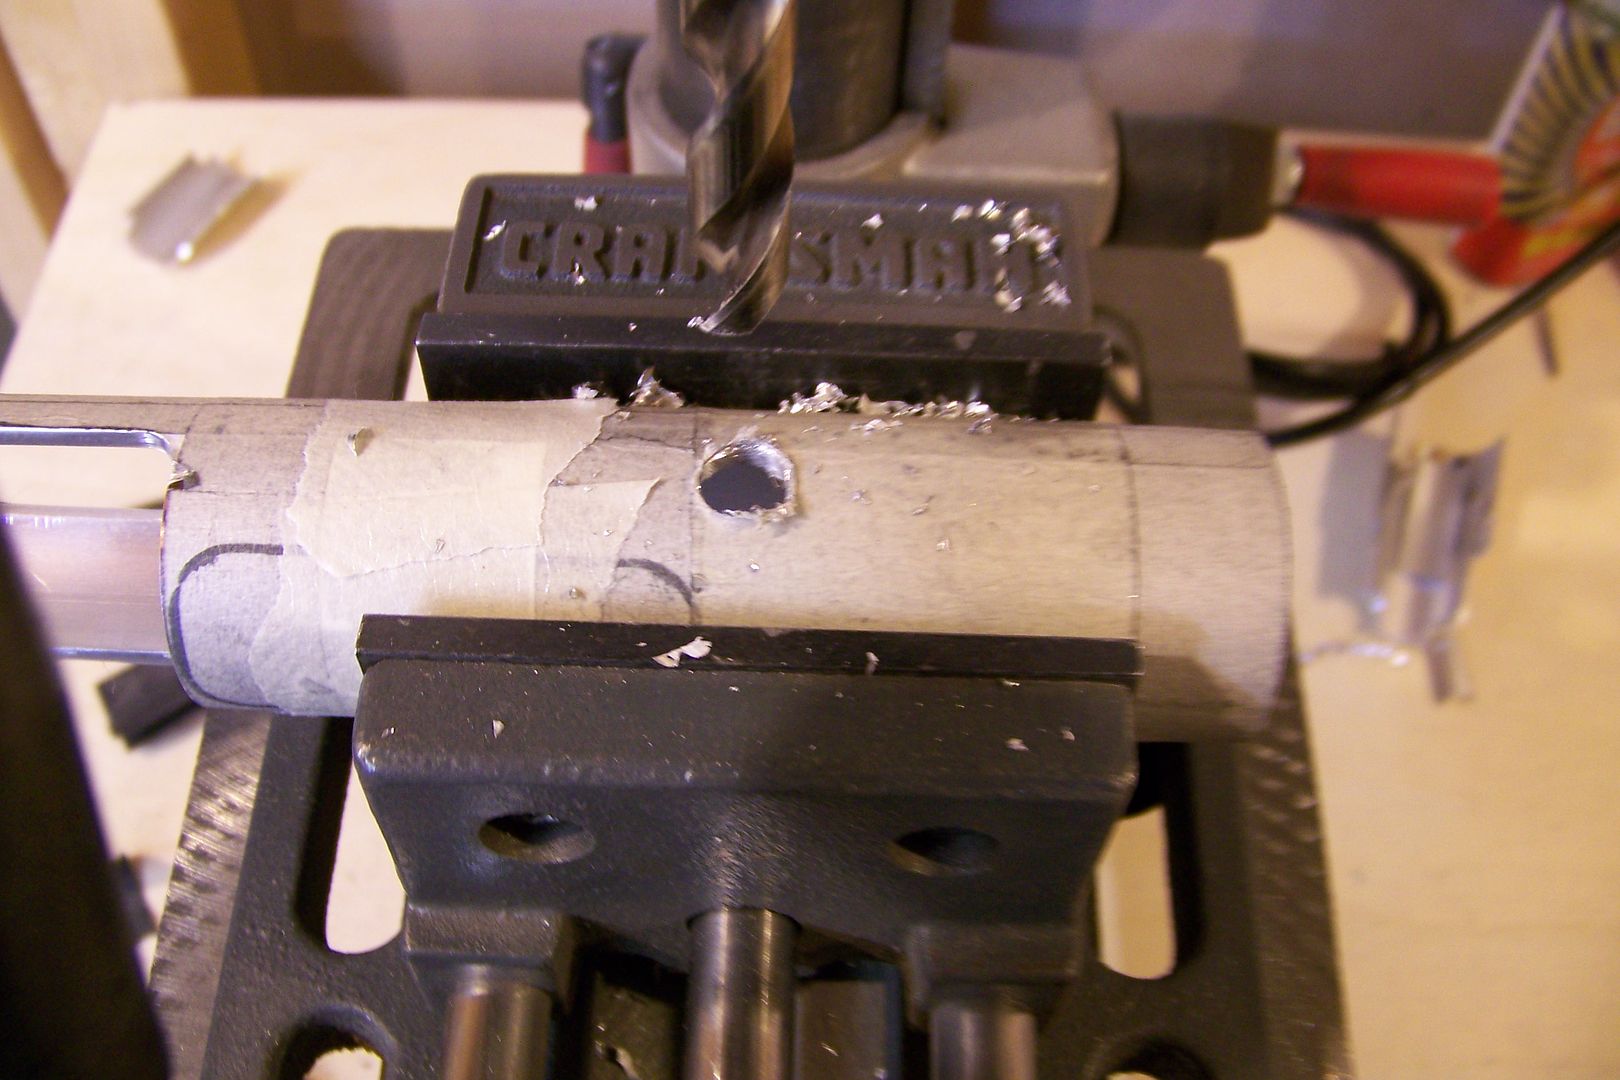
Then I again used the dremel to remove the unwanted section of hilt:

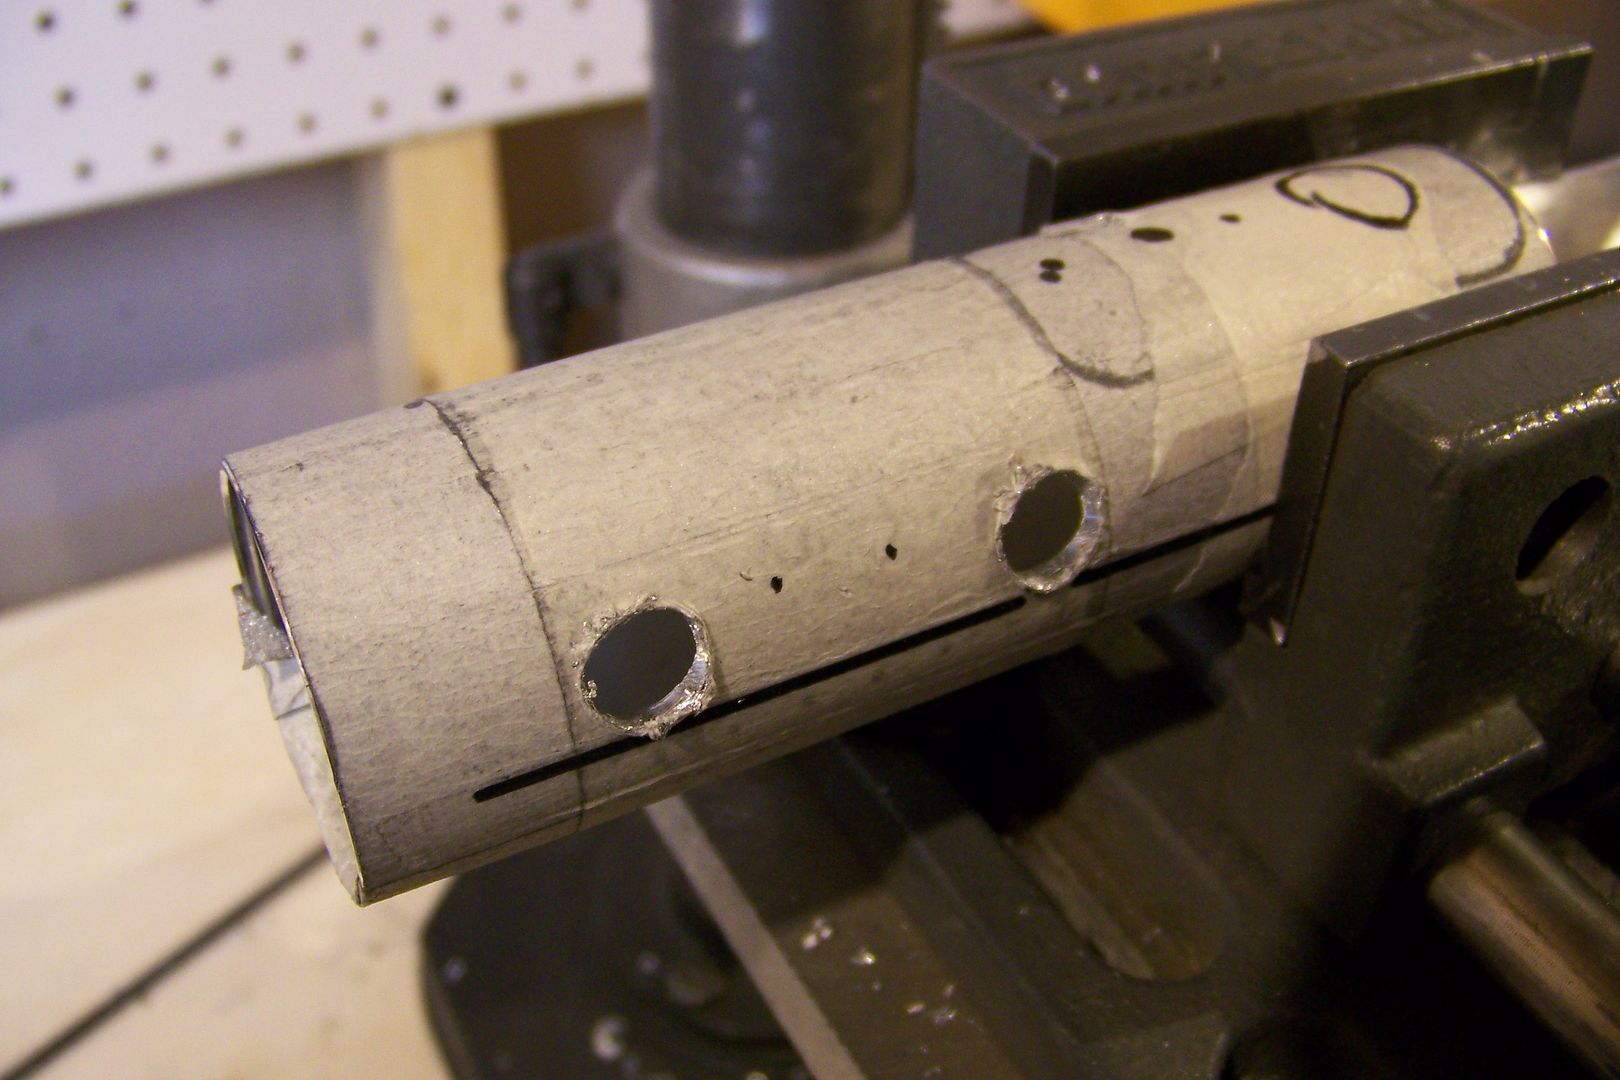
Next I spent several hours over the course of a few days filing and sanding on the extension. Prior to working on it all, I had also wet-sanded the extension with 800 and then 1000 grit wet-dry sandpaper and polished it to a chrome-like finish.
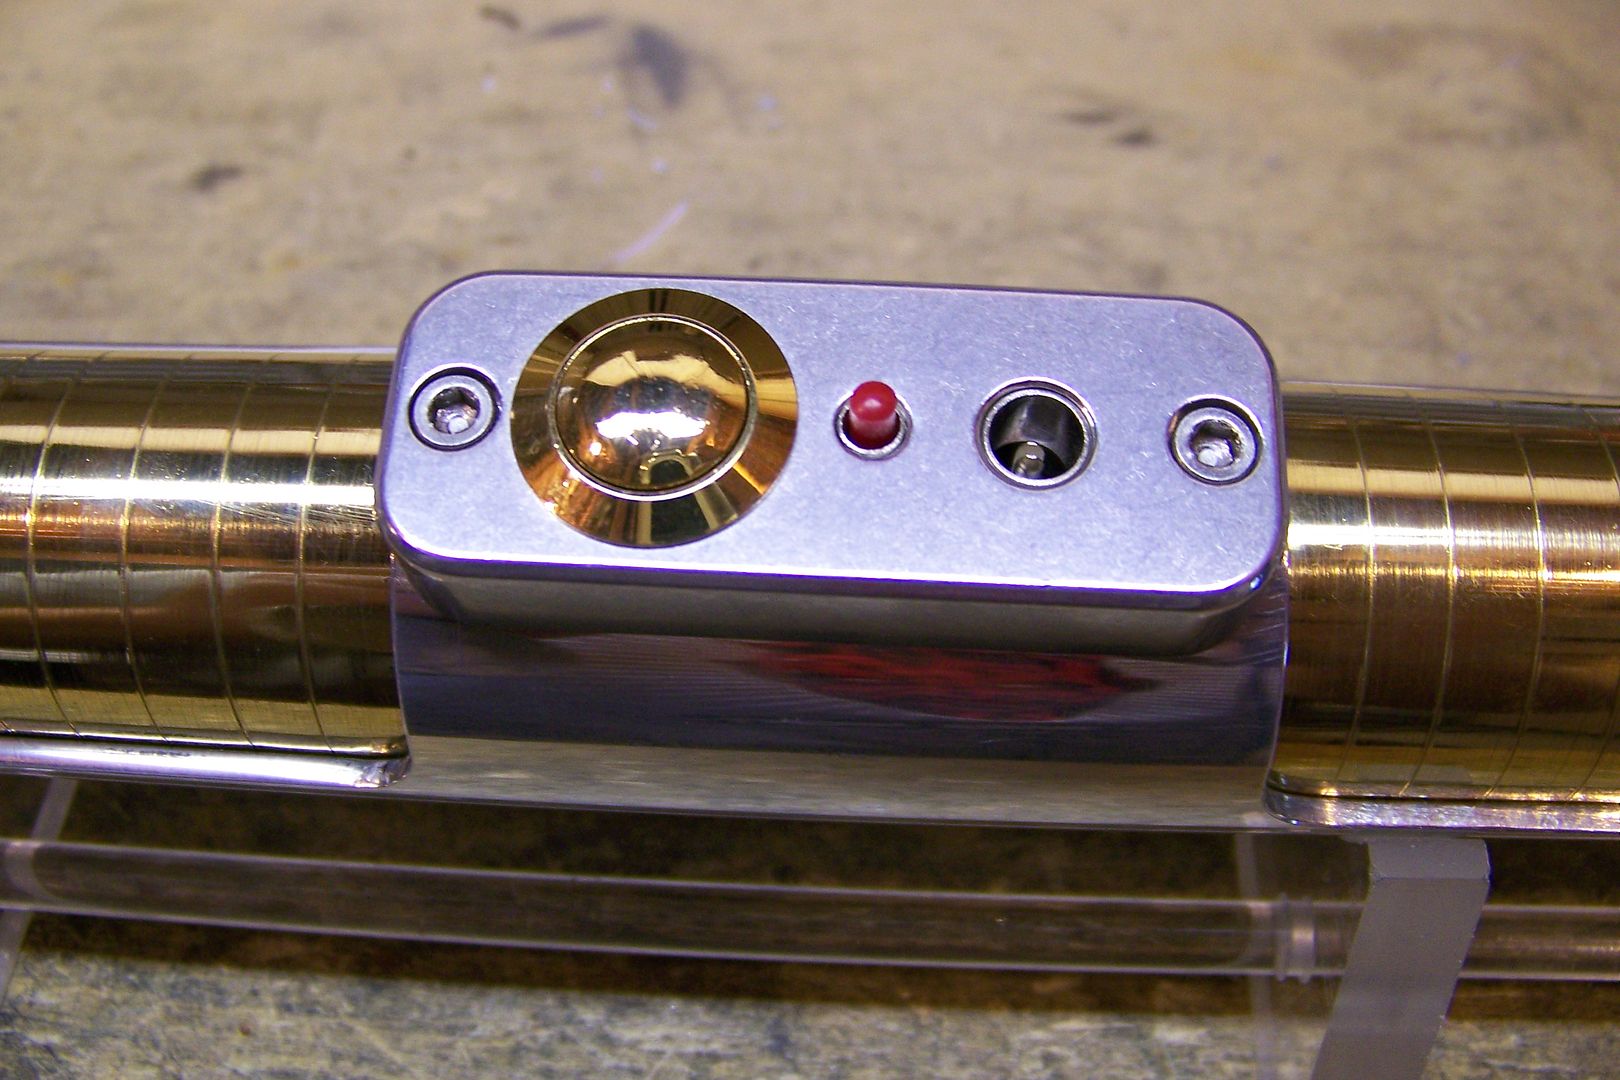
After that was done, I moved on to locating the switch box:
Then drilled the holes for the switches, recharge port, and mounting screws. I also tapped the mounting screw holes for the required 6-32 threads:

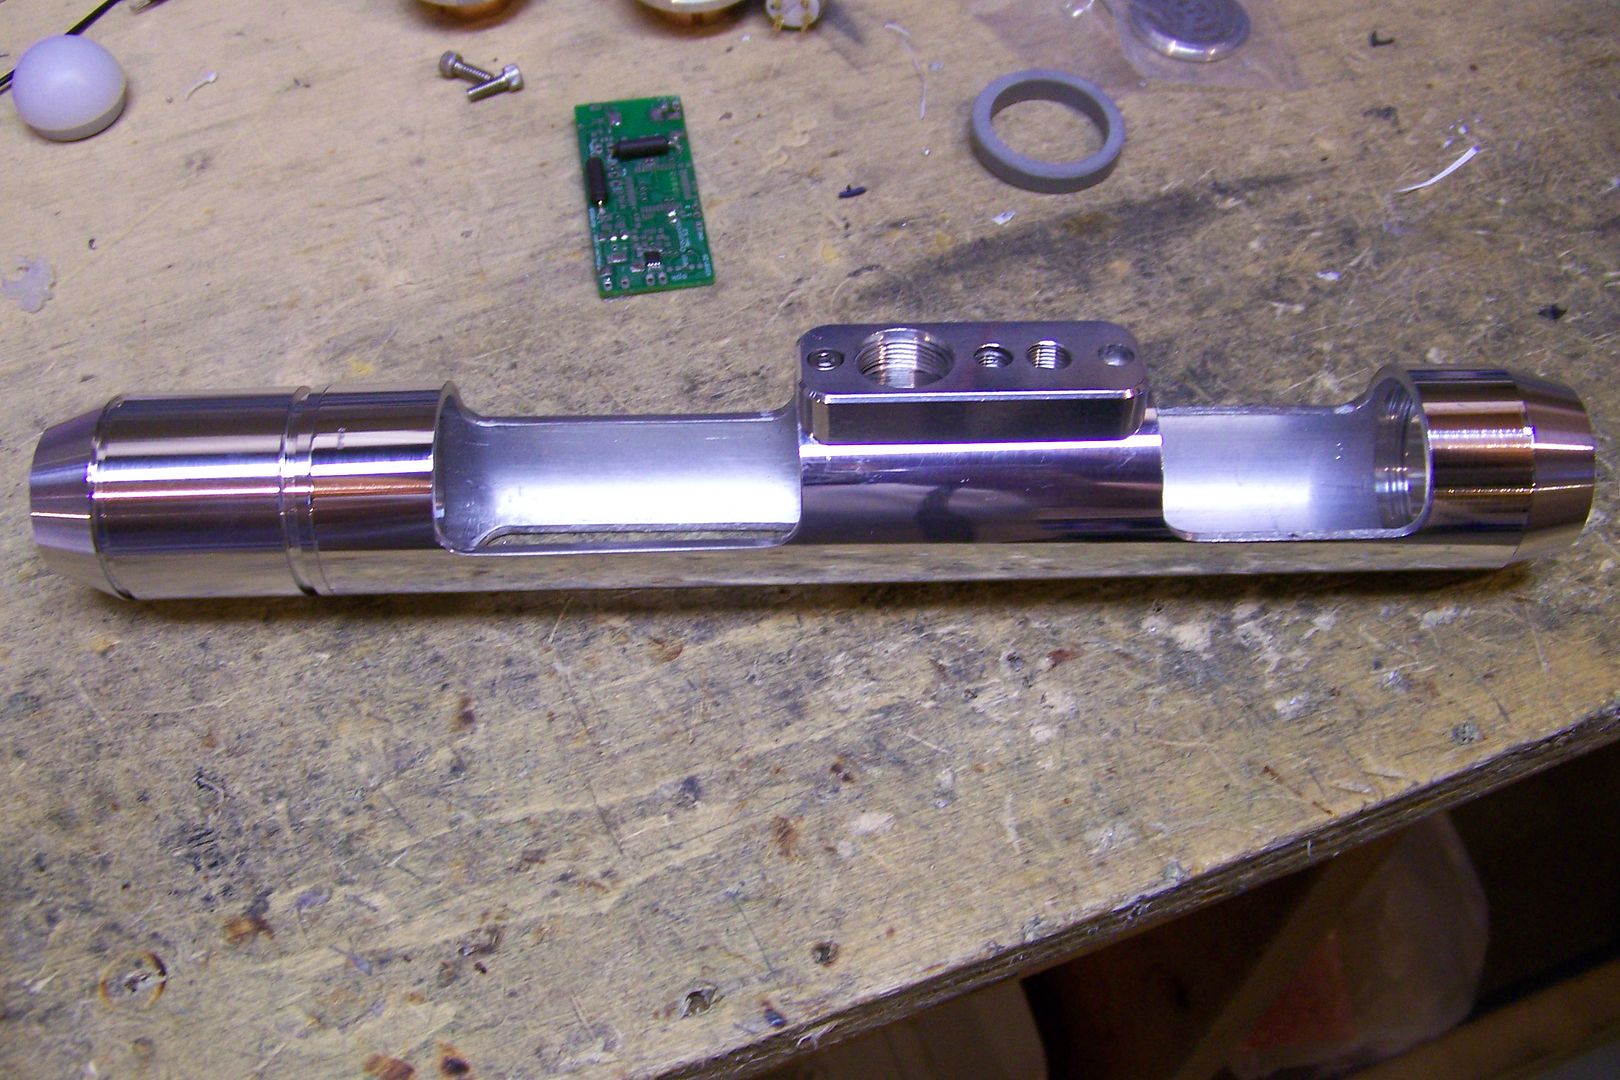
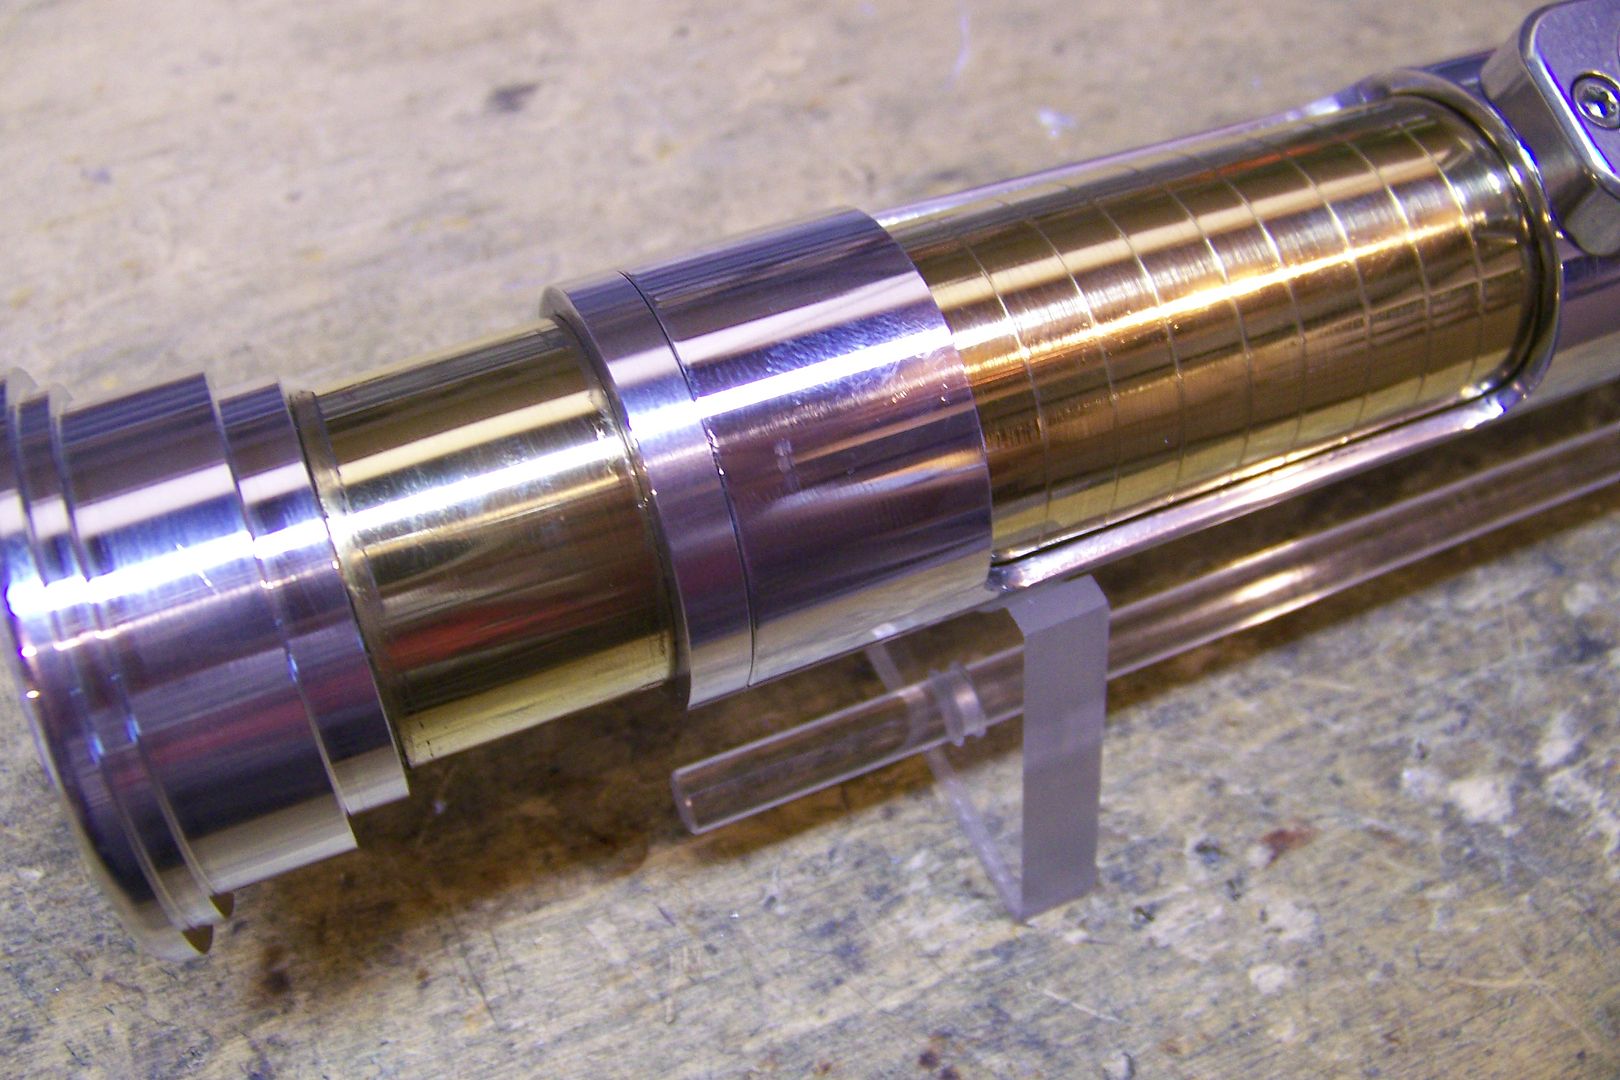
Now, the thing to keep in mind about the MHS parts is that you can sleeve them using the TCSS sleeve material or a chrome plated or polished brass sinktube, but they can also be used as the sleeve itself because the inside diameter just happens to accommodate a 1 1/4" sink tube perfectly!
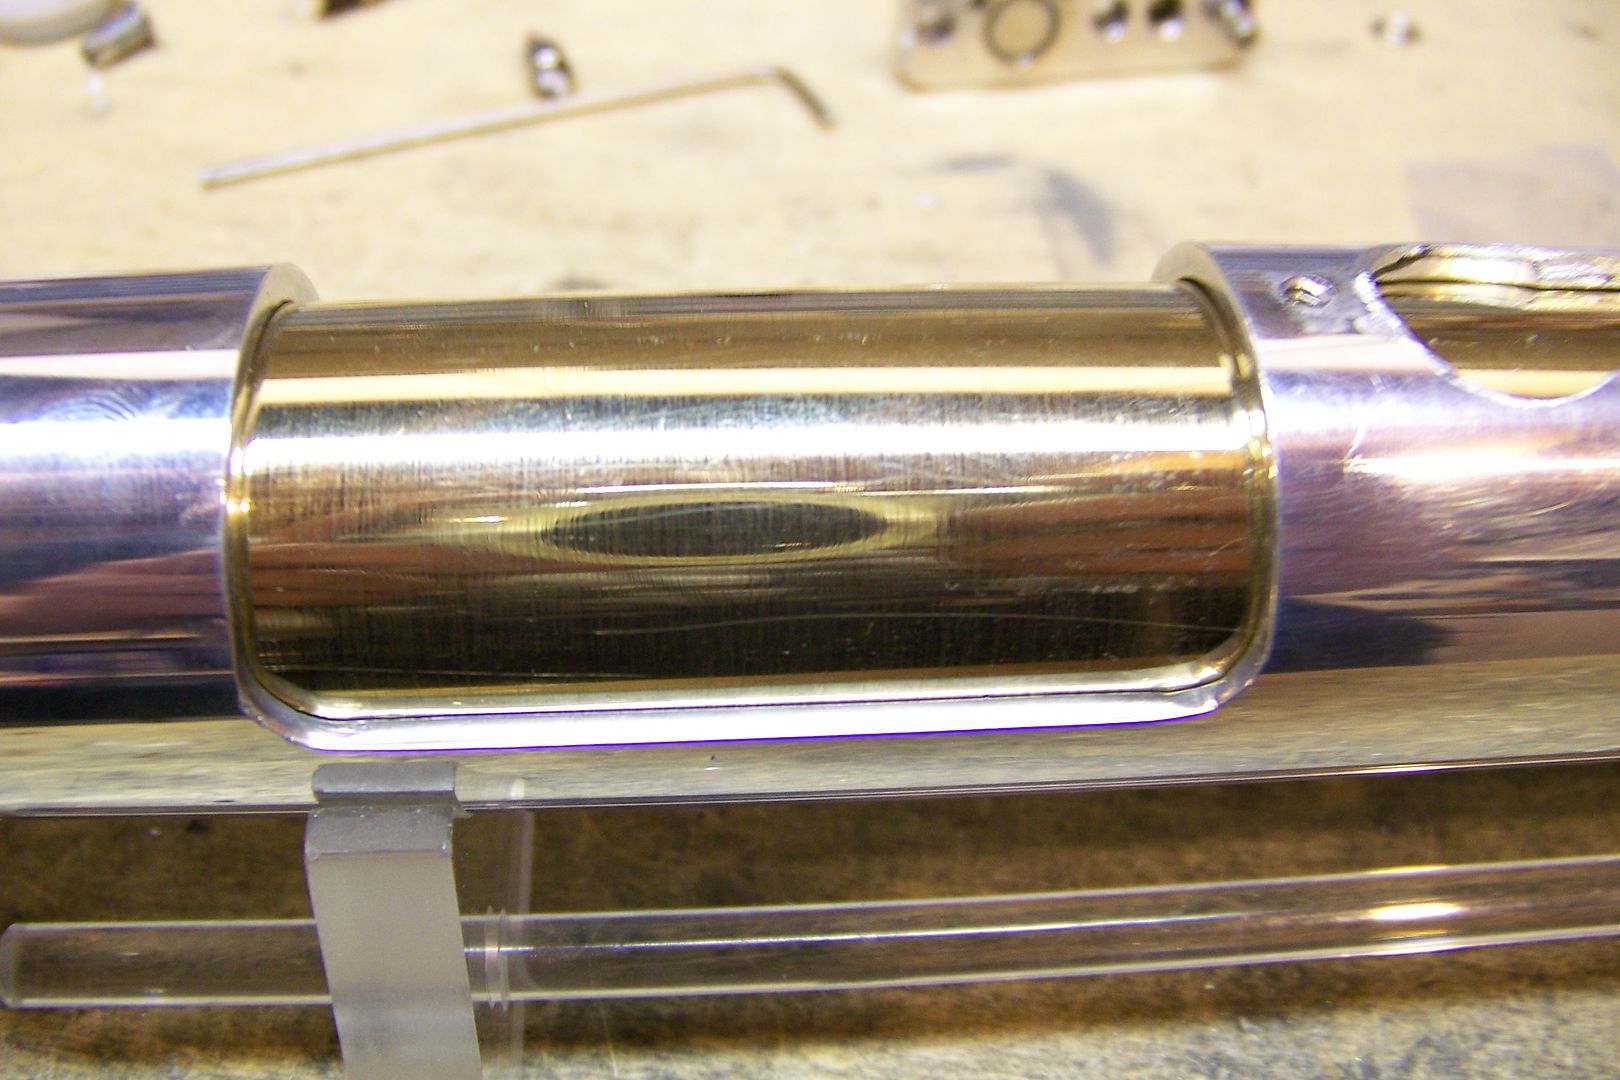
So, I sanded down a 20-gauge chrome plated 1 1/4" threaded tube to the brass, and then cut it to the proper length to fit inside the 8" extension. I de-burred it and test fit:
A closer look at the rear grip:
The front grip:
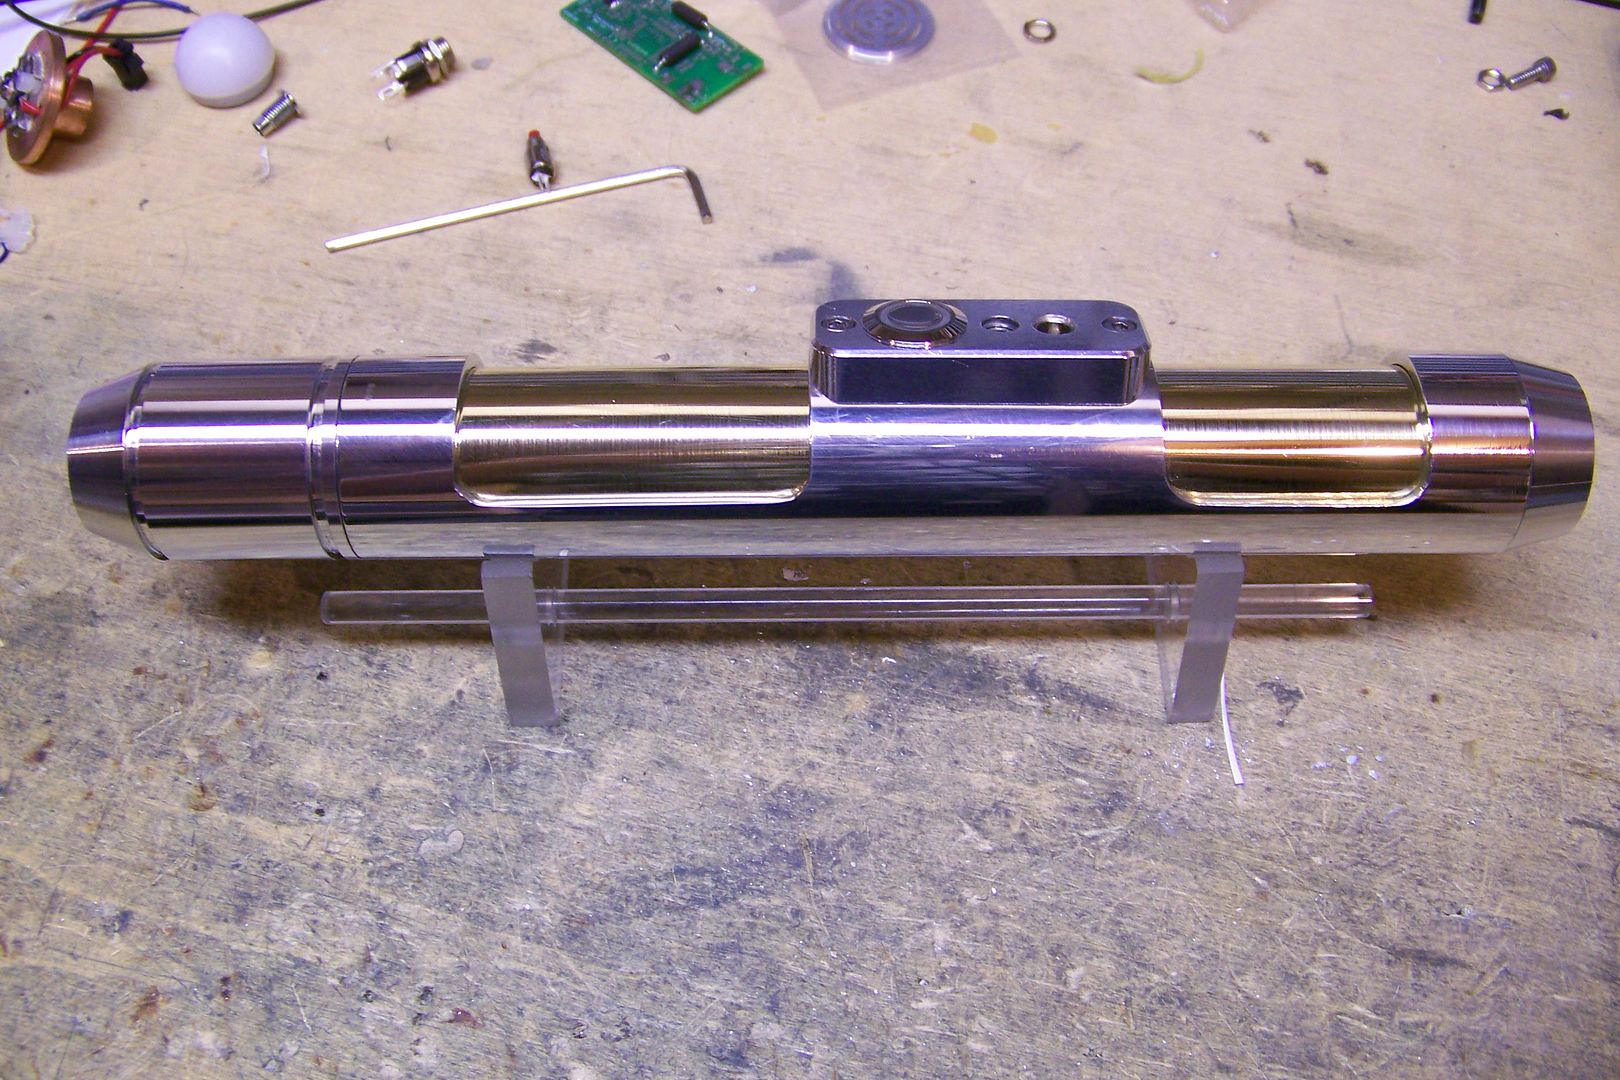
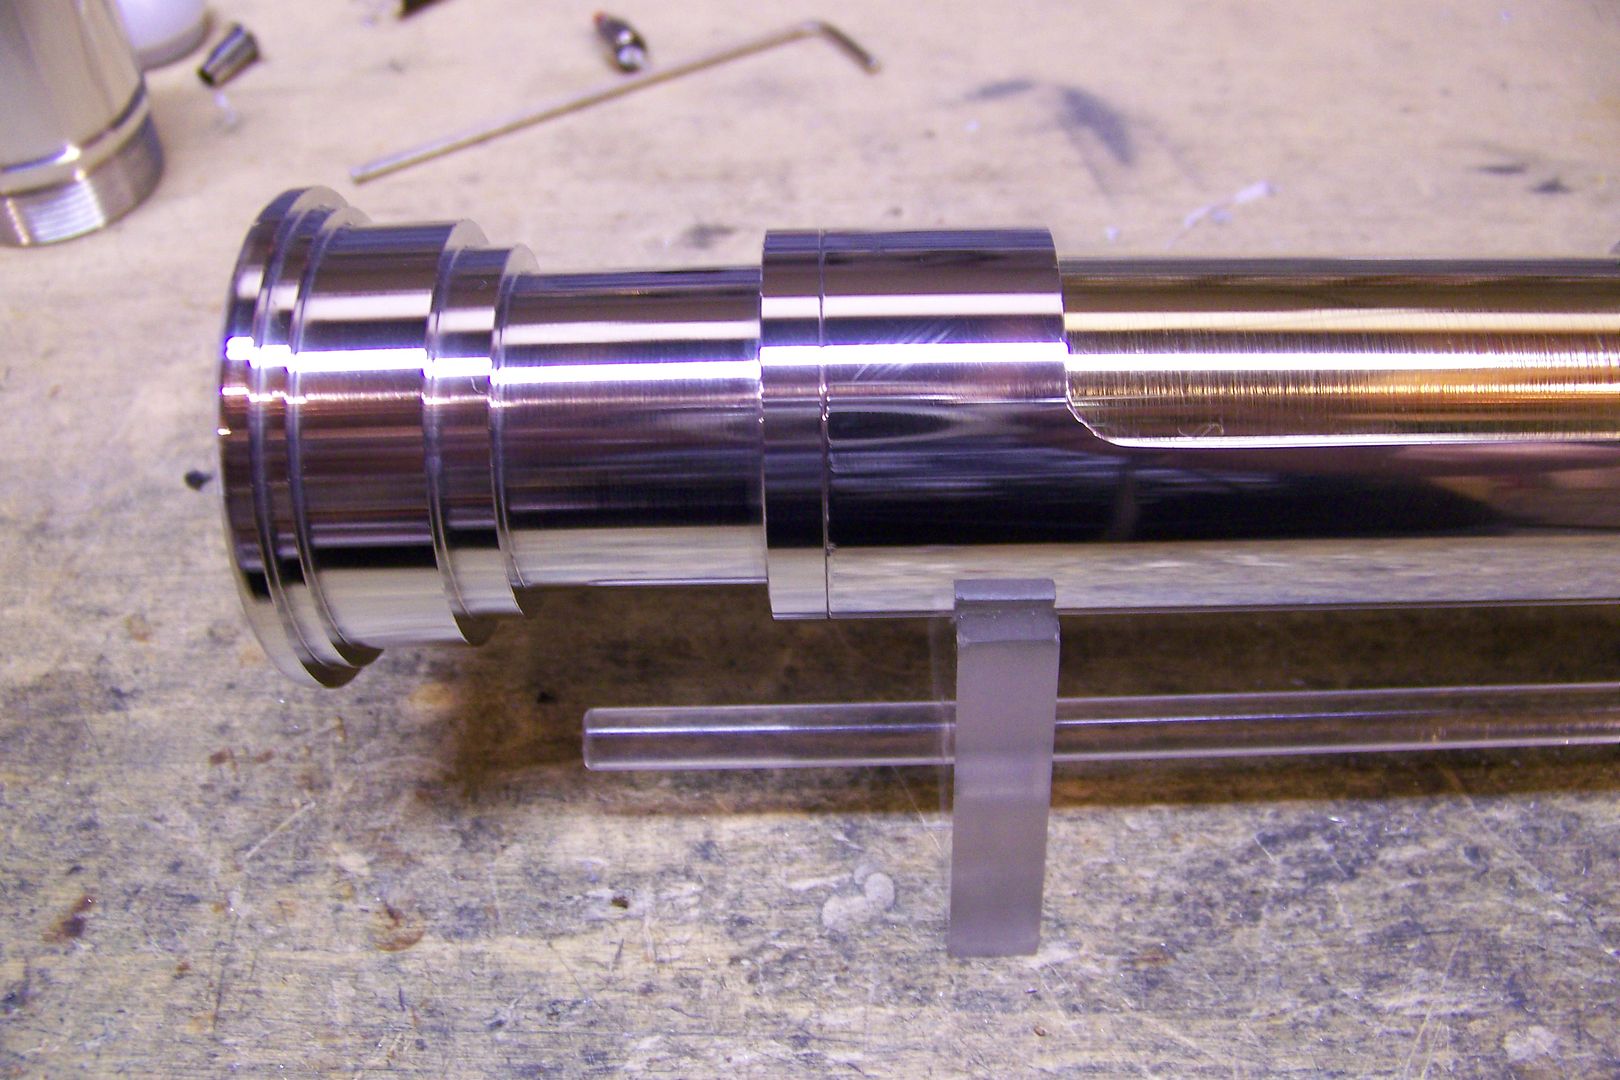
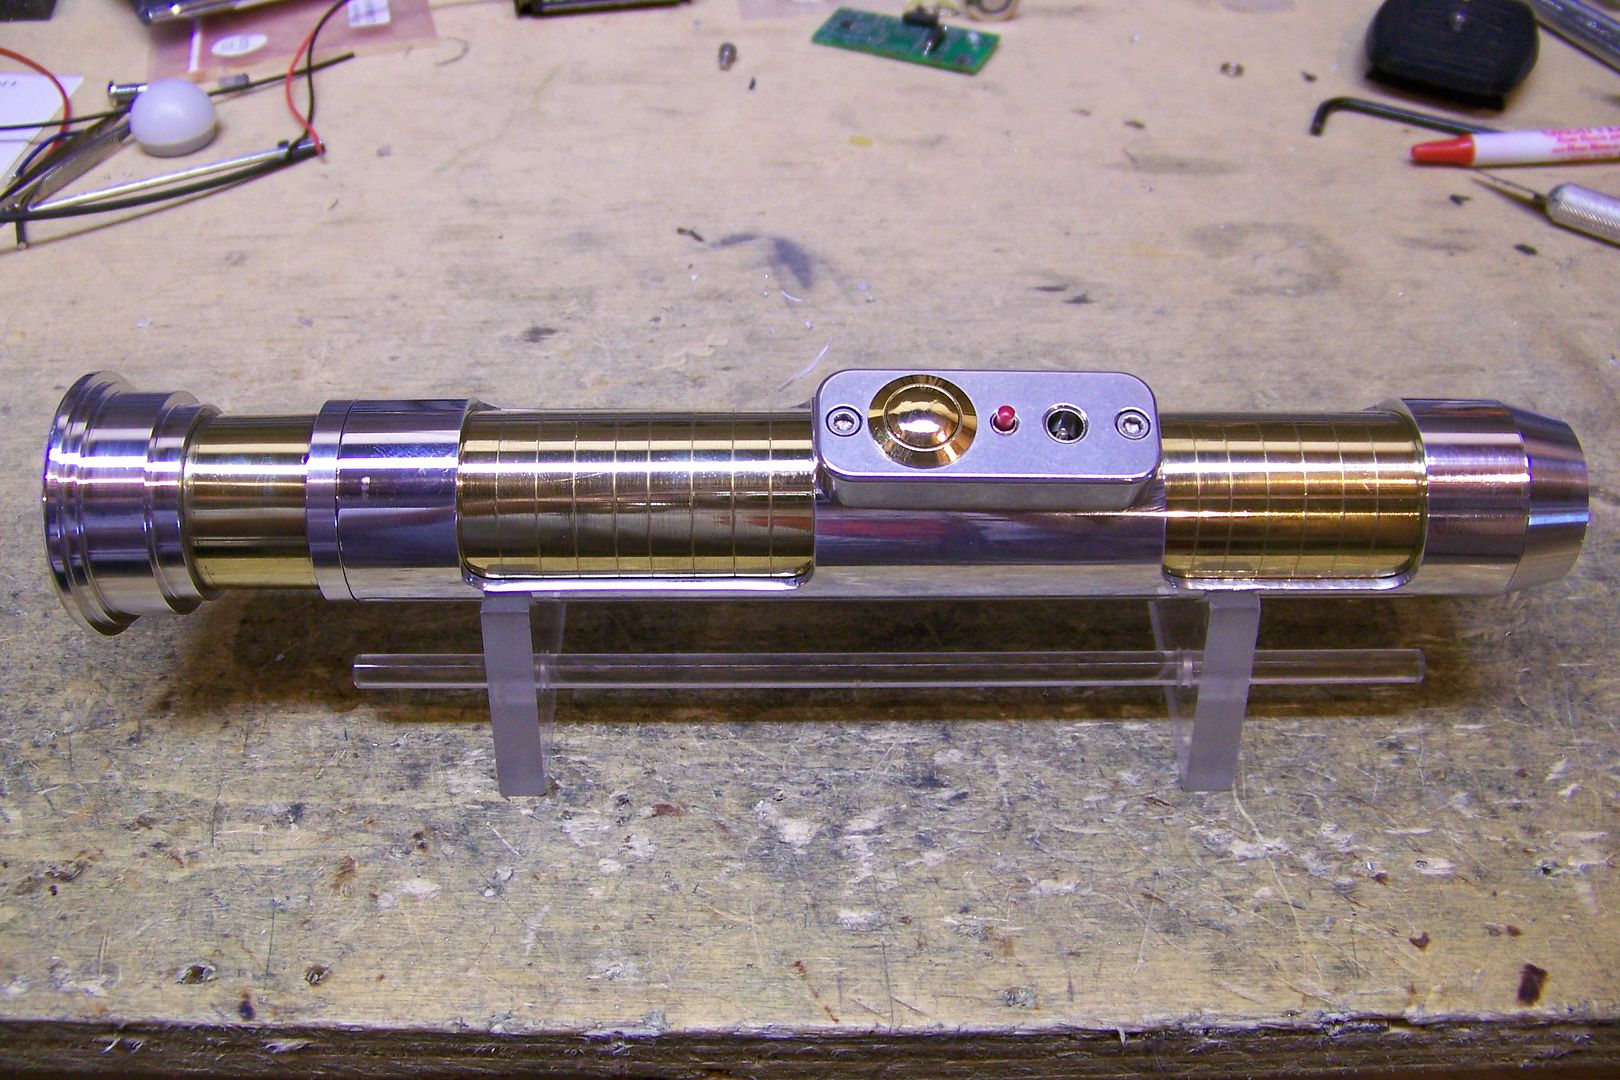
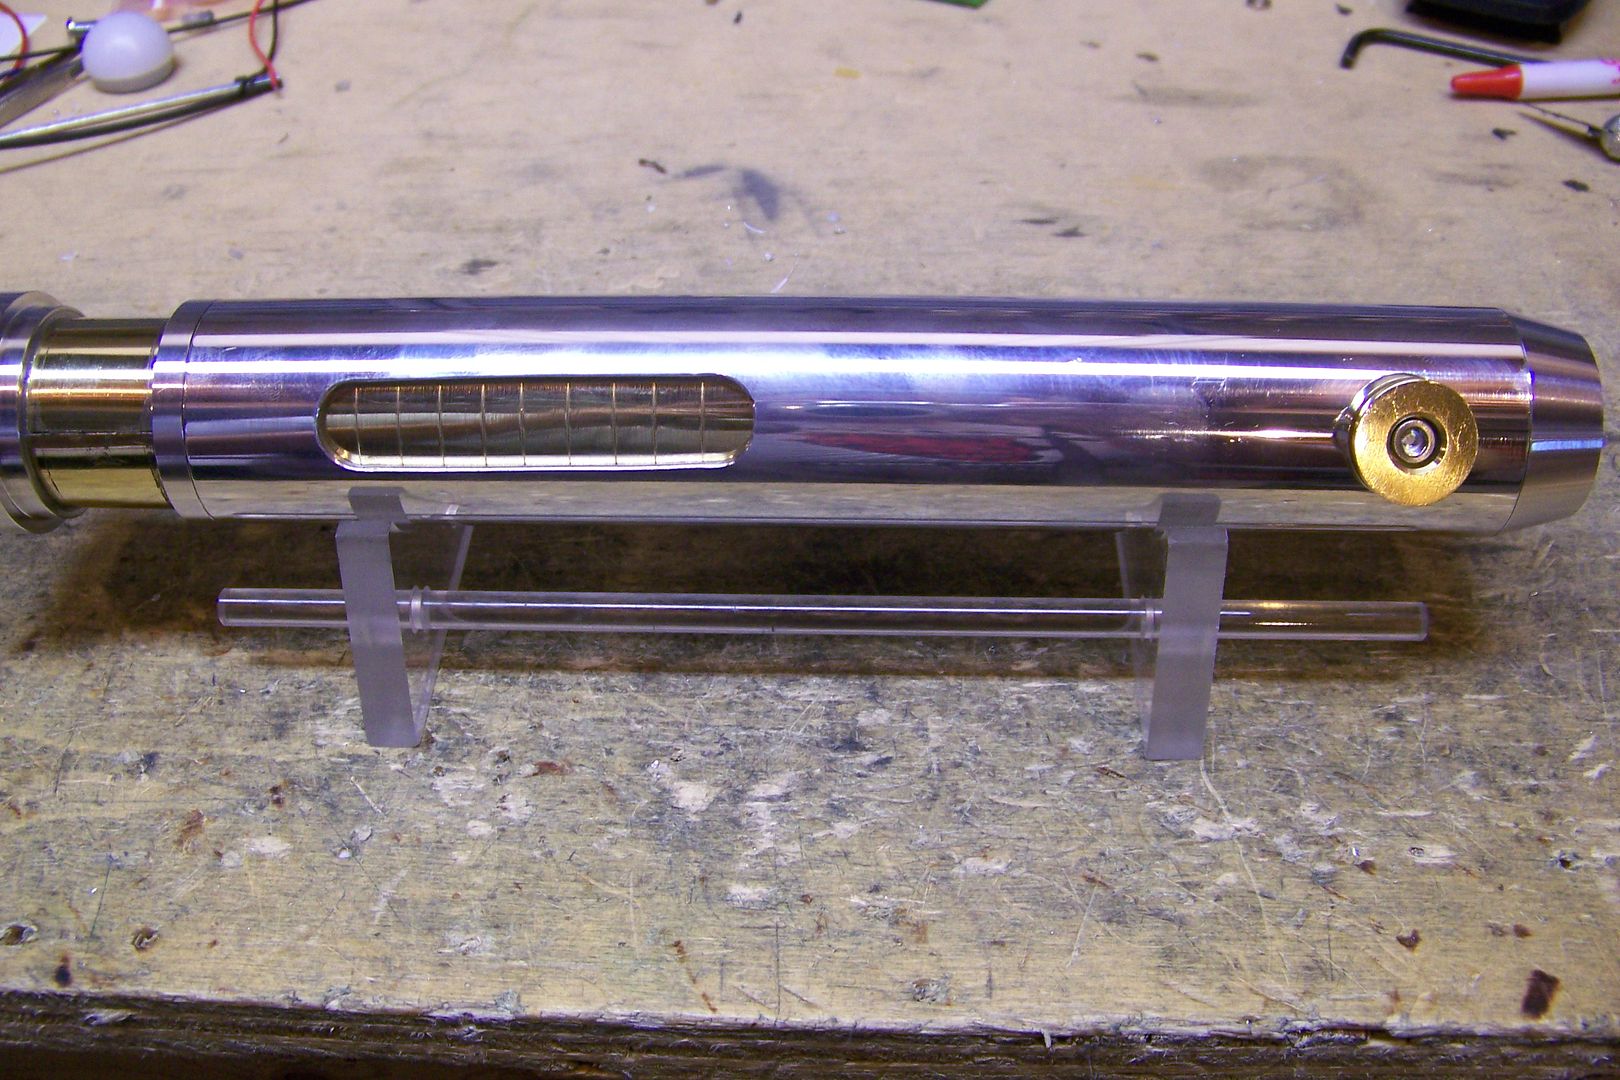
And the saber test assembled:
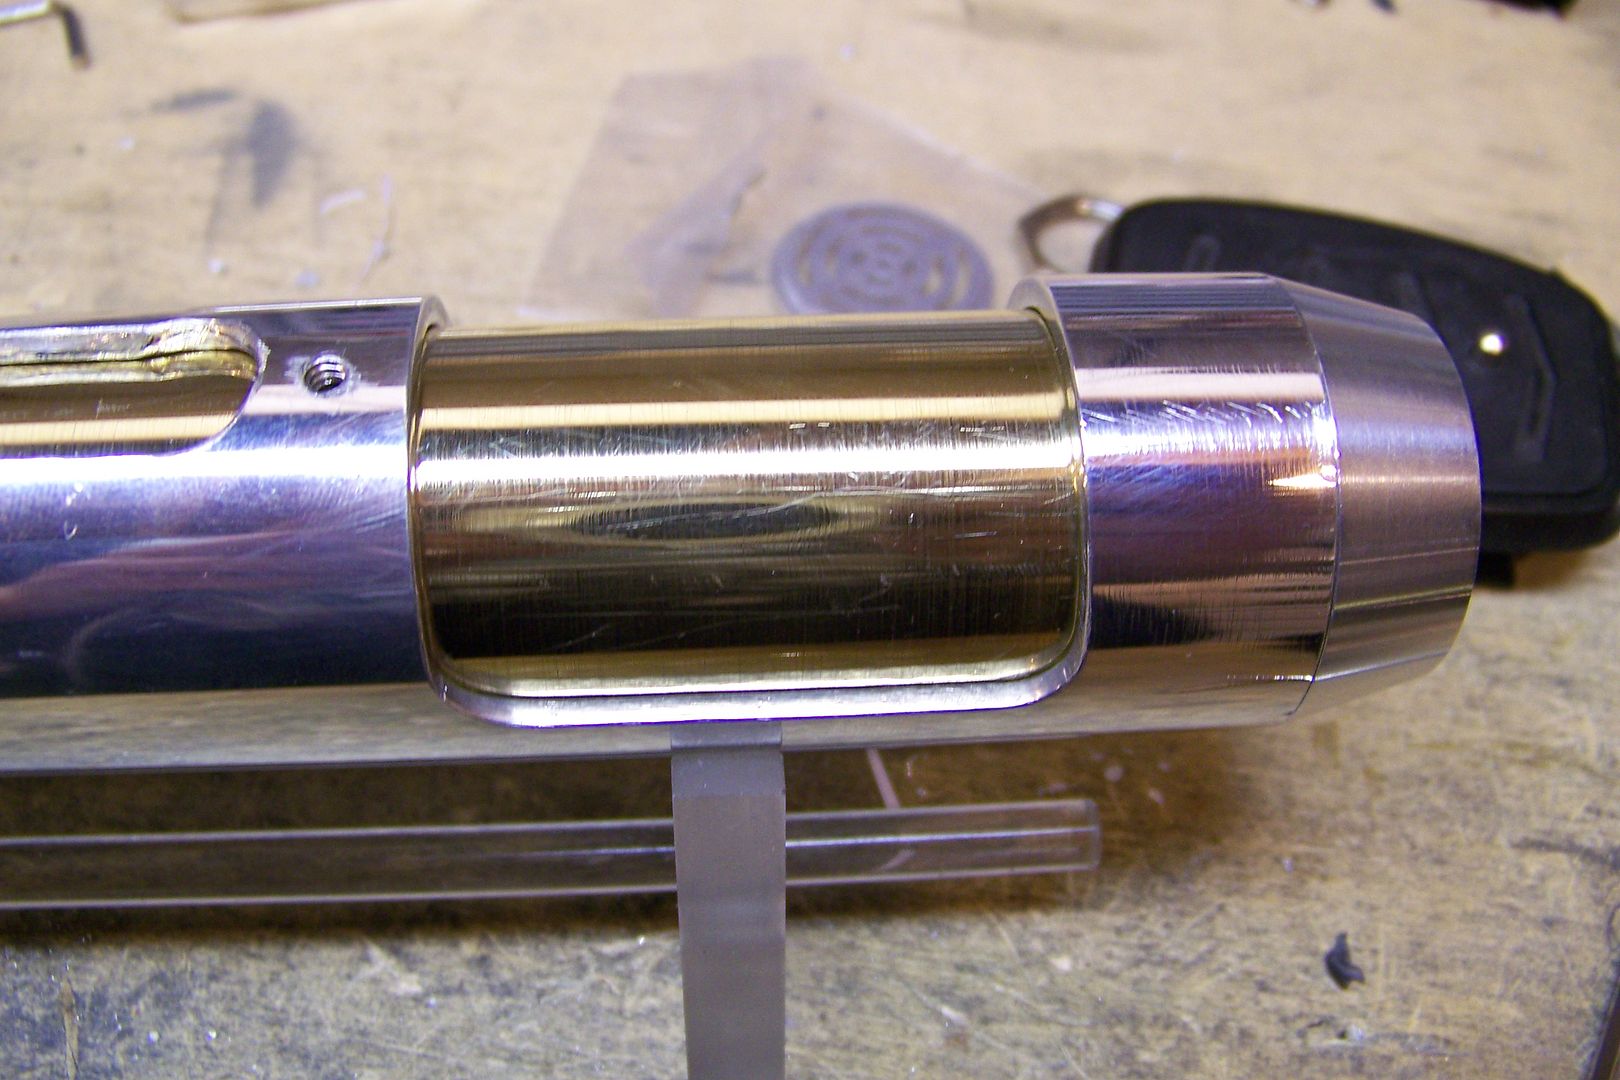
As it turned out, I decided I didn't like that blade holder for this...it just looked to "chunky" on it, so I ordered a replacement style 8 instead:
-
Council Member
Jedi Council Member
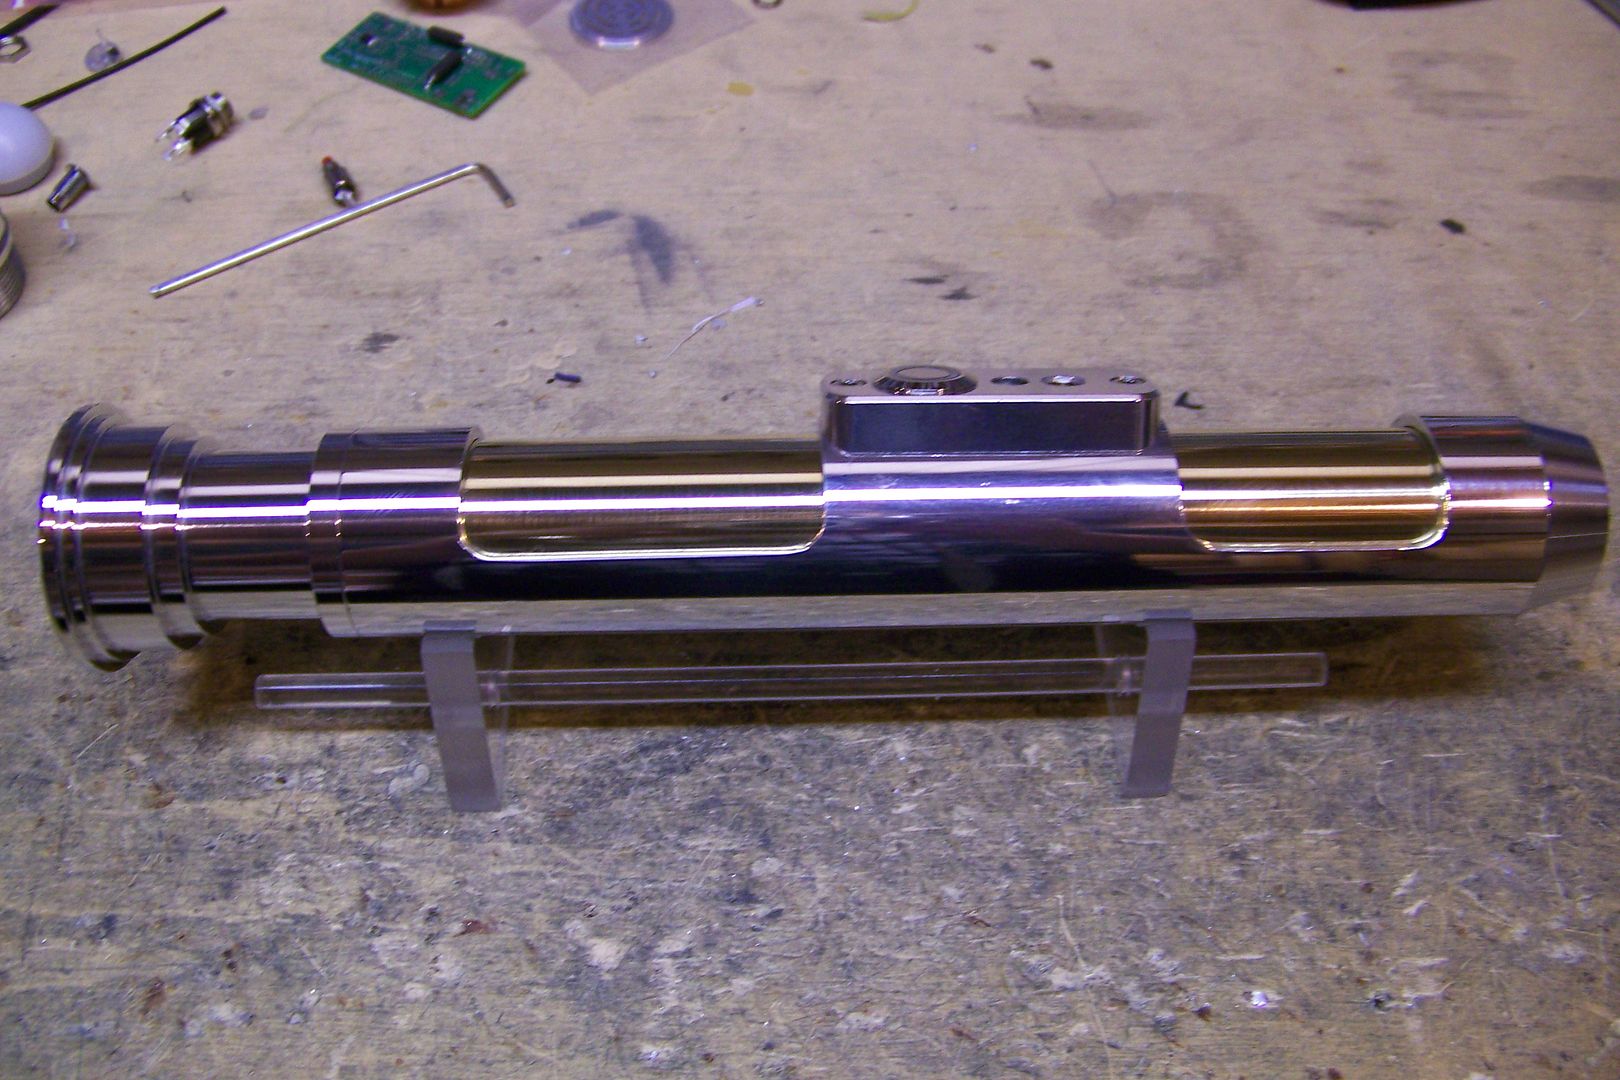
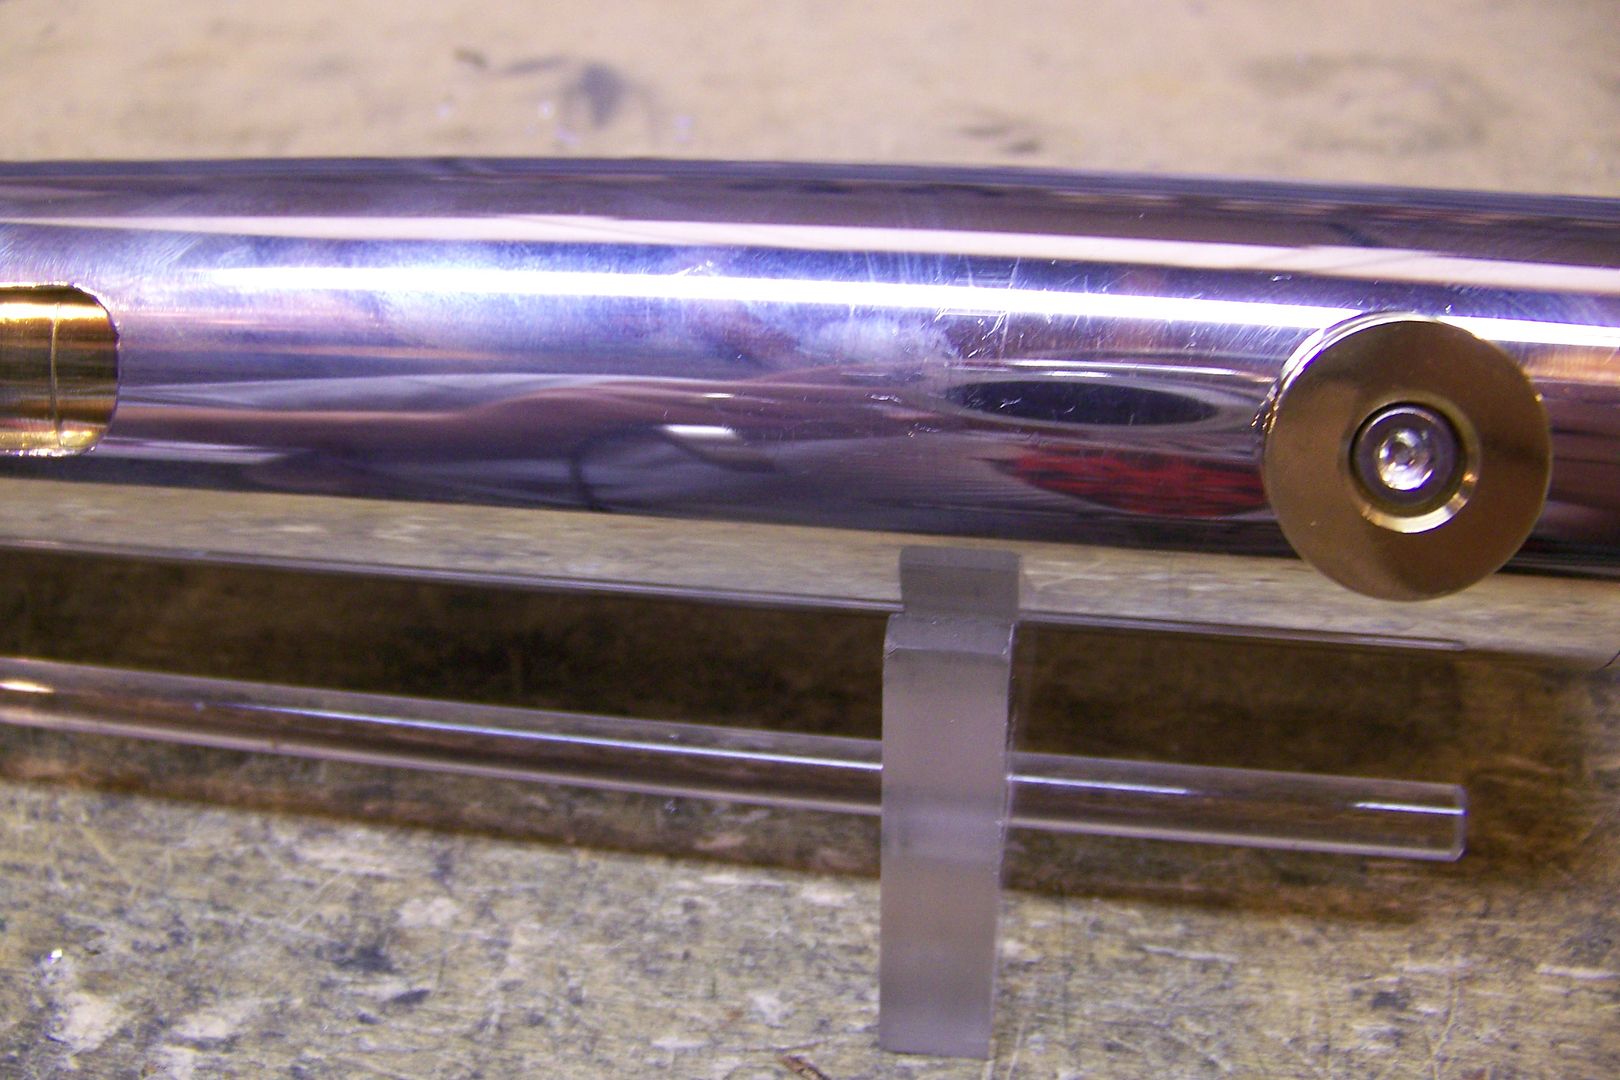
The owner liked the saber with the style 8 blade holder better, and that was what was chosen to stay on the saber. I'll have to find another use for the style13.
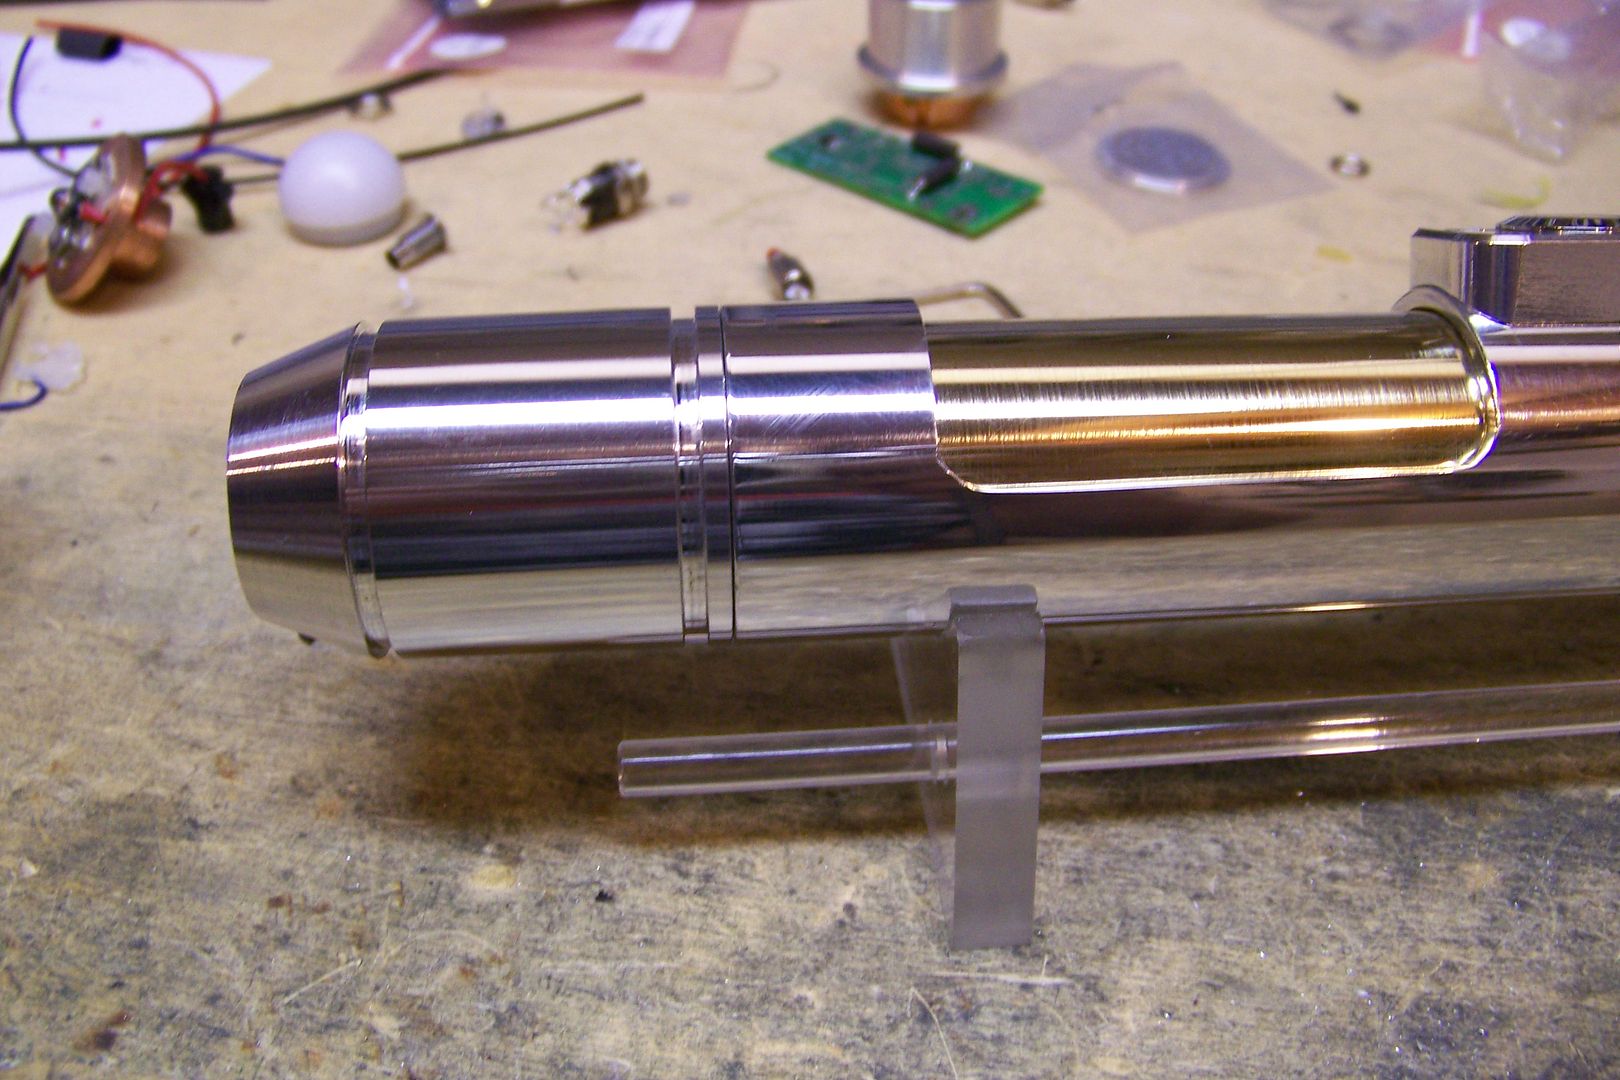
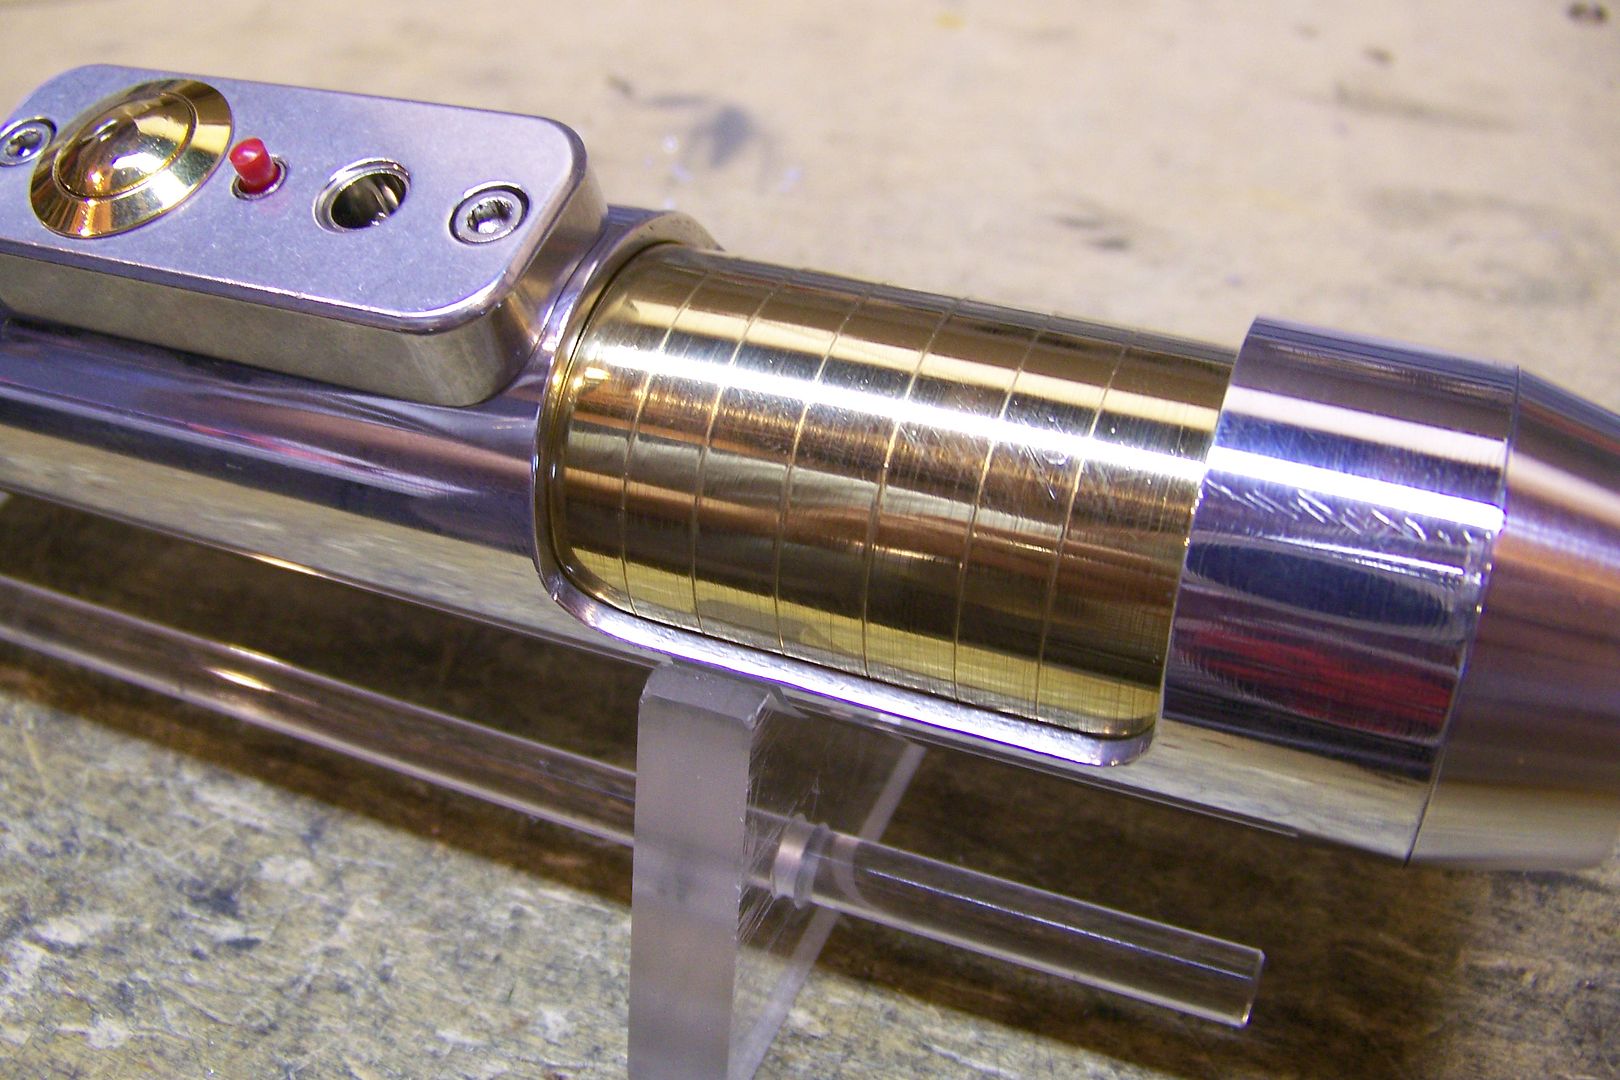
I got to looking at it after installing that blade holder and thought the neck of the emitter looked pretty close to the same size as the brass tube, so i got out my calipers, and sure enough, it was 1.2", really close to the 1.25" of the brass tube. I got to thinking how cool it would look if the neck of the emitter was made in brass it would look like the saber was built on a single brass tube, and that got me thinking about asking Tim about doing modular Blade holders, where you could unscrew the emitter face, and replace or sleeve the emitter neck. That would likely never happen so I did the next best thing....I wrapped it in a piece of brass sinktubing that I cut, filed and sanded to fit. After getting it fit properly, I used some two-part epoxy and a hose clamp to hold it in place while I went to work and then overnight:
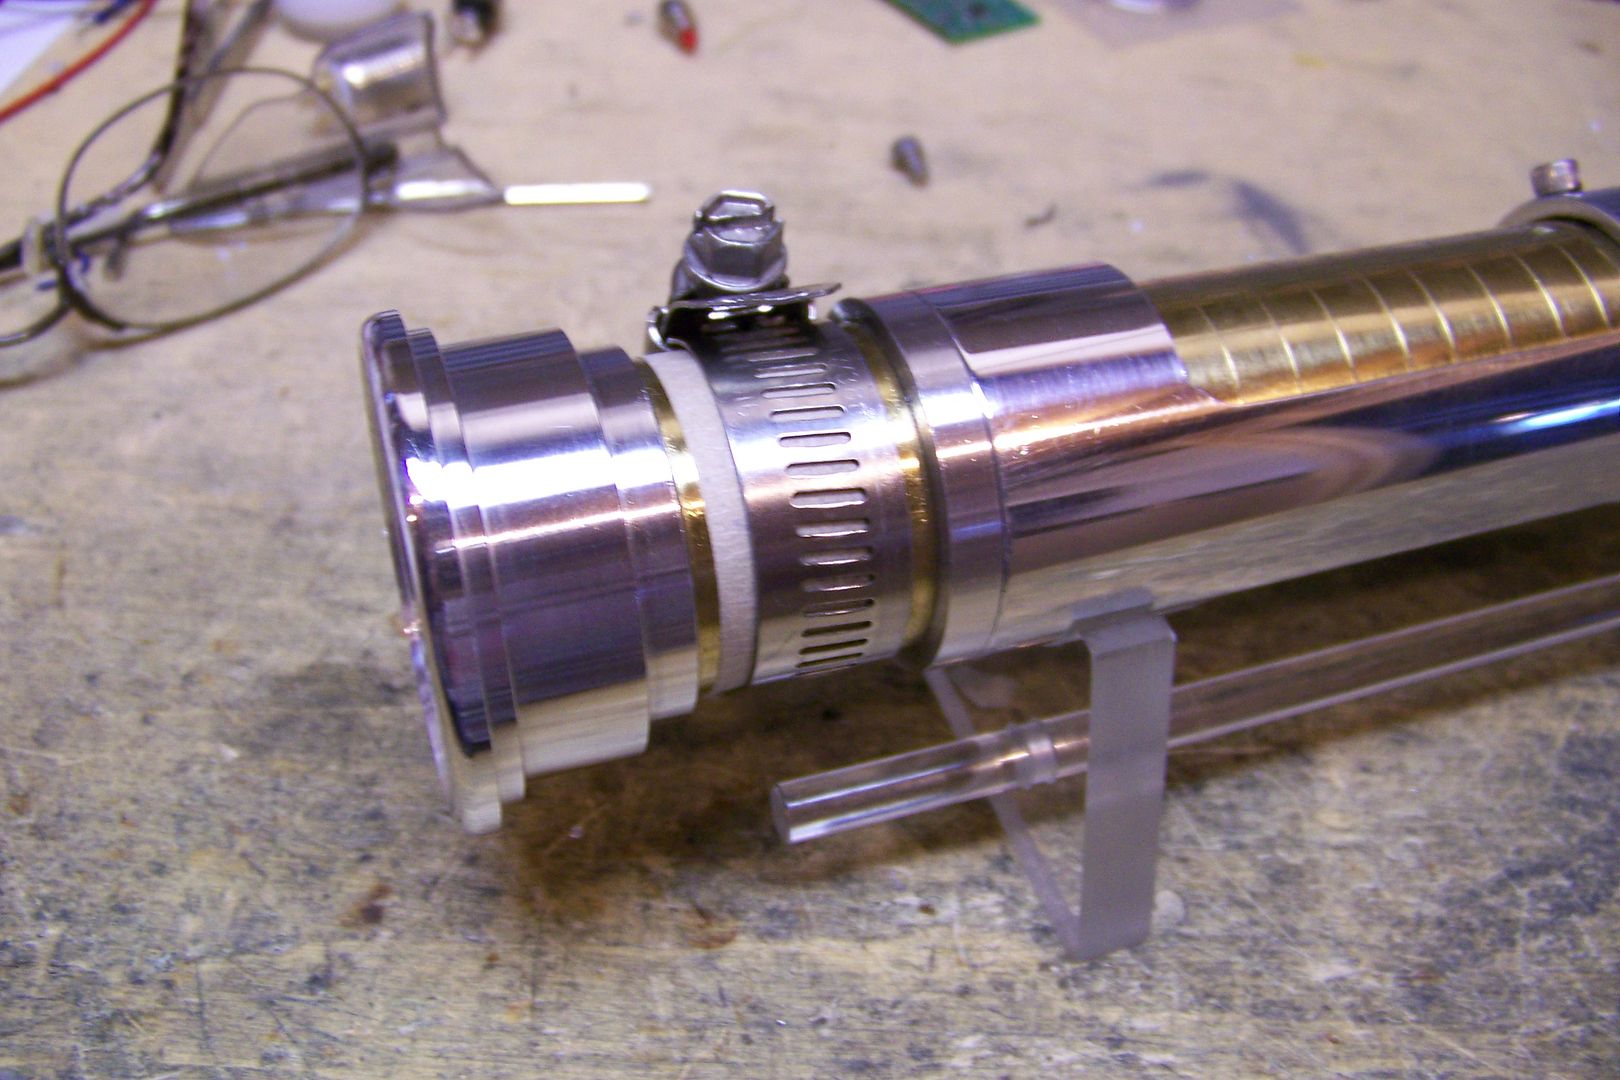
I just snugged up the clamp and had taped the brass to protect it.
The next day, I removed the hose clamp:
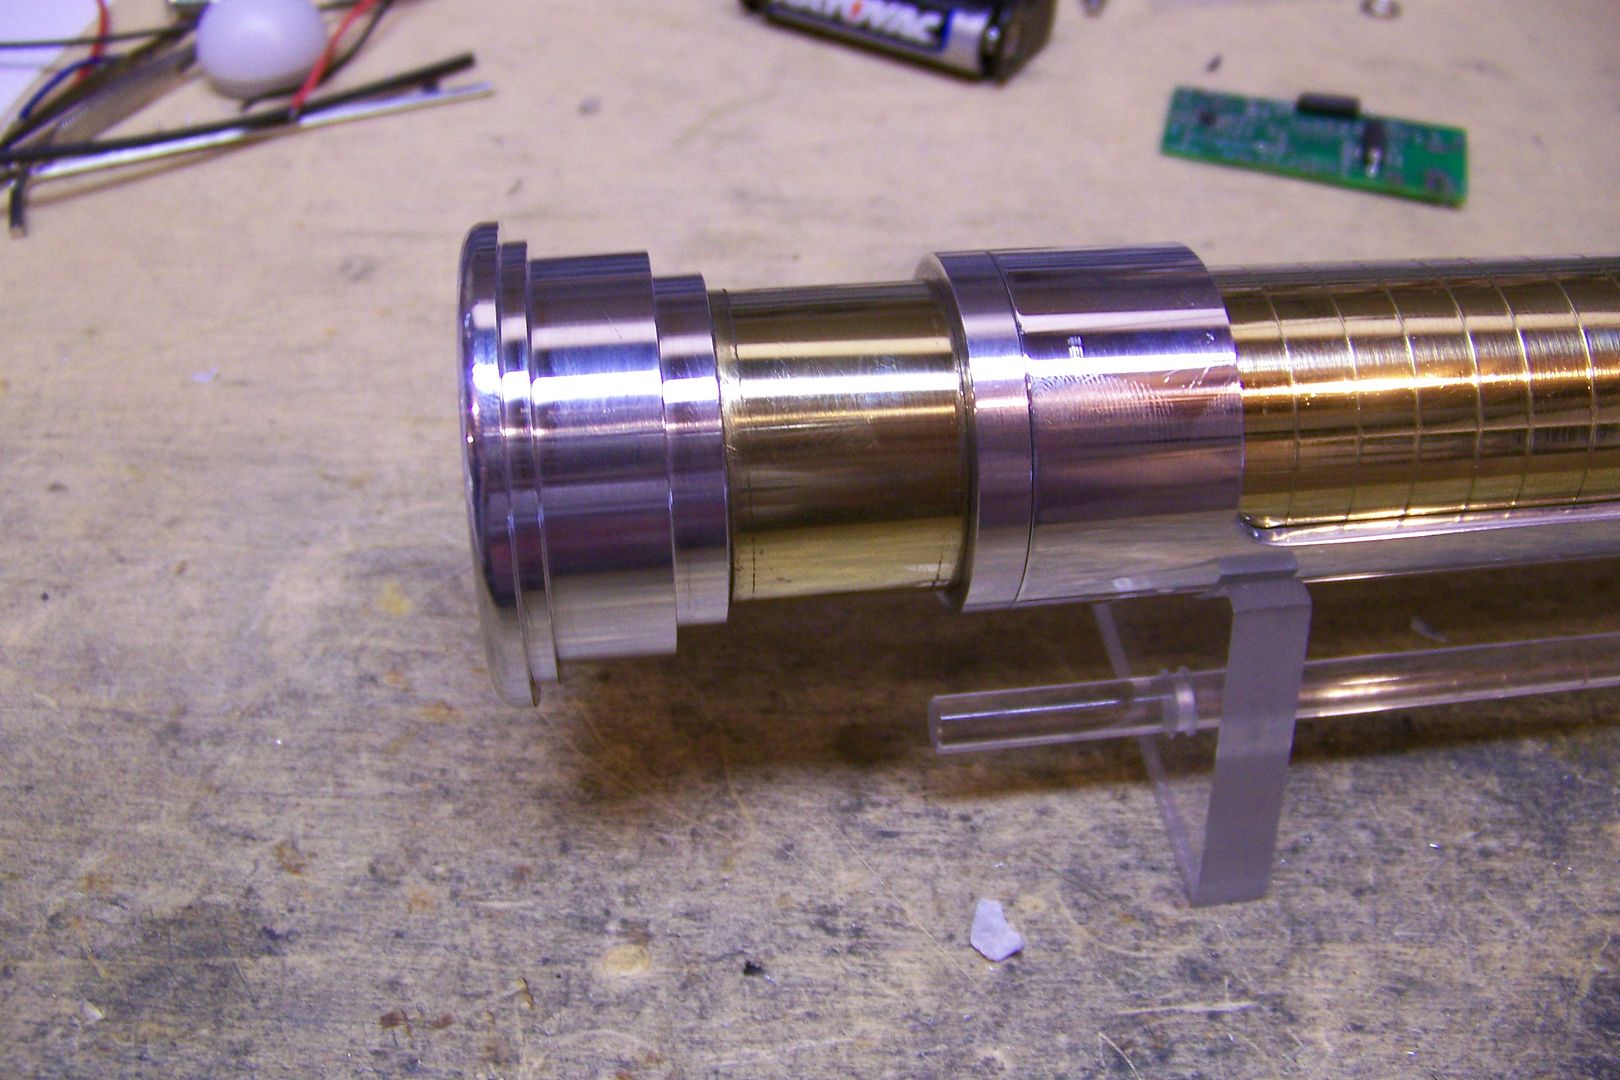
Success! I think the saber actually does look like it has a single brass tube running up the center! I had also added scoring marks to the inner brass tube in the hilt to make it look more like a grip, but forgot to add them to the brass piece I added to the blade holder. Oh, well, maybe next time, since I'd like to do this in chrome as well.
I also wanted to have more gold/brass color on this one, so I placed another order from the store at TCSS and got a gold plated momentary switch and a brass CT button. I received the parts a few days later, and tried them out:
I also wet sanded and then polished the blade holder to remove the excess epoxy and give the brass a good shine:
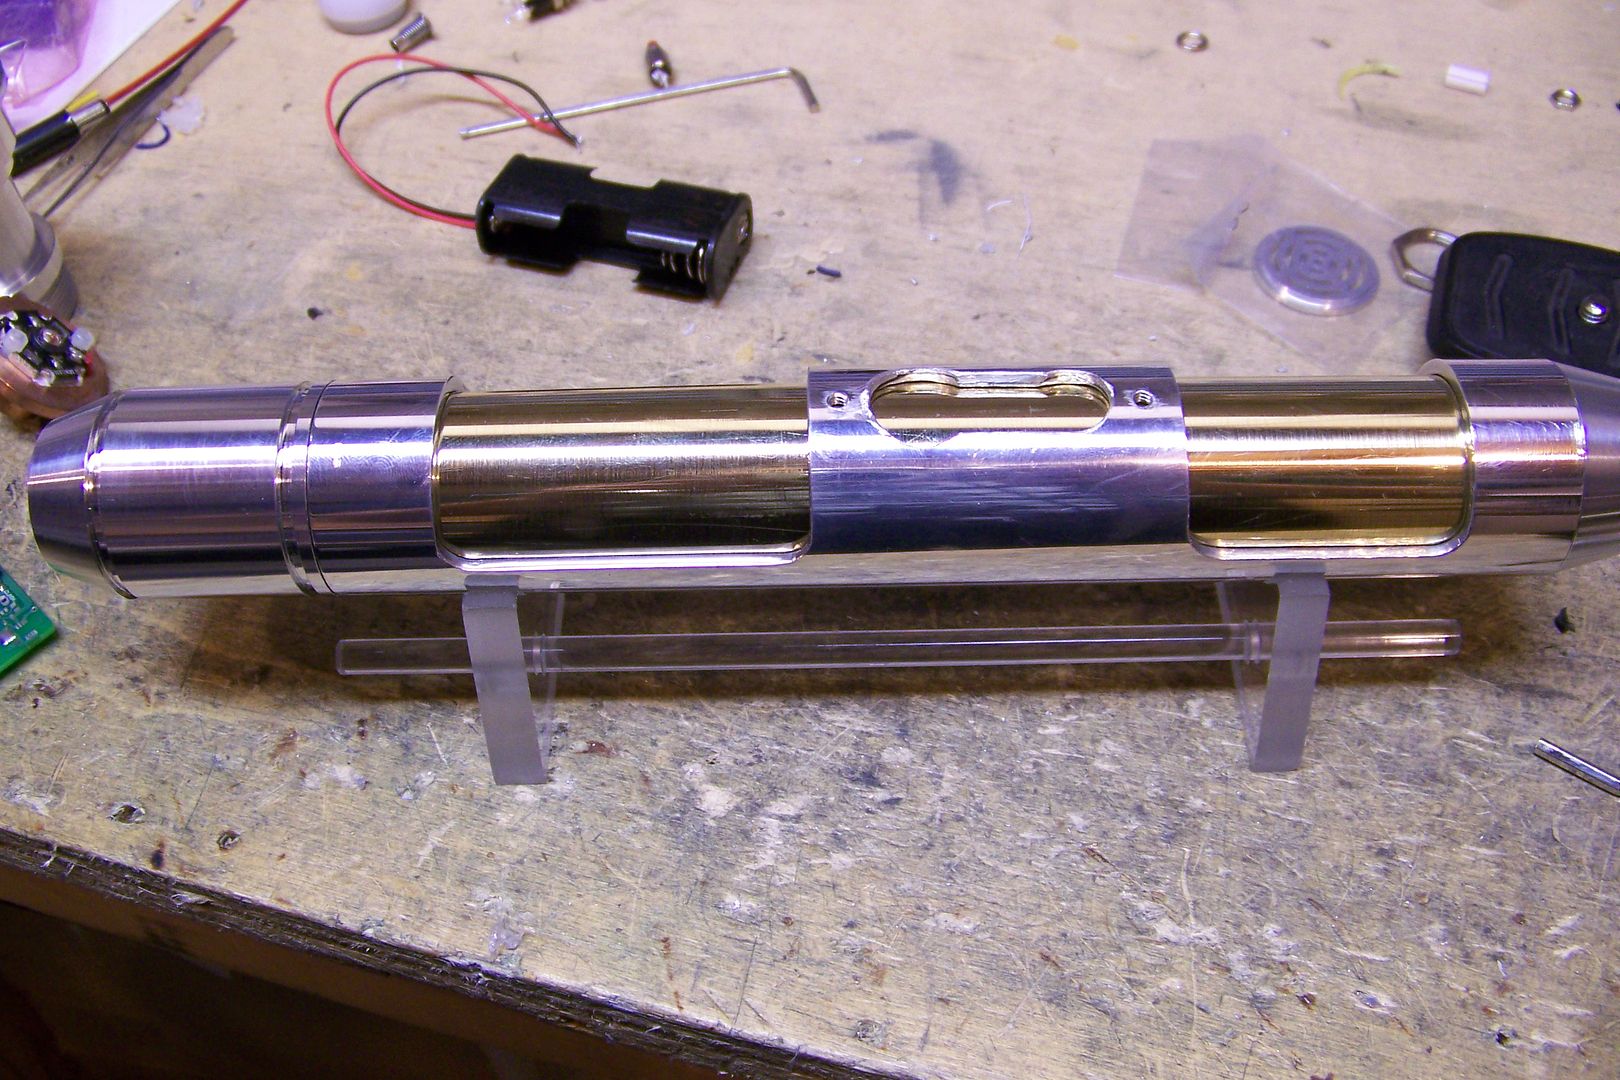
The switch box with the switches and recharge port installed:
Here's the rear grip section:
The underside of the rear section:
This needs some more work here, I think:
I am probably going to cut another slot here, just in front of the CT wheel, and right about to the opposite spot under the switch box where the first slot stops, just to try and maintain some symmetry.
Since the owner is not in a hurry for this one, it will take a bit more time to get it complete, but next up will be cutting the rear slot, and then possibly clear coating the hilt pieces to maintain the shine, or not, depending on if the owner wants it done.
After that, the plan is to begin the wiring. The saber will be running a PC powered by removable Trustfire Li-Ion 14500's (this is a costume accessory, so it needs to be able to have the batteries changed while at a 4 hour + event) and will have a violet main blade led that can be swapped out for a hot pink one.
Last edited by Jay-gon Jinn; 07-30-2011 at 11:27 PM.
-
-
Jedi Padawan


Looks pretty awesome. I agree, it looks a lot better with the second blade holder.
-
Saber looks awesome as usual Jay! And I agree with everyone else. It looks a heck of a lot better with the second blade holder.
-
Jedi Initiate

-
I love the look of the brass tube and the finish is exceptional.
Last edited by kcdill; 07-31-2011 at 10:05 AM.
Reason: typo
-
In my opinion this design is one of the best you already made. It also should be quite handy.
-
Youngling
Youngling

-
Nice! Although I think it looks a bit bare without an overlay..lol JK. With the large sections cut out of the body how sturdy of a build is it? I'm guessing the underlay will add some strength if it's full length. I like what you did with the emitter although I'm curious to see how the seam worked out.
 Posting Permissions
- You may not post new threads
- You may not post replies
- You may not post attachments
- You may not edit your posts
-
Forum Rules


 Reply With Quote


Bookmarks