


Hello everyone, my name is Joe and like most of you, I am a huge Star Wars fan. I am a writer for AskaJedi.com (writing name is Josto) and want to do an article for the Off-TORpic column on my experience using TCSS but want to build a saber first. Ask a Jedi is a fansite dedicated to keeping fans up to date on news about Star Wars: The Old Republic, the upcoming MMO from BioWare Studios. My specific job at Ask a Jedi is to write about more off-topic things from just the MMO, relating to Star Wars and MMO's in general.
I plan on writing about the store, community, MHS builder (which is amazing btw) and the overall quality of the product. However, I have one issue-- I'm technologically impaired. When it comes to wiring something that doesn't have clear instructions, I feel a bit lost. This is especially true when it comes to buying the parts that I need to complete this. Using the MHS builder, I have a slight idea of what I want, but I'm hoping I can get the community's help.
I'm looking to do a full fledged, LED lightsaber. Something that can be taken apart and put back together in a somewhat canon fashion. I'm talking a slot to put a crystal, a blade that has the animation similar to the ForceFX sabers, the works. To be able to do all this, though, is going to require some ingenuity which is a quality I do not posses when it comes to electronics. Below is the basic idea of what I'm thinking for the saber (thanks to your MHS Builder).
The requirements for the lightsaber I want to build is it has to be something that will impress readers. I’m going for full canon on this one. I want to be able to break down the lightsaber to get to a crystal chamber without seeing too many of the components that make it light.
UPDATE
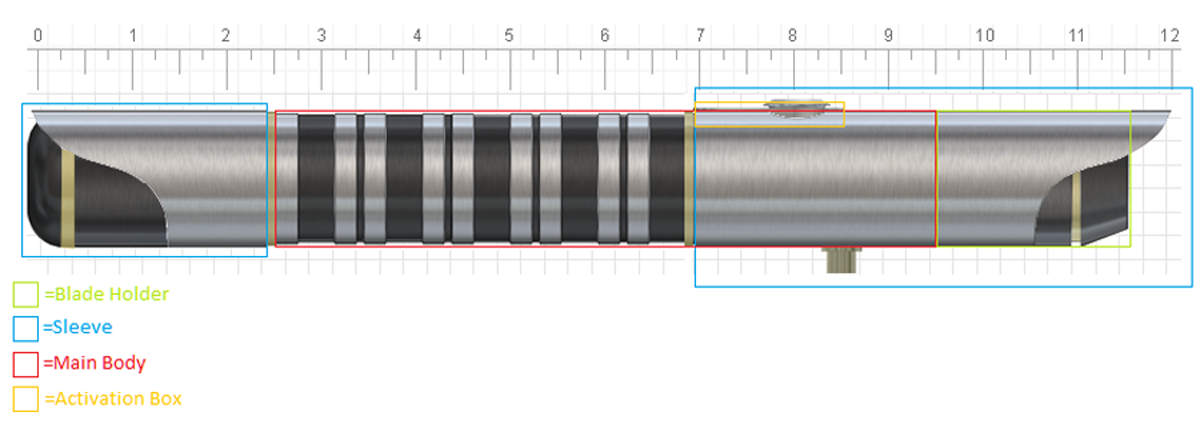
External View:
I plan on putting a sleeve over the 2" extension on that is between the main body and pommel and another one from the end of the machined part that extends 1/4" past the blade holder. The adapter box will be mounted directly to the sleeve which will have matching mounting holes in the main body. The sleeve mounted to the extension will be held in place by a flat button screw and the sleeve near the blade mount will be fastened to the main body with a decorative screw. The sleeve on the extension will have a Trim Ring 1 between the extension and the main body, tapering down from sleeve to main body.
This section has been moved to the Part Check thread I created.
http://forums.thecustomsabershop.com...-for-purchase)

 Reply With Quote


Bookmarks