


SaberForge Leia
Polished by Azmaria
So I was rummaging around in some gallery archives and I found a sweet gem. As soon as I saw it, I knew I had to have it and polish it up. :005: So I bought it from a friend and waited a week or so for shipping to get to me.
So yeah, I don't have many build pics... And my hands are tore up pretty bad now... I have small cuts everywhere and I stabbed myself several times with my needle point files - one time bad enough to require a first aid kit... In the end, it took about 8 hours of dremeling, filing, and sanding to finally get her nice enough to not slice my hands up when I hold her. 4 of those hours were on the switch box alone...
Youtube Video
The inside of the switch box. Dremels don't make very good routers, but i'm happy with how it turned out. Besides that, you don't see it when it's put together. the switches sit in there tightly, but i glued them in place anyway. And after i wired them up, I coated the contacts in glue as well. If i ever have to replace these for ANY reason, I have about a dozen more so I'll just use a hammer and punch and pop them out. The point is that they're not grounding to the hilt. these are 2M ohm/2 ohm switches though, so I'll have to keep an eye on them. The PC seems to like them plenty so far, so here's hoping.
The finished switch box. Upper is power and lower is aux. For being hand filed from a 1/8" hole with jeweler's files, I don't think they turned out too bad.
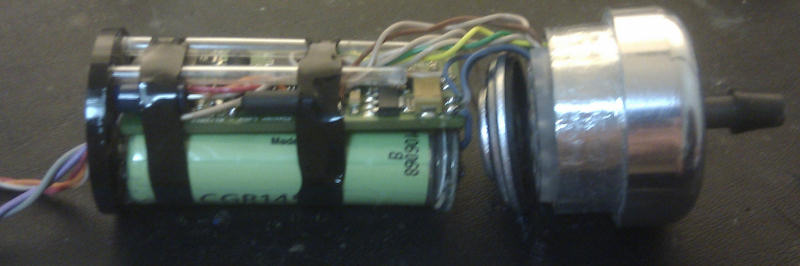
A couple poor wiring and chassis pictures... The chassis is pressure fit so that the small amount of pressure from the ends of the battery heatshrink keeps the pommel insert in solidly. To get to the uSD card, you undo the 2 set screws for the pommel and just pull the pommel assembly and speaker out of the way. I took Jango's idea of using an MHS pommel 6 instead of that POS that she came with. THAT took an hour to dremel down to the same ID as the main body...
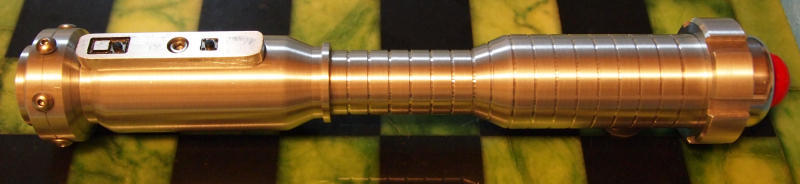
Here she is, finished. The kill key I made for her is still setting - the gorilla glue should be cured tomorrow.
Better picture of the pommel. Filed the gear grooves to get rid of the chatter and used a sanding pad to get rid of the razor edges on it. Also, since I have a 'thing' about using all the features i can on whatever electronics I work with, I had to use all 3 LED pads. Therefore, I put 2 blues and a red in the pommel. 1 blue is on the 3.3V pad, and the other 2 are on the accent pads - the red being the idle blinky. I think the MHS pommel matches up with the rest quite nicely as well, even with the slight polishing mis-match.
Oh, and of course a picture with it lighting up a blade. As if you haven't seen a blue P4 at 1500mA before. :dft012:
Az


 Reply With Quote


Bookmarks