


Photobucket - Tutorial for Enabling Clickable Thumbnail Pictures and Posting Them in Forums:
Have you ever wanted to show off pictures of your stuff on a forum but are unsatisfied with the picture size limitations that are required (rightfully so and with good reason) by that forum? Tired of not knowing how to post a clickable thumbnail? If so, then this tutorial is for you.
For only 3 easy payments of $19.95, you too can learn how to enable and post clickable thumbnails in the forum of your cho Whats that forum mod? Ahem, for absolutely free and by continuing to read this post, you too can learn how to enable and post clickable thumbnails in the forum of your choice. In fact, this tutorial uses clickable thumbnails to demonstrate certain tasks.
The part of this tutorial that discusses enabling clickable thumbnails, only applies to Photobucket. Other image hosting websites will have different methods of doing this. This tutorial assumes that you already have a Photobucket account and know how to upload pictures to your Photobucket account. This tutorial also assumes that you know how to post a new topic, reply to a topic or edit one of your existing posts, in an online forum.
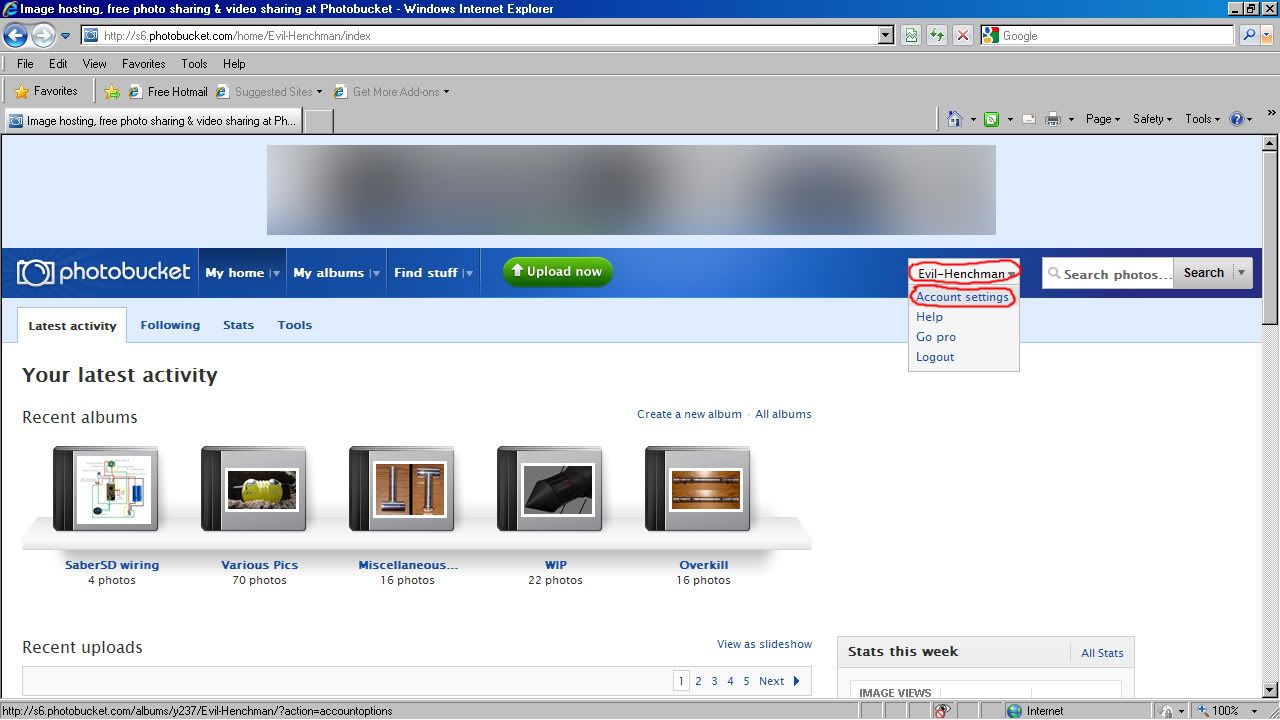
Start off by going to Photobucket.com and sign in to your account. This should bring you to your Photobucket page. Depending on how you have your account setup, will depend on what page it opens to. It does not matter if you are on My home, My albums or Find stuff as it will not affect the next step. The Illustration below is the My home page for my Photobucket account. As you can see in the image on the far right of the screen, there is a Search photos box. Just to the left of that should be your Photobucket Account name. Click on that and a drop down menu will appear with several options. Click on the Account settings option.
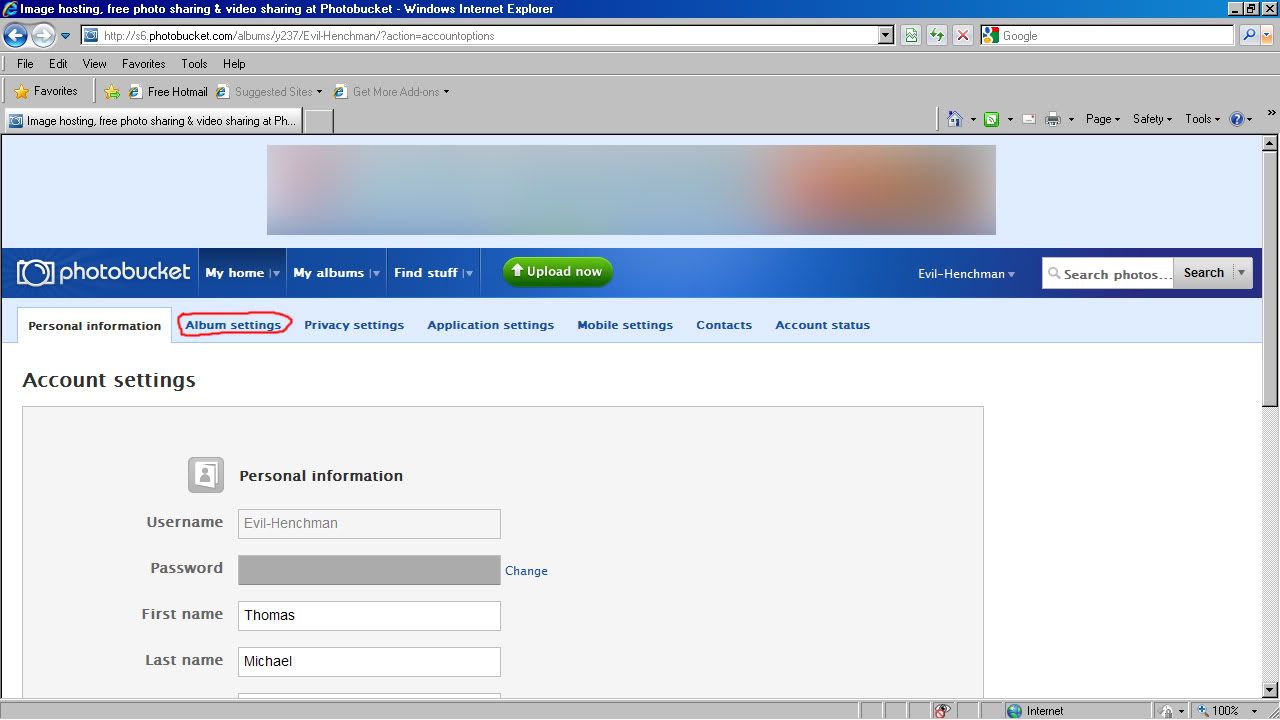
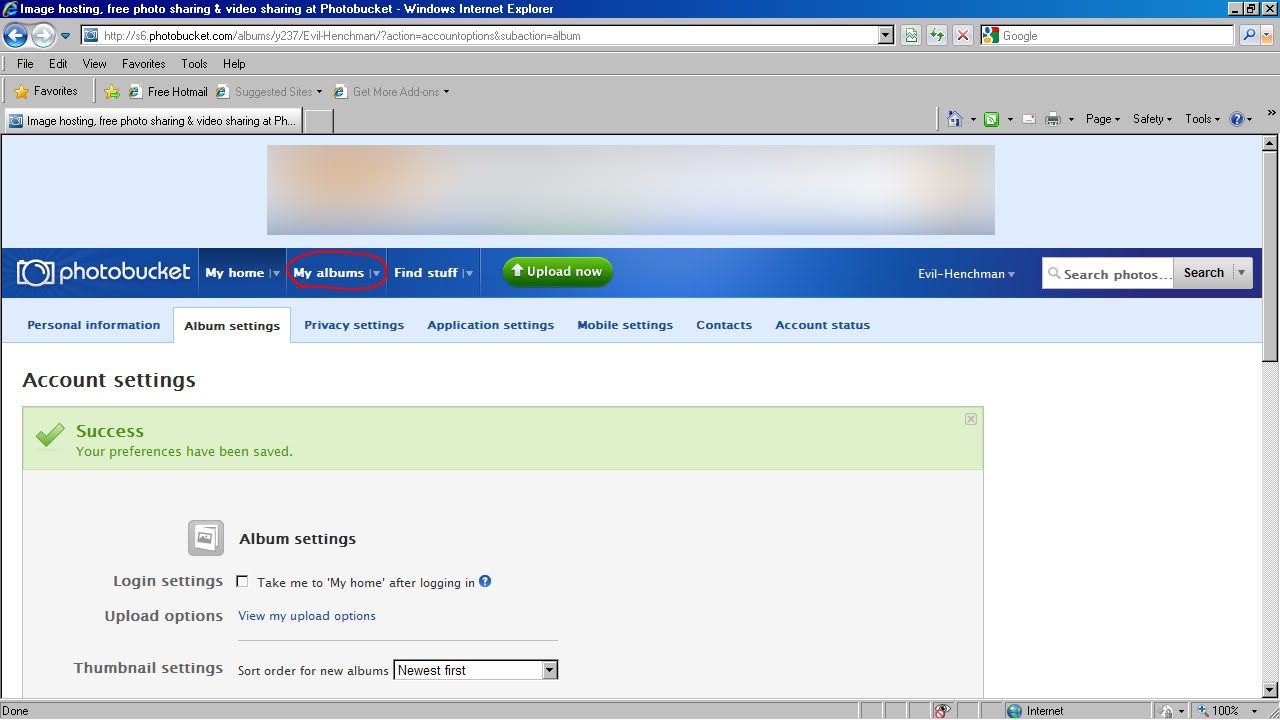
This will bring up the page you see below. On that page, click on Album settings.
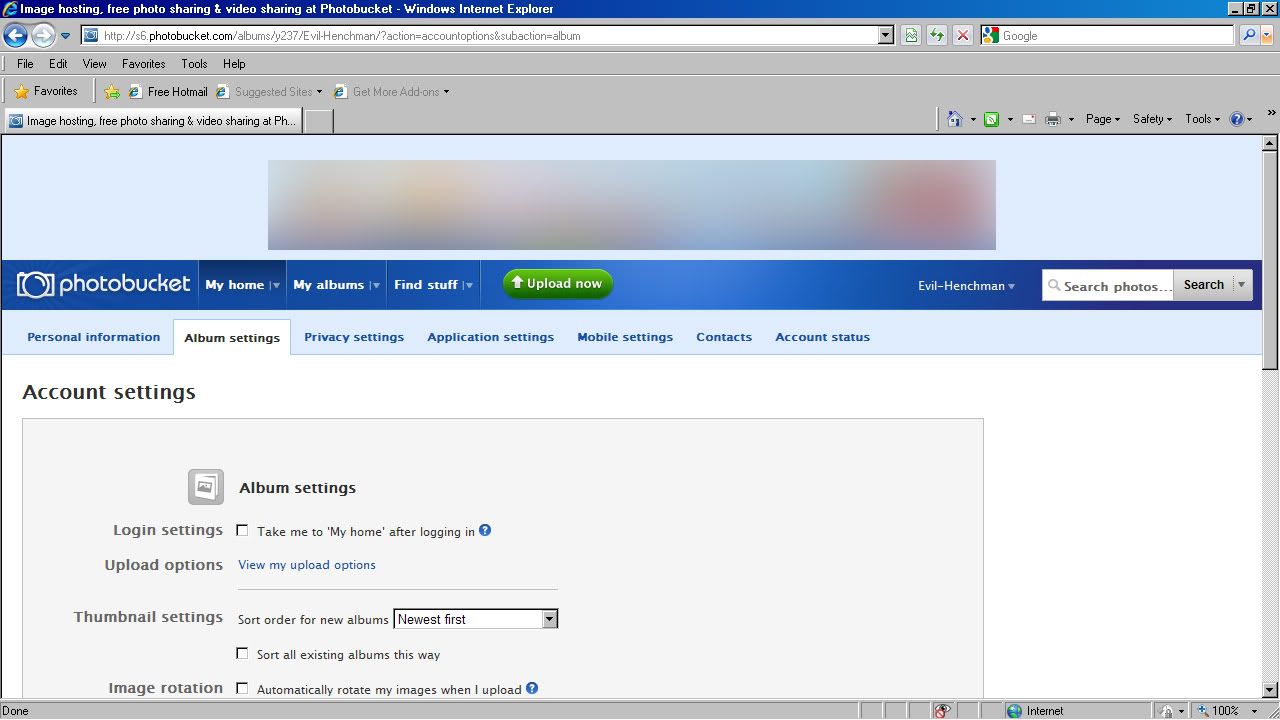
This will bring you to a page that looks something like this
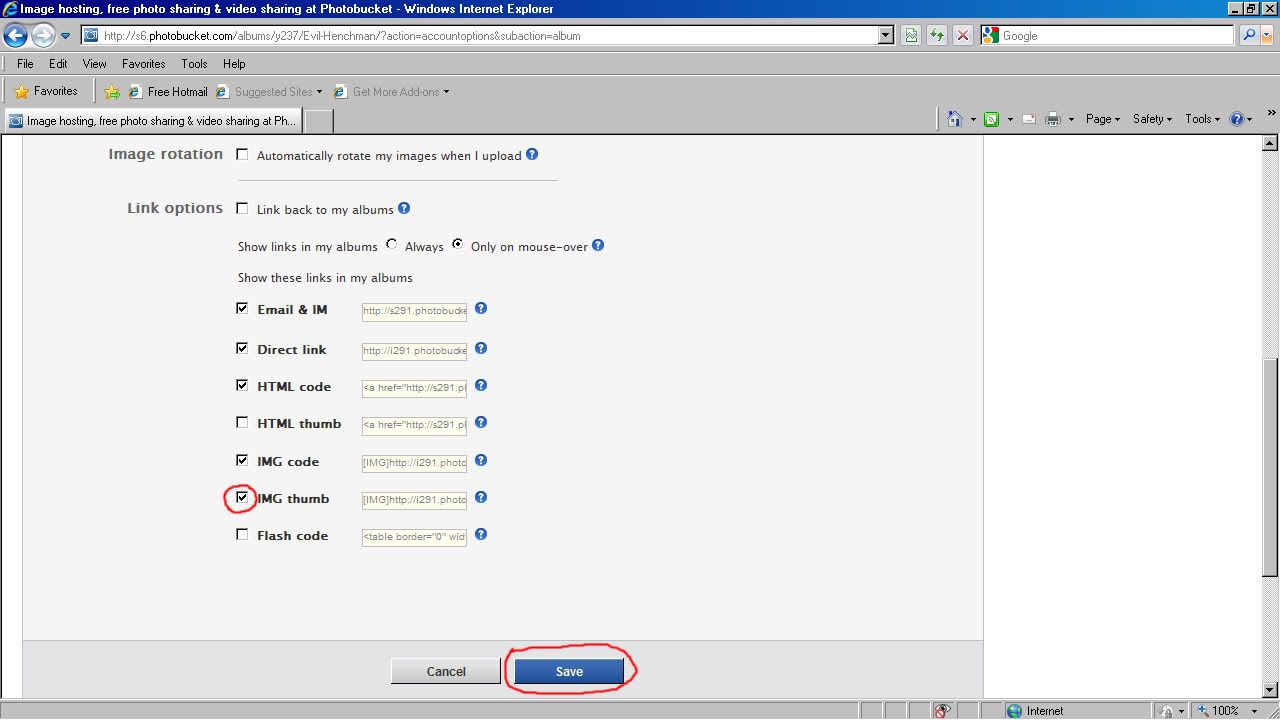
Scroll down until you see all of the link options, then put a check mark in the box next to IMG thumb and click on the Save button.
You should then see a page that states that your preferences have been saved. From there, click on My albums.
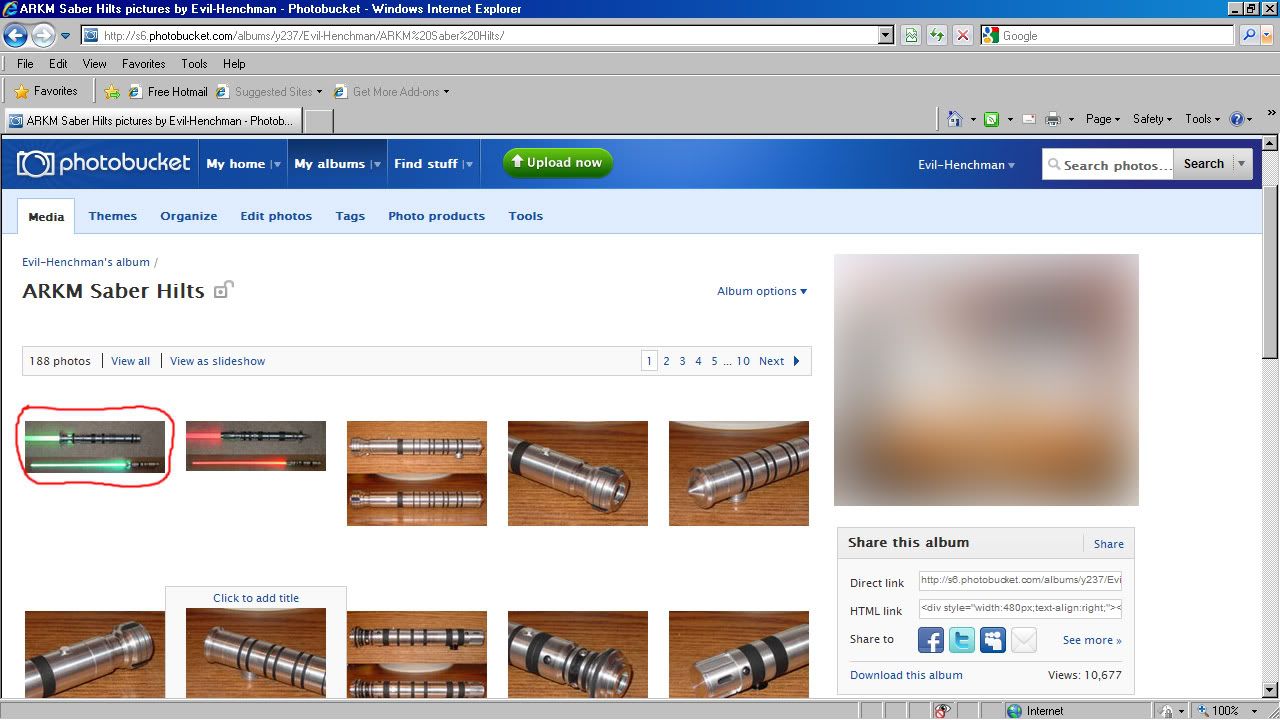
You should now be at your main album page. If you have sub-albums, they should appear on the right-hand side of the screen underneath the ad. You can scroll down to see all of the sub-albums that you have. If the pic you want to post in the forum as a clickable thumbnail is in a sub-album, click on the sub-album pic (or name) from the list on the right of the screen, to enter it. Since the sub-album that I want to enter is also listed on this page as a sub-album that I recently visited, I can also click on the pic (or name) for that sub-album in that area of the page, to enter it. The pic below illustrates this.
Obviously if the pics you want are in the main album, you do not need to enter a sub-album.
Once you are in the album where the pics are, you should see something similar to this
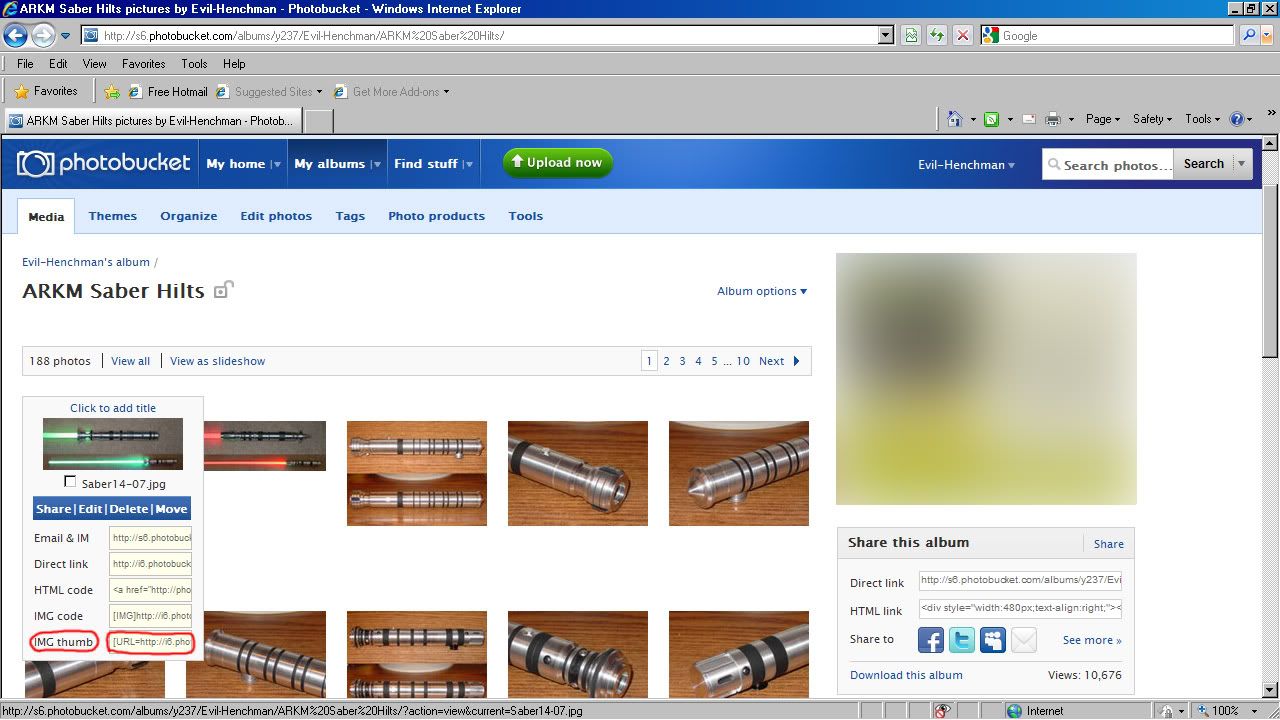
Move your mouse pointer over the pic that you want to post in the thread. A list of options and links for that pic will then appear. The IMG thumb option should now be on the list. Click on either the words IMG thumb or in the box directly to the right of it.
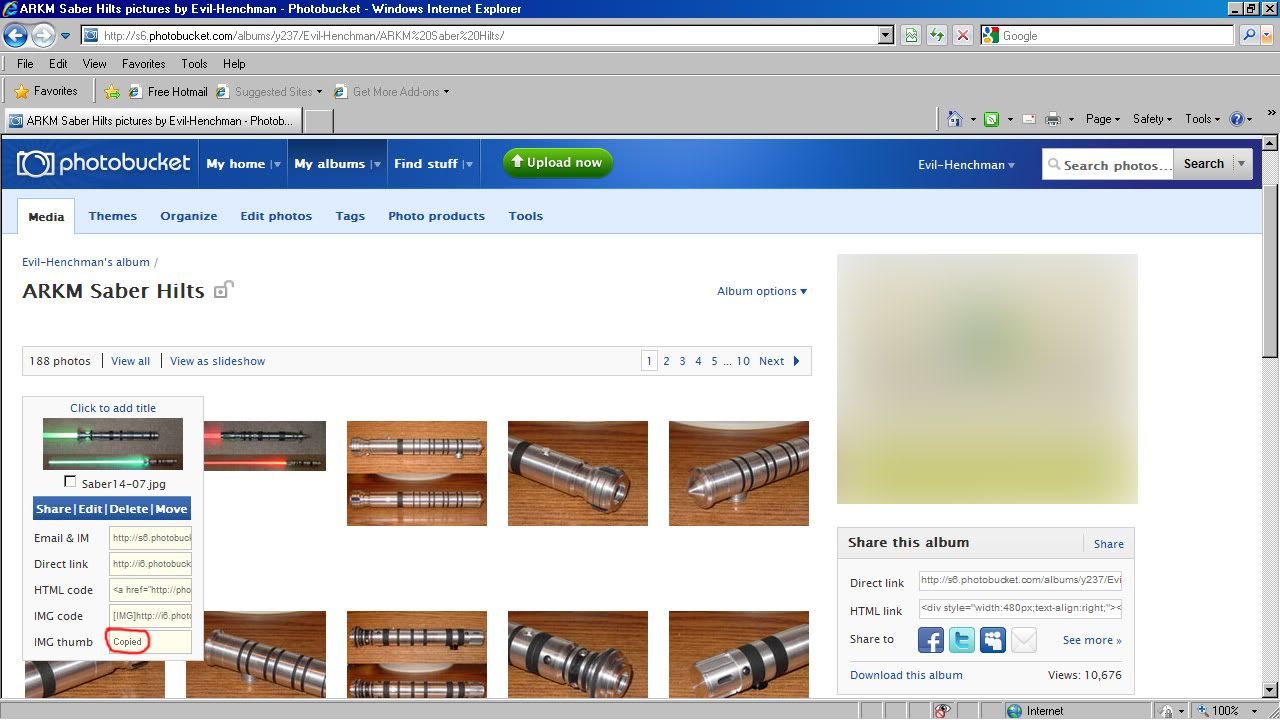
You should now see the word Copied in the box that is directly to the right of IMG thumb.
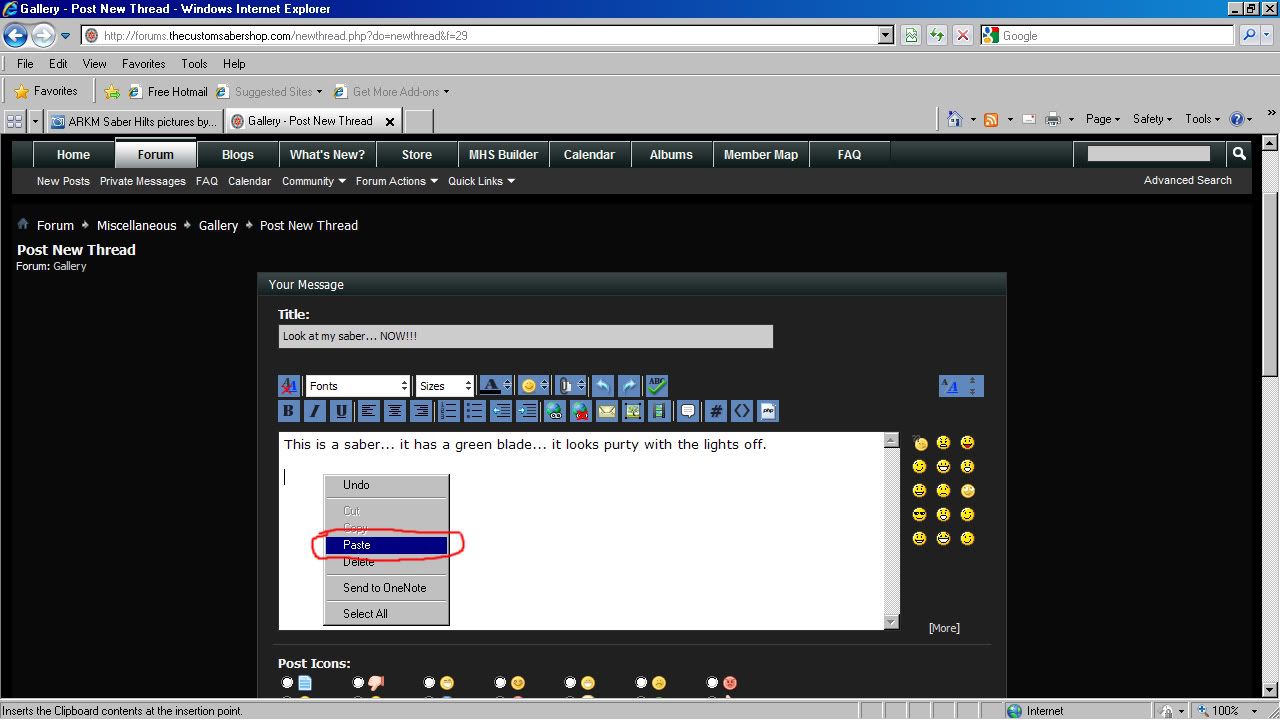
Now you are ready to post that pic in a forum. You can either create a new thread by posting a new topic, reply to an existing post or edit one of your previous posts (if the forum allows). Once you have started one of these processes, you can then paste the IMG thumb link you copied into your post. To do this, move the text cursor in your post to where you want the top of the thumbnail to start. Then right-click in the post window and a menu will appear with several options. Click on the Paste option.
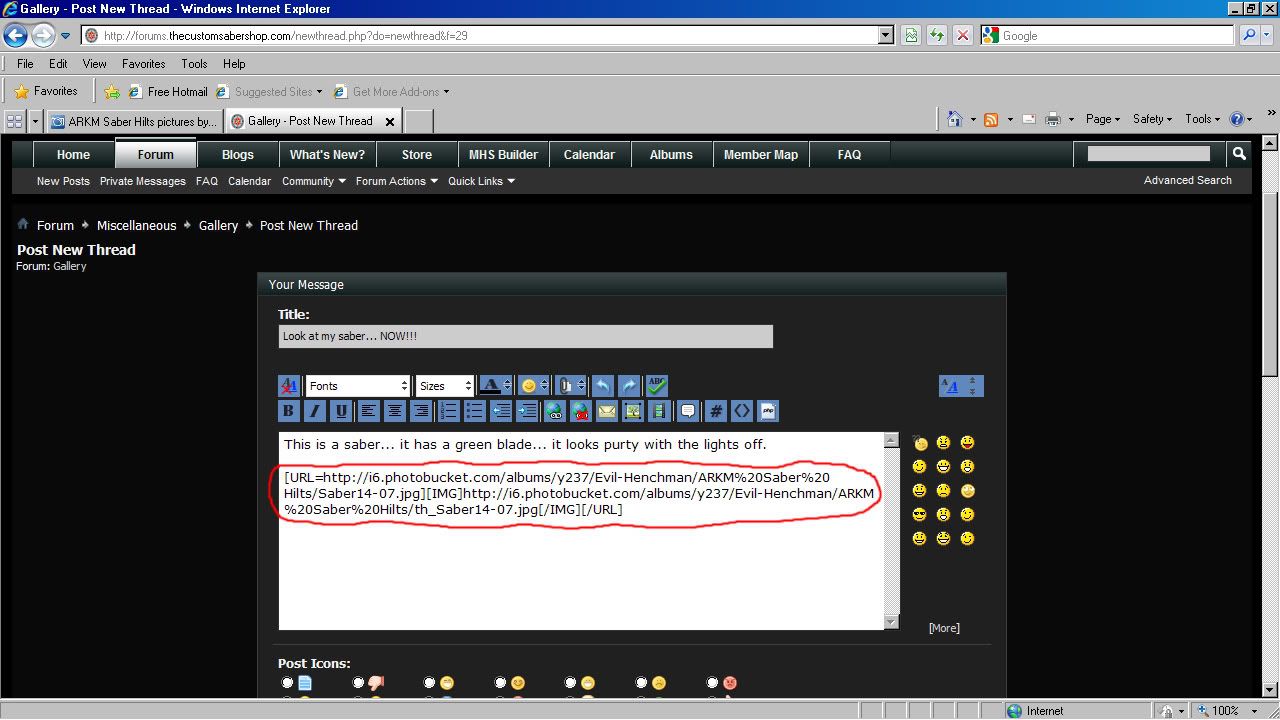
The HTML code for the image will then appear in the post window.
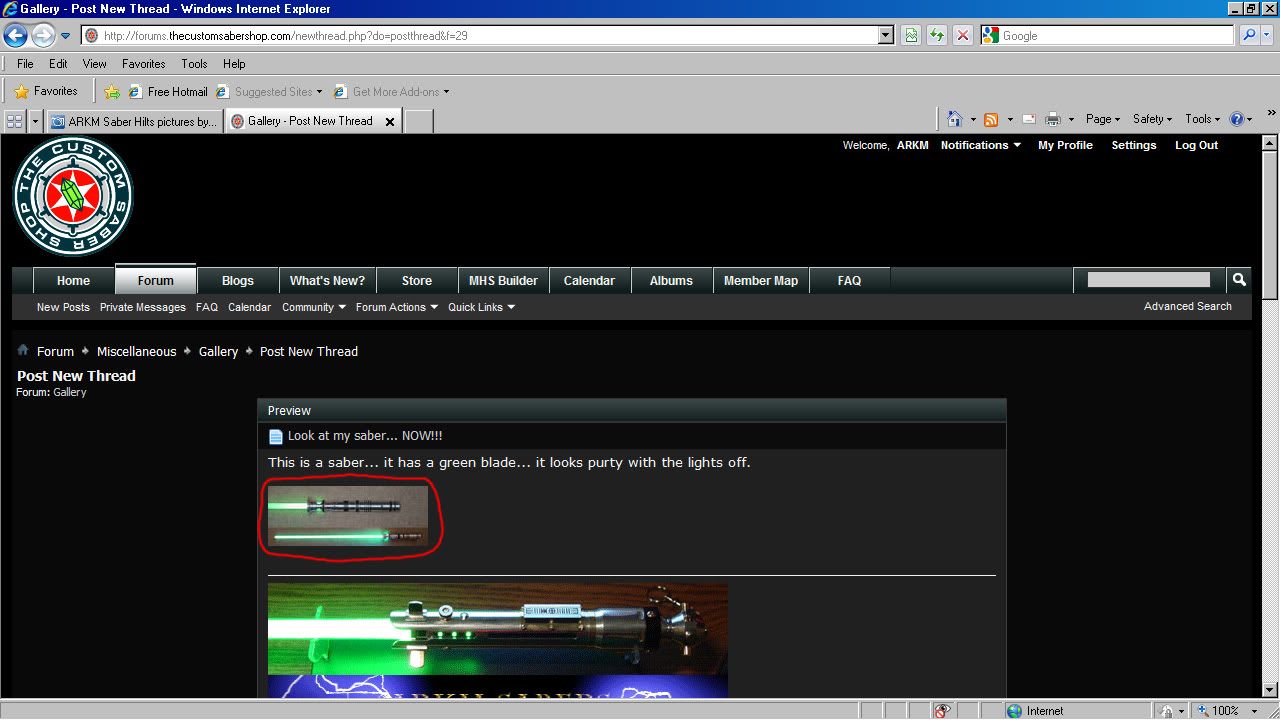
You can then press Enter as many times as you want, to go to a new line to type in more text as desired. Once you are satisfied with your post, you can either preview it (if the forum has that option) or submit the post to the forums. One thats done, you should then be able to view your post and you will now see a small thumbnail image of your pic. Click on the pic
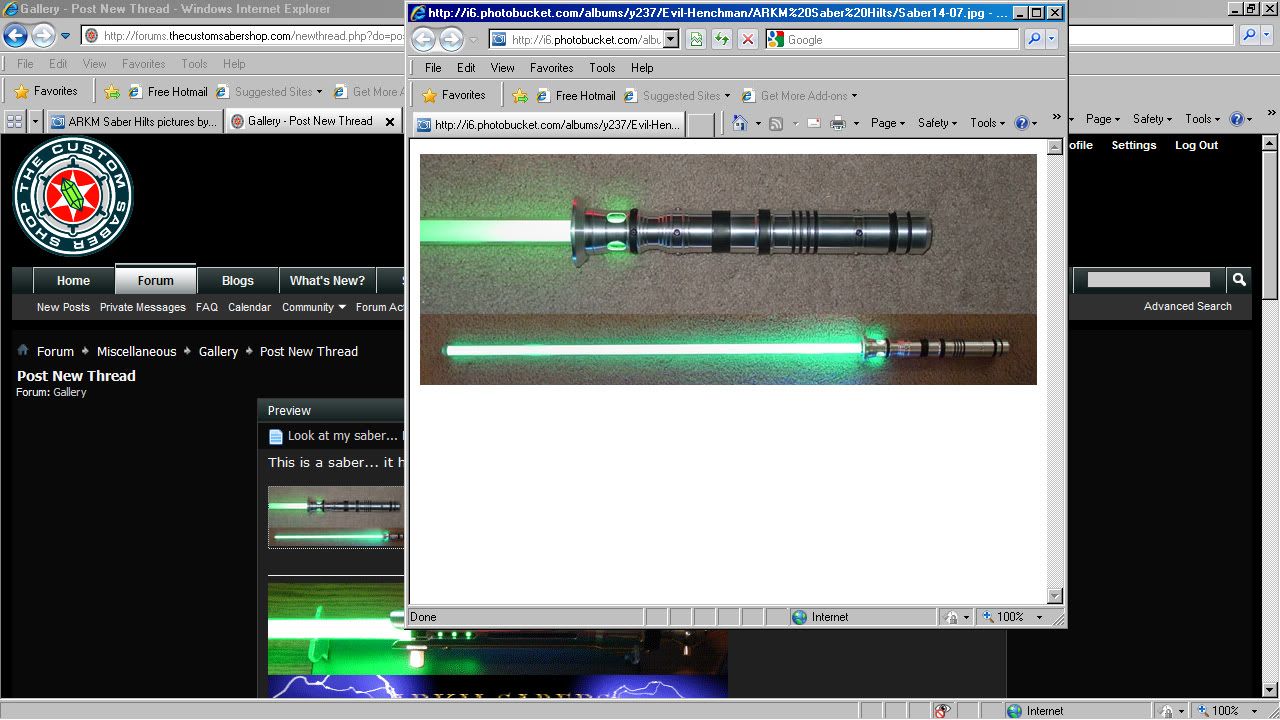
This should open up a new browser window that takes you directly to the Photobucket page of the pic iteslf.
You can then maximize that browser window and if necessary click on the pic to further enlarge it.
I hope some of you found this tutorial to be informative and helpful. Thanks for reading.


 Reply With Quote


Bookmarks