Page 1 of 3 1 2 3 LastLast
Results 1 to 10 of 198

Thread: slothfurnace's TOR Consular saber

Hybrid View

Previous Post Previous Post   Next Post Next Post
  1. #1

    Default slothfurnace's TOR Consular saber


    Image property of BioWare

    My wife wants me to make her the double bladed lightsaber that the Jedi Consular uses in BioWare's HOPE trailer for The Old Republic. This saber has been a challenge to begin, as I am not sure how to make the intricate details of the handle section. However, the rest of the saber isn't easy either. For instance, the emitters...


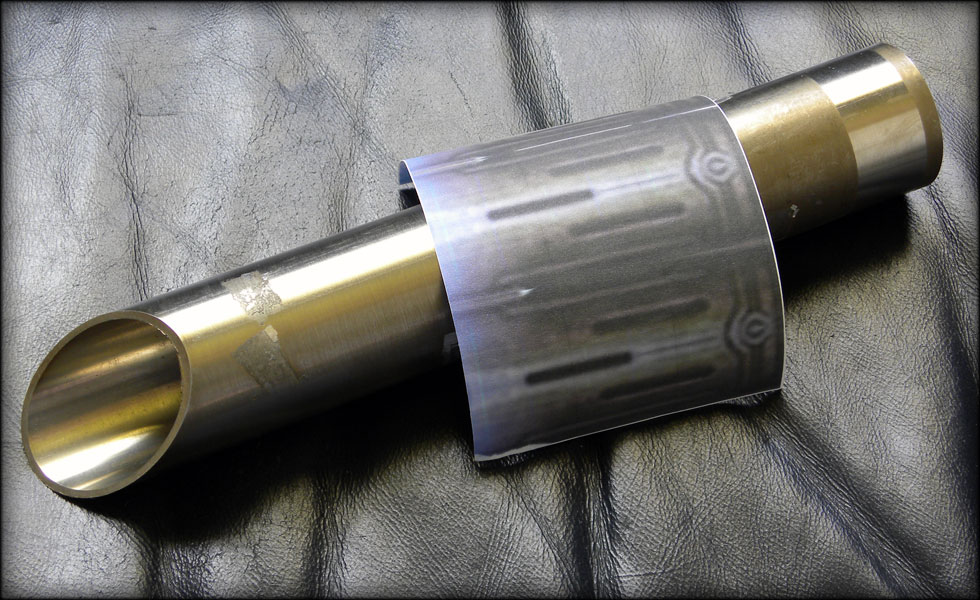
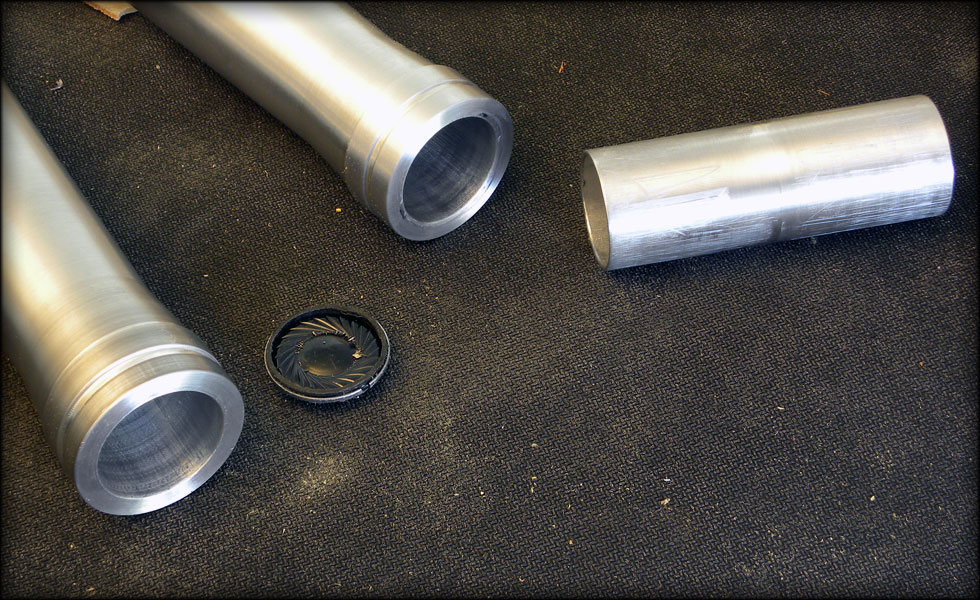
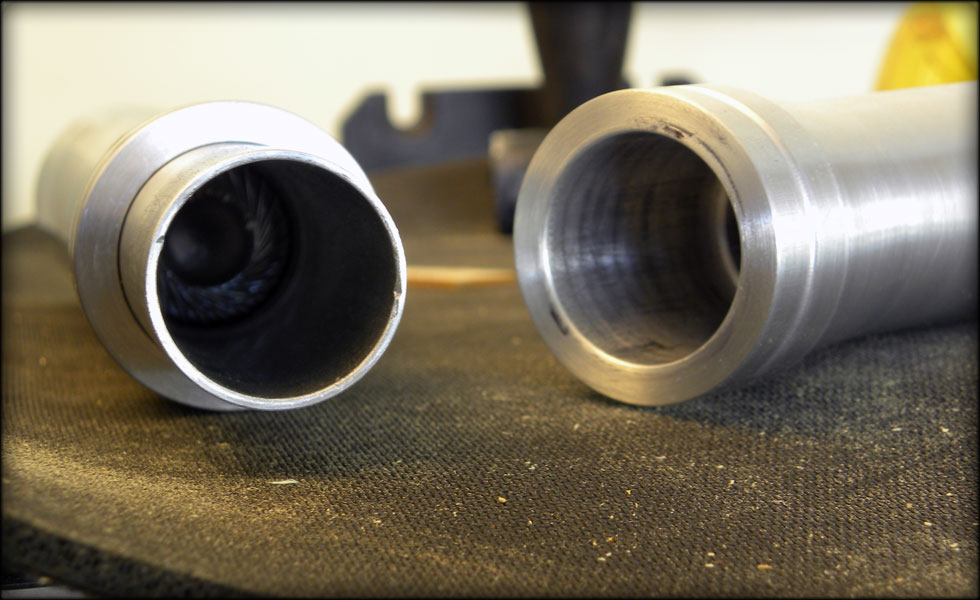
    To start with, I decided to take some time and attempt to fashion the emitter ends from a section of scrap stainless steel tubing. I chose stainless over aluminum, because of the way the saber is rendered in the trailer, seems more fitting a finish in the long run than aluminum.


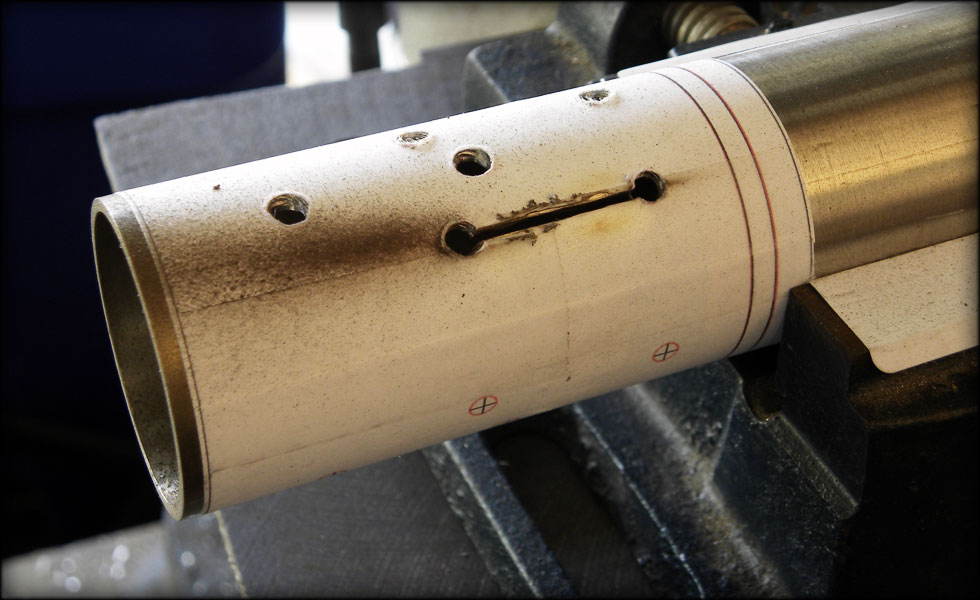
    I took the screen capture above and blew it up in photoshop, duplicating it across the appropriate size paper to wrap around the diameter of the tubing.


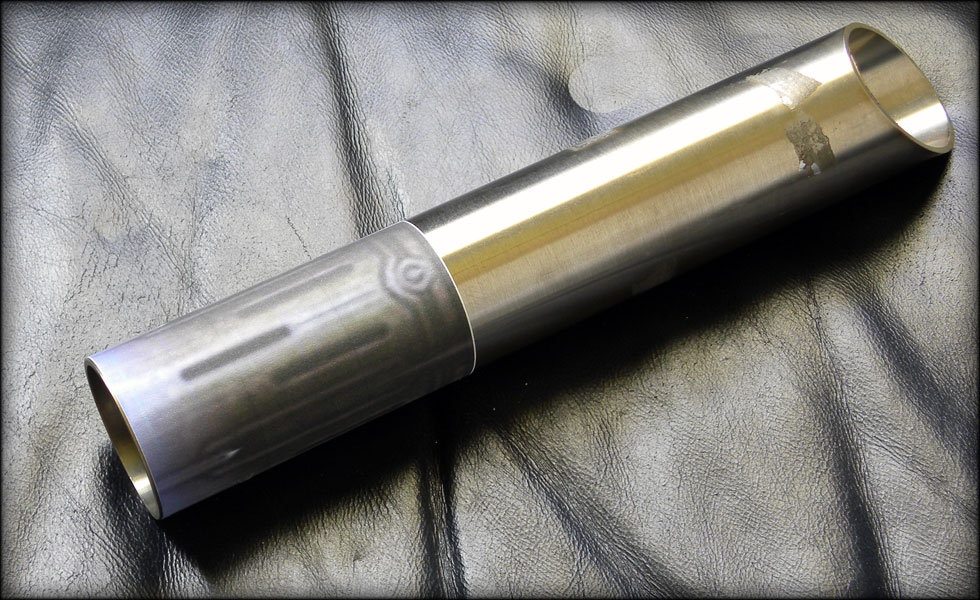
    This wraps around perfectly, and seems to look about right. However, I noticed it would be kind of hard to drill through that, so I used that image as a basis for a template that I printed out and replaced the old one with.


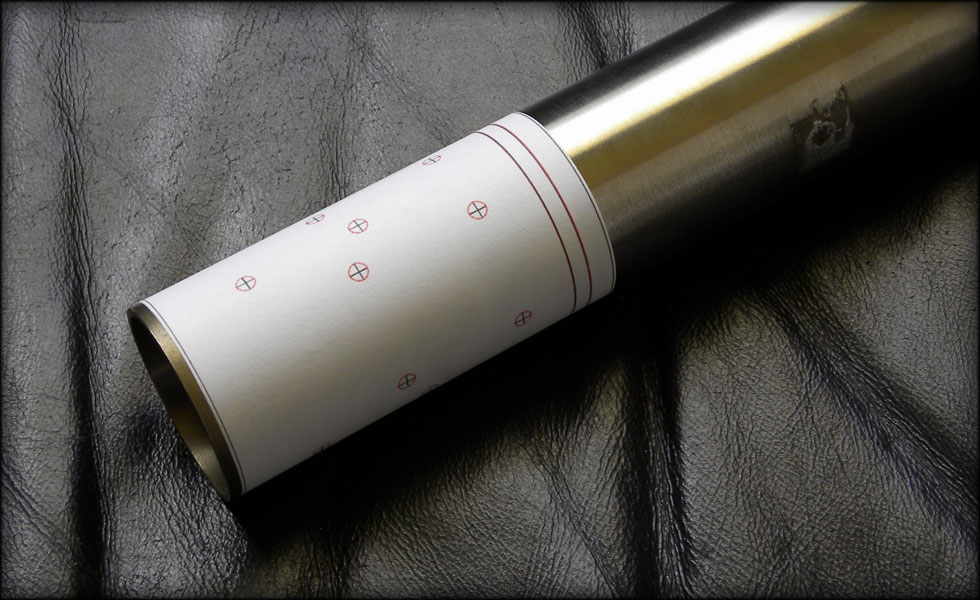
    This marks my drill points, and groove for the back of the emitter.


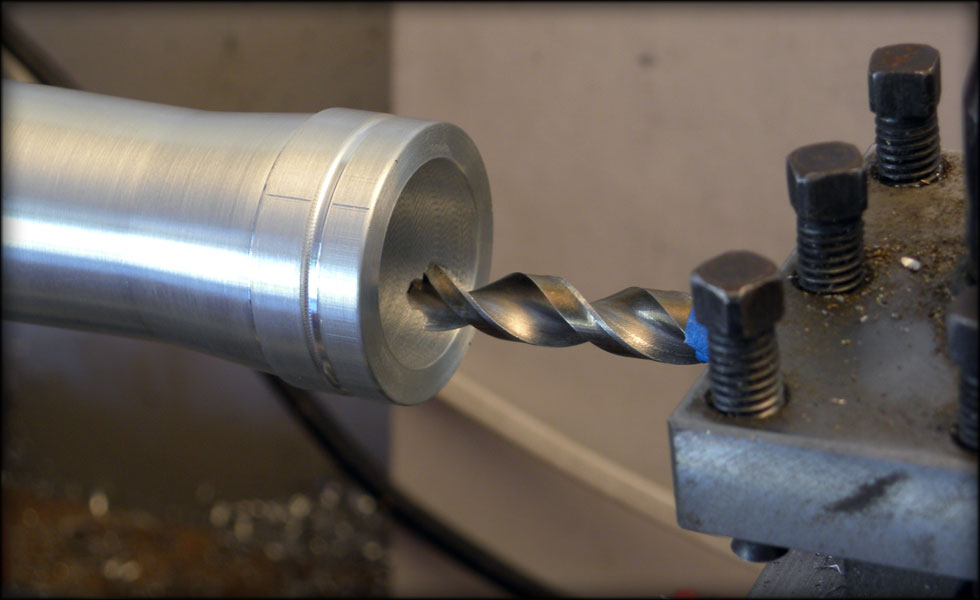
    Problem #1 - Holes drilled by hand on curved surfaces tend to wander the drill bit... a bit. Therefore making the holes not quite lined up perfectly. This is a problem, as I will have to connect the holes with slots to form the slots evident in the saber emitter, and they have to be straight, uniform, consistent and even. But, even though I know I will probably have to re do this part, I decide to forge ahead and see what I will learn by finishing it.


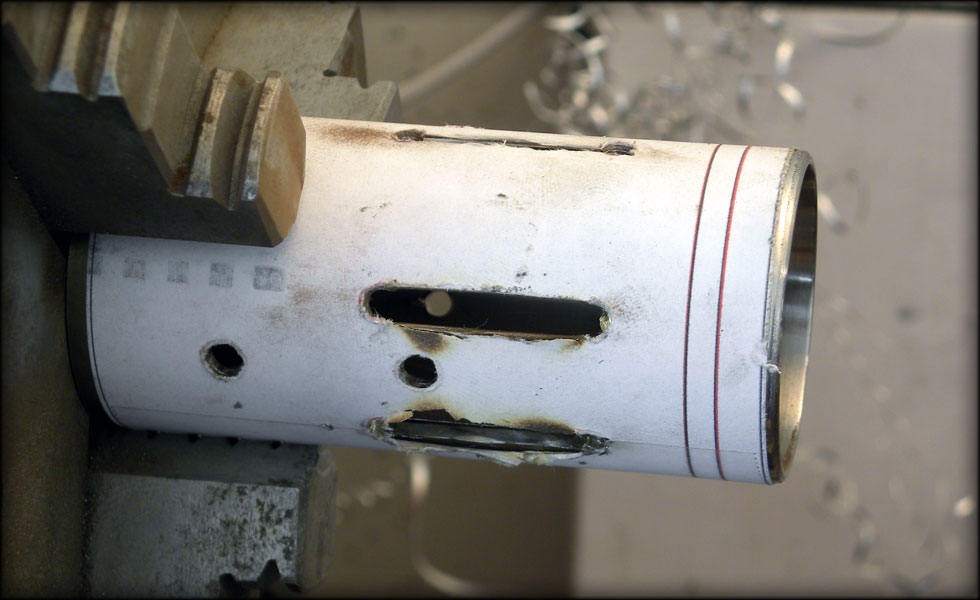
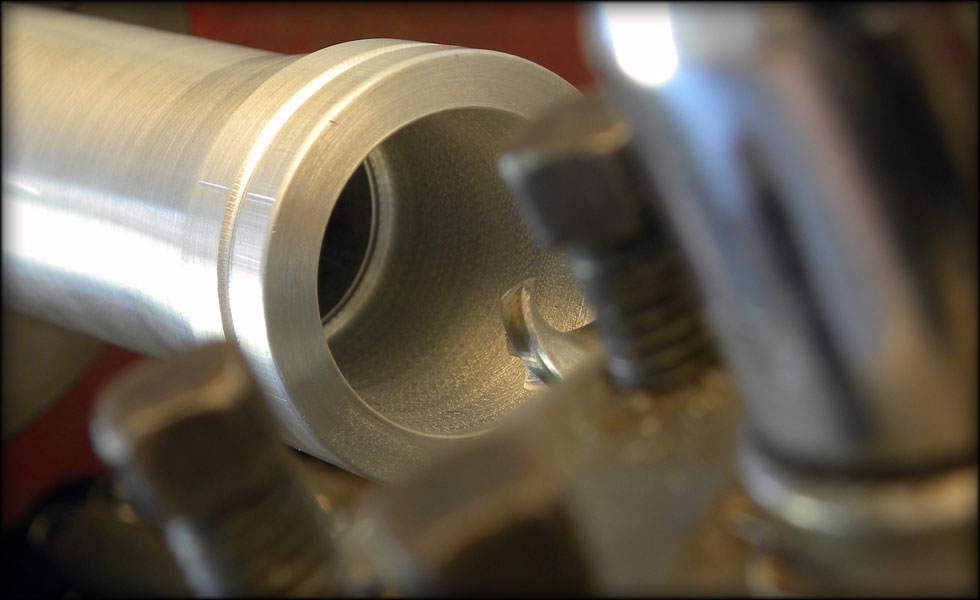
    I found that using my dremel and cutoff wheel is the easiest, fastest way to cut these slots. One cut at the top of the hole, one at the bottom. If I had a milling machine this would be worlds easier, and more consistent, but I don't have a mill, so I have to do the best I can with what I have.


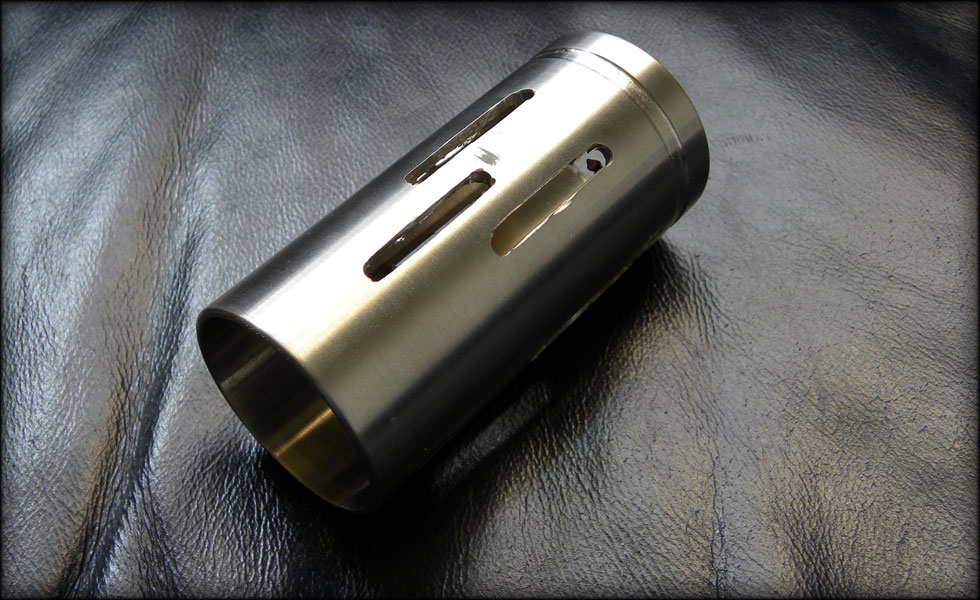
    As you can see, the dremel cutoff wheel approach technically works, but leaves uneven results. I will have to bring some stainless tubing out to the ranch and use the big mill back home for this piece, but for now, I have this to think on.


    Three sets of three slots, and a groove at the back. Not terrible, but not up to my standards. I will re do this piece, and make two copies once I get time on the mill back at the ranch. I may go back out and enlarge the slots some to make them all more even, but I will most likely leave this piece alone and move on to a replacement.


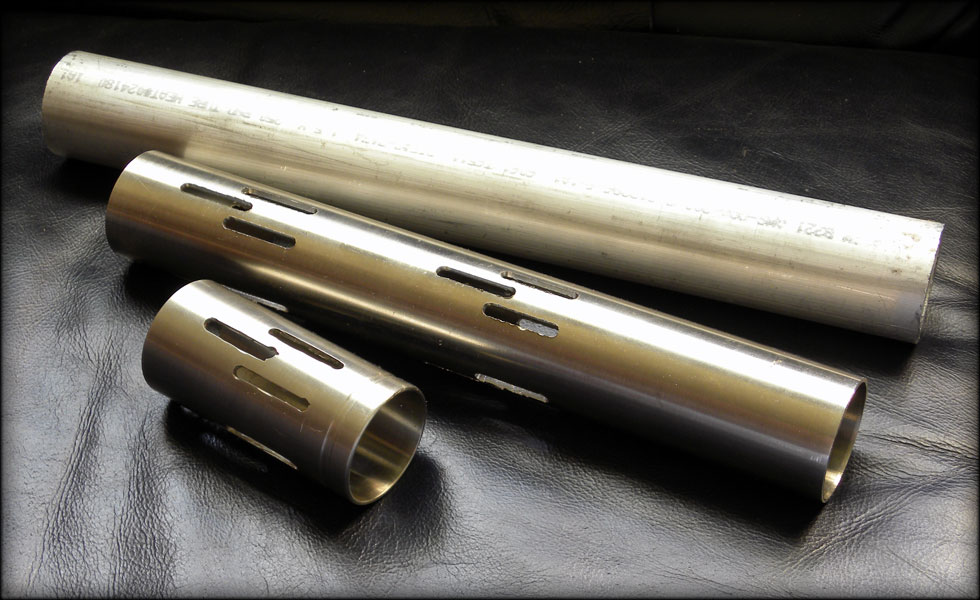
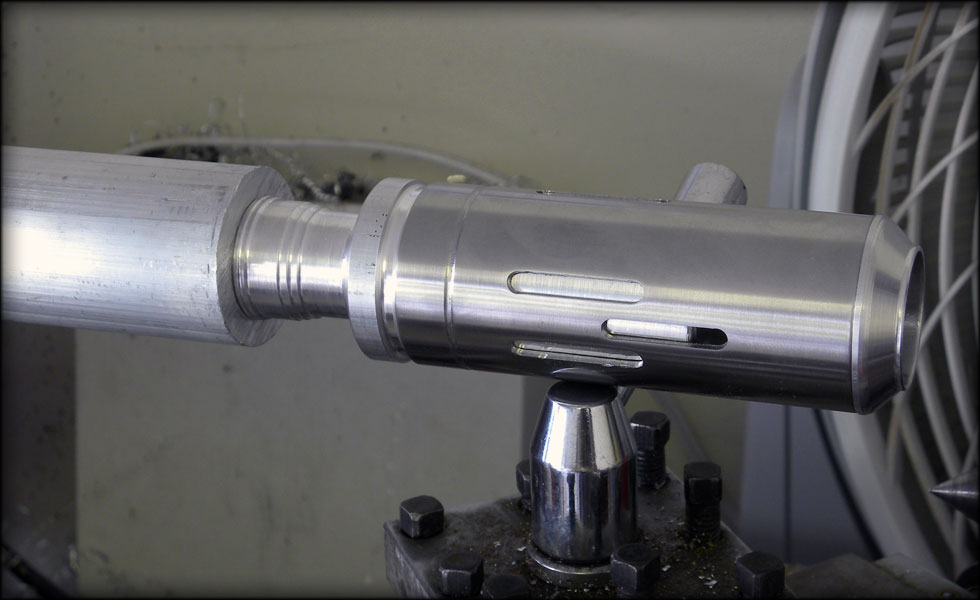
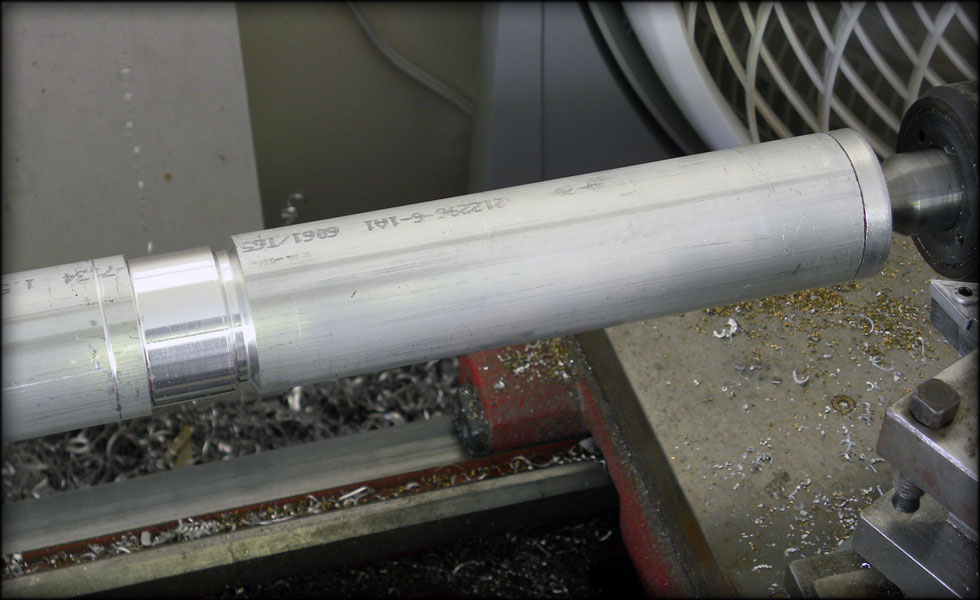
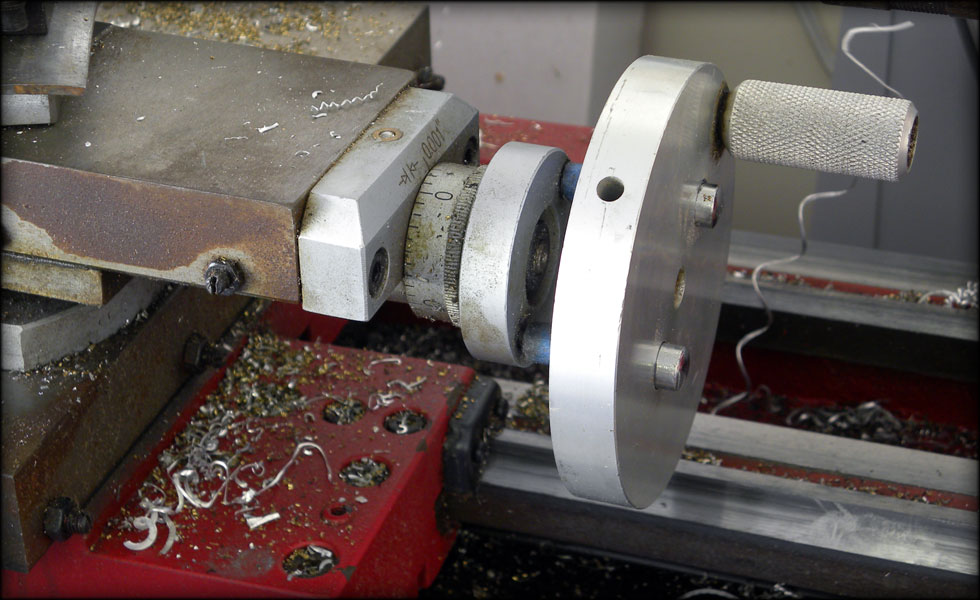
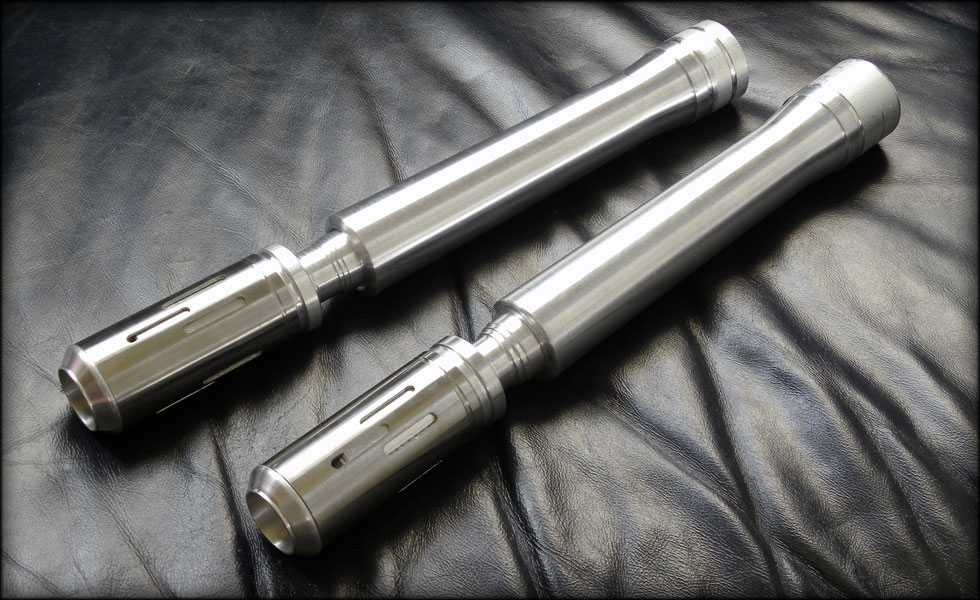
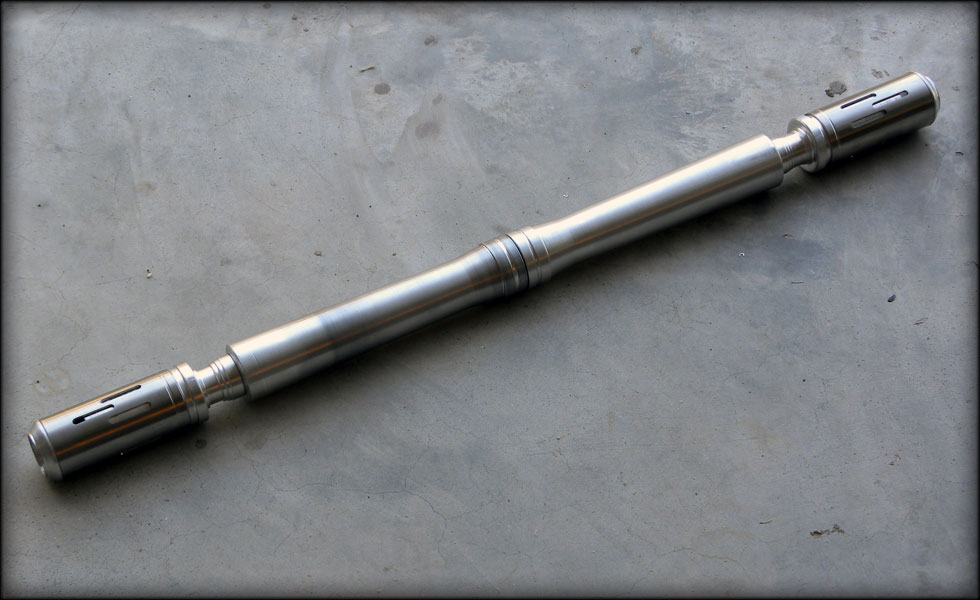
    Here I had used a mill to cut my slots more accurately, straighter. The edges are kind of rough, I'll sand those out on the lathe. Once those are clean, I'll cut it in two so I have two emitter cans.


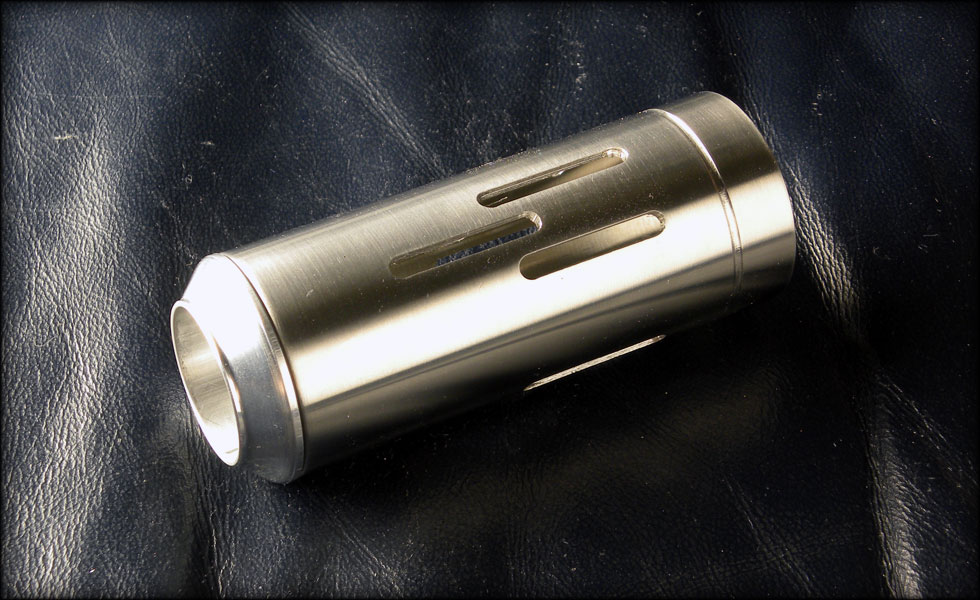
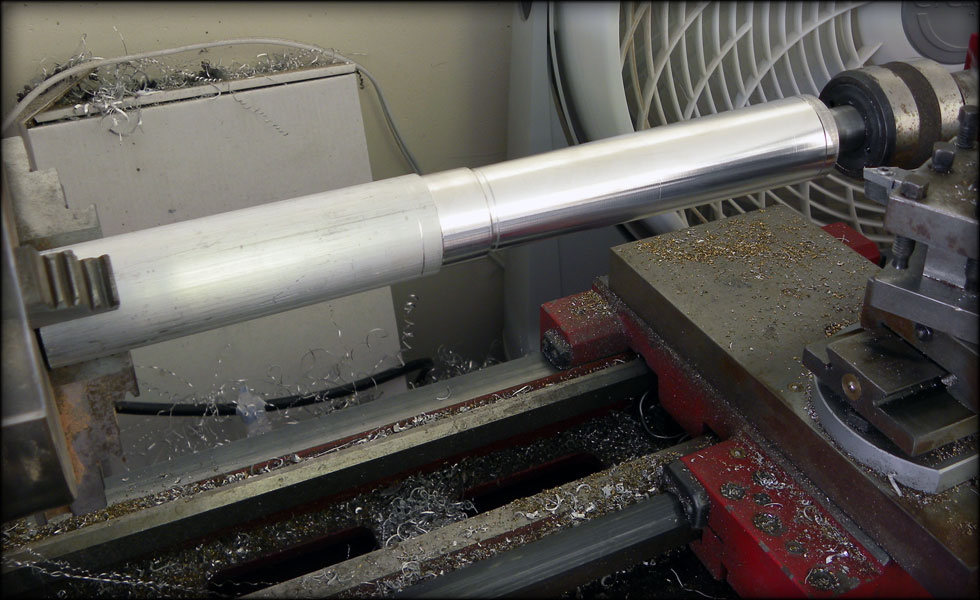
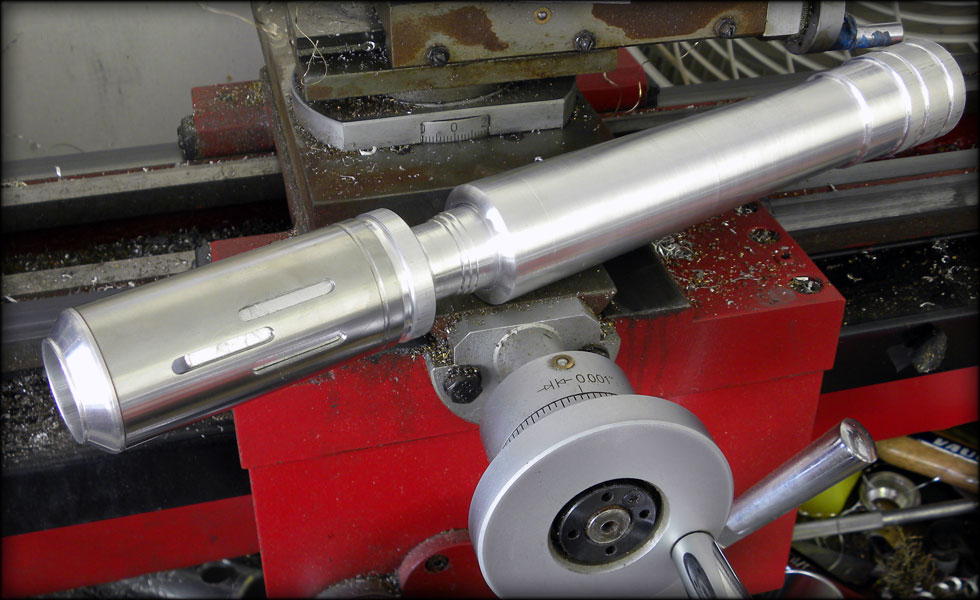
    One end cap installed, I will have to shorten the emitter can a bit to the right length, but it's getting close to good.


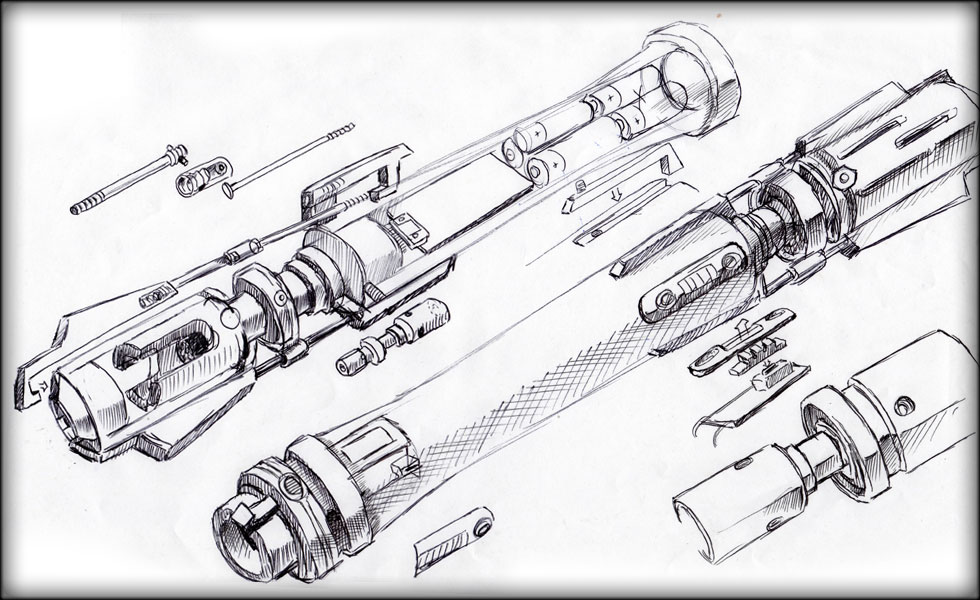
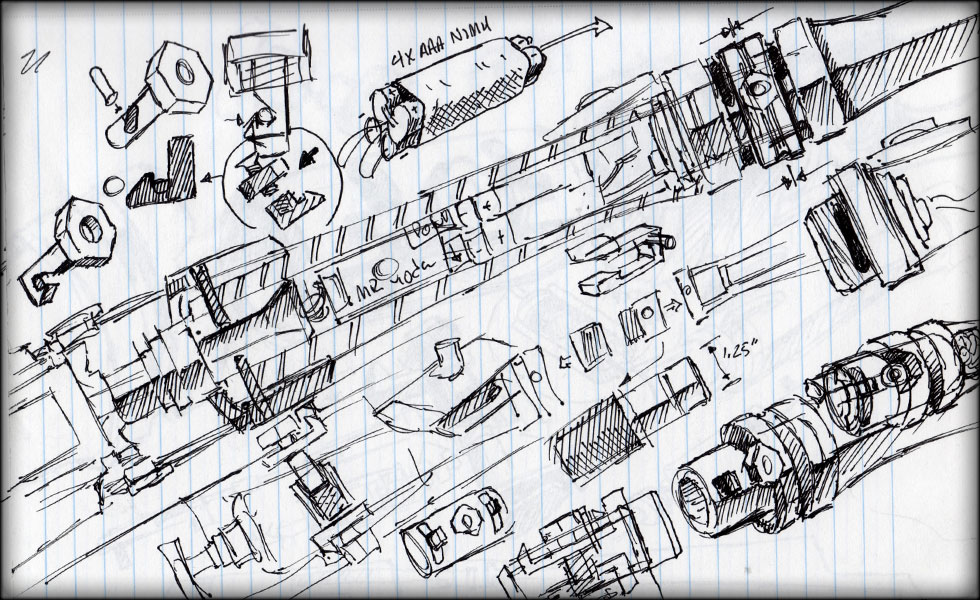
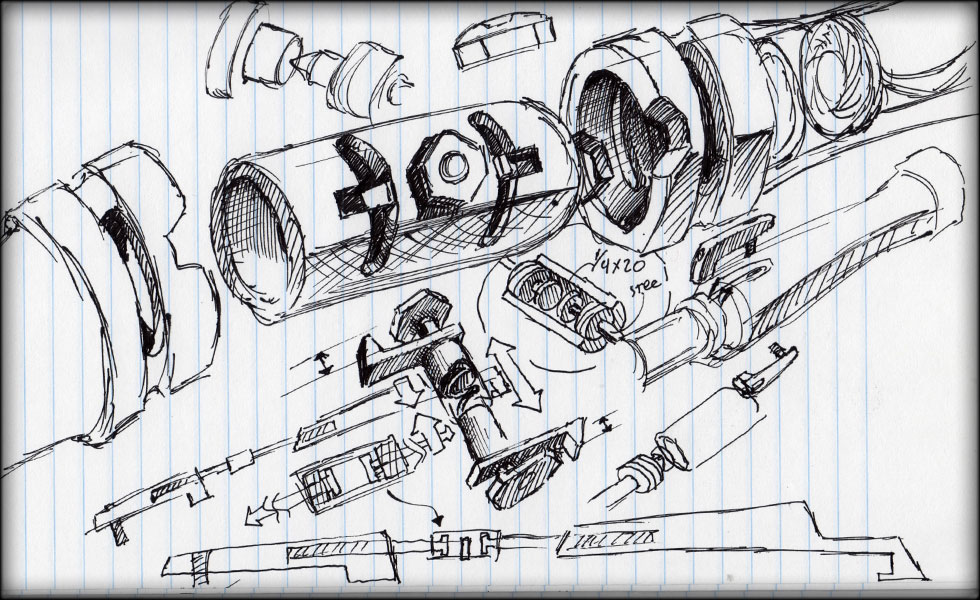
    Here's a quick sketch I did showing how I think I am going to make the pieces to make this thing all come together.

    CordaroyFog: you know, its really mean to set the bar that high.

  2. #2
    Youngling Lawrs1's Avatar
    Join Date
    Sep 2008
    Location
    Furthest reaches of the Galaxy (Scotland)
    Posts
    230

    Default

    Looking good so far Sloth, look forward to seeing it come together

  3. #3

    Default

    I'm excited to see such a challenging build come to life. I look forward to the updates.

  4. #4
    Jedi Padawan Ronan's Avatar
    Join Date
    Jul 2010
    Location
    Montreal, QC
    Posts
    529

    Default

    *eats sloth's pizza* Nice dude
    Corbin_Das: If I got a tattoo below my waist, it'd say "Found someone you have I would say, hmmmm?"

  5. #5

    Default

    Today, I got out into the garage while it was still early and cool, and decided to get the lathe heated up and turn out some metal for this saber.


    I started today with the emitter neck. This is a solid piece of aluminum that goes up into the handle, and up into the emitter can. I also machined the other emitter tip. I have yet to trim the emitter cans down to proper length, so they're both still a little long.


    Once I got both emitter necks done, I needed to contour the handles. I start with setting the lowest point of the contour, measuring with my calipers down to 1/8 of an inch. To do the tapers, I'll need to set my angle on my toolpost, and use the crank to bring the tool across at that angle.


    However, my crank is a PAIN to use, and has bad results. So I found a hand crank off an old X/Y plate, and drilled two holes into it to fit my crank, now I have a much easier and smoother way to turn this.


    The biggest contour done, I had to play with the angles in tiny increments to get the right 1/8 inch in 7 inches slope.


    Turned the handle around and dressed out the end where the emitter neck plugs in. Mental note, next time, I should do both contours on the handle before unchucking it. Doing the short angle is pretty difficult when it's not the exact same alignment as the main slope.


    Here is the smaller slope, again, it's not perfect due to the fact that I rechucked it. But with a bit of sandpaper it cleans up.


    I laid these out on the garage floor to see what the length would be like, once I decide how the two sabers attach in the middle, I'll trim that extra material off the ends. I let myself have enough material just in case.


    Not too shabby. I am still evaluating a few parts, might replace one of the necks, and I need to figure out how they attach together, but I got a LOT done today.

    CordaroyFog: you know, its really mean to set the bar that high.

  6. #6

    Default

    Quote Originally Posted by slothfurnace View Post
    Not too shabby. I am still evaluating a few parts, might replace one of the necks, and I need to figure out how they attach together, but I got a LOT done today.
    Though I haven't built my first yet, I've been thinking of different ways to join two hilts.

    The most obvious way is with some kind of threaded coupler, but this isn't exactly quick-release. Plus, each hilt will look different once they are separated, with one having ugly male threads exposed.

    The second idea is to have several layers of thin tubing that fit snugly inside one another. Imagine having these concentric tubes, cutting them along a line, then offsetting them so that one hilt exposed the outside tube, third from the outside, and so on, while the other hilt exposed the second from the outside, fourth from the outside, and so on. With enough layers, it could be pretty strong. You could make it very secure by having an L-shaped notch in the tubing on one hilt (running through multiple layers) coupled with a pin or set screw (again, through multiple layers) on the other. Then you'd slide the pommels together, and give them a partial twist to lock them in place.

    A third way I was thinking of is with two matching 'crown' sections. It would be like two toothed parts meshing together. You'd probably also need a bit of tubing either inside or outside the teeth to help keep it from flexing. In fact, this is the method I'll probably end up using on my first PVC sabre: 1.25" OD for the main hilt, then some thick 1.25" ID tubing cut into strips and screwed on to the ends. I got this epiphany while looking at the third sabre shot (the shroud, in particular) in Crystal Chambers' Mantis thread.

    The fourth idea, if the tube wall thickness supports it, is to take several metal pins. Drill holes in the tube parallel to the tube walls, and thread every second hole. Cut the pins so half will rest in each hole, and have half of each pin threaded. Obviously, you'll need to drill the threaded holes a little smaller than the other ones.

    For the third and fourth approaches, there is nothing besides friction holding the hilts together. Ditto the second approach without a pin-notch arrangement. My solution here is to get some disc-shaped rare-earth magnets that can be mounted in each pommel. When the hilts are attached, they will be close enough to exert a fairly strong force to hold the pommels together.

    Another way would be to modify the pin-notch setup, but instead have one or more pins on each hilt, coupled with a matching ring on the other hilt. This ring would have the L-notch on the inside, so you could slide the hilts together and turn the locking ring on each to ensure a nice tight fit. Machining the ring from a single piece would likely be quite difficult, but if the ring was constructed from two pieces (one nested inside the other), then the inner ring could have the notch, while the outer ring concealed it. The pins could appear as decorative elements (thumbscrews, buttons, etc); the only concern would be that they were strong enough (easy enough to do by running it entirely through the hilt, and having it protrude on either side as though it were two pins).

    Anyways, I'm not sure if I explained my ideas very well. I'd try to draw pictures to illustrate the idea, but I'm a horrible artist. I've got all these ideas in my head that I'll probably never be able to make a reality, so why not share some of them?

  7. #7

    Default

    I think I figured out exactly how I want to do the raised details on the handle, but for now, I am working on the attachment point in the middle...


    I cleaned off the extra metal I left for the middle section, and decided how I wanted to attach the two sabers together.


    Here I have carved out enough space for the speaker and connector tube, and far enough back that the tube has enough purchase on the saber ends that it will be sturdy.


    The speaker slides right in, on either side of the connector tube. I had to carefully mate each side of the connector tube with each saber section, for a snug fit with no rattle.


    You can see here that the connector tube butts up against the rim of the speaker, and will on both sides. Should make for an interesting resonance chamber.


    Now the middle is shaping up to be much more like the render. I will run over to the hardware store and get some stainless hex bolts to begin my latch.

    CordaroyFog: you know, its really mean to set the bar that high.

  8. #8

    Default

    Where are the sound holes going to be?

    BTW this might be my favorite build of yours so far
    -Sidd-

  9. #9
    Jedi Padawan Ronan's Avatar
    Join Date
    Jul 2010
    Location
    Montreal, QC
    Posts
    529

    Default

    Nice
    Corbin_Das: If I got a tattoo below my waist, it'd say "Found someone you have I would say, hmmmm?"

  10. #10

    Default

    Quote Originally Posted by Sidd View Post
    Where are the sound holes going to be?

    BTW this might be my favorite build of yours so far
    Oh, I should post more of these sketches...


    The sound will come out of small slots I will mill out of the groove between the two stripes at the base of the hilt...


    They will also be the same slots that engage the latch once I get that built.

    CordaroyFog: you know, its really mean to set the bar that high.

Bookmarks

Posting Permissions

  • You may not post new threads
  • You may not post replies
  • You may not post attachments
  • You may not edit your posts
  •