
Thanks for the great idea!!!

Thanks for the great idea!!!
Got a Question? There's a thread for that...
~Do what you can, with what you have, where you are.~Teddy Roosevelt
SollusVir everywhere else... FXsabers, Youtube, etc...
that is an awesome idea! i'll have to see if i can scrounge a spare connector from an old laptop or something now. thanks! ^_^
Now known as Azmaria Dei
i really need "meow on clash" mya! =^_^=
duel - to fight someone 1 on 1
dual - 2 of something in line with each other


Agreed cool idea! I think this works mainly if you design your own speaker holders, though, right? I mean, I don't think this setup would work the way it is right now with the MHS speaker holder (well, not without some modifications)
LOCKHEED


the 'dish' isnt big enough to hold that..
anyways.. you get tons of cool stuff at sparkfun.com
similar to the connetors he made:
http://www.sparkfun.com/commerce/pro...oducts_id=9749


A little work on random bits today...
Here I am hollowing out the blade holder to 7/8, and I'll go the rest of the way to one inch diameter with a finer tool to control accuracy.
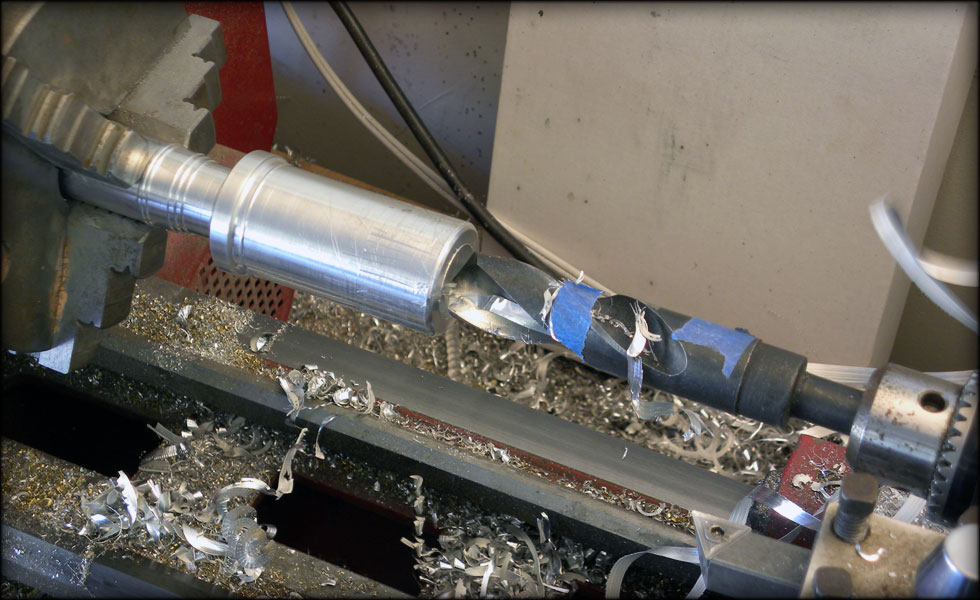
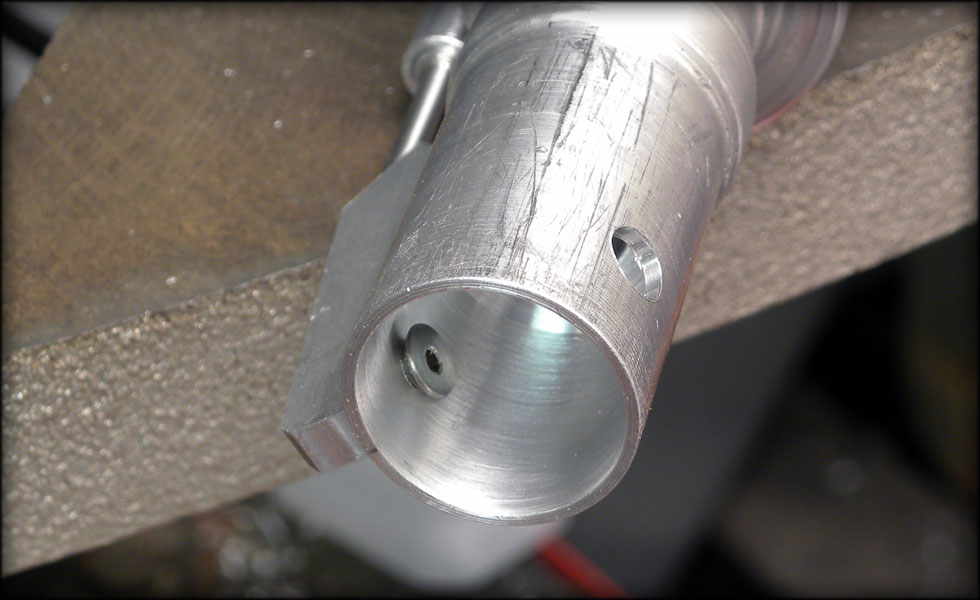
Here I am drilling out the center portion to 3/8 for my DIN plug.
So I had to come up with a way to tighten the fin against the anchor. If I made the strut a solid piece, as I tightened it, one side would tighten, and one side would loosen. Since I can't reverse thread this piece, I came up with a solution.
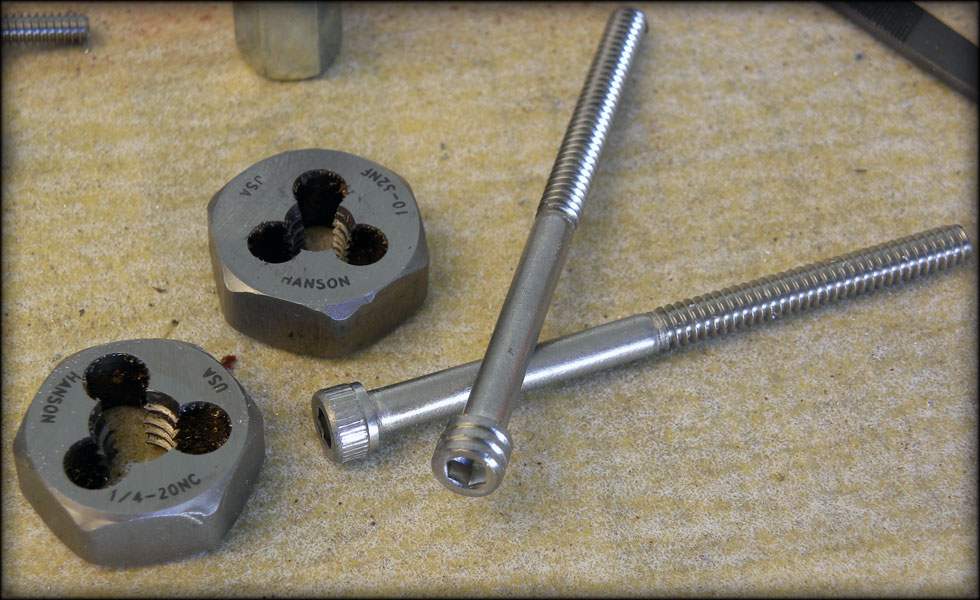
inside the large cylinder is a freespinning bolt, the one going toward the fin. As I tighten that cylinder, the bolt going towards the anchor tightens, and lets the other bolt spin, or stay in place. This way I can tighten my strut. To do this, I took These stainless hex screws, thinned the head down and threaded it. This picture shows a 1/4 x 20 threading, but I ended up going with 10-32
And here is one test strut.. When I twist the outer ring, it tightens, and pulls the fin towards the anchor. The long hex screw is going toward the anchor, and has its head threaded to go into the cylinder. The other screw is just held in place by the smaller diameter end, kind of like a tall washer with bigger threads on the other end to accept the hex screw. This is a much more elegant design than I orginally had.
CordaroyFog: you know, its really mean to set the bar that high.
ahh I am missing out... all pics are coming up Red X's and tried to access Slothfurnace's site in hope of seeing something posted there but can't get it to load??
Your work is amazing! I’m still drooling over your crystal chamber. You and every one here thanks for posting your sabers. I’ve gone crazy and taken apart 5 hard drives, started on my own crystal core thanks for the inspiration.
I got the metal in for the anchor pieces, and drew out the piece. I think I can get two per slab, if I cut it right.
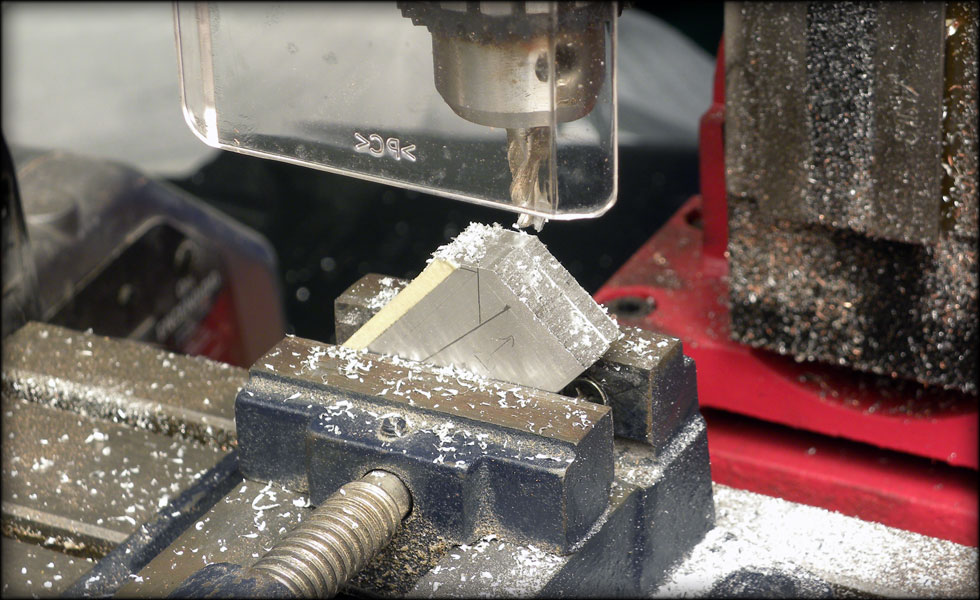
Here I have three anchor pieces clamped together to mill at once. I will mill what corners I need to then hacksaw the majority of the metal away.
Like this. I think by doing this I won't waste any metal, as I can make six anchor pieces from cutting these in half.
And here I am milling out the slots for the anchor pieces. This would have taken so long without the mill. Now it takes minutes instead of hours.
CordaroyFog: you know, its really mean to set the bar that high.

I see your putting your new "toy" to good use already =)
Yub Yub Commander.
This is how I will attach each fin anchor piece to the emitter neck. I drill a small hole for the screw to go through, drill and tap the anchor, and drill a large hole so I can fit a screwdriver through the opposite side and into the screw. I'll need to do this three times, and on one side mill out a slot for the on off switch housing.
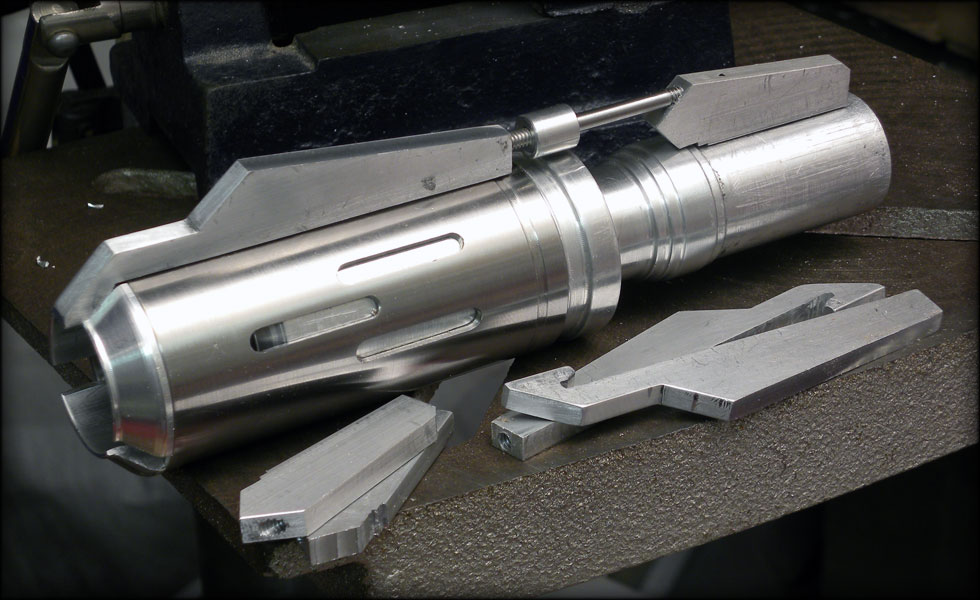
Here I have the strut assembled. I think I'll have to tweak some lengths on some things, but it should work fine. What I don't like about it is the small patch of exposed threads on the sloped face of the anchor piece, and that the hole I drilled for the strut to thread into popped out of the top of the anchor a wee bit. Oh well, "battle damage."
Here's the emitter neck and anchor fit into the slot I milled out of the handle. It's a nice snug fit. I did have to file the round area where my milling bit stopped so that it was square, but that's why I keep some files around.
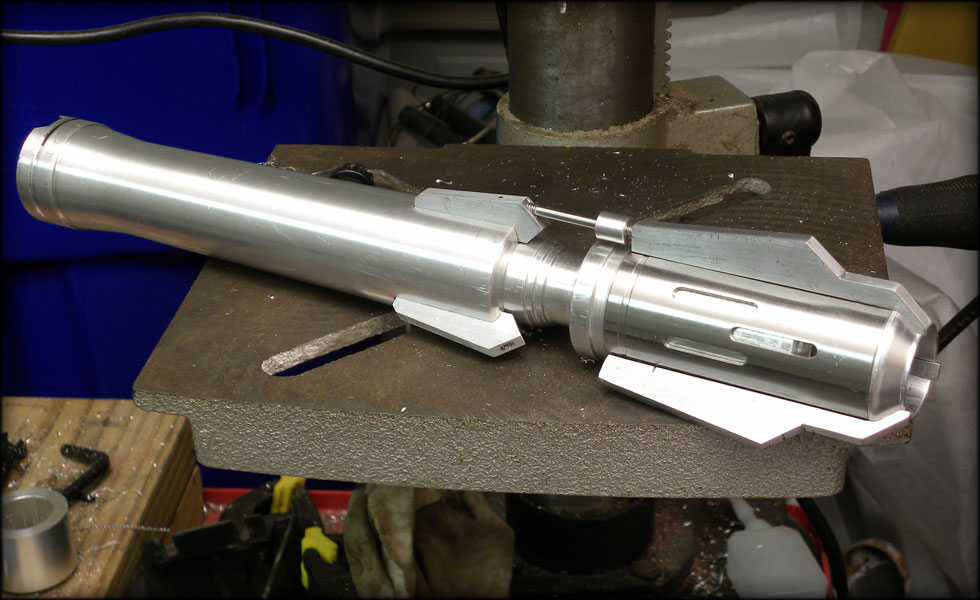
Shaping up, I need to run to the hardware store to pick up some screws and material to do the other 5 struts. Three on each end. The saber parts are getting kind of scratched up, but I'll buff everything out before I am done.
CordaroyFog: you know, its really mean to set the bar that high.
 Posting Permissions


 Reply With Quote


Bookmarks