Page 1 of 4 1 2 3 ... LastLast
Results 1 to 10 of 32

Thread: slothfurnace's ESB Graflex

  1. #1

    Default slothfurnace's ESB Graflex


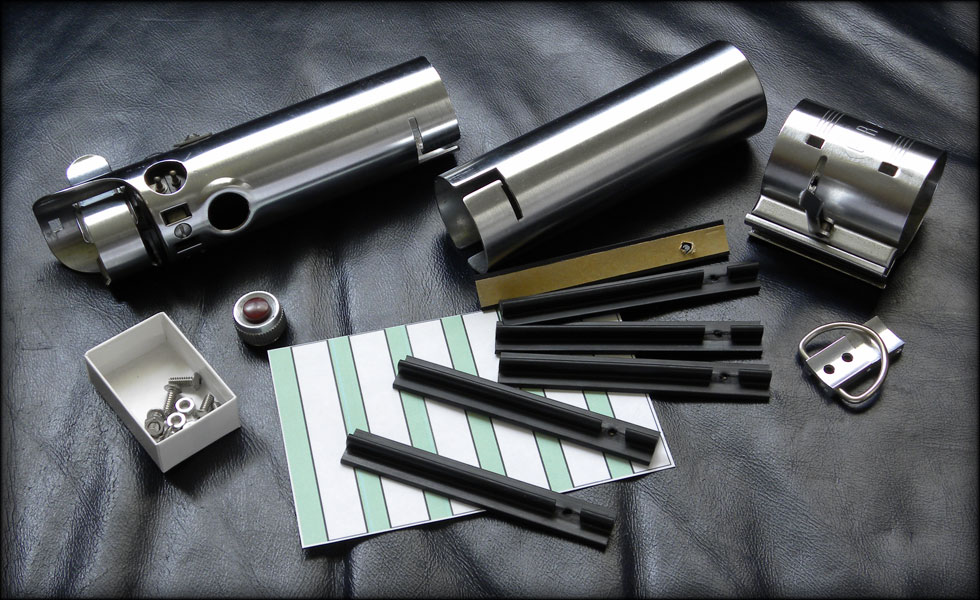
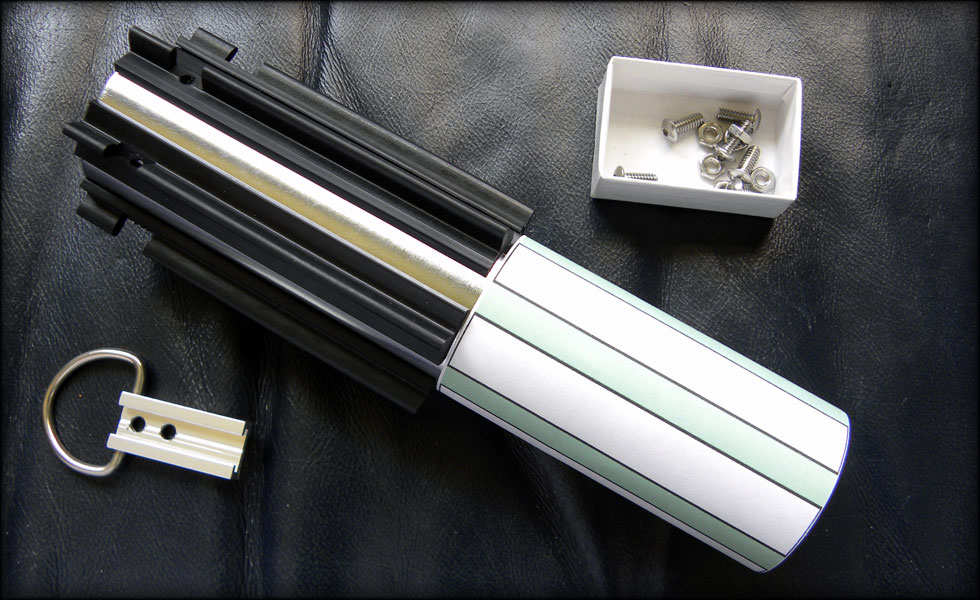
    This saber is going to be a lot easier to make than my New Hope graflex. I will make it so that both the ESB and ANH sabers can share the same internal chassis. I will most likely mount them both on a display with one having the expanded look with the chassis in it, and the other saber displayed closed, beneath it. I have many of the parts ready to go for this, the original Graflex flash gun, the Kobold replica D ring assembly, the 6 notched grip sections from Blast Tech, and an extra vintage Graflex red button assembly.


    Since I had the parts for this, I thought I'd start with the grips. I made a grip alignment template in Photoshop, printed and cut it out. I wrapped it around the base handle and taped it to itself so I could slide it off. More on that later.

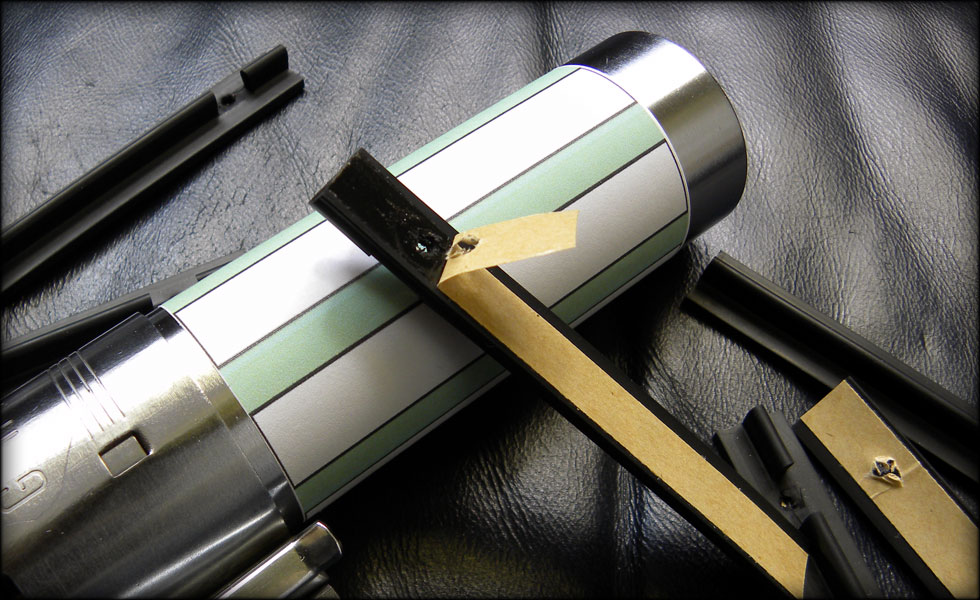
    Here's the way I do it. This is my way, not the only way, but it's what works for me. Before you start, CLEAN the graflex handle with something like rubbing alcohol or degreaser. This is very important to get a good stick on the grips. Then be careful not to touch it after that. Then, align your template where it needs to be, and don't move it. I try to leave around a half inch above the template clear, so I have something to stick the back of the grips to. I peel the first little bit of the adhesive backing off the grip, and fold it to the side. This is important later.


    Now I very carefully adhere the grip section that's exposed to the metal base, making sure my peeled section is accessible to one side, and that my grips are aligned to the template as accurately as possible.


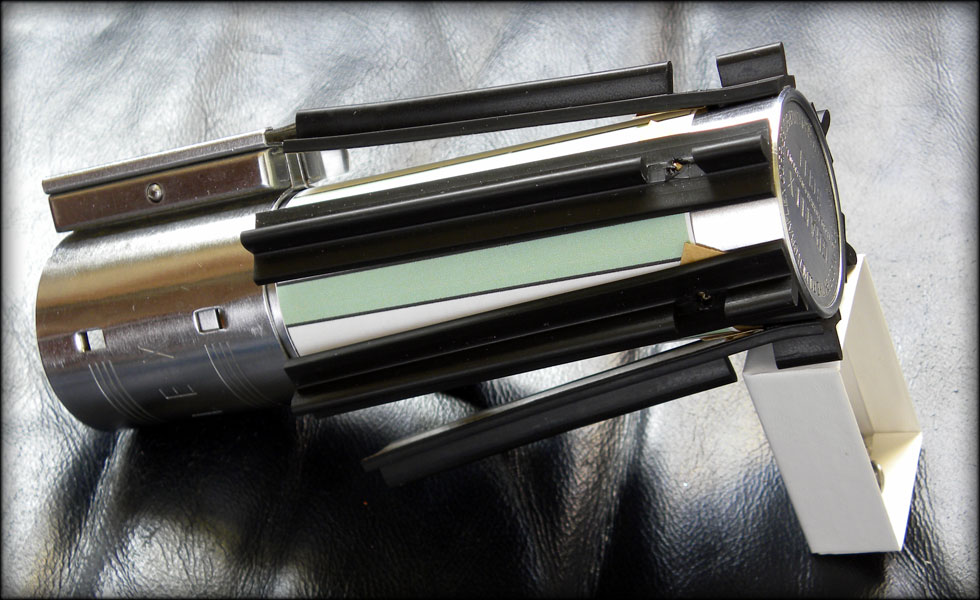
    Making sure that they are evenly spaced around AND up and down, and that my template hasn't moved, go ahead and attach the rest of the grips in that fashion. It will be very cumbersome, so you have to be careful.


    Now the hard part. CAREFULLY slide the template down JUST past the ends of the grips, without rotating it. If you got your template on tight enough, it should smoothly slide down, and stay in place. Also, make sure you haven't accidentally stuck your grip sections TO the template, that's why you only peel a small bit of the adhesive backing off.


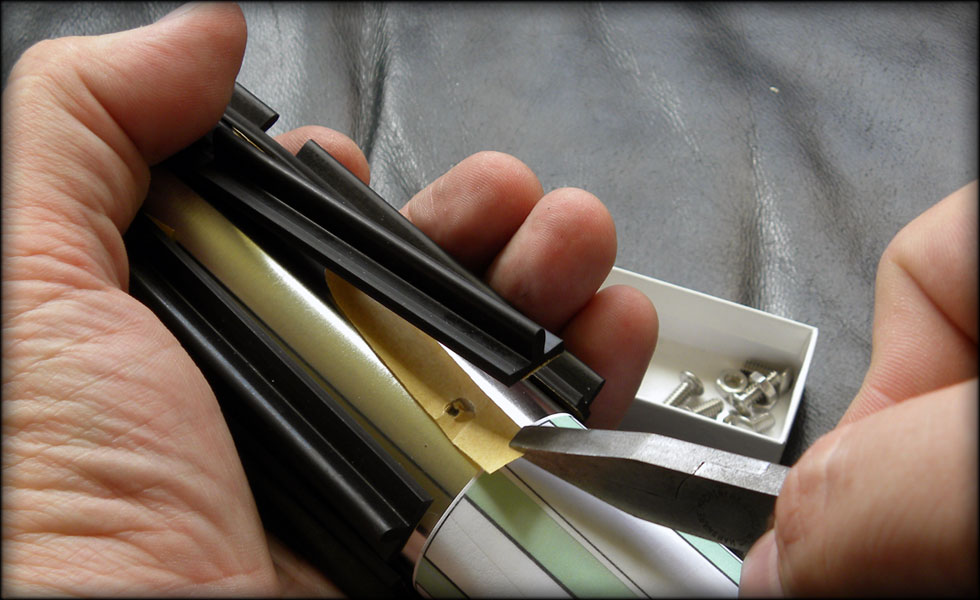
    Now the fun part! Hold tightly with your thumb to the stuck section of grip, and with needlenose pliers, reach under the grip and grasp that folded piece of backing. Slide it carefully down away from your thumb, and with a finger (if you can) keep the grip from snapping to the graflex until you're ready to push it down.


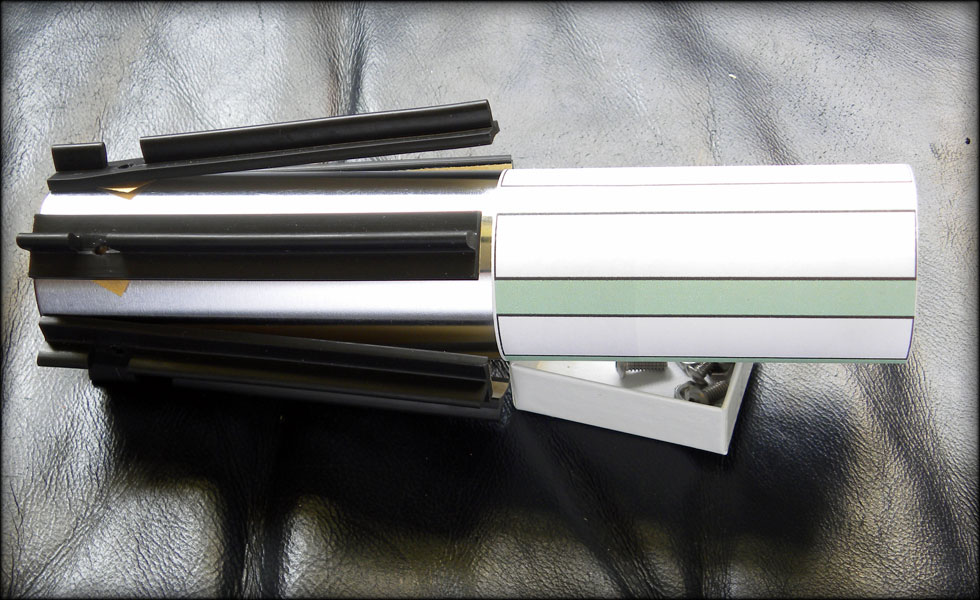
    Once you get the adhesive backing off, line your grip up with the lines on your template, and press down. You may have to lightly adhere it, look, reposition, etc, before you finally press it for good.


    Once you have all your grips done this way, use opposing force on them to press them. Meaning, pinch each side of one grip with your thumbs, and each side of the opposite side's grip with your fingers, and press hard to secure the adhesive. Once done, slide your template off, and attach your clamp. I'll get into the screws that go into the notch a little later.


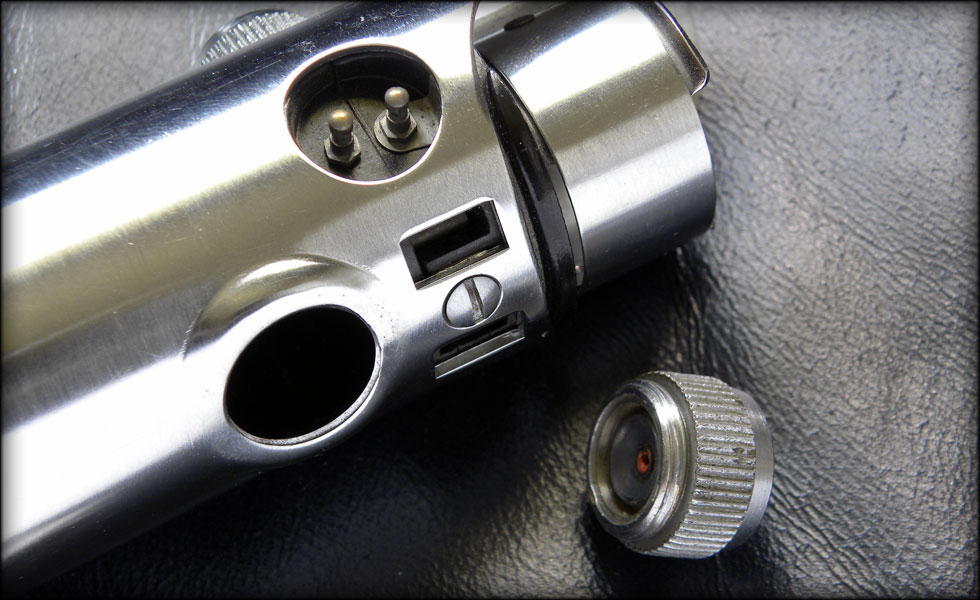
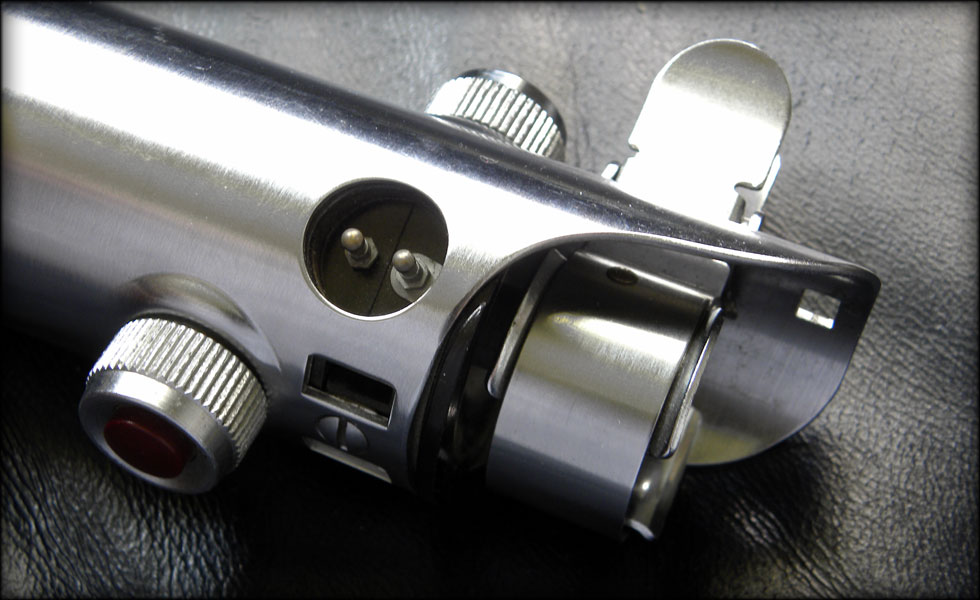
    While I have my parts out, I thought I'd go ahead and remove the glass eye mount, and replace it with the extra red button from the other busted Graflex top I found on ebay. This is easy, the button just unhooks from the pull tab metal retainer, and the threading is the same, so it will screw right into the glass eye hole.


    Like so.
    Last edited by slothfurnace; 08-29-2010 at 04:24 PM.

    CordaroyFog: you know, its really mean to set the bar that high.

  2. #2

    Default

    Here we go again, I can't wait
    First!

  3. #3
    Jedi Padawan Ronan's Avatar
    Join Date
    Jul 2010
    Location
    Montreal, QC
    Posts
    529

    Default

    *Grumbles* He is doing EXACTLY what i'm going to do next week once i receive the rest of my parts.

    On the other side, it's good to know what i was thinking of doing is implemented here and is working, it takes a huge load off my shoulders

    Thanks Sloth :P

  4. #4
    Council Member
    Jedi Council Member
    Rhyen Skytracker's Avatar
    Join Date
    Feb 2009
    Location
    Covington, GA
    Posts
    2,550

    Default

    Very nice so far. Can't wait to see it complete. BTW - what kind of camera do you have?

    Live long and...I mean May the force be with you. http://saberconcepts.50.forumer.com/index.php

  5. #5
    Jedi Padawan Ronan's Avatar
    Join Date
    Jul 2010
    Location
    Montreal, QC
    Posts
    529

    Default

    Quote Originally Posted by Rhyen Skytracker View Post
    Very nice so far. Can't wait to see it complete. BTW - what kind of camera do you have?
    Rhyen the camera doesn't matter, its how well you know how to use it

    With that said, i do highly recommend a Nikon or Canon DSLR. If you are in the market for one, i would suggest something cheap but practical like a Nikon D3100 (just came out), or a D90 (soon to be replaced).

  6. #6
    Jedi Knight cannibal869's Avatar
    Join Date
    Sep 2008
    Location
    Home of NUCLEAR JEDI SABERS
    Posts
    1,027

    Wink

    Quote Originally Posted by Ronan View Post
    Rhyen the camera doesn't matter, its how well you know how to use it

    With that said, i do highly recommend a Nikon or Canon DSLR. If you are in the market for one, i would suggest something cheap but practical like a Nikon D3100 (just came out), or a D90 (soon to be replaced).
    And don't forget the tripod....
    LOCKHEED

  7. #7
    Jedi Padawan Ronan's Avatar
    Join Date
    Jul 2010
    Location
    Montreal, QC
    Posts
    529

    Default

    Quote Originally Posted by cannibal869 View Post
    And don't forget the tripod....
    Tripods aren't necessary (unless for low light/long exposure situations). It really depends what he is shooting.

    I can shoot handheld at nightish with my D3.

    If he wants to start i would get the following:
    DSLR
    Standard lens (Something around the 25-50mm range)
    Flash
    Tripod

    With those, he has his bases covered. Oh and don't forget a memory card + back up.

  8. #8

    Default

    Of course you have to go and post ANOTHER build log right AFTER I post mine.... Just have to be a glory hog don't you

    Seriously though, I am psyched for your build, i was so disappointed when you finished your other masterpiece. Now I have something to get my slothfurnace fix on
    Every time Tim ships an order... an angel gets its wings


    "Just get one and go nuts, that's how this hobby works. Get stuff. Go nuts. Period." ~FenderBender~

  9. #9

    Default

    Quote Originally Posted by Rhyen Skytracker View Post
    Very nice so far. Can't wait to see it complete. BTW - what kind of camera do you have?
    A semi cheap Nikon P90 coolpix
    A tripod that is worth less than 30 bucks
    The diffused sunlight from my office window
    one leather couch.

    CordaroyFog: you know, its really mean to set the bar that high.

  10. #10
    Jedi Padawan Ronan's Avatar
    Join Date
    Jul 2010
    Location
    Montreal, QC
    Posts
    529

    Default

    Quote Originally Posted by slothfurnace View Post
    A semi cheap Nikon P90 coolpix
    A tripod that is worth less than 30 bucks
    The diffused sunlight from my office window
    one leather couch.
    Nikon P90 is a beast. They replaced it not long ago.

Bookmarks

Posting Permissions

  • You may not post new threads
  • You may not post replies
  • You may not post attachments
  • You may not edit your posts
  •