


After re-reading this tutorial on the Blaster Builder's club a few months back. I decided to see if I could make a simpler version using fewer parts, that looked more accurate, and do it mostly with parts I already had on hand.
It was also a prop I'd want to have to use with the Moisture Farmer costume I was thinking of doing.
I started looking through my parts drawers to see what I could use, already knowing that a piece of 1 1/2" sink tube would be the main body. I needed something for the "emitter" and a 1" PVC plug would fit into the top with just a little sanding.
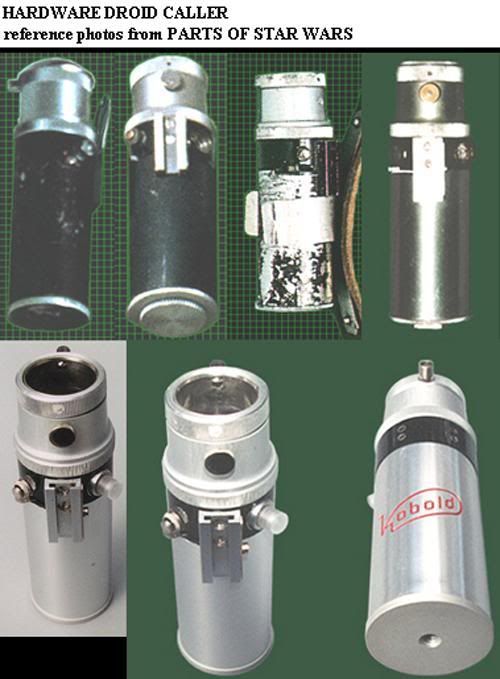
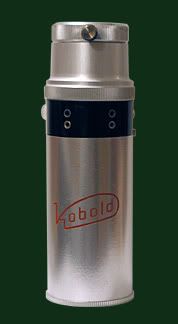
I wanted to do the silver version of the Kobold flash, not the black one like people are more familiar with:
Next, I started looking through a box of hardware and switches and pulled out a small momentary switch, some different sizes of finish washers, a picture hanger and some interesting lamp hardware.
I sanded down the lip of the PVC plug till it just fit inside the piece of sink tube. Then I marked and drilled my holes in the sink tube and plug for the hardware and switch. Then I did a test fit of the switch and hardware:
That's a finishing nail inside the "emitter".
Later, I switched out the black allen head cap screw for a silver one that looked better. I also lightly sanded the sink tube to give it sort of a "brushed" finish and make it not so shiny.
I decided that I didn't like the way the switch I had looked, and since I needed to go to RadioShack to get a buzzer anyway, I picked up a package of smaller momentary switches.
"A buzzer?", you might ask? Yes, I didn't want this to be a static prop, I wanted this to "do" something, in this case, make noise. I took my cue from the original tutorial.
Here are the parts I ended up using:
Clickable thumbnail with all the parts tagged.
Not pictured is extra wire, a small strip of styrene, pop rivets and 2 different finishing nails. I ended up not using the square aluminum tube because my idea for it didn't work.
I wanted to add the extra ridged ring you see on the real flash, so I cut a strip of thin styrene and used hot water to bend it into a circle.
I roughed up the edge of the sink tube where the ring would attach, then mixed up some 2-part epoxy and glued the ring on, using some small clamps to hold it in place while the epoxy cured. After a couple of hours, I took an X-acto knife and made the ridges around the ring.
I also used my tubing cutter to make a groove about 1/4" from the top of the "emitter" and used a jeweler's file to widen it a bit. Then I also made ridges around the top of that piece.
Now it was time to glue the PVC plug in place with more epoxy. After a couple more hours (just for good measure, even though it was 5 min. epoxy), to hold the ring ends and the emitter in better (or just to give myself a little peace of mind), I drilled a small hole at the seam where the ends of the styrene ring came together, through the sink tube and into the PVC plug, then used a larger drill bit to counter sink it a little. Then I took a finishing nail that I cut down to about 3/8", put a drop of super glue on it and pushed it into the hole.
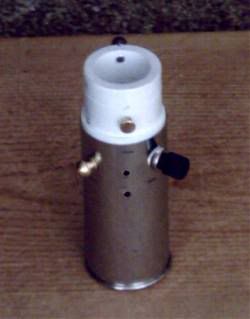
Then it was time for paint. I did the black first. Before the paint was fully cured, I took a pencil and added this detail from the real flash, by drawing rings that removed the black paint, though you can't see it in my pics of my prop:
After giving the paint a day to cure, I painted the silver on the ridged ring and the emitter.
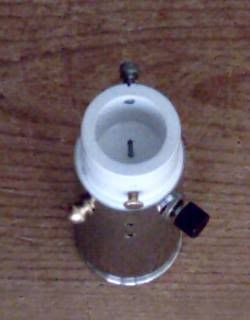
Then next day it was time for the final assembly. First I mounted the round knob, then my buzzer circuit (pre-tested, of course) and lastly, I riveted the picture hanger in place.
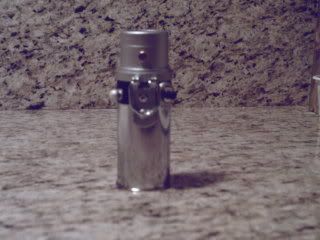
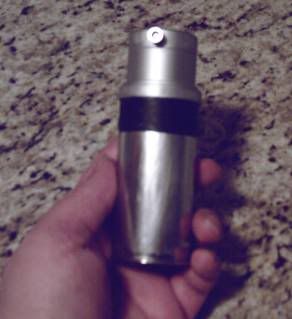
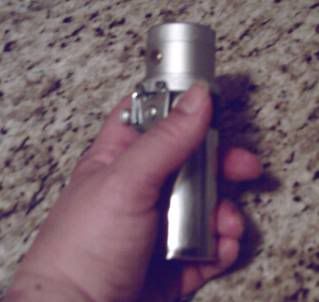
Here are some finished pics. I kept them small, because then they look less blurry from my crappy camera.
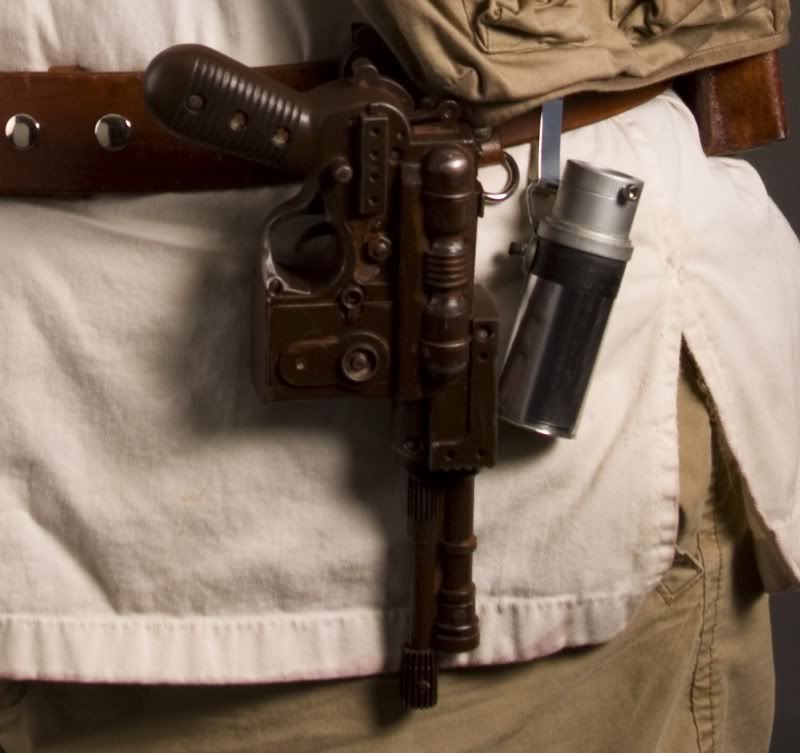
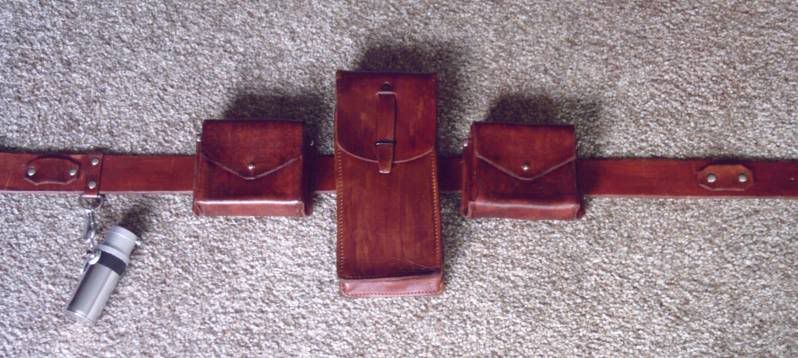
Here it is on my belt, before I decided to move it back by mounting a hook behind the D-ring mount:
Here's a teaser detail pic of it on my finished costume, after weathering it a bit:


 Reply With Quote
 ;
;


Bookmarks