Results 1 to 9 of 9

Thread: Arkhan's hw/sinktube, 99.9% complete, links

  1. #1

    Default Arkhan's hw/sinktube, 99.9% complete, links

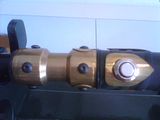
    <edited> Added thumbnails of some cellphone shots I took of the Tombblade.

    TOMB BLADE


    First, a couple links to some youtube videos. Some of you may have seen the in-progress video for the electronics and hilt components. If not, you can search for "rory lightsaber" and should find them.

    http://www.youtube.com/watch?v=tPX86Kv5bhA
    http://www.youtube.com/watch?v=hxnXh8-wCOo

    and if anyone has any questions, including ones like "could it get any uglier", I'll be happy to answer.

    as info, this is my first saber with sound or "real LED". I've made one for a guy at work that is a display piece (no blade capability), but has rechargeable battery pack and a crystal chamber (go figure). I made a PVC IRON-man themed saber for my 5-year old, and I'm using some left-over bits to make an Egyptian themed saber for my daughter.

    saving pennies for MHS parts.


    Last edited by Arkhan; 10-01-2010 at 02:14 PM.

  2. #2
    Jedi Initiate annon's Avatar
    Join Date
    Aug 2008
    Location
    charlotte nc
    Posts
    341

    Thumbs up

    Very cool saber. I like it.
    How did you secure the leather?

  3. #3

    Default

    at the bottom, where the wrap started, glue under the leather, directly onto the sinktube brass.

    at the top, same thing. the leather ends UNDER the top shroud, so you can't see any hint of that.

    The O-rings at the ends of the leather hide the transition between leather and sinktube. there is maybe 1/2mm gap at either end, but I didn't like it, so I used the good-old O-ring.

    The two small shrouds, on the switch bezel and covertec wheel, are there to cover the fact that it is pretty well impossible to cut a perfect circle into leather wrapping.

    The first attempt at the leather hilt was a single piece of leather, sewn into a cylinder and slid on. That would have probably worked if I didn't already have the covertec and switch bezel INSTALLED on the hilt at that point.

  4. #4

    Join Date
    Dec 2008
    Location
    Born and raised in Alaska-currently in Louisville,Ky
    Posts
    133

    Default

    Ive been watching this build for a while now--and i have to say its come together SWEET
    MONGO-[aka ALASKAN JEDI]

  5. #5

    Default

    Very nice to the the complete work. Looks incredable just as the in work pics fore told.
    "Art is never finished, merely abandoned." Da Vinci

  6. #6

    Default

    Very nice build indeed. I like the shroud parts alot. Probably gonna try and do some leather wrap myself later this year.
    "A Jedi Master always said this to each of his students before their first lesson: Cross an unfamiliar river without first discerning its depths and shallows, and you will drown in its currents without reaching your goal. Being a Jedi is no different. Identify the pitfalls and learn the proper path, or you fail the Order and sacrifice yourself to no good purpose."

  7. #7
    Sith Warrior Sairon's Avatar
    Join Date
    Sep 2008
    Location
    Calgary, Alberta, Canada!
    Posts
    1,603

    Default

    Very nice, the shroudwork is great along with the saber itself. Kinda long for my tastes but still very awesome indeed.
    New to the forum: READ, READ, READ! it's the best way not to get flamed.
    Time for a kirby dance <('-'<) (><) <('-')> (>'-')> (>'-'<)<('-'<) (><) <('-')> (>'-')> (>'-'<)

  8. #8

    Default

    I have replaced the decidedly pedestrian AAA batteries with Energizer Ultimate Lithium AAA batteries.

    I head back into the dark garage of doom. Compare and contrast with the earlier garage darkness video.

    Also, images of both the blades that i have on hand, with the saber, in the dark.

    The camera I was using has exactly 2 settings ON and OFF, so the very red-orange blade ends up looking pretty WHITE on the video, but the color of the walls should give a more accurate depiction.

    http://www.youtube.com/watch?v=pKRgVHC9OV8


    http://forums.thecustomsabershop.com...pictureid=1553
    Last edited by Arkhan; 06-29-2010 at 05:50 PM. Reason: added screenshot to show difference

  9. #9

    Default

    Nice blade comparison, really bright....I think if you want solid, bright and even, trans is the way to go. Otherwise the other variations make some nice core and texture effects. I think the TCSS diffuser has lost it's usefulness.

Bookmarks

Posting Permissions

  • You may not post new threads
  • You may not post replies
  • You may not post attachments
  • You may not edit your posts
  •