I just knew it was that mouse under your hat pulling all the strings.Originally Posted by slothfurnace


I just knew it was that mouse under your hat pulling all the strings.
Hokey religions and ancient weapons are no match for a good blaster at your side, kid.


Well, it's been a while since I have posted, but here's some updates.
Last week I spent a ton of time on the plug that goes into the blade adapter and interfaces with the detachable blade. More on that later, but here's a few pics.
When the blade is not in the saber, I have a 1" to 3/4" blade stepdown adapter as my plug. Inside that I have soldered 6 Mako V3 LEDs to make the ring illuminate when it's turned on. Not quite finished with that part yet though.
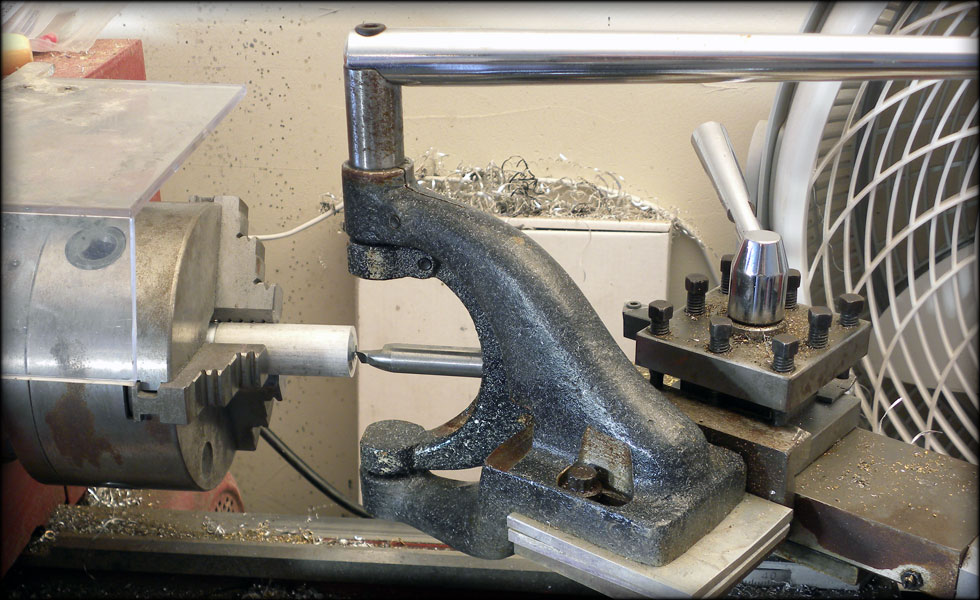
Here I have set up my radius cutter to do the radius for the collector on the inside of the chassis, positioned above the crystal.
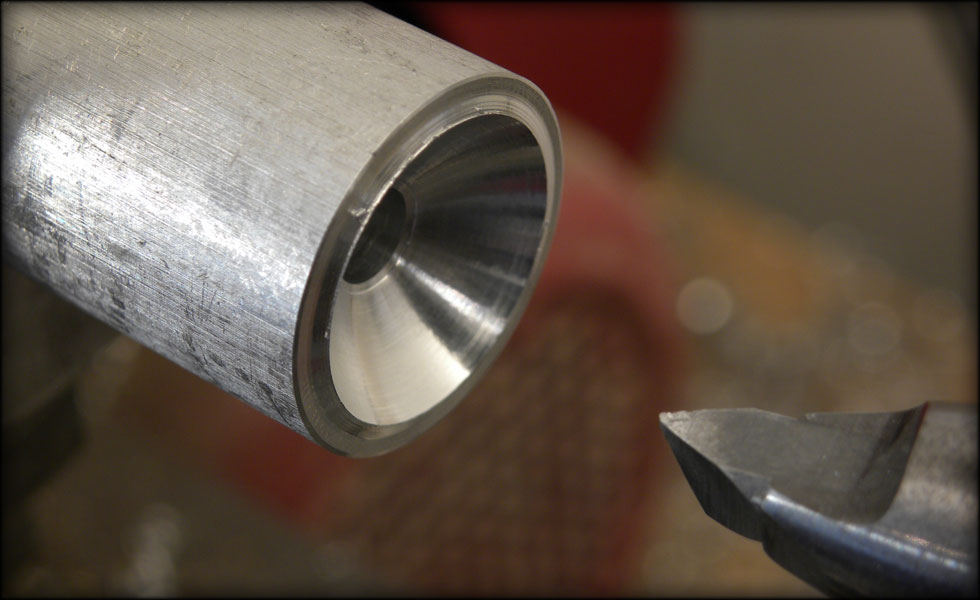
Here you see my radiused inner surface, the hole will be for another Mako V3 LED.
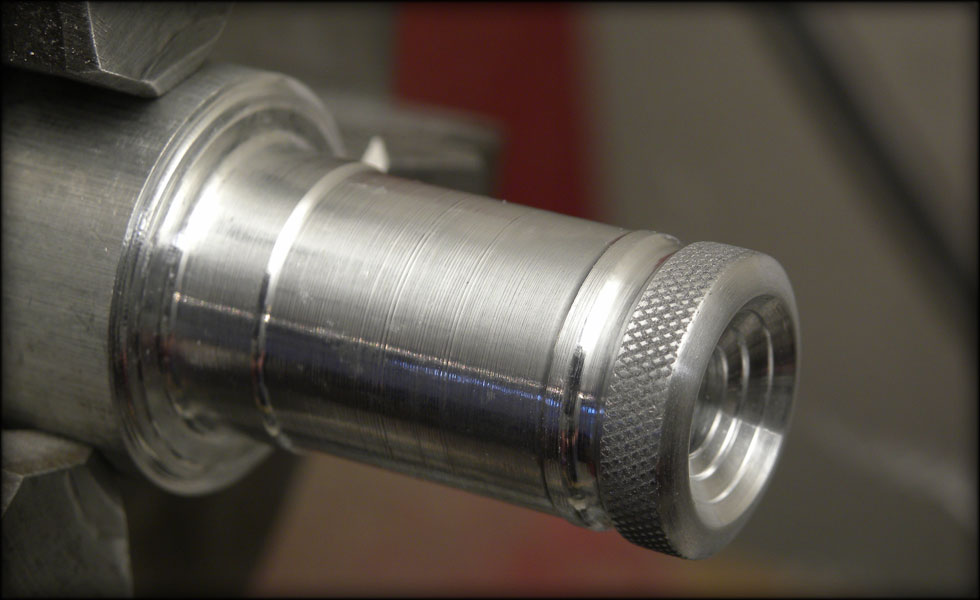
Here I have knurled a section, radiused the outer edge, and begun trimming down the back of the piece so I can part it off and thread it. This will hold the top harddrive platter retainer plate to the machined adapter plug. That might not make sense now, but once I get pics made of that piece it will all be clear.
Here's the custom bolt finished, threaded for 3/8, hollowed for the LED, and cut down so it fits the inner hole of my harddrive platter retainer plate.

This is the most brilliant build thread ever, I'm rapt every time I look at it.
I can't wait for the next update, keep em coming SF.
Obi-Wan: "If you spent as much time practicing your saber techniques as you did your wit, you'd rival Master Yoda as a swordsman"
Anakin: " I thought I already did"
Obi-Wan: "Only in your mind, my very young apprentice"

Agreed - I do have to say that one of the reasons this thread is so full of win is that the pics are just ungodly crisp and detailed. I really really love the super macro mode of your camera Slothfurnace!
LOCKHEED
Hey I appreciate that!
Here's a couple pics on a major update,
This was the result of some very tedious headscratching. The joining of the chassis to the actual adapter plug went through heavy revision until I finally found a way to do it with the space I had left that also let the unit be strong.
I decided to take the very heavy risk of drilling and tapping six 2-56 holes through the retainer plate into my plug housing, then using scrap harddrive screws to mount the retainer plate to the plug. I had no room to use the custom LED bolt collector I had machined, so this is how it has to be.
And here I am testing my wiring harness for fit and finish, all the wires fit, and I also took the last four radiator plates, and for three of them drilled a hole that will accept the shock sensor, and the very last one, a hole that fits the wires for the shock sensor. I like having the shock sensor embedded here, as it adds a bit of interest, and gets it away from cramped spaces while also keeping it rigid.
The switch wires run through holes in the radiator as well, the length of the chassis.

Now all you need to do is fit some swiss army knife attachments on the other radiator plates...
Seriously though.. awesome *sighs at cliche*
Click here to learn all about me!
The Shoutbox: The only place you can double post!
Anybody who spells it Lightsabre is dyslexic
"Yeah, if I had Skotts face I'd hit it too" ~ Fenderbender
"You didn't buy a toy saber just to break it. You bought an economy sound card with a really complicated wrapping scheme." ~ Silver Serpent

Swiss Army Lightsaber? Totally doing it now. Red enamel hilt and all. ;-D
SF, you never cease to amaze...even the soldering is beautiful.
It's not supposed to be cheap or easy. It's an ordeal.
But if you're not here to make a light saber the hard way, just follow this guide and stay out of the way.
If you're lost, here's a directory of all the most pertinent threads - it'll save sorting through the rubbish, thank the mods for braving it for us.
If you have a question, there's a solid chance it's answered here. Not too much to ask you to check ONE page for your question before posting, is it?

Hee hee
In order to see the Light,
you must sometimes risk the Dark.
TCSS MODERATOR
BLUE 8 Ready to ROCK and ROLL!
Ha ha ha. Good one
Obi-Wan: "If you spent as much time practicing your saber techniques as you did your wit, you'd rival Master Yoda as a swordsman"
Anakin: " I thought I already did"
Obi-Wan: "Only in your mind, my very young apprentice"
Well, tonight I had to solve a lingering problem with my crystal mount.
The LED matrix had a kind of sloppy circular positive lead ring. In addition to being sloppy, it tended to ground out against my support pillars after I added the thicker machined brass trim pieces.
To solve it, I tossed the Mark I LED matrix in favor of the Mark II. A triangular hot lead, with inverted LEDs, passing the hot lead under the mount, against the crystal itself to add stability to the crystal.
This also is a tighter, closer in setup, and after noodling with how exactly to do it, I finally just bent and soldered everything with the crystal installed, thereby making sure it all fit. I inverted the LEDs so I could pass the ground Leads up into the mount, grounding against the body of the mount, and hiding them as well.
 Posting Permissions


 Reply With Quote
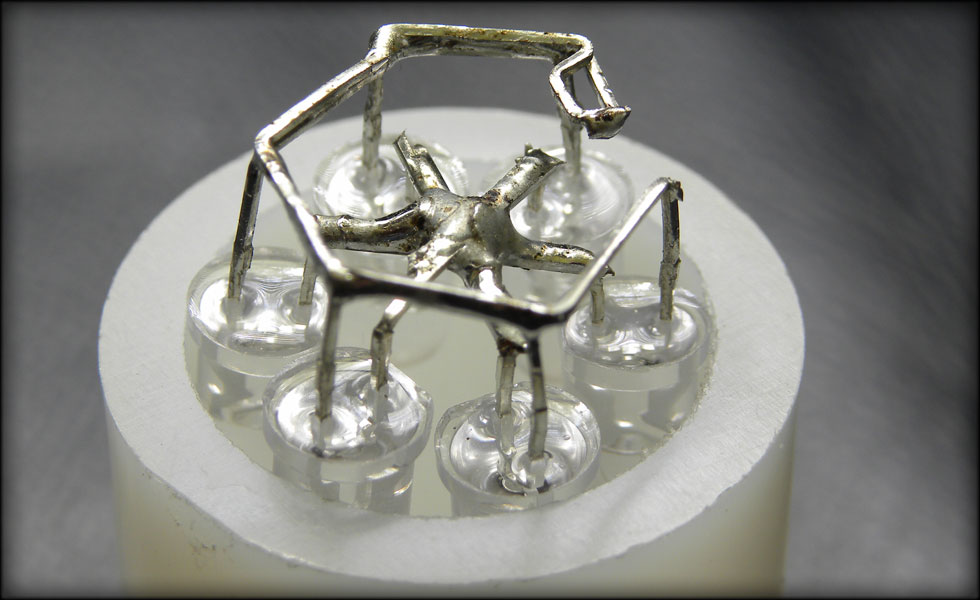


Bookmarks