With absolutely no "Dremel-Fu" and the uttermost basic level of "Soldering-Fu" ... I have started my first saber build.
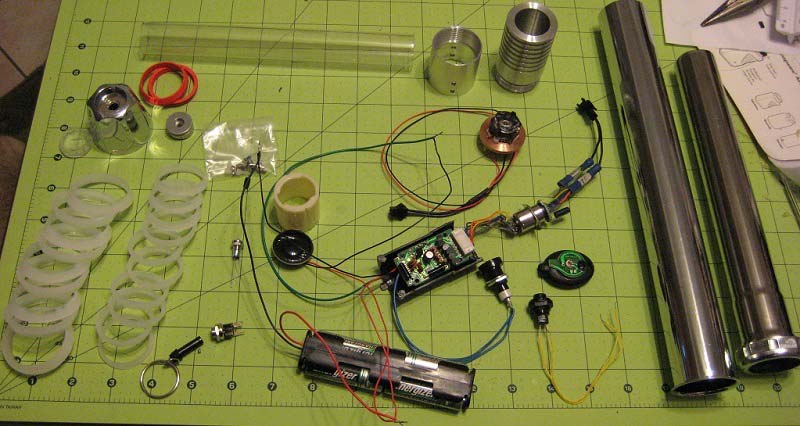
Parts:
1 - Rebel GREEN LED
1 - MR FX Anakin 2005 Sound card
1 - MHS LED Blade Holder style 3
1 - MHS to 1.5" Sink tube adapter
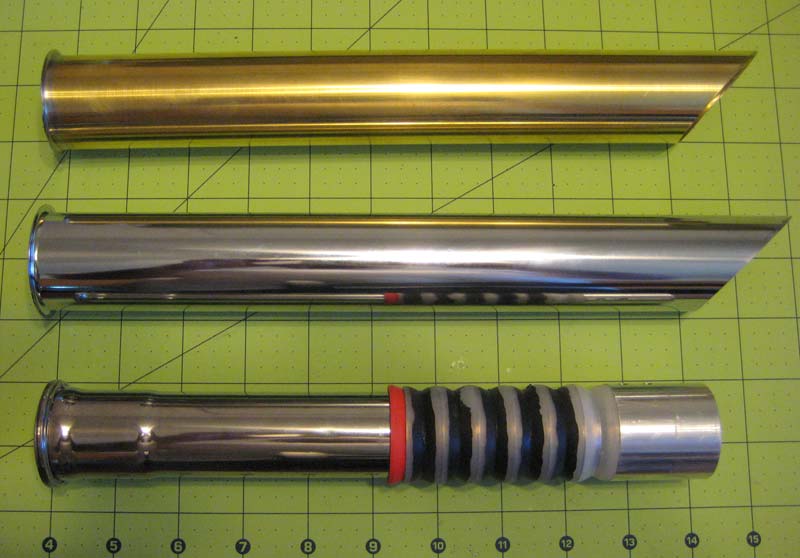
1 - 1.25" x 12" Joint extension tube
2 - 1.50" x 12" Sink tube
12 - 1.25" Poly washers
10 - 1.50" Poly washers
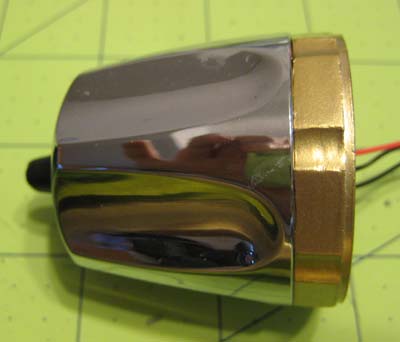
1 - Chrome faucet knob
1 - Black SPST Mom switch w/ Pololu monentary-to-latching board
1 - Green accent LED
1 - TCSS 2.1mm Charge port
1 - 4AA battery holder
5 - 8/32 Set screws
1 - 8/32 Head cap screw
1 - TCSS Machined Covertec clip button
1 - TCSS Premium speaker
1 - Rebel lens holder and 8.7degree lens
1 - 1" x 32" LED White Translucent Thin blade (added 4' cellophane)
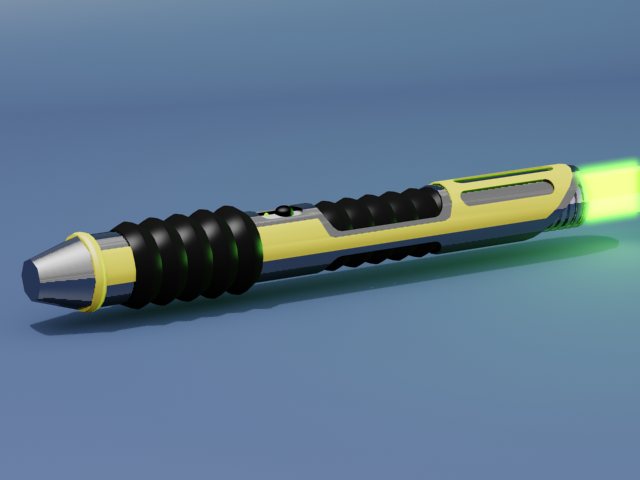
I have added a rough render of what I hope the saber will look like.
I have also added a quick render of an easy little mod to the Covertec clip to hold my kill key. When you unclip your saber and pull the saber away from your belt, the kill key will just pull right out (depending on its location on your saber). This will activate your electronics and also keep you from losing your kill key. You could use a thin chain, nylon cord, leather lacing, etc. to attach the covertec to the key. Just an idea I had.
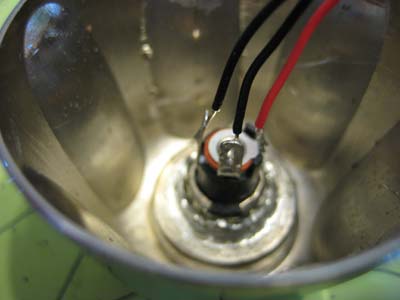
Wired up the recharge port. Man! Grinding that faucet knob was painful.
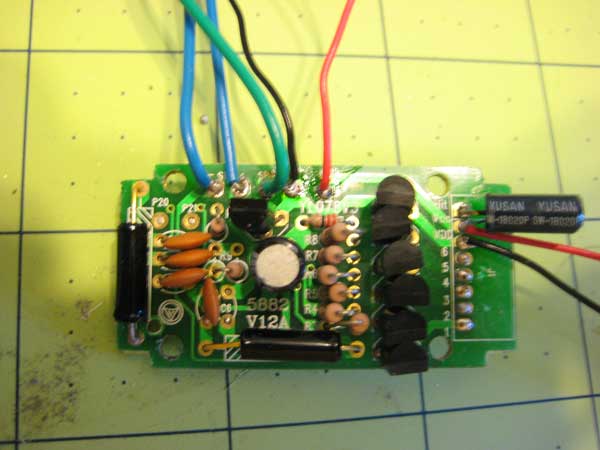
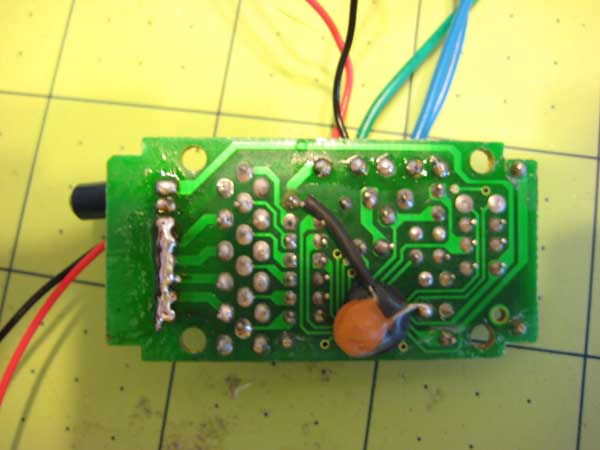
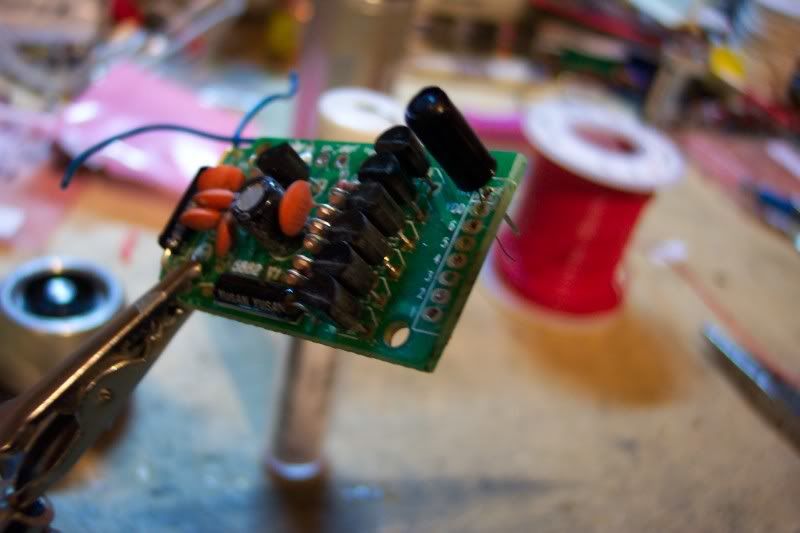
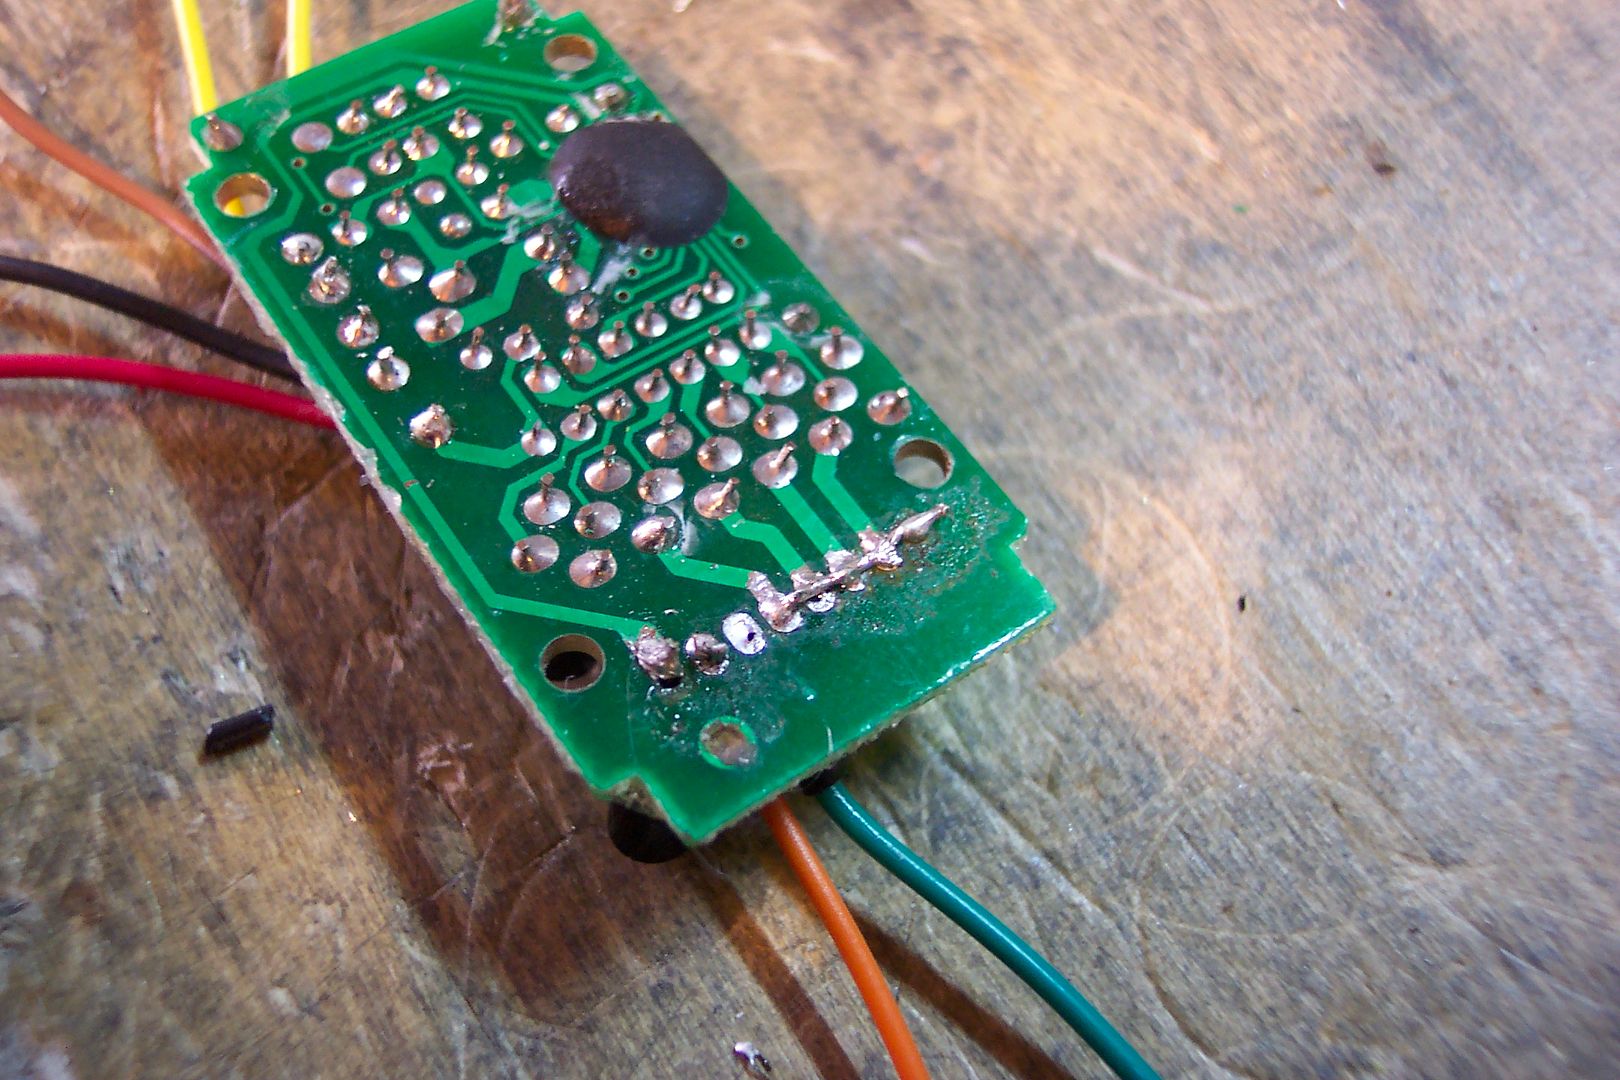
Moved the wires on the soundboard from the bottom to the top of the PCB, took off the white connector, soldered in the clash sensor, connected all the (-). Does anyone else have that ??? attached to the bottom of their Anakin?
Having to work outside since I have no garage or a work area that I would want to throw metal shavings around in... really puts the brakes on your productivity.
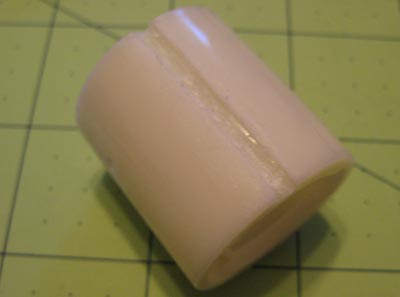
I finally found a compression sink plug that I could use so I could sand down my sink tube. Messed up the fist angled cut on my sink tube and decided to use it as my brass overlay tube. Cut the second tube angle, painted and glued the pommel & connecting ring, and drilled & attached the 1.5"-to-MHS adapter.
Finally got a chance to work on my saber a little more. Not all sink tubes are created equal. After messing up the 2 that I originally bought from Lowes, I bought 2 more from Home Depot. They didn't fit over the 1.5"-to-MHS adapter. Back to Lowes for more sinktubes and a miter saw. Newly cut sinktubes and the sanded inner grip main body.
Printed out my templates to cut the sinktubes then used a glue stick to attach them securely.
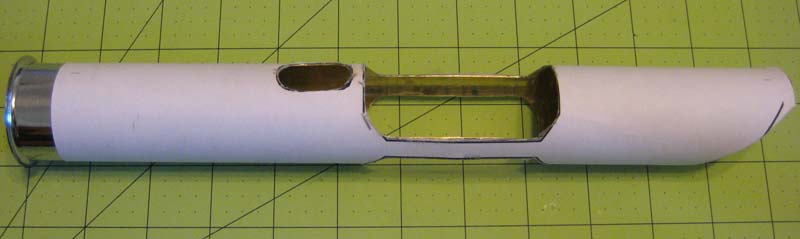
Outter tube rough cut.
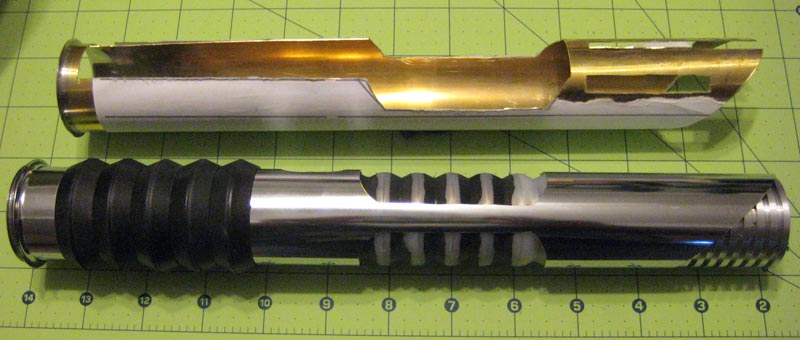
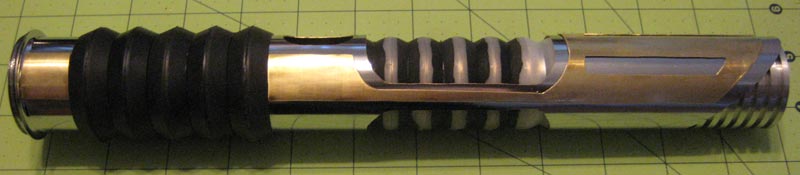
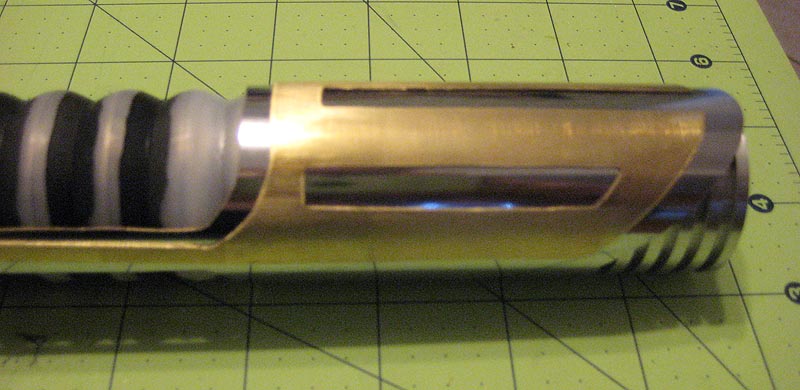
Partially cut brass shroud. I thought it would be easier to file these edges before making the final cuts and having to deal with a lot of thin metal. I think I am going to put an angle on the slots to match the 45 degree angle at the emitter. Outter tube sanded and test fit with inner grip tube. Rubberized poly washer grip added to outter tube.
Finished the brass overlay. Hand filed the slots. I need to figure out a softer lighting scheme to take pictures of shiny things.
Brass still needs it's final polishing. Inner grip needs masking and repainting. Outer grip needs a touch up. Still trying to finalize how to get the guts installed and stable.
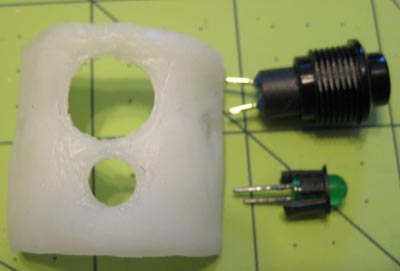
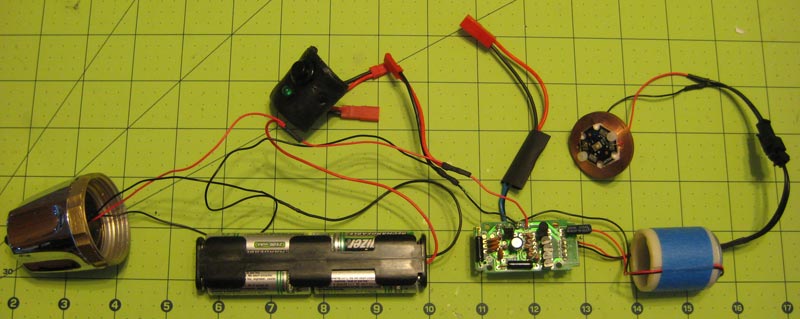
While waiting for paint to dry on the grips, I have made a switch and accent LED holder from "ShapeLock" low temperature molding plastic. The plastic cylinder was part of the removable blade in the MR Anakin saber that was used to lock the blade into the hilt. The TCSS premium speaker literally snaps into it like it was made for it. I have cut groves in the sides so that the main LED wires can go past the speaker in a reverse speaker configuration.
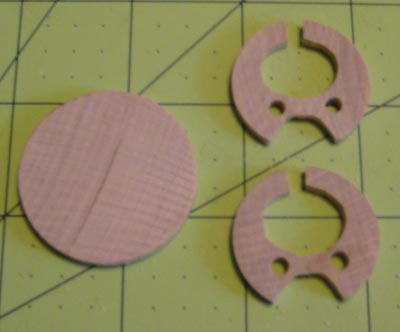
I built a basic chassis to better organize my electronics. I used 1.5" wooden disks from the craft store which I sanded down, drilled and dremeled outwire and sound holes, and threaded holes for the #8-32 threaded rods. I will add another picture of the finished chassis as soon as I reorganize the guts.
Here are all the guts laid out roughly how they will be installed. The black thing middle/top is the white plastic switch and LED holder that I painted black. The switch and LED have quick connect plugs.
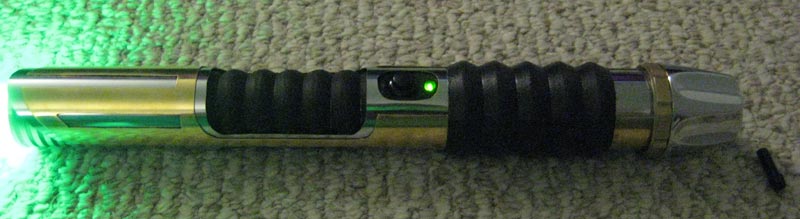
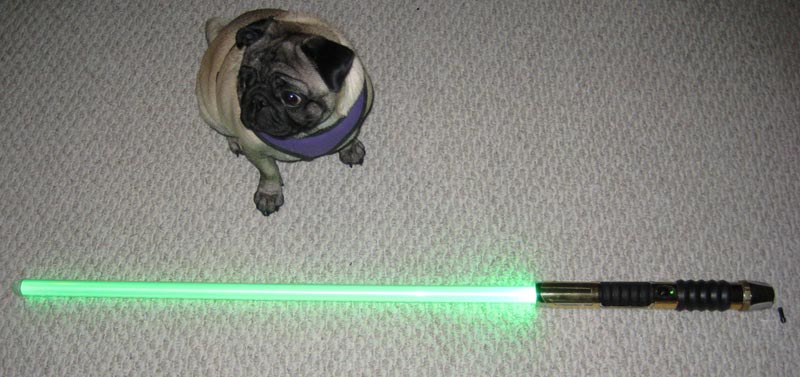
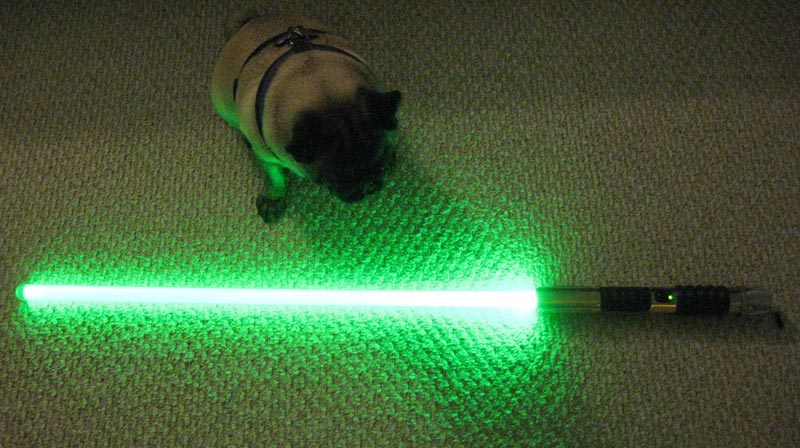
And finally my lightsaber is assembled!!
Here it is, with my dog, in a dimly lit room with flash and without.
I have hidden sound holes in the upper grip area under the two strips running down each side. I need to add more holes in the pommel around the recharge port.
I need to disassemble the guts because the clash sensor needs me to pound the hilt for it to work. It worked great before putting it in the hilt. And there is possibly a loose wire because sometimes it shuts off shortly after I turn it on.
I have a new 1" OD thinwalled trans white blade that I need to get about 5' of wrap into.
When I have all that completed I will post in the Gallery section.
Thanks for everyone's help and comments!!
Last edited by Rathan; 07-18-2010 at 08:25 AM.
Reason: Updated for switch holder and speaker tube.
OK... camera, parts, and design .. check!
Now I just need the weather to clear up so I can start cutting outside. (No garage/work area but my dinning room table.)
im lookin over your parts, and i got to thinkin... your mhs to sinktube adapter of course fits inside the 1.5 sink tube, and the 1.25 tube will fit inside the adapter so the lux end of your hilt is going to be very secure, but i was wondering what your plans where for span the gap between the tubes on your pommel end?
The short tube will be on the inside so the thick end will be the pomel end. The red rubber washers will go between the two tubes and the covertec button will be threaded through both tubes locking them together.
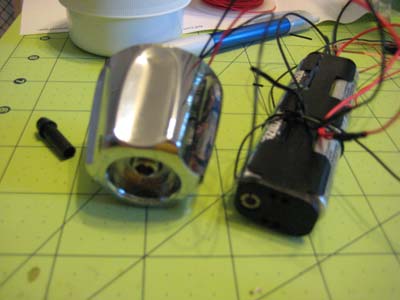
There is a whole pile of other parts out of the picture that I have been playing around with like Legos to make sure everything will fit and be secure. I actually forgot to include the 3rd sink tube that I will be sanding down to the brass and cutting for the overlay. I am planning on using "Goop" glue and the covertec button to hold the overlay on.
New render of "hopefully" what my saber will look like.
And a potentially BAD thing.
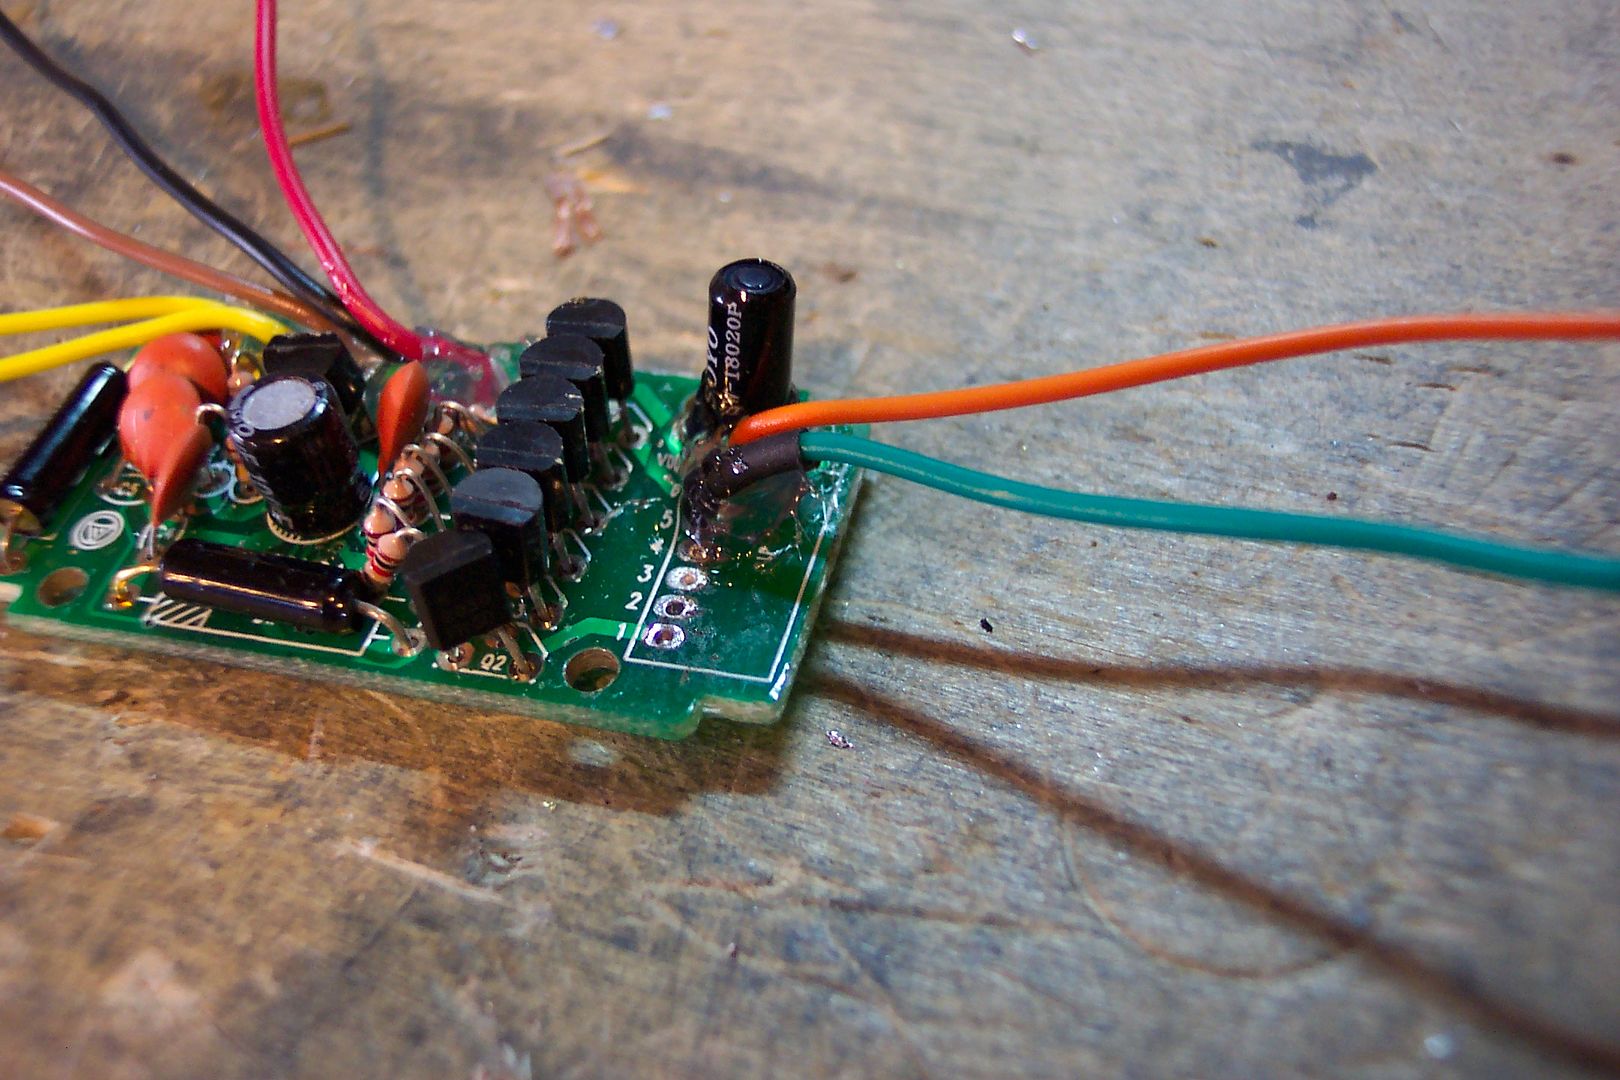
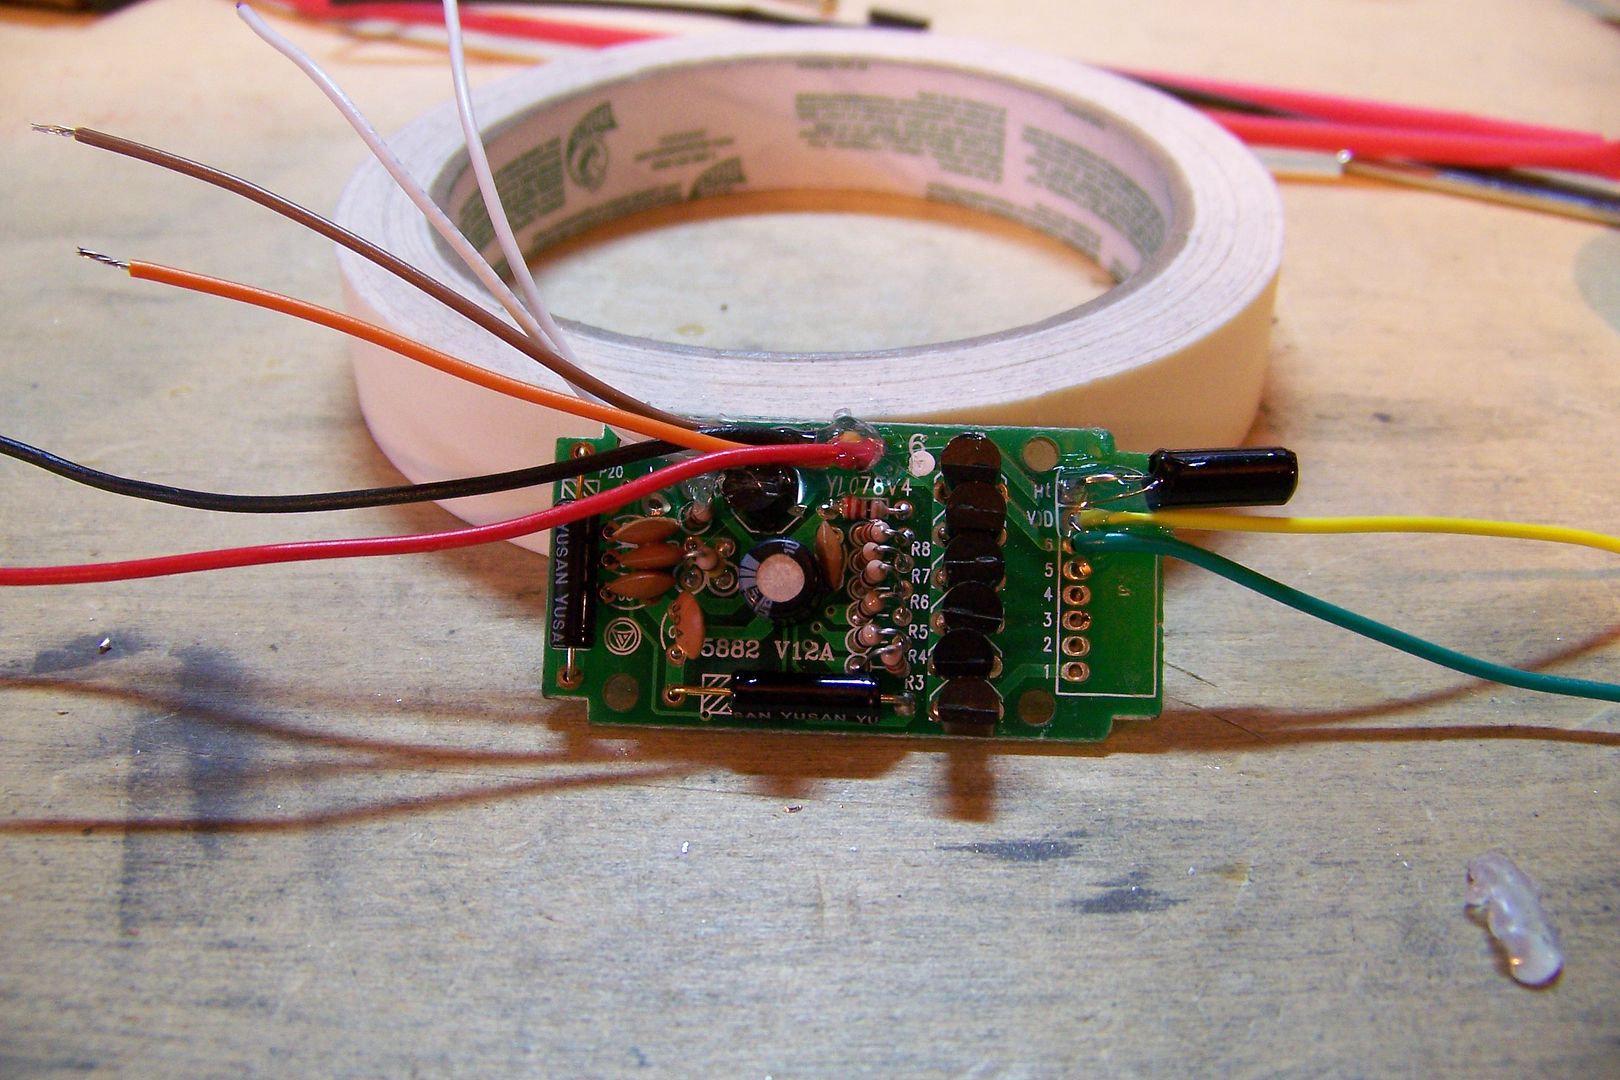
So as you can see from the parts photo, this is the Anakin 2005 with the replaceable blade. The silver connectors are a major pain so I unsoldered them and neatly connected all the correct wires together. This board has the brown wire as the + instead of the purple like most of the wiring diagrams I have seen. I of course shrinkwrapped the connectors because I wanted to see how everything will need to be cramed into the hilt. So... now I am taking everything back apart to figure out the LED issue. I am getting around 2.5v from the board to the quick connect for the LED.
You can de-solder the clash sensor from the DIN connector and solder it directly to the board, like this:
I also de-soldered and removed the white plastic plug header from the board....makes it much easier to add the clash sensor this way. Then all you need to do is add a wire for the positive lead for your main led (you can fit the led wire and the wire from the clash senor in the hole at the same time) and add a "jumper" wire across the negatives. I do this by stripping a long section off the led negative lead and soldering it all the way across the negative pads.
The board ready to go:
Save a lot of hassle with that DIN plug, and makes it a lot easier to run wires for accent leds, because then you've got holes in the board to solder through for them. If you do this, though, all of your accent led's will come on at once, rather than in sequence.
Also, if you're limited for height for the board, you bend the clash sensor forward like this:
Got a question? Start Here. Have you tried the Thread Index yet? Most questions can be answered there.
Awesome Thanks! Just did it.
I actually just figured out what I did wrong. When I unsoldered the TCSS quick connect plugs I forgot that they wired wrong and had the pins reversed.


 Reply With Quote


Bookmarks